Japanese Cheesecake Tiramisu-Style

Japanese Cheesecake Tiramisu-Style

Japanese Cheesecake Tiramisu-Style

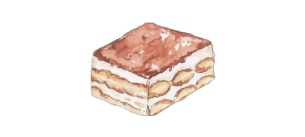
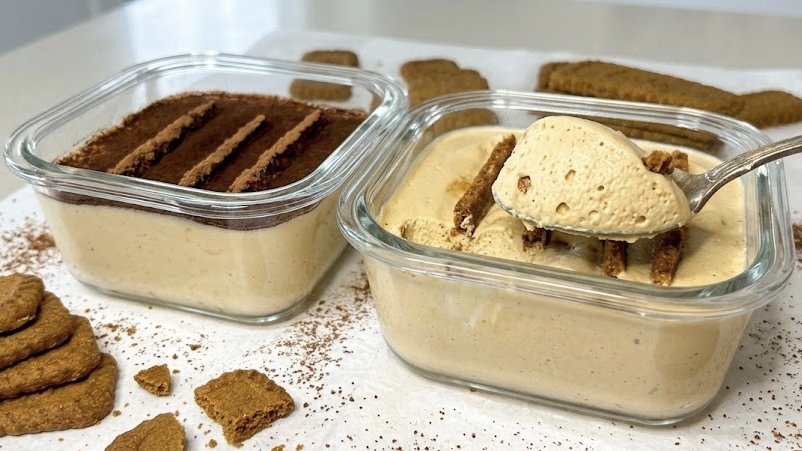
If you love creamy desserts that feel luxurious yet take almost no effort to prepare, this Japanese Cheesecake Tiramisu-Style recipe is about to become one of your new favorites. Inspired by the viral Japanese cheesecake tiramisu trend that has been taking over social media, this no-bake dessert combines the light, airy creaminess of cheesecake with the rich coffee flavors of classic tiramisu. The result is a smooth, fluffy, melt-in-your-mouth dessert that tastes incredibly indulgent while being surprisingly simple to make at home.

What makes this version especially unique is the addition of a whipped Dalgona-style coffee mixture folded directly into the creamy yogurt base. This extra step creates a deeper coffee flavor and gives the dessert a silky, mousse-like consistency that feels elegant and comforting at the same time. Once chilled, the speculoos biscuits soften beautifully into the creamy layers, creating a texture somewhere between tiramisu, cheesecake, and an icebox cake. Every spoonful delivers creamy coffee richness, subtle caramel notes from the maple syrup, and the delicate crunch of cocoa-dusted biscuits.

Another reason this dessert stands out is how refreshing and balanced it feels compared to many traditional heavy cheesecakes or tiramisu recipes. Instead of cream cheese and heavy cream, this recipe uses Greek yogurt or skyr as the main base, making it lighter while still maintaining that rich cheesecake-like texture. It is one of those desserts that feels both satisfying and refreshing, making it perfect for warm weather, afternoon coffee breaks, or elegant make-ahead treats for guests.

Greek yogurt and skyr are also packed with nutritional benefits, which makes this dessert more than just delicious. They are naturally high in protein, calcium, and beneficial probiotics that support muscle health, digestion, and overall wellness. Protein-rich foods like Greek yogurt can help keep you fuller for longer and support balanced energy levels throughout the day. Including high-protein dairy products regularly in your diet may also contribute to stronger bones thanks to their calcium content. Coffee and cocoa powder additionally provide antioxidants, while maple syrup offers a more natural sweetness compared to refined sugar. Altogether, this dessert manages to feel indulgent while still offering nourishing ingredients that can fit into a balanced lifestyle.

Ingredients

  • 2 cups (480 g) 0% fat Greek yogurt or skyr
  • 1 tbsp. instant coffee
  • 1 tbsp. hot water
  • 2 tbsp. maple syrup or honey
  • 8 speculoos biscuits or biscuits of choice
  • 1 tsp. cocoa powder

Directions

  1. Add the Greek yogurt or skyr to a mixing bowl.
  2. In a separate small bowl or glass, combine the instant coffee, hot water, and maple syrup.
  3. Using a hand mixer or whisk, whip the coffee mixture until it becomes thick, creamy, light, and fluffy, similar to a Dalgona coffee texture.
  4. Add the whipped coffee mixture to the yogurt and stir thoroughly until completely smooth, creamy, and fully combined.
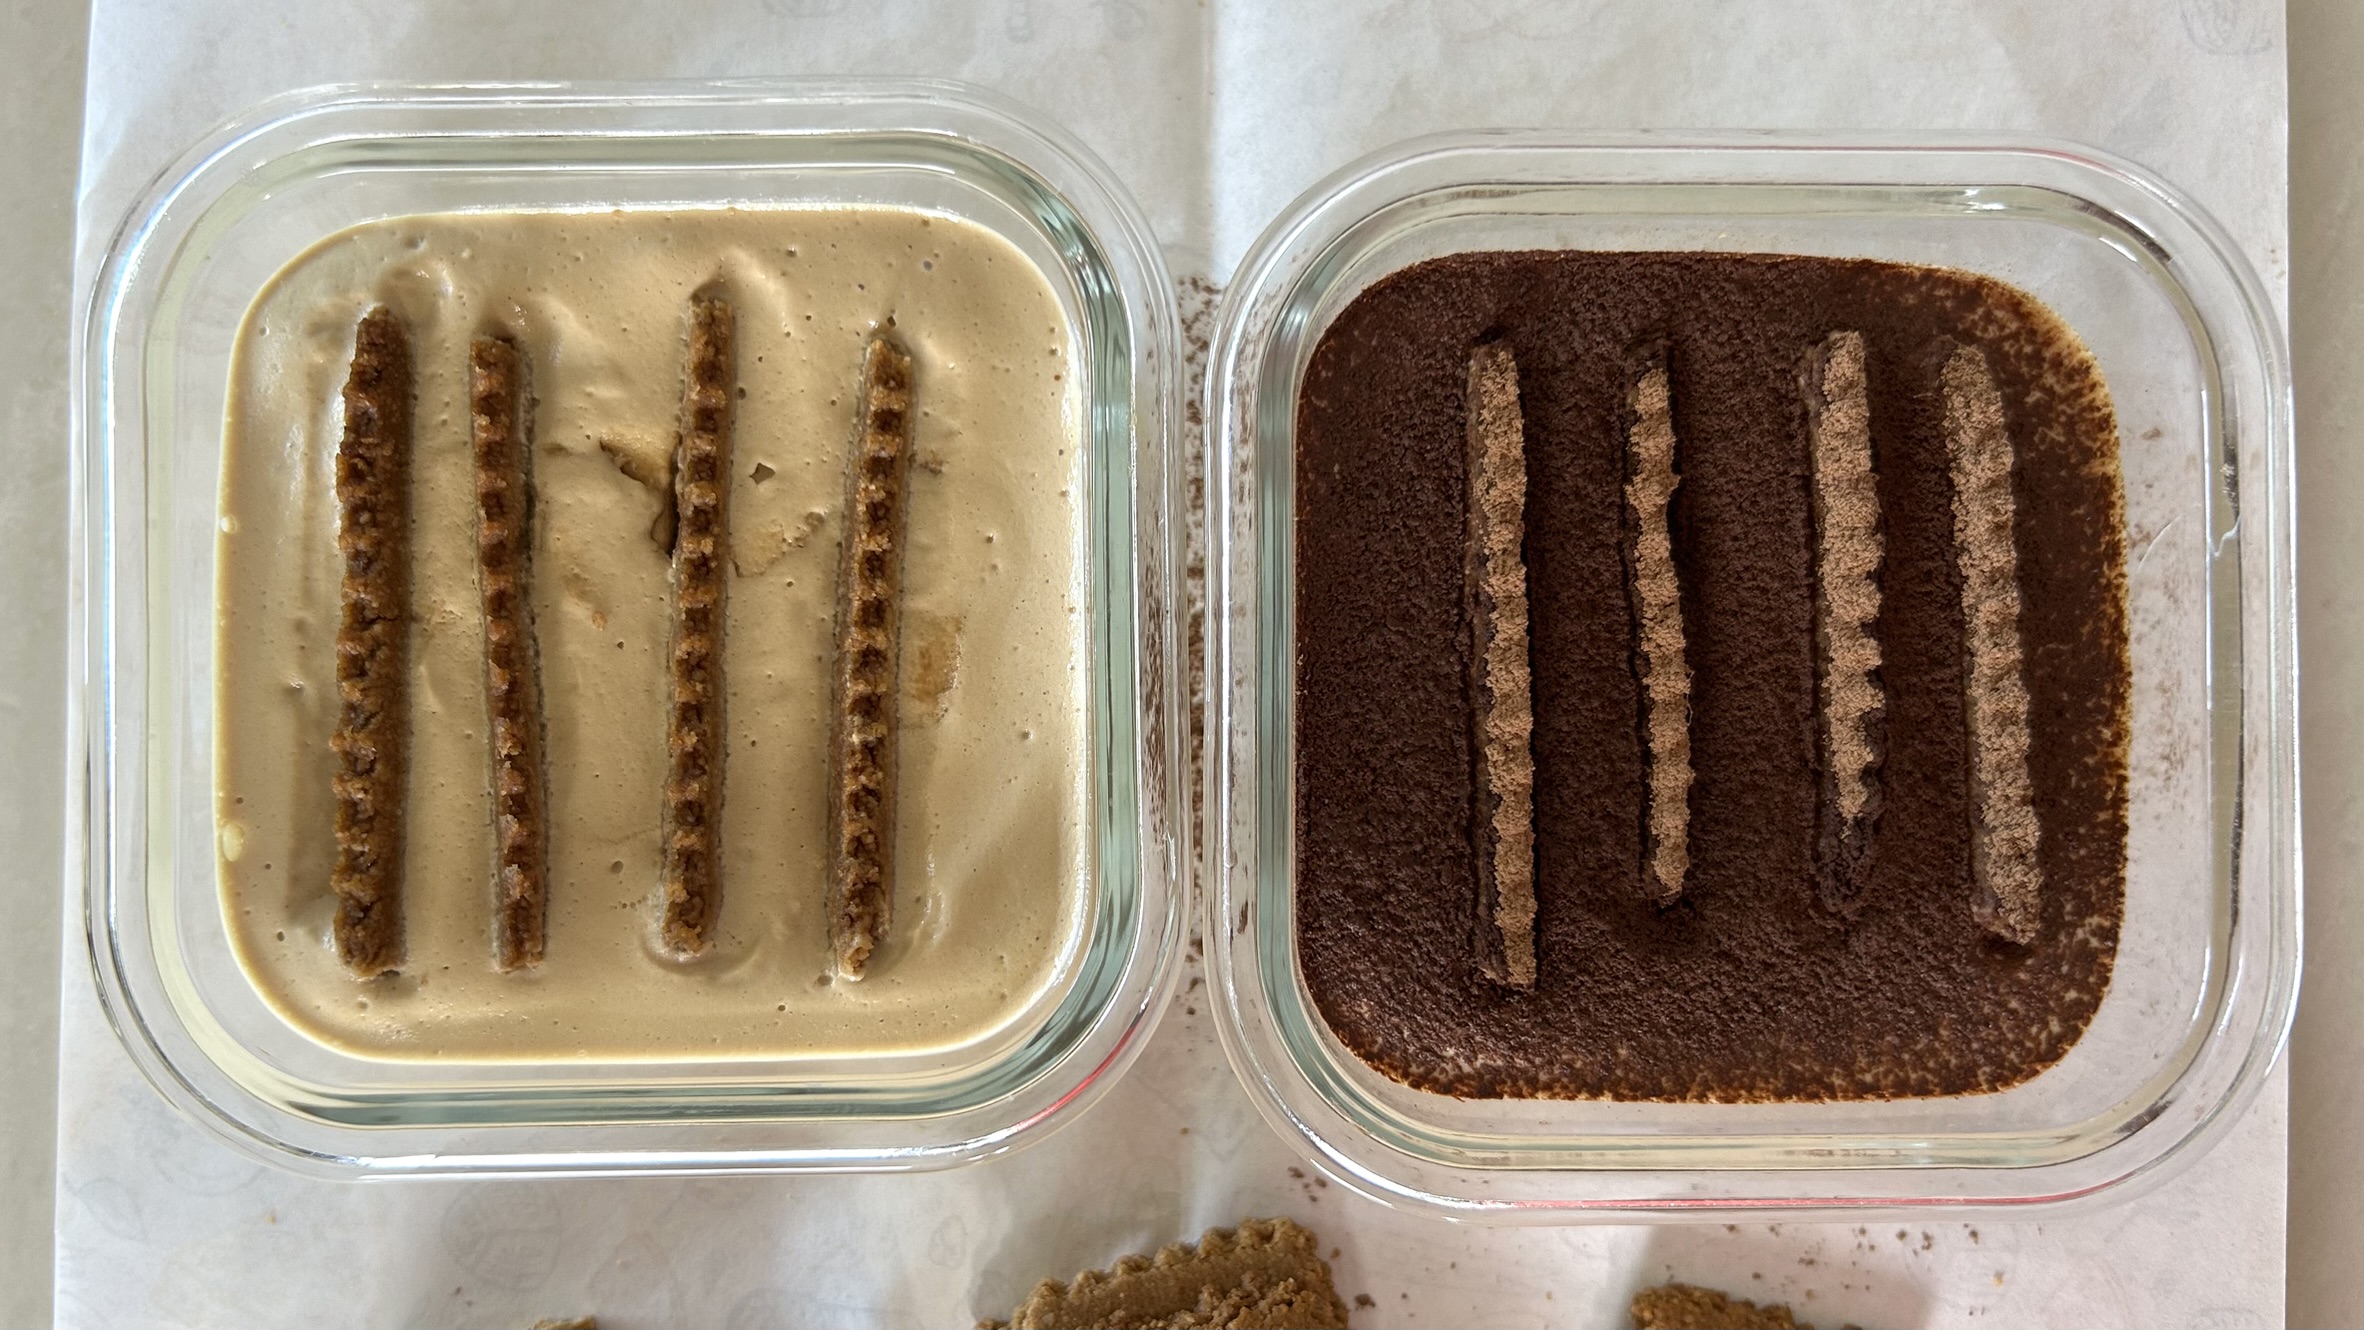
  5. Divide the creamy mixture evenly between two square or rectangular serving dishes.
  6. Smooth the surface using the back of a spoon or spatula.
  7. Insert the speculoos biscuits into the creamy mixture, spacing them evenly throughout the dessert.
  8. Dust the top evenly with cocoa powder.
  9. Cover and refrigerate for at least 3 hours so the dessert can fully chill and set.
  10. Serve cold and enjoy the creamy cheesecake-like texture with soft coffee-infused biscuit layers.

Prep Time, Chilling Time & Servings

  • Prep Time: 20 minutes
  • Chilling Time: 3 hours
  • Servings: 2

Nutritional Information (Per Serving)

  • Calories: 305
  • Protein: 27.1 g
  • Fat: 4.22 g
  • Carbohydrates: 43.05 g
  • Fiber: 2.9 g

Storage

  • Store covered in the refrigerator for up to 3 days.
  • The texture becomes even creamier after overnight chilling.
  • Serve very cold for the best cheesecake-like consistency.

Recommendations & Notes

  • You can replace speculoos biscuits with ladyfingers, graham crackers, digestive biscuits, or oat biscuits.
  • For a richer dessert, use full-fat Greek yogurt or skyr.
  • A small pinch of cinnamon on top pairs beautifully with the coffee and speculoos flavors.
  • This recipe is high in protein and lighter than traditional tiramisu desserts.

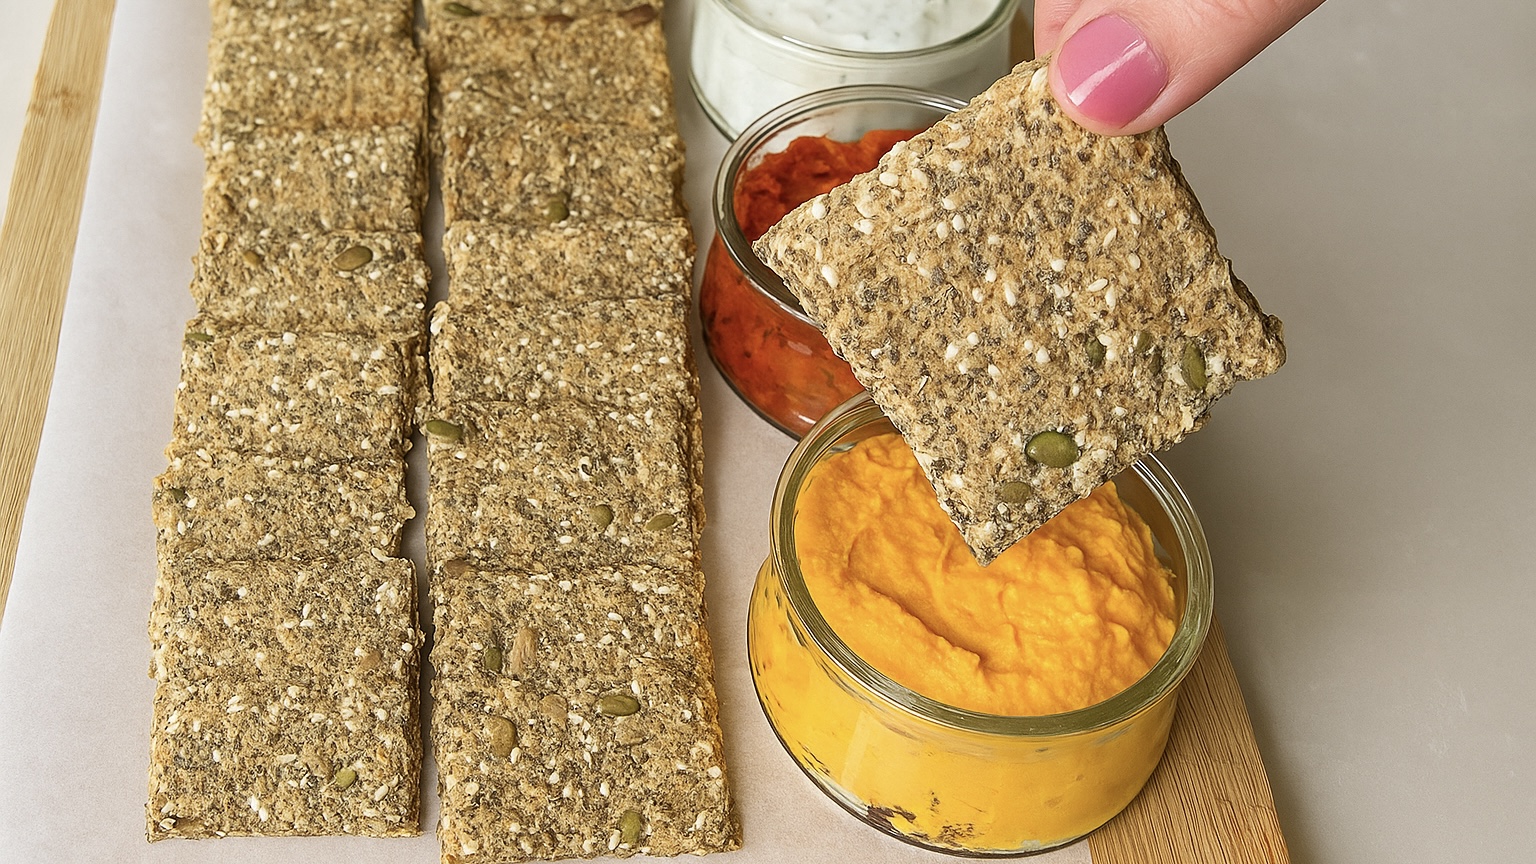
Gluten-free option available depending on the biscuits used.
Vegetarian recipe.

Folded Sushi Wrap

Folded Sushi Wrap

Folded Sushi Wrap

If you love sushi but don’t always love the rolling, precision, or time-consuming process that usually comes with making it at home, this Folded Sushi Wrap might become your newest obsession. Somewhere between a sushi hand roll, a breakfast wrap, an omelette sandwich, and a trendy folded tortilla wrap, this creative recipe transforms classic sushi flavors into something incredibly easy, satisfying, portable, and fun to make.

This recipe is proof that homemade sushi-inspired meals don’t need to feel intimidating. Instead of carefully rolling rice inside seaweed with a bamboo mat, everything is layered into sections over a soft egg omelette lined with nori, then folded into a compact layered wrap. The result is a beautiful sushi-style sandwich packed with creamy avocado, tender smoked salmon, crunchy cucumber, fluffy eggs, and soft sushi rice in every bite.

What makes this recipe especially exciting is how approachable and customizable it is. It captures all the fresh, savory, slightly smoky flavors people love about sushi while simplifying the entire process into something beginner-friendly. It’s perfect for busy lunches, quick dinners, savory breakfasts, meal-prep ideas, or even healthy snacks when you want something nourishing but still comforting and flavorful.

The textures are honestly what make this wrap unforgettable. You get the richness of avocado, the delicate smoky flavor of salmon, the refreshing crunch of cucumber, the softness of rice, and the savory umami from the nori and eggs all layered together in one compact wrap. Every bite feels balanced, fresh, creamy, and satisfying without feeling heavy.

Another reason this recipe stands out is how versatile it can be. You can switch the fillings depending on what you have at home or your favorite sushi-inspired combinations. Add spicy mayo, tofu, shrimp, tuna, cream cheese, pickled vegetables, sesame seeds, or even sriracha for endless variations. Once you try the folding technique, you’ll probably start using it for many other wraps too.

And while the focus here is definitely the creativity, convenience, and flavor of the recipe, this wrap also happens to be protein-rich, made with wholesome ingredients, and satisfying enough to keep you full for hours. It’s one of those recipes that feels playful and modern while still being nutritious and balanced.

Smoked salmon is one of the star ingredients in this recipe, and it brings far more than just flavor. Salmon is naturally rich in high-quality protein and omega-3 fatty acids, which are important for brain health, heart health, and reducing inflammation in the body. It’s also an excellent source of vitamin D, selenium, and B vitamins that support energy production and overall wellness. Including salmon regularly in your diet can help support healthy skin, cognitive function, and balanced nutrition while providing satisfying protein that keeps meals filling and nourishing. Combined with avocado, eggs, cucumber, and seaweed, this wrap becomes a delicious way to enjoy nutrient-dense ingredients in an easy everyday meal.

Ingredients

  • 2 eggs
  • Salt, to taste
  • Ground black pepper, to taste
  • 1 tsp. oil
  • 1 sushi nori sheet
  • 50 g cooked sushi rice
  • ¼ avocado (~25 g flesh), sliced
  • 20 g smoked salmon
  • 10 g cucumber, sliced
  • Japanese mayonnaise sauce, optional

Directions

  1. Crack the eggs into a bowl and season with salt and ground black pepper. Beat thoroughly until smooth and fully combined.
  2. Lightly oil a nonstick pan using a brush or paper towel and place it over low-medium heat.
  3. Pour the beaten eggs into the pan and allow the omelette to cook gently.
  4. While the top of the omelette is still slightly wet, place the sushi nori sheet directly over the eggs with the rough side touching the omelette and the smooth side facing upward.
  5. Continue cooking until the omelette is fully set and no longer wet on top.
  6. Transfer the omelette onto a large plate or clean working surface with the omelette side facing upward.
  7. Using a knife or scissors, make a slit from the bottom edge toward the center of the wrap, stopping halfway through, just like the classic folded tortilla wrap technique.
  8. Divide the fillings between the four sections (sushi rice in one section, avocado in another, smoked salmon in another, and cucumber in the last section)
  9. If desired, drizzle Japanese mayonnaise over the rice or salmon section for extra creaminess and flavor.
  10. Begin folding, fold the rice section over the avocad, fold both over the salmon, and finally fold everything over the cucumber section.
  11. Serve immediately while fresh and enjoy your easy sushi-inspired folded wrap.

    Prep Time, Cooking Time & Servings

    • Prep Time: 15 minutes
    • Pan Cooking Time: 5 minutes
    • Total Time: 20 minutes
    • Servings: 1 serving

    Nutritional Information (Per Serving)

    • Energy: 318 calories
    • Protein: 20.2 g
    • Fat: 19.84 g
    • Carbohydrates: 13.61 g
    • Fiber: 2.2 g

    Storage

    • This wrap is best enjoyed freshly made for the best texture and flavor.
    • If needed, store it tightly wrapped in the refrigerator for up to 1 day.
    • Avoid storing too long as the nori can soften from moisture over time.

    Recommendations & Variations

    • Add spicy mayo or sriracha for extra flavor.
    • Sprinkle sesame seeds on top before serving.
    • Serve with pickled ginger or soy sauce for a more authentic sushi-inspired experience.
    • Replace smoked salmon with tuna, shrimp, tofu, or crab for different variations.
    • Add cream cheese for a richer sushi-wrap flavor.
    • Use brown rice or cauliflower rice depending on your preference.
    Chickpea Crackers

    Chickpea Crackers

    Chickpea Crackers

    Get ready to revolutionize your snack game with these incredible Homemade Chickpea Crackers! If you are tired of the expensive, highly processed, and often flavorless crackers you find in the grocery store aisles, this recipe is exactly what you have been waiting for. These crackers are not just a healthy alternative; they are an absolute flavor explosion, incredibly crunchy, naturally gluten-free, and vegan-friendly!

    Whether you are looking for the perfect on-the-go snack to fuel your busy day or a sophisticated addition to your next charcuterie board with your favorite dips and sauces, these crackers deliver on every level. You won’t believe how easy it is to achieve that professional-grade “snap” right in your own kitchen with just a few simple ingredients.

    The absolute star of this show is chickpea flour, a culinary powerhouse that is about to become your new favorite pantry staple. Unlike common refined flours found in most crackers, chickpea flour is naturally rich in plant-based protein and provides significantly more fiber, which is essential for keeping you full and satisfied throughout the day. It also contains fewer net carbohydrates, making it a much more balanced and nutritious choice for anyone looking to maintain steady energy levels. Beyond the basics, chickpea flour is a fantastic source of essential vitamins and minerals like folate, which supports heart health and cell growth, and iron, which is vital for energy production. By making these crackers a regular part of your diet, you are choosing a nutrient-dense food that promotes better digestion and helps manage blood sugar levels. It’s a delicious way to nourish your body while still enjoying the satisfying crunch of a gourmet snack!

    Ingredients

    • 1 cup (120 g) chickpea flour

    • 1/2 tsp. salt

    • 2 tbsp (30 ml) olive oil (Optional)

    • 1 1/2 cups (360 ml) water

    • 1 tbsp dried rosemary

    • 1 tbsp nigella seeds

    Instructions

    1. Start by adding your chickpea flour, salt, and olive oil into a large mixing bowl.
    2. Gradually pour in the water while whisking vigorously and continuously until you achieve a totally smooth, lump-free consistency.
    3. Prepare your baking tray (ideally 37 cm × 25 cm or 14.5 inches × 10 inches) by brushing it with oil and lining it with a sheet of parchment paper.
    4. Pour the chickpea batter onto the prepared tray, spreading it out evenly across the entire surface.
    5. Give the pan a gentle shake to help the batter distribute perfectly.
    6. Now for the flavor: sprinkle your favorite seeds or herbs over the batter; for this version, we sprinkled dried rosemary on one half and nigella seeds on the other.
    7. Place the tray into a preheated oven at 350°F (180°C) and bake for 10 minutes until the batter turns into a dry texture.
    8. Remove the tray from the oven and use a pizza cutter or sharp knife to cut the dough into small squares or your desired cracker shapes.
    9. Return the cut crackers to the oven and bake for an additional 40 minutes at 340°F (170°C), or until they are completely dry and crispy.
    10. Once finished, take the crackers out of the oven and let them cool completely before serving with your favorite dips.

    Nutritional Information per 1 Cracker

    • Energy: 25 calories

    • Protein: 0.9 g

    • Fat: 1.2 g

    • Carbohydrates: 2.7 g

    • Fiber: 0.8 g (Note: Nutritional values are per 1 cracker)

    Prep, Cook, and Servings

    • Prep: 10 mins

    • Cook: 60 mins (10 mins initial bake + 50 mins second bake and prep)

    • Servings: 28 Crackers

    • Dietary Status: Gluten-Free and Vegan

    Notes and Recommendations

    • Storage: Once they have cooled completely, store your crackers in an airtight container at room temperature for up to 10 days to maintain their crunch.

    • Customization: Don’t be afraid to get creative with your toppings! You can easily substitute the rosemary and nigella seeds with other spices like garlic powder, onion powder, or sesame seeds depending on your mood.

    • Serving Suggestion: These are perfect by themselves for a quick on-the-go snack, but they truly shine when served alongside a creamy hummus, a spicy salsa, or your favorite dairy-free dip.

    Wholesome Seed Crackers

    Wholesome Seed Crackers

    Wholesome Seed Crackers

    When was the last time you checked the ingredient list on a box of store-bought crackers? Chances are, it was a long list packed with preservatives, refined oils, and additives you can’t even pronounce. Most commercial crackers may look healthy, but they often hide unnecessary ingredients that your body doesn’t need. That’s why making your own crackers at home is such a game-changer. You know exactly what goes in-simple, natural ingredients that you can trust. No artificial flavors, no chemicals, just wholesome, real food.

    These homemade seed crackers prove that healthy snacking doesn’t have to be complicated. Made with a mix of flaxseeds, chia seeds, sunflower seeds, sesame seeds, and pumpkin seeds, they deliver a delicious crunch while packing in serious nutrition. The magic starts when flax and chia combine with water to form a natural gel that holds everything together—no eggs, no gluten, no refined flour needed. Just seeds, seasoning, and a little love.

    And let’s talk about flaxseeds, the true star of this recipe. These tiny seeds are nutritional powerhouses, rich in omega-3 fatty acids that support heart and brain health, as well as fiber to promote digestion and keep you feeling full. They also contain lignans, antioxidants with incredible benefits for hormonal and cellular health. But here’s the catch: your body can’t absorb all these nutrients from whole flaxseeds because their hard outer shell is difficult to break down. That’s why we grind the flaxseeds into a fine flour before using them, so you can actually reap every single benefit they offer.

    By combining flaxseeds with other nutrient-packed seeds like sesame, pumpkin, and sunflower, you’re creating a snack that’s rich in minerals like magnesium, zinc, and calcium, plus plant-based protein and healthy fats. These crackers are not just tasty, they’re functional food. A simple, crunchy, and satisfying option for anyone who wants to eat better without sacrificing flavor.

    Enjoy them as a quick snack, pair them with your favorite dip, or serve them alongside a comforting bowl of soup. Once you taste them, you’ll never look at store-bought crackers the same way again.

    Ingredients

    • ¼ cup (40 g) golden or brown flaxseeds, ground into flour
    • 3 tbsp (30 g) chia seeds
    • 1 cup (240 ml) room temperature water
    • ¼ cup (35 g) sunflower seeds
    • ¼ cup (35 g) sesame seeds
    • ¼ cup (35 g) pumpkin seeds
    • ⅓ cup (30 g) oat flour (or almond/coconut flour for keto-friendly option)
    • ¼ tsp salt
    • ¼ tsp garlic powder
    • 1 tsp dried oregano

    Directions

    1. Grind the flaxseeds into a fine flour using a coffee grinder or food processor. Transfer to a mixing bowl.
    2. Add chia seeds and water, stir well, cover, and let sit for 15–30 minutes until it turns into a thick, gel-like mixture.
    3. Combine remaining ingredients: Stir in sunflower seeds, sesame seeds, pumpkin seeds, oat (or almond/coconut) flour, salt, garlic powder, and oregano. Mix until everything is well incorporated and slightly sticky.
    4. Rest the dough for another 10–15 minutes to make it easier to handle.
    5. Spread the mixture: Transfer onto a parchment-lined baking sheet (about 37 cm × 25 cm / 14.5 in × 10 in). Spread evenly using a spatula to about 0.3–0.4 cm thickness.
    6. Smooth the surface: Place an oiled sheet of parchment on top and gently press with a flat utensil or your hands. Remove the top parchment carefully.
    7. Preheat the oven to 340°F (170°C). Bake for 10 minutes. Remove from the oven, cut into cracker shapes, and return them to the oven.
    8. Bake again for 35–45 minutes until the crackers are crisp and golden.
    9. Cool completely before serving. Crackers will harden more as they cool.

    Prep & Baking Info

    • Servings: About 24 crackers

    • Soaking Time: 30 minutes

    • Prep Time: 20 minutes

    • Baking Time: 10 minutes + 35–45 minutes

    Nutritional Information (Per Cracker)

    • Energy: 46 calories

    • Protein: 1.75 g

    • Fat: 3.56 g

    • Carbohydrates: 2.5 g

    • Fiber: 1.4 g

    Storage

    • Store cooled crackers in an airtight container at room temperature for up to 10 days.

    • To keep them extra crispy, place a small piece of parchment paper in the container to absorb any moisture.

    Serving Ideas

    • Pair with hummus, guacamole, or cheese.

    • Enjoy as a stand-alone snack or a crunchy side with soup.

    Dietary Info

    • 100% Vegan

    • Gluten-Free (if using certified gluten-free oat flour or almond/coconut flour)

    • No refined sugars, no additives, no preservatives.

    Red Lentil Nuggets

    Red Lentil Nuggets

    Red Lentil Nuggets

    When it comes to creating nutritious meals that everyone will love, these Red Lentil Nuggets are a true winner. Whether you’re whipping up a quick lunchbox addition, a satisfying snack, or a wholesome dinner centerpiece, these nuggets are guaranteed to impress. The beauty of this recipe lies in its simplicity, made with pantry staples, fresh veggies, and hearty red lentils, these nuggets are gluten-free, packed with protein, and baked to golden perfection.

    But what makes these nuggets truly special is their versatility. They’re perfect for picky eaters, busy parents, or anyone looking for a healthier alternative to store-bought options. Imagine the joy of knowing exactly what’s in your food—no preservatives, no hidden additives, just real, wholesome ingredients. Serve them alongside a creamy avocado dip, a fresh salad, or even tucked into wraps for a fun twist on mealtime.

    Now, let’s talk about the star ingredient: red lentils. These humble legumes are a nutritional powerhouse and a must-have in any well-rounded diet. Red lentils are rich in plant-based protein, making them an excellent choice for vegetarians and omnivores alike. They’re packed with dietary fiber, which supports digestion and helps maintain healthy blood sugar levels. But that’s not all—red lentils are an outstanding source of iron, folate, and magnesium, nutrients crucial for energy production, immune function, and overall vitality.

    Incorporating red lentils into your regular diet can have lasting health benefits. Their iron content can help combat fatigue and support red blood cell production, while their low glycemic index keeps you feeling full and energized for hours. Red lentils are also incredibly versatile, they pair well with countless flavors and can be used in soups, stews, salads, and, of course, these delightful nuggets.

    If you’re looking for a recipe that’s healthy, flavorful, and easy to make, these Red Lentil Nuggets tick all the boxes. Plus, they’re a fantastic way to introduce more plant-based ingredients into your diet while ensuring that every bite is as delicious as it is nourishing. Whether you’re feeding a crowd or preparing a meal for yourself, these nuggets are sure to become a household favorite.

    Ingredients:

    • ½ cup (90 g) red lentils
    • 30 g onion, coarsely chopped
    • 1 garlic clove, coarsely chopped
    • 1 egg
    • 1 can (110 g) strained tuna meat
    • 50 g shredded carrot (or veggies of choice)
    • 40 g finely chopped red bell pepper (or veggies of choice)
    • 10 g finely chopped fresh parsley
    • 30 g shredded mozzarella (or cheese of choice)
    • 3 tbsp. olive oil, plus 1 tbsp for brushing
    • ¼ tsp. salt
    • ¼ tsp. dried onion powder
    • ¼ tsp. dried garlic powder
    • ¼ tsp. dried oregano (or herbs of choice)
    • Black pepper to taste

    Directions:

    1. Soak red lentils in water for 4 hours at room temperature or overnight in the refrigerator.
    2. Rinse soaked lentils thoroughly and strain well to remove any excess water.
    3. Blend lentils with onion, garlic, and egg in a blender or with a hand blender until smooth and creamy.
    4. Add strained tuna, shredded carrot, chopped bell pepper, parsley, mozzarella, olive oil, and all seasonings to the mixture.
    5. Mix everything thoroughly until the mixture holds together easily.
    6. Shape the mixture into nugget fingers or rectangles, about 2 tablespoons each.
    7. Place the shaped nuggets onto a parchment-lined baking pan.
    8. Brush the tops of the nuggets with olive oil for a crispier texture.
    9. Bake in a preheated oven at 350°F (180°C) for 30 minutes, or until golden brown.
    10. Serve warm with your favorite dipping sauce, such as fresh avocado dip.

    Prep Time and Baking Information:

    • Soaking: at least for 4 hours or overnight in the fridge
    • Prep Time: 30 minutes
    • Baking Time: 30 minutes
    • Servings: 16 nuggets

    Nutritional Information:

    Per 1 nugget:

    • Energy: 70 calories
    • Protein: 3.6 g
    • Fat: 4.35 g
    • Carbohydrates: 4.4 g
    • Fiber: 0.8 g

    Storage:

    • Store leftovers in an airtight container in the fridge for up to 5 days.
    • Freeze uncooked nuggets on a baking sheet, then transfer to a freezer-safe bag for up to 3 months. Bake directly from frozen, adding 5–7 minutes to the cook time.

    Particular Recommendations:

    Red lentils are a versatile ingredient that blends seamlessly into both savory and sweet recipes. To maximize their health benefits, pair them with vitamin C-rich foods to boost iron absorption, such as fresh bell pepper in this recipe or a side of citrus salad. These nuggets also make a great gluten-free and protein-packed option for those focusing on balanced eating habits!