
2 Ingredient Chocolate Cake
2 Ingredient Chocolate Cake

There’s something magical about creating a cake that feels luxurious with just two ingredients. Yes, you read that right—two simple ingredients are all you need to whip up this rich, chocolatey masterpiece. This recipe is proof that sometimes less is more. Imagine a cake that’s velvety, moist, and full of deep chocolate flavor, perfect for an indulgent treat or impressing unexpected guests without the hassle of elaborate baking. If you’re someone who loves chocolate (and let’s be honest, who doesn’t?), this dessert will quickly become your new go-to. It’s ideal for those days when you’re short on time or ingredients but still want something that feels decadent and special.
Dark chocolate and eggs, two staples you likely already have in your kitchen, come together to create something that tastes far more complex than it is. The beauty of this recipe lies in its simplicity: dark chocolate melts into a silky smooth base, and the beaten eggs add structure, lightness, and a melt-in-your-mouth texture that elevates the cake to restaurant-quality perfection. Whether you’re serving it as a post-dinner treat or celebrating a special occasion, this cake delivers a wow factor that’s hard to beat.
Beyond its irresistible taste, dark chocolate is a nutritional powerhouse that deserves a regular spot in your diet. It’s packed with antioxidants like flavonoids, which can help reduce inflammation, improve blood flow, and boost heart health. Dark chocolate also contains minerals such as iron, magnesium, and copper, which are essential for energy production, healthy red blood cells, and overall brain function. Plus, it’s known to elevate mood naturally by stimulating endorphins and increasing serotonin levels, making it the perfect little pick-me-up during a busy day.
When paired with eggs, which are loaded with high-quality protein, choline, and vitamin D, this cake isn’t just about indulgence, it’s about nourishment too. Eggs provide essential nutrients that support brain health, muscle maintenance, and a strong immune system, making this dessert surprisingly wholesome. Together, these two ingredients create a cake that is not only a treat for your taste buds but also a small boost of nutrition.
This recipe proves that you don’t need a long list of ingredients or complicated techniques to create something wonderful. It’s a minimalist masterpiece that brings joy to any occasion while giving you a reason to keep dark chocolate stocked in your pantry at all times. So go ahead, treat yourself, this cake is an invitation to savor simplicity, celebrate indulgence, and embrace the magic of chocolate in its purest form.
Ingredients
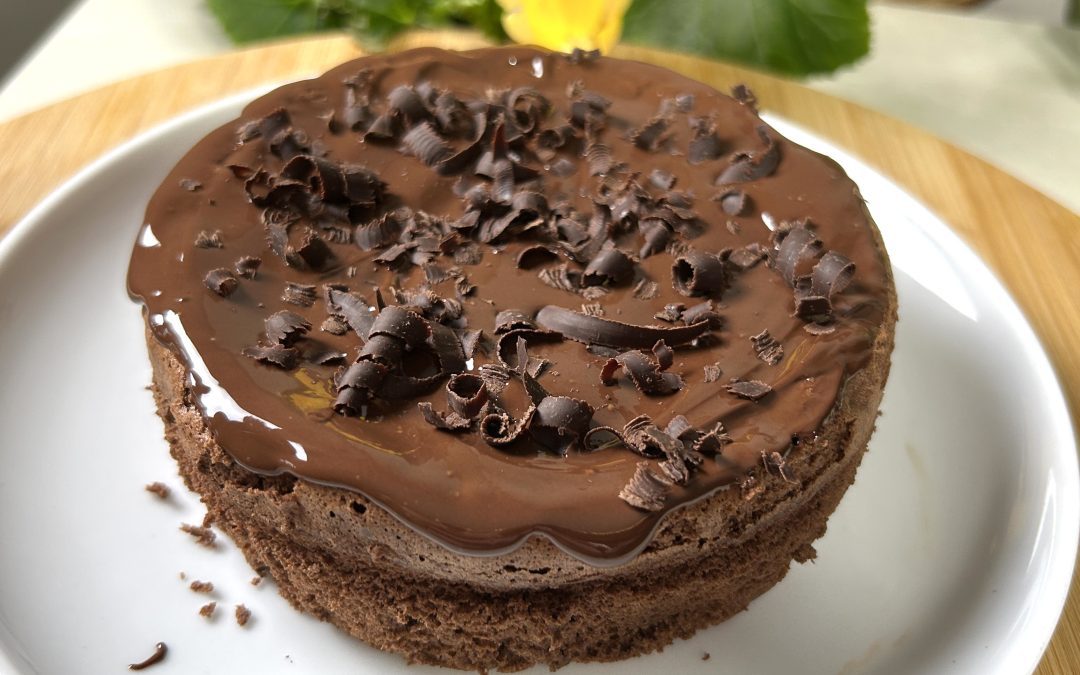
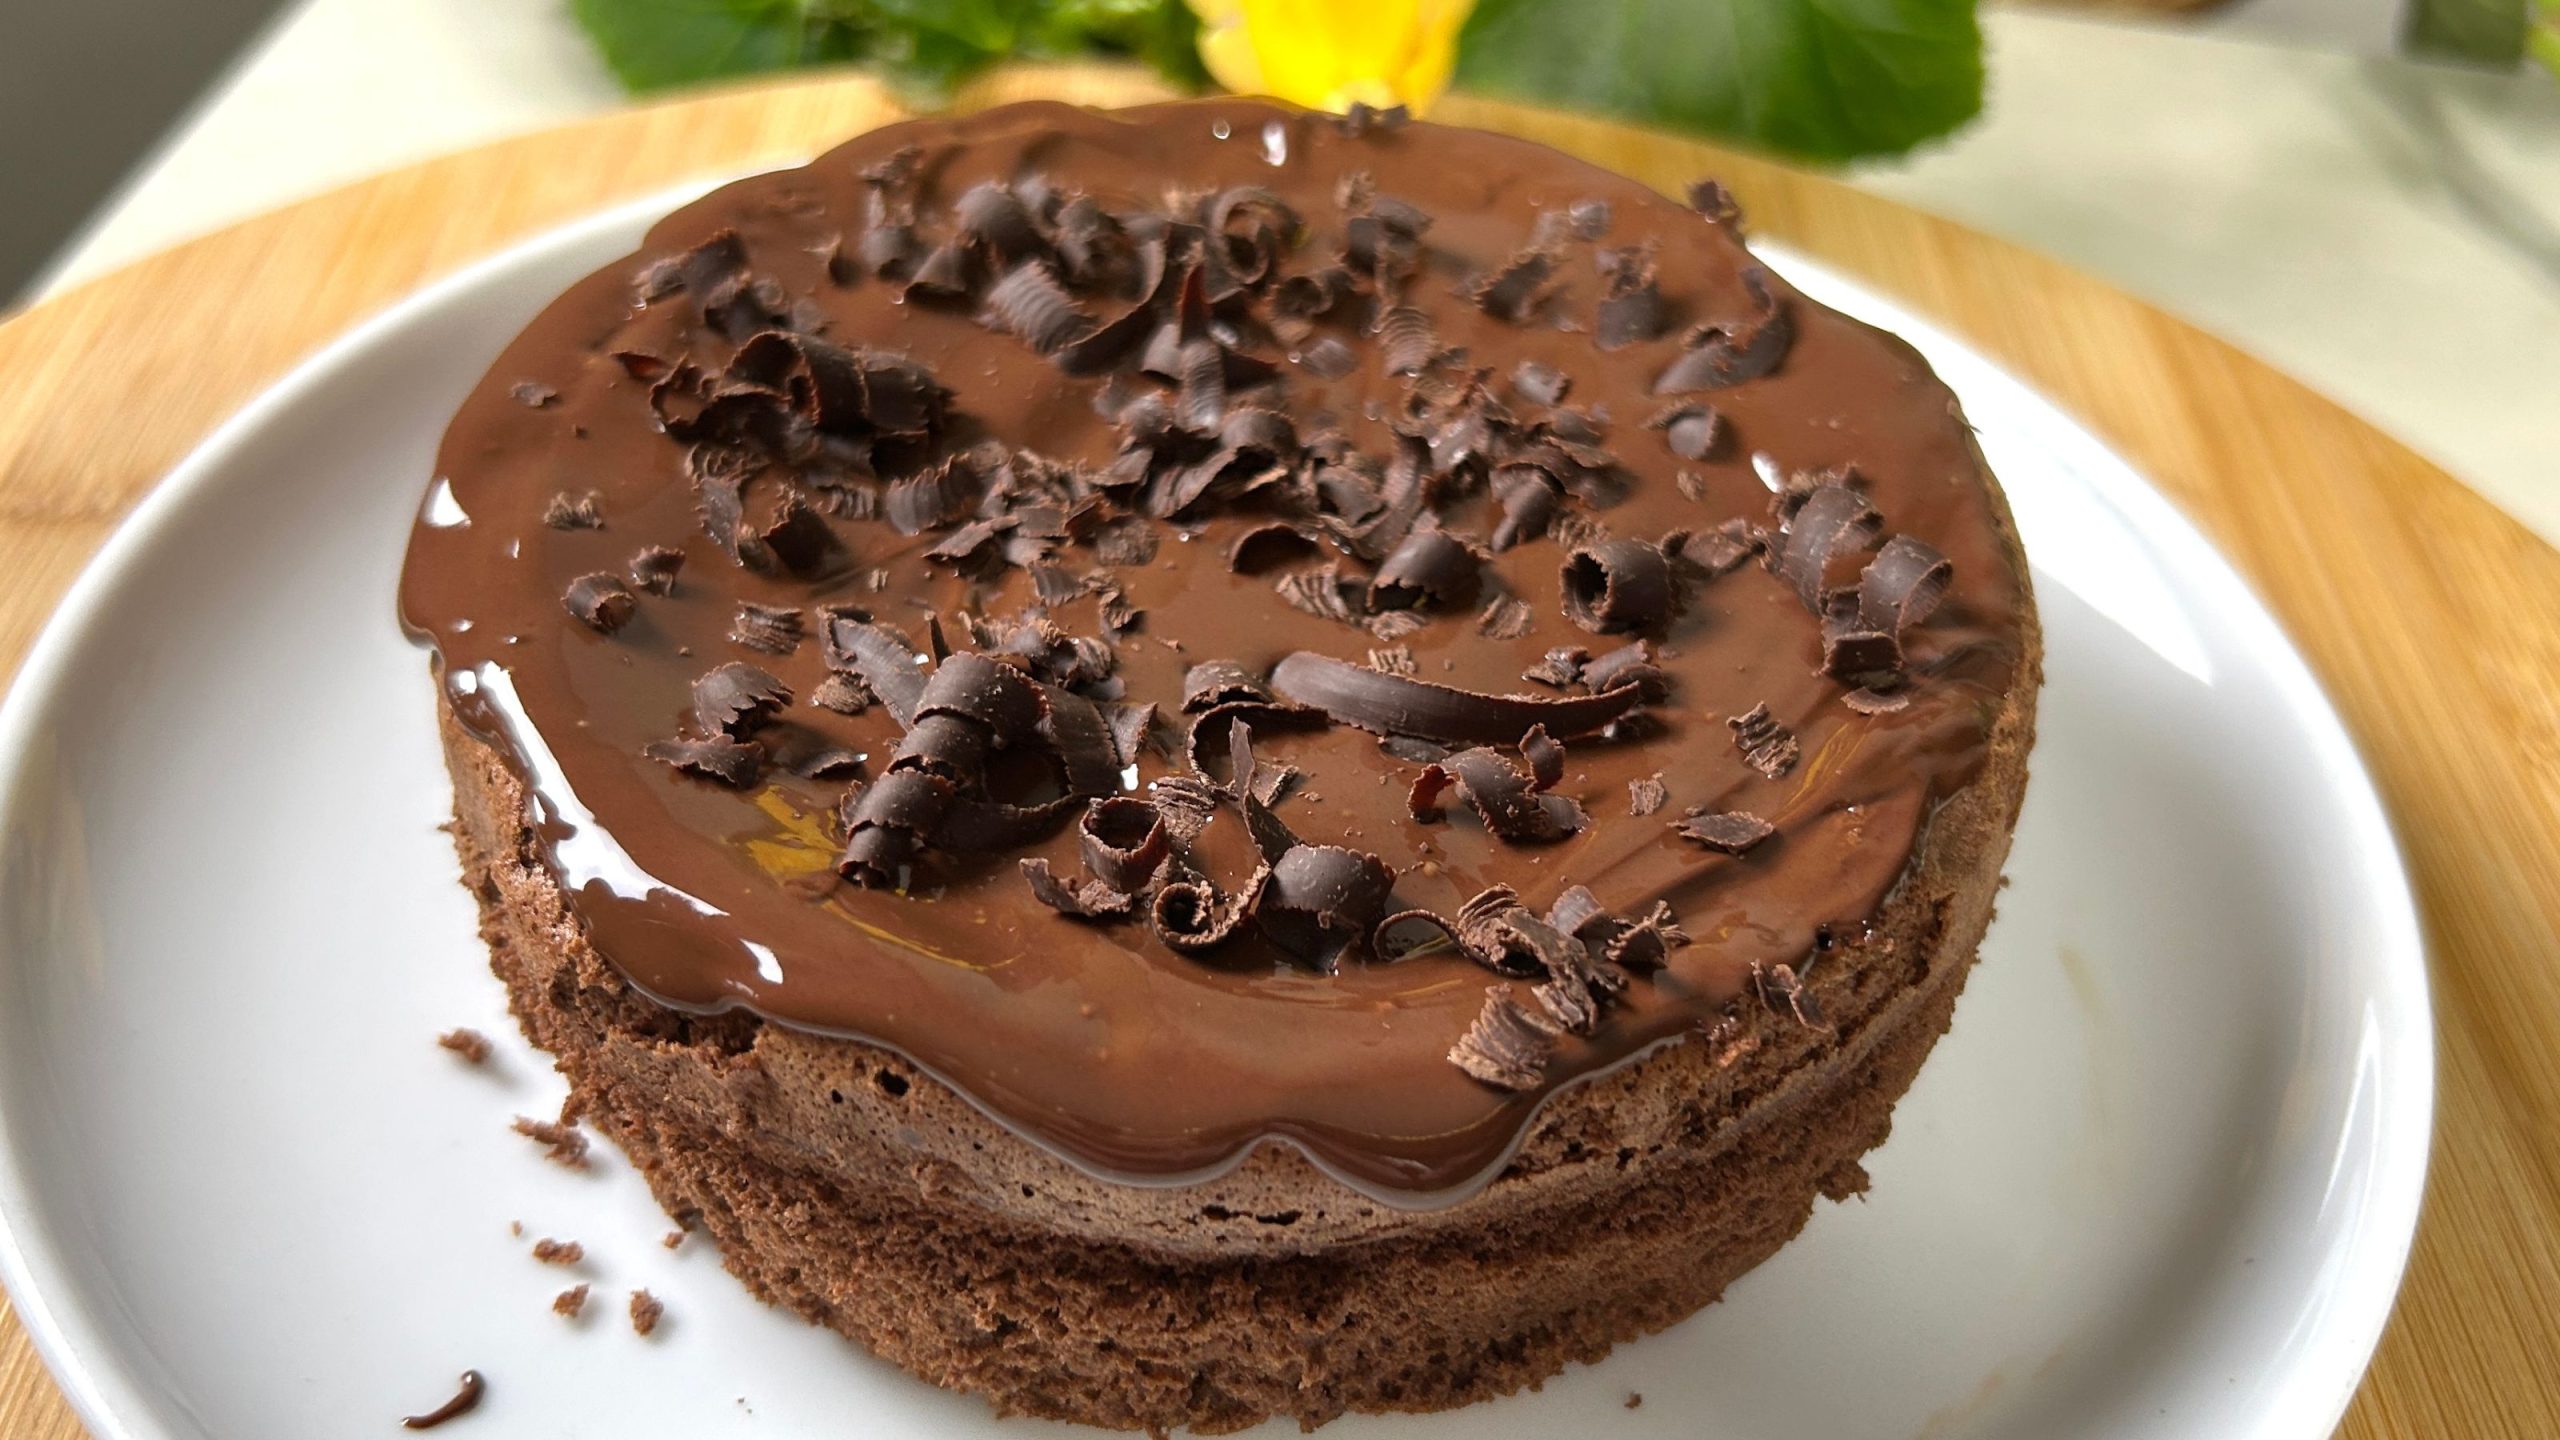
- 150 g dark chocolate (plus 40 g for topping and 10 g for garnish)
- 3 large eggs
- Pinch of salt
Directions
- Preheat the oven to 330°F (165°C) and line a 15 cm (6-inch) circular baking pan with parchment paper. Grease the edges with oil.
- Chop the dark chocolate into small pieces and melt it in the microwave (in 30-second intervals) or over a double boiler. Stir until smooth and let it cool slightly.
- Separate the egg yolks and whites into two bowls.
- Whisk one egg yolk at a time into the melted chocolate, ensuring each yolk is fully incorporated before adding the next. The mixture should be smooth and uniform.
- Add a pinch of salt to the egg whites and beat them with an electric whisk until stiff peaks form.
- Gradually fold the beaten egg whites into the chocolate mixture in small batches, maintaining the airy texture.
- Pour the batter into the prepared baking pan and smooth it out evenly.
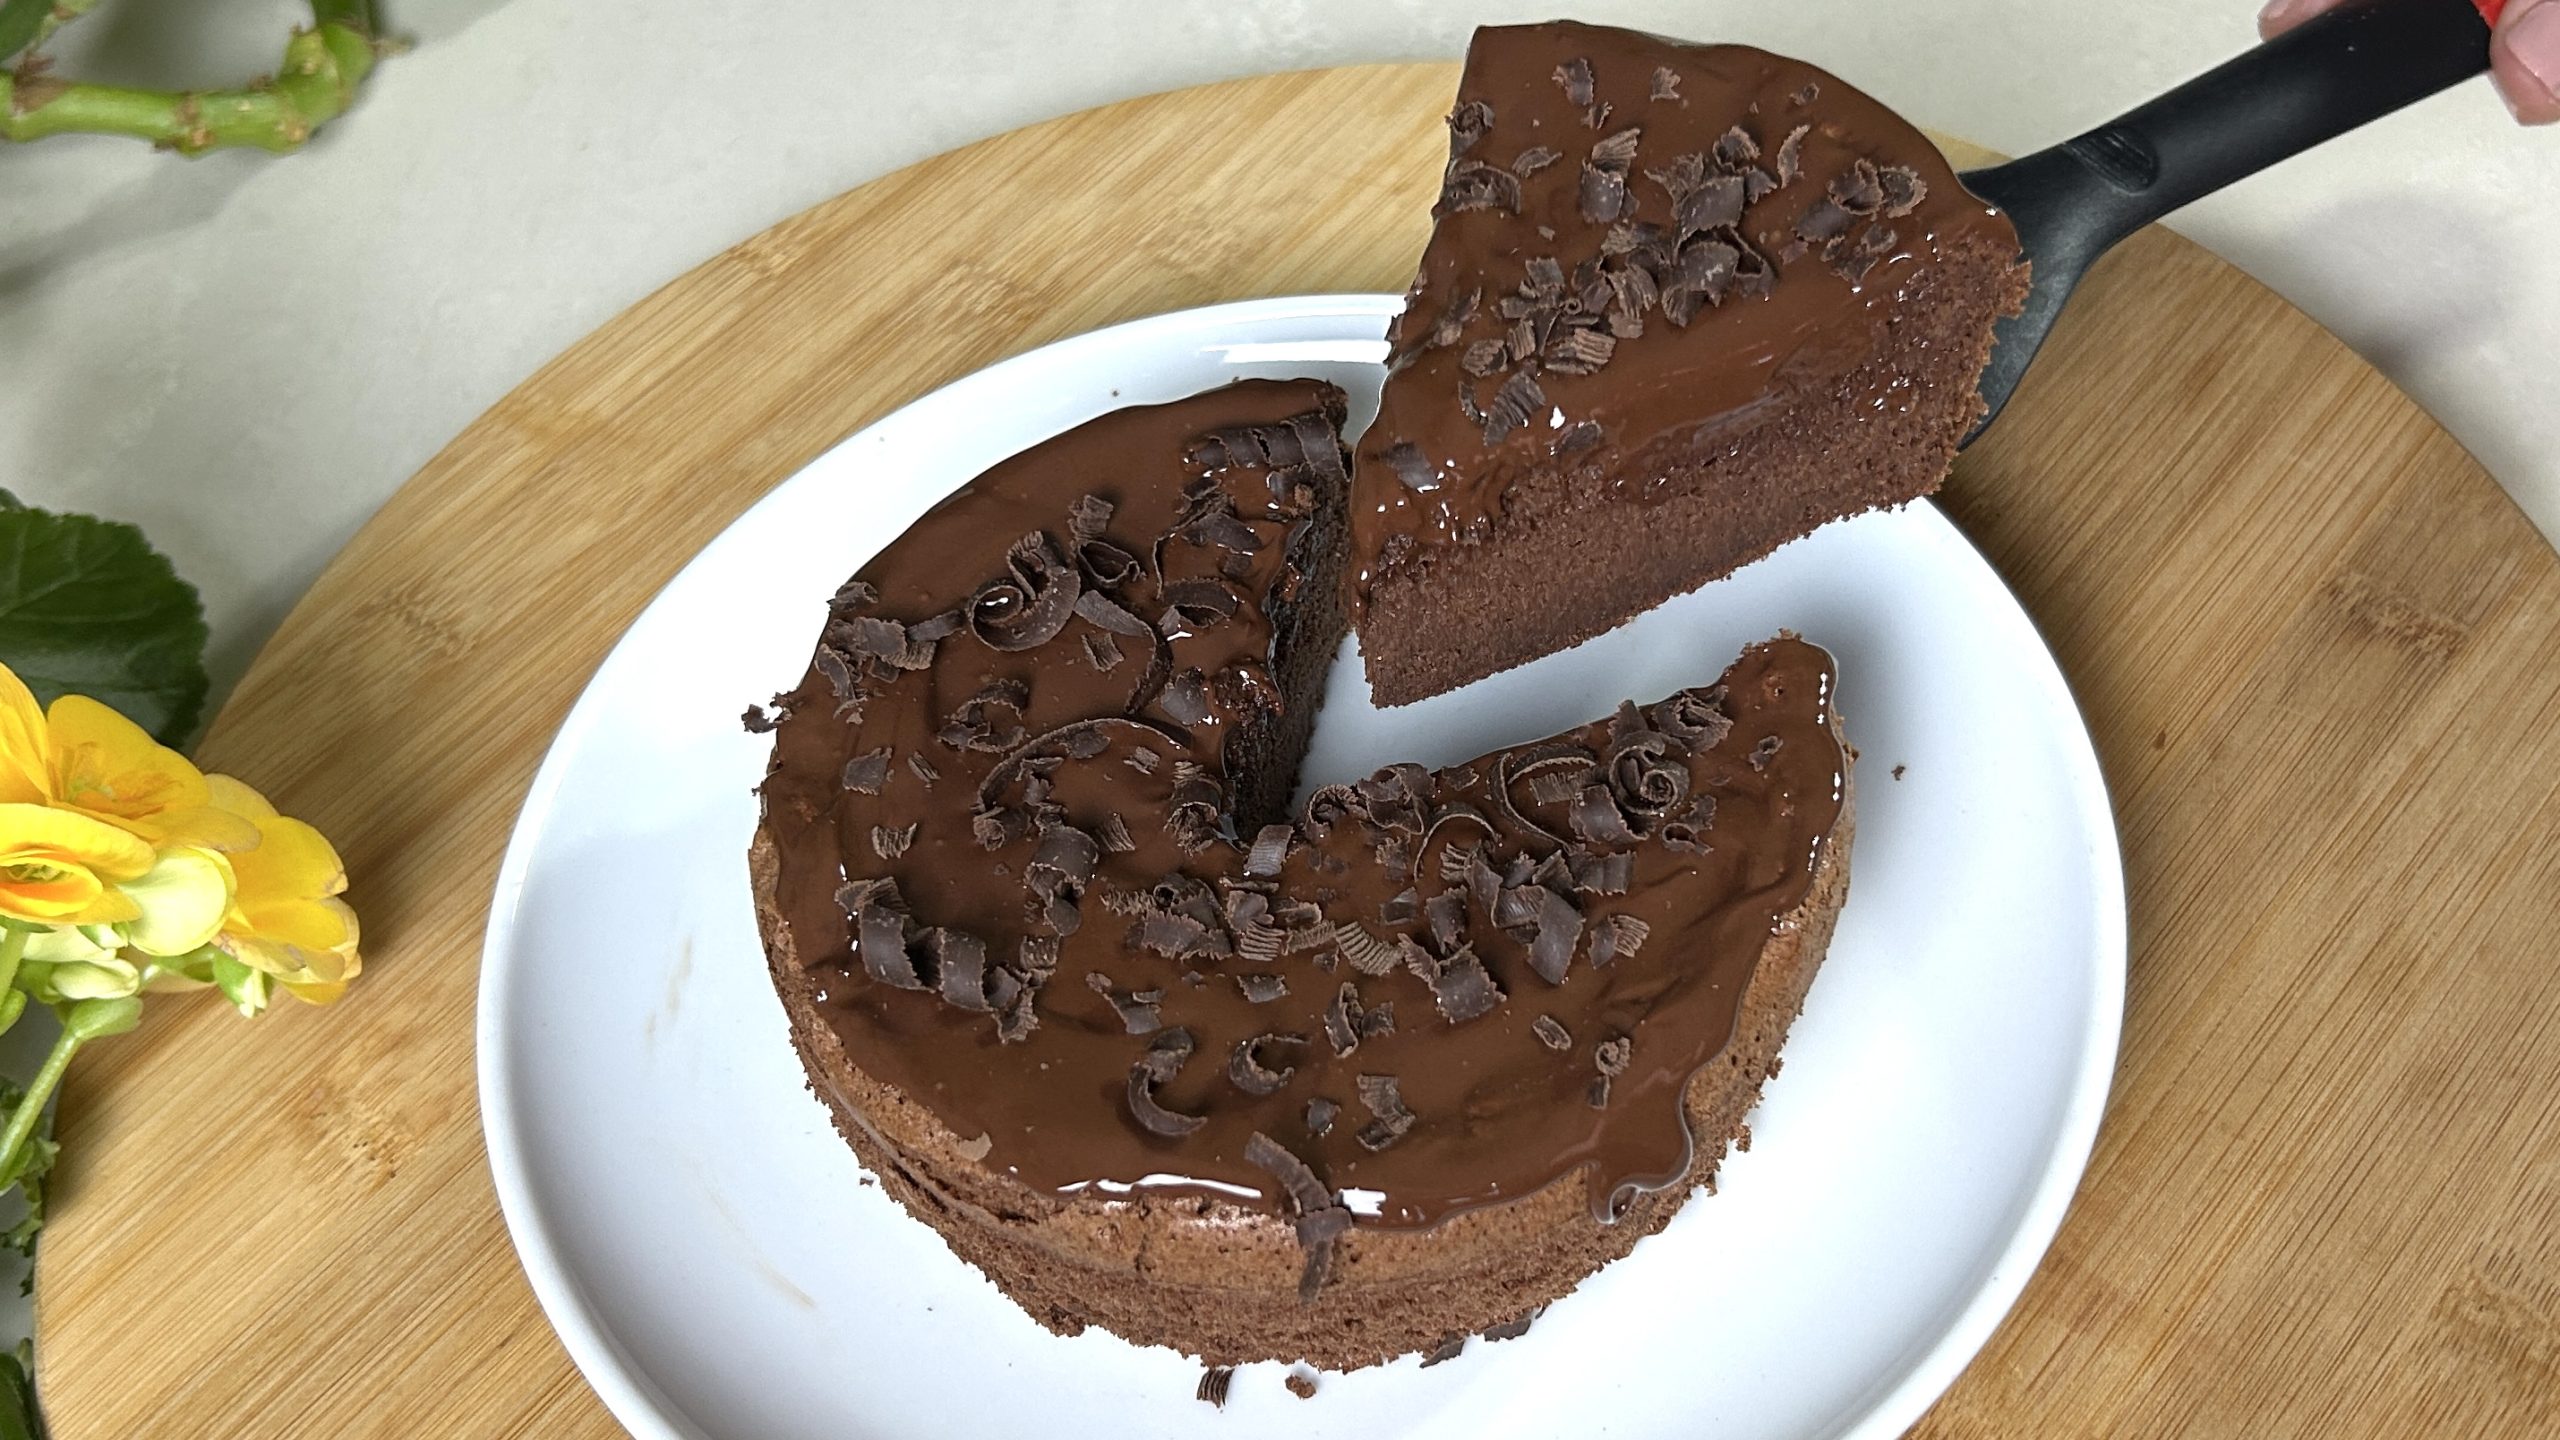
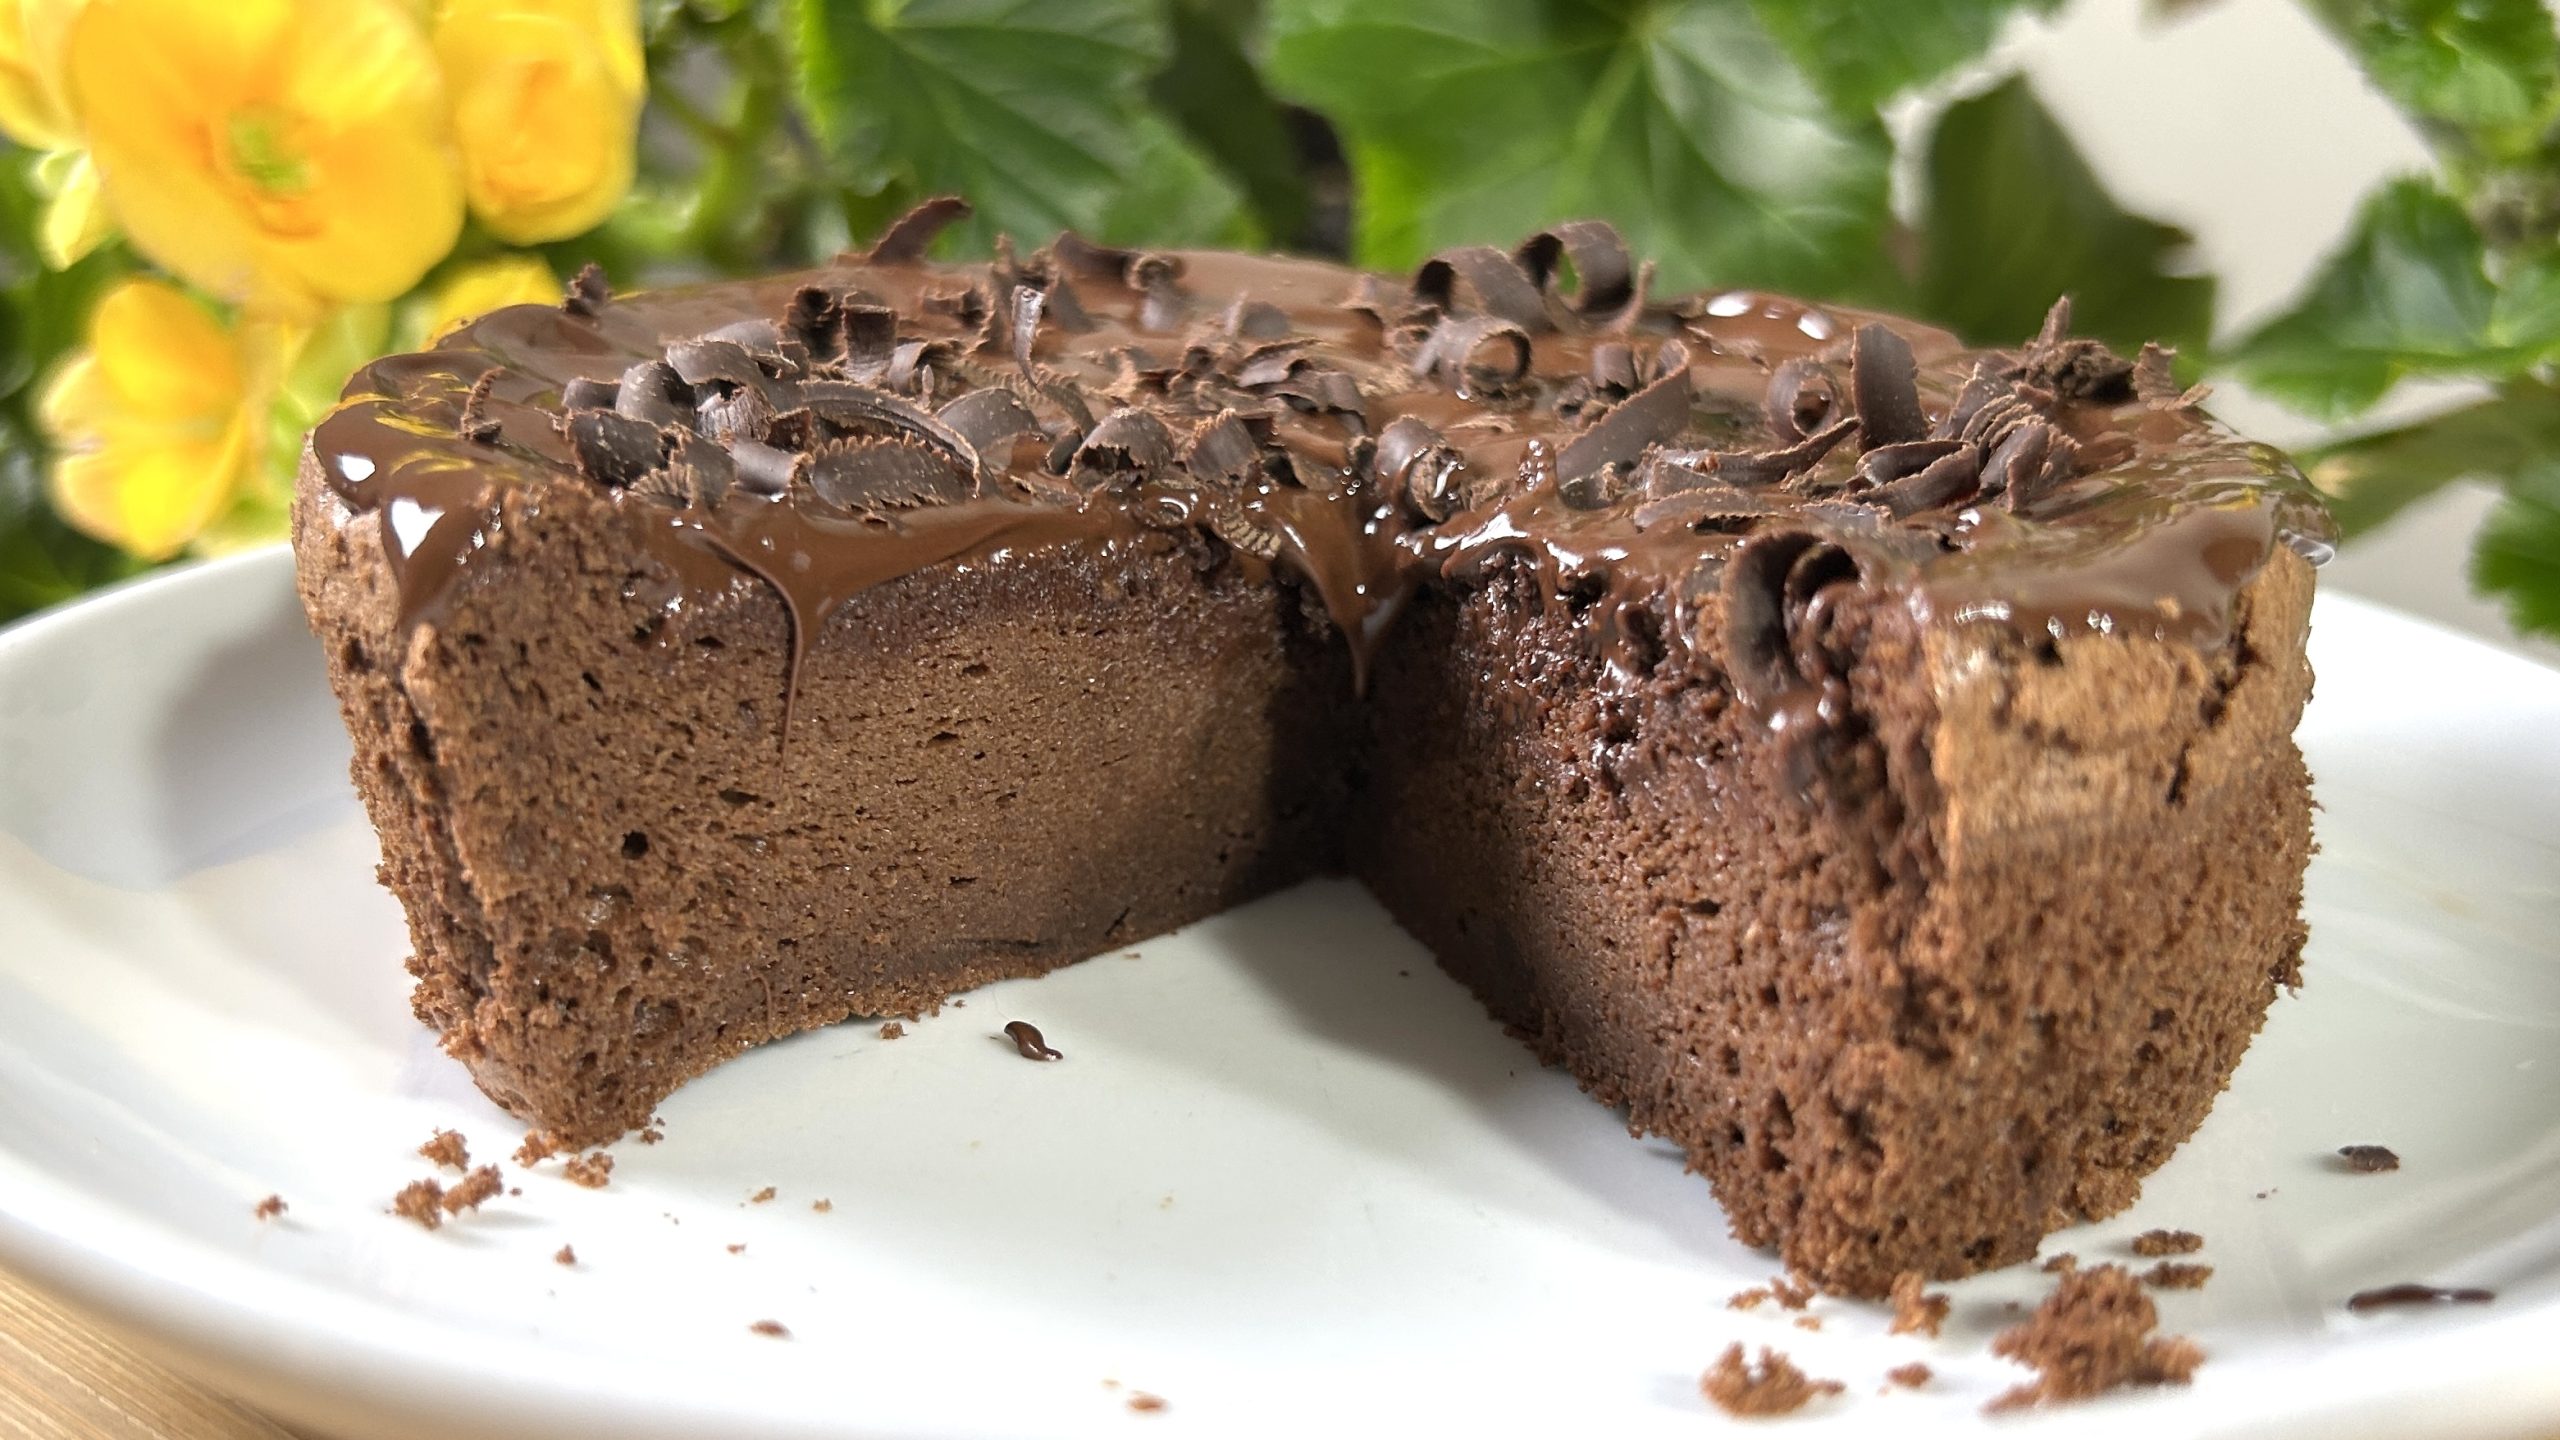
- Bake for 25 minutes, or until a toothpick inserted into the center comes out clean.
- Cool the cake for a few minutes, then top with melted chocolate and garnish with chocolate curls before serving.
Prep Time: 20 minutes
Baking Time: 25 minutes
Servings: 6
Nutritional Information (Per Serving):
- Energy: 235 calories
- Protein: 5.74 g
- Fat: 16.59 g
- Carbohydrates: 15.48 g
- Fiber: 3.6 g
Storage Recommendations:
- Store the cake in an airtight container at room temperature for up to 2 days.
- For longer storage, refrigerate for up to 5 days. Let it come to room temperature before serving.
- Pair with a cup of coffee, tea, or a dollop of whipped cream for an extra treat.


