Reese’s Treats
Reese's Treats

Indulge in these homemade Reese’s treats, a perfect way to satisfy your sweet cravings with a wholesome touch. Made with creamy peanut butter and rich dark chocolate, these delightful creations are not only delicious but also offer a healthier twist on the classic favorite. Whether you’re enjoying them as a personal treat or sharing them with loved ones, these Reese’s treats are bound to be a hit!
Peanut butter is the star ingredient in this recipe, offering a good source of protein and healthy fats that help keep you satisfied. It’s also rich in essential vitamins and minerals, including vitamin E, magnesium, and potassium, which are important for heart health, muscle function, and maintaining healthy skin. Dark chocolate, known for its high antioxidant content, not only adds a rich, indulgent flavor but also provides health benefits, such as improving heart health and reducing inflammation. Together, these ingredients create a treat that’s both satisfying and better for you than store-bought alternatives.
These treats are easy to make and store, making them perfect for meal prepping or for having a ready-to-go snack on hand. Enjoy them chilled for a refreshing dessert or snack that’s perfect for any occasion.
Ingredients
- 1 cup or 230 g creamy peanut butter (made with only peanuts)
- 1/3 cup maple syrup or honey or other sweetener of your choice
- 120 g dark chocolate
- 1 tsp coconut oil (or other oil of choice)
- Mini cupcake liners
Directions
- Melt dark chocolate with coconut oil for a smooth texture. Let it cool.
- In a mixing bowl, vigorously stir together creamy peanut butter and maple syrup until well combined and smooth. Place the mixture in the refrigerator to chill for easier handling later.
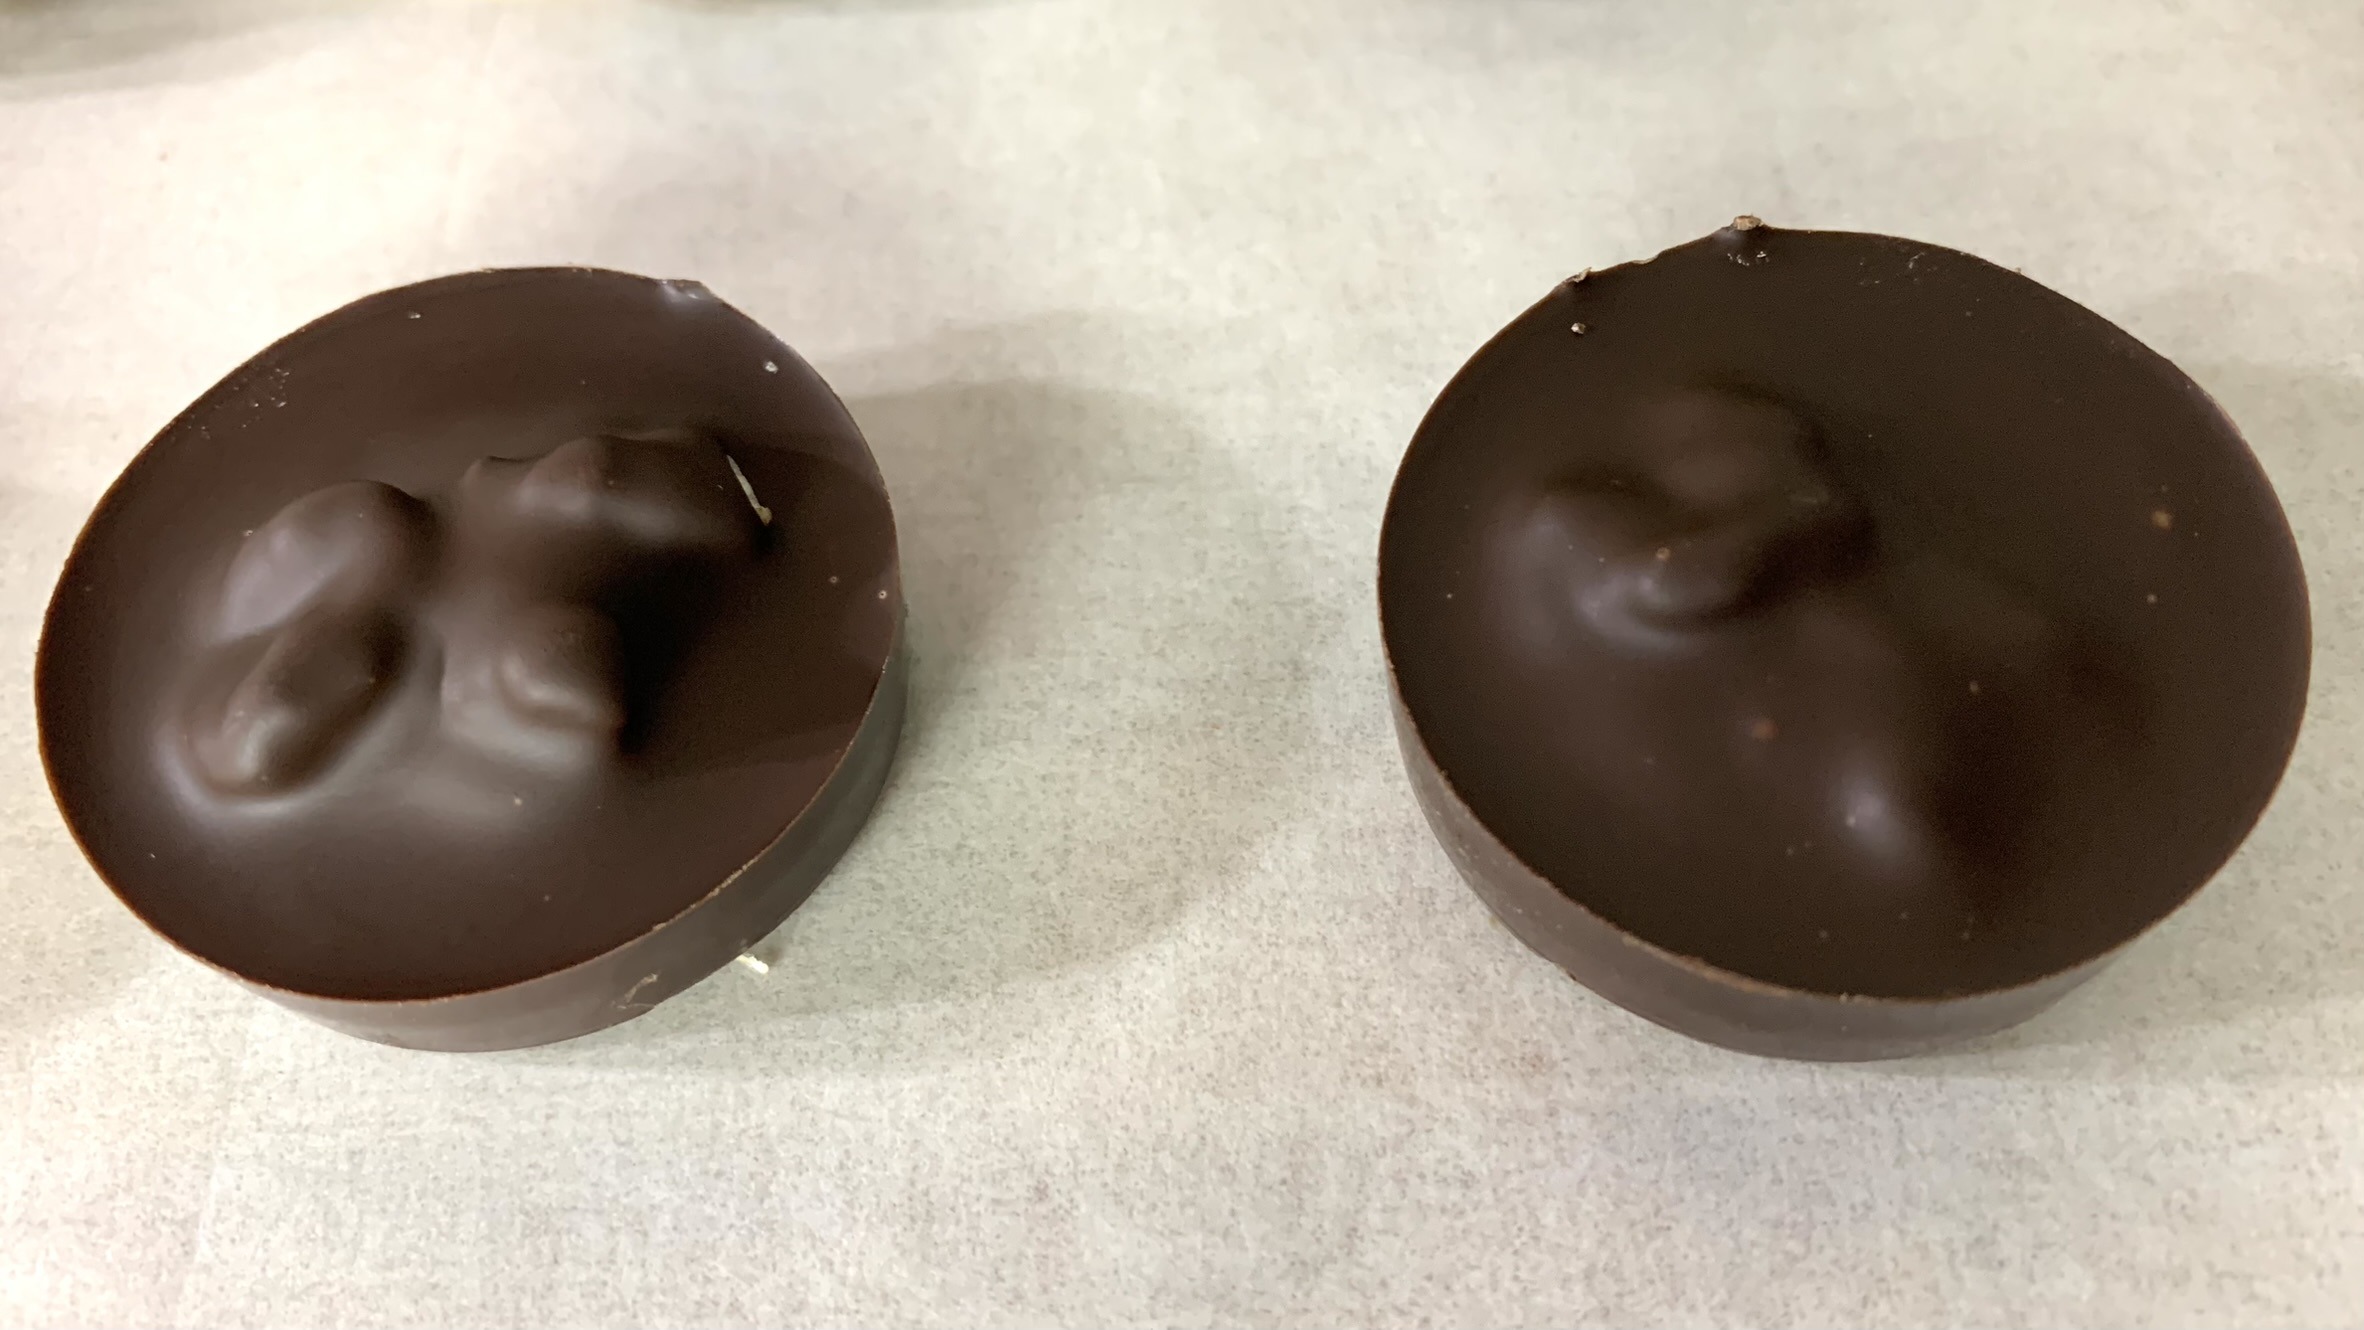
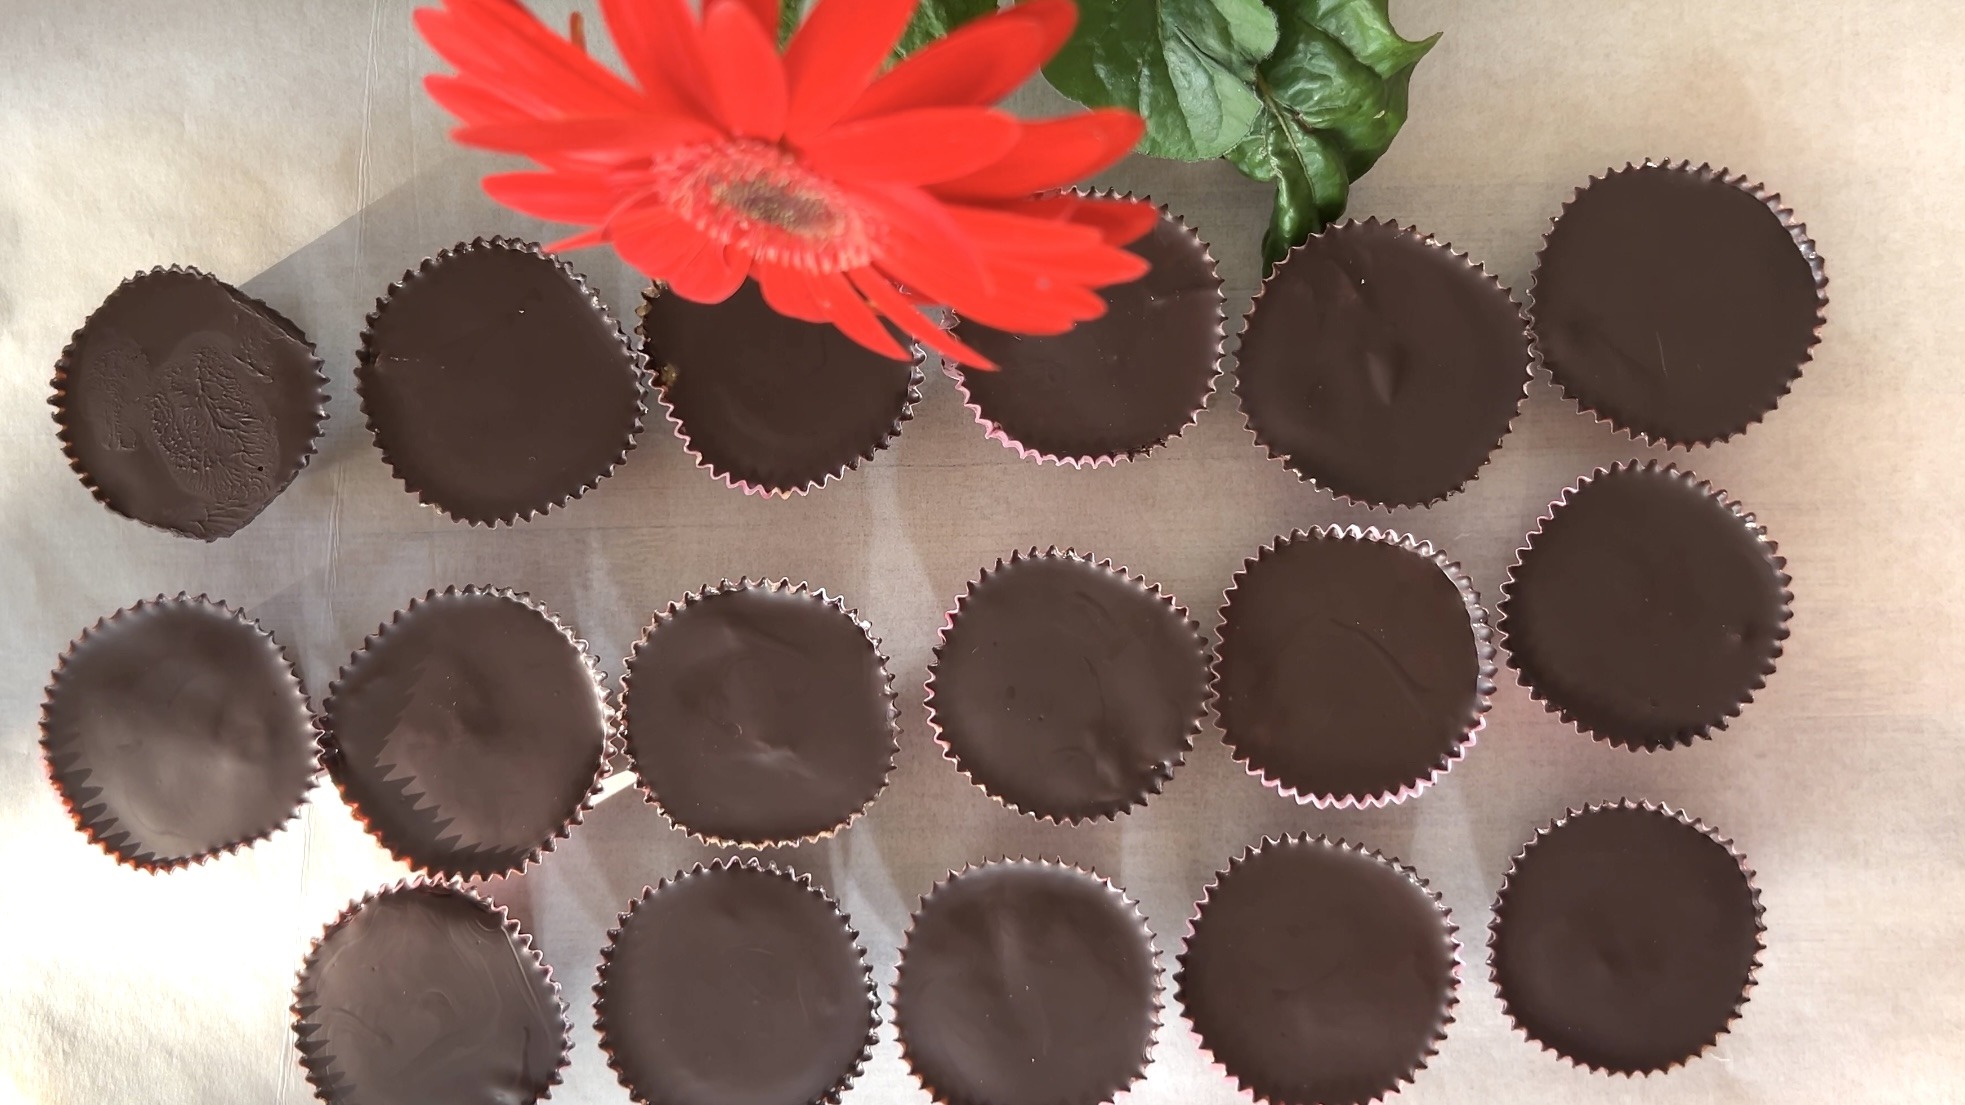
- Prepare mini cupcake liners and fill each with approximately 1/2 teaspoon of the melted dark chocolate. Rotate the liners to ensure even coating of the interior surfaces with a thin layer of chocolate. Place in the fridge for at least 30 minutes to set.
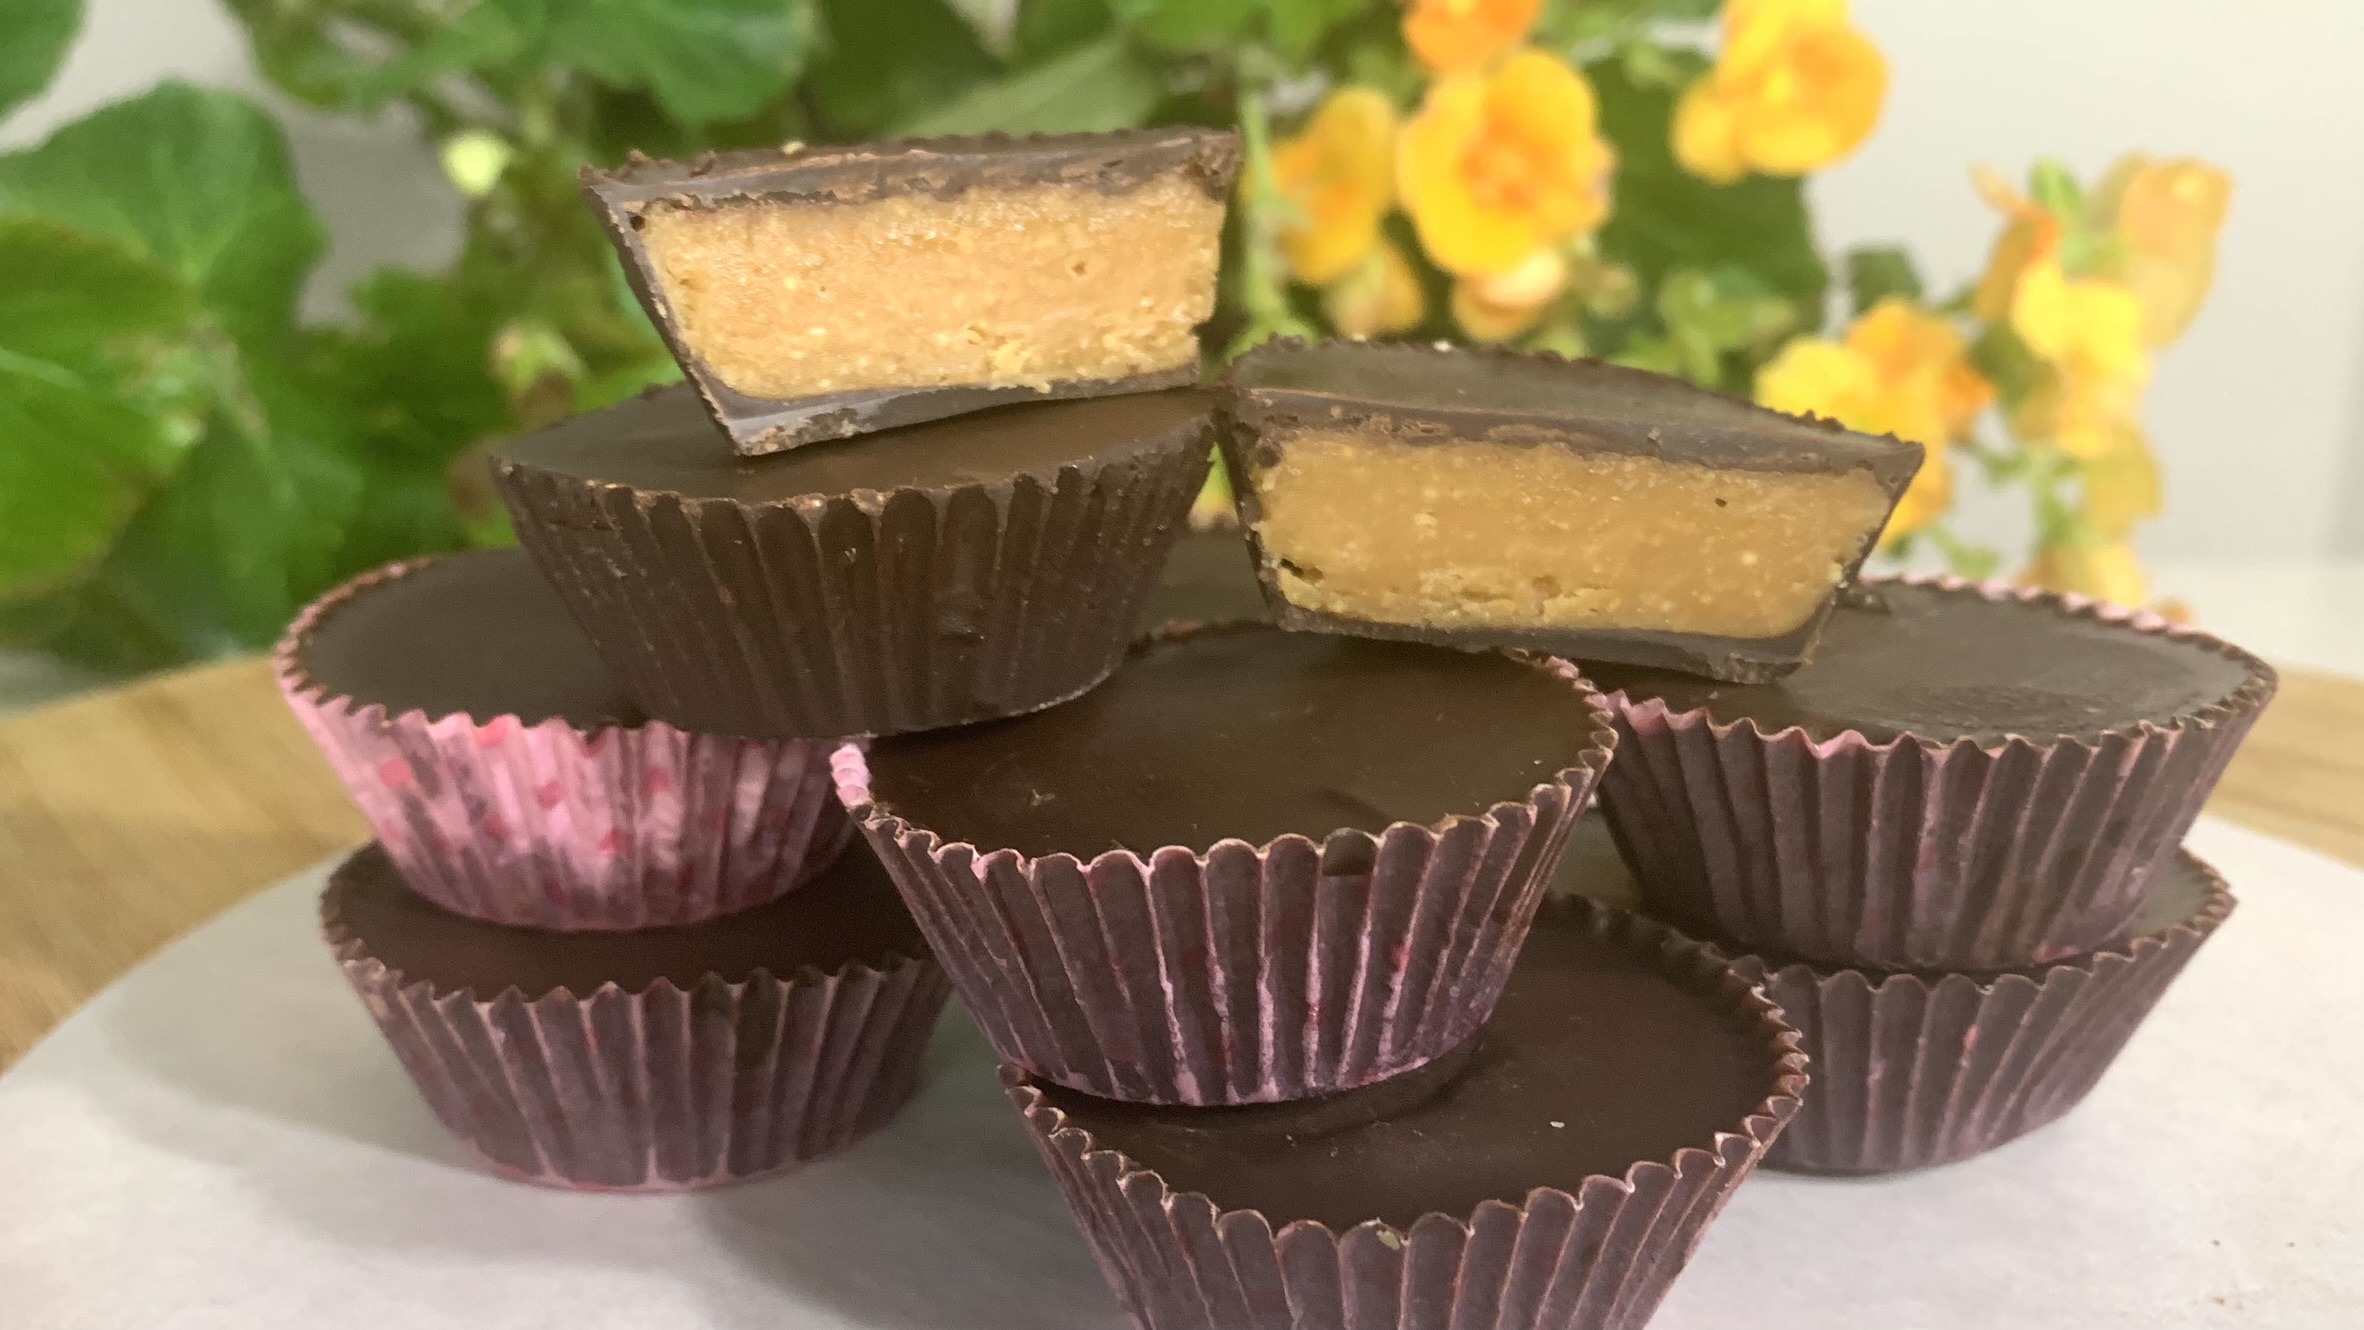
- Once the chocolate has set, fill each with approximately 1 teaspoon of the chilled peanut butter and maple syrup mixture. Gently press to evenly distribute the mixture within the chocolate mold.
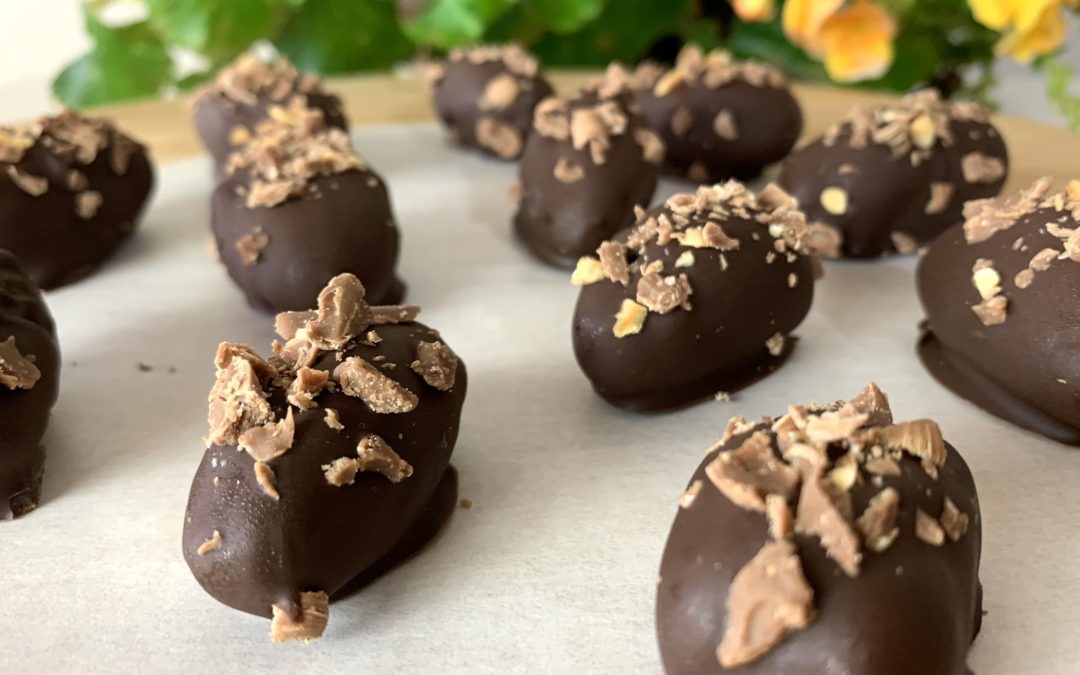
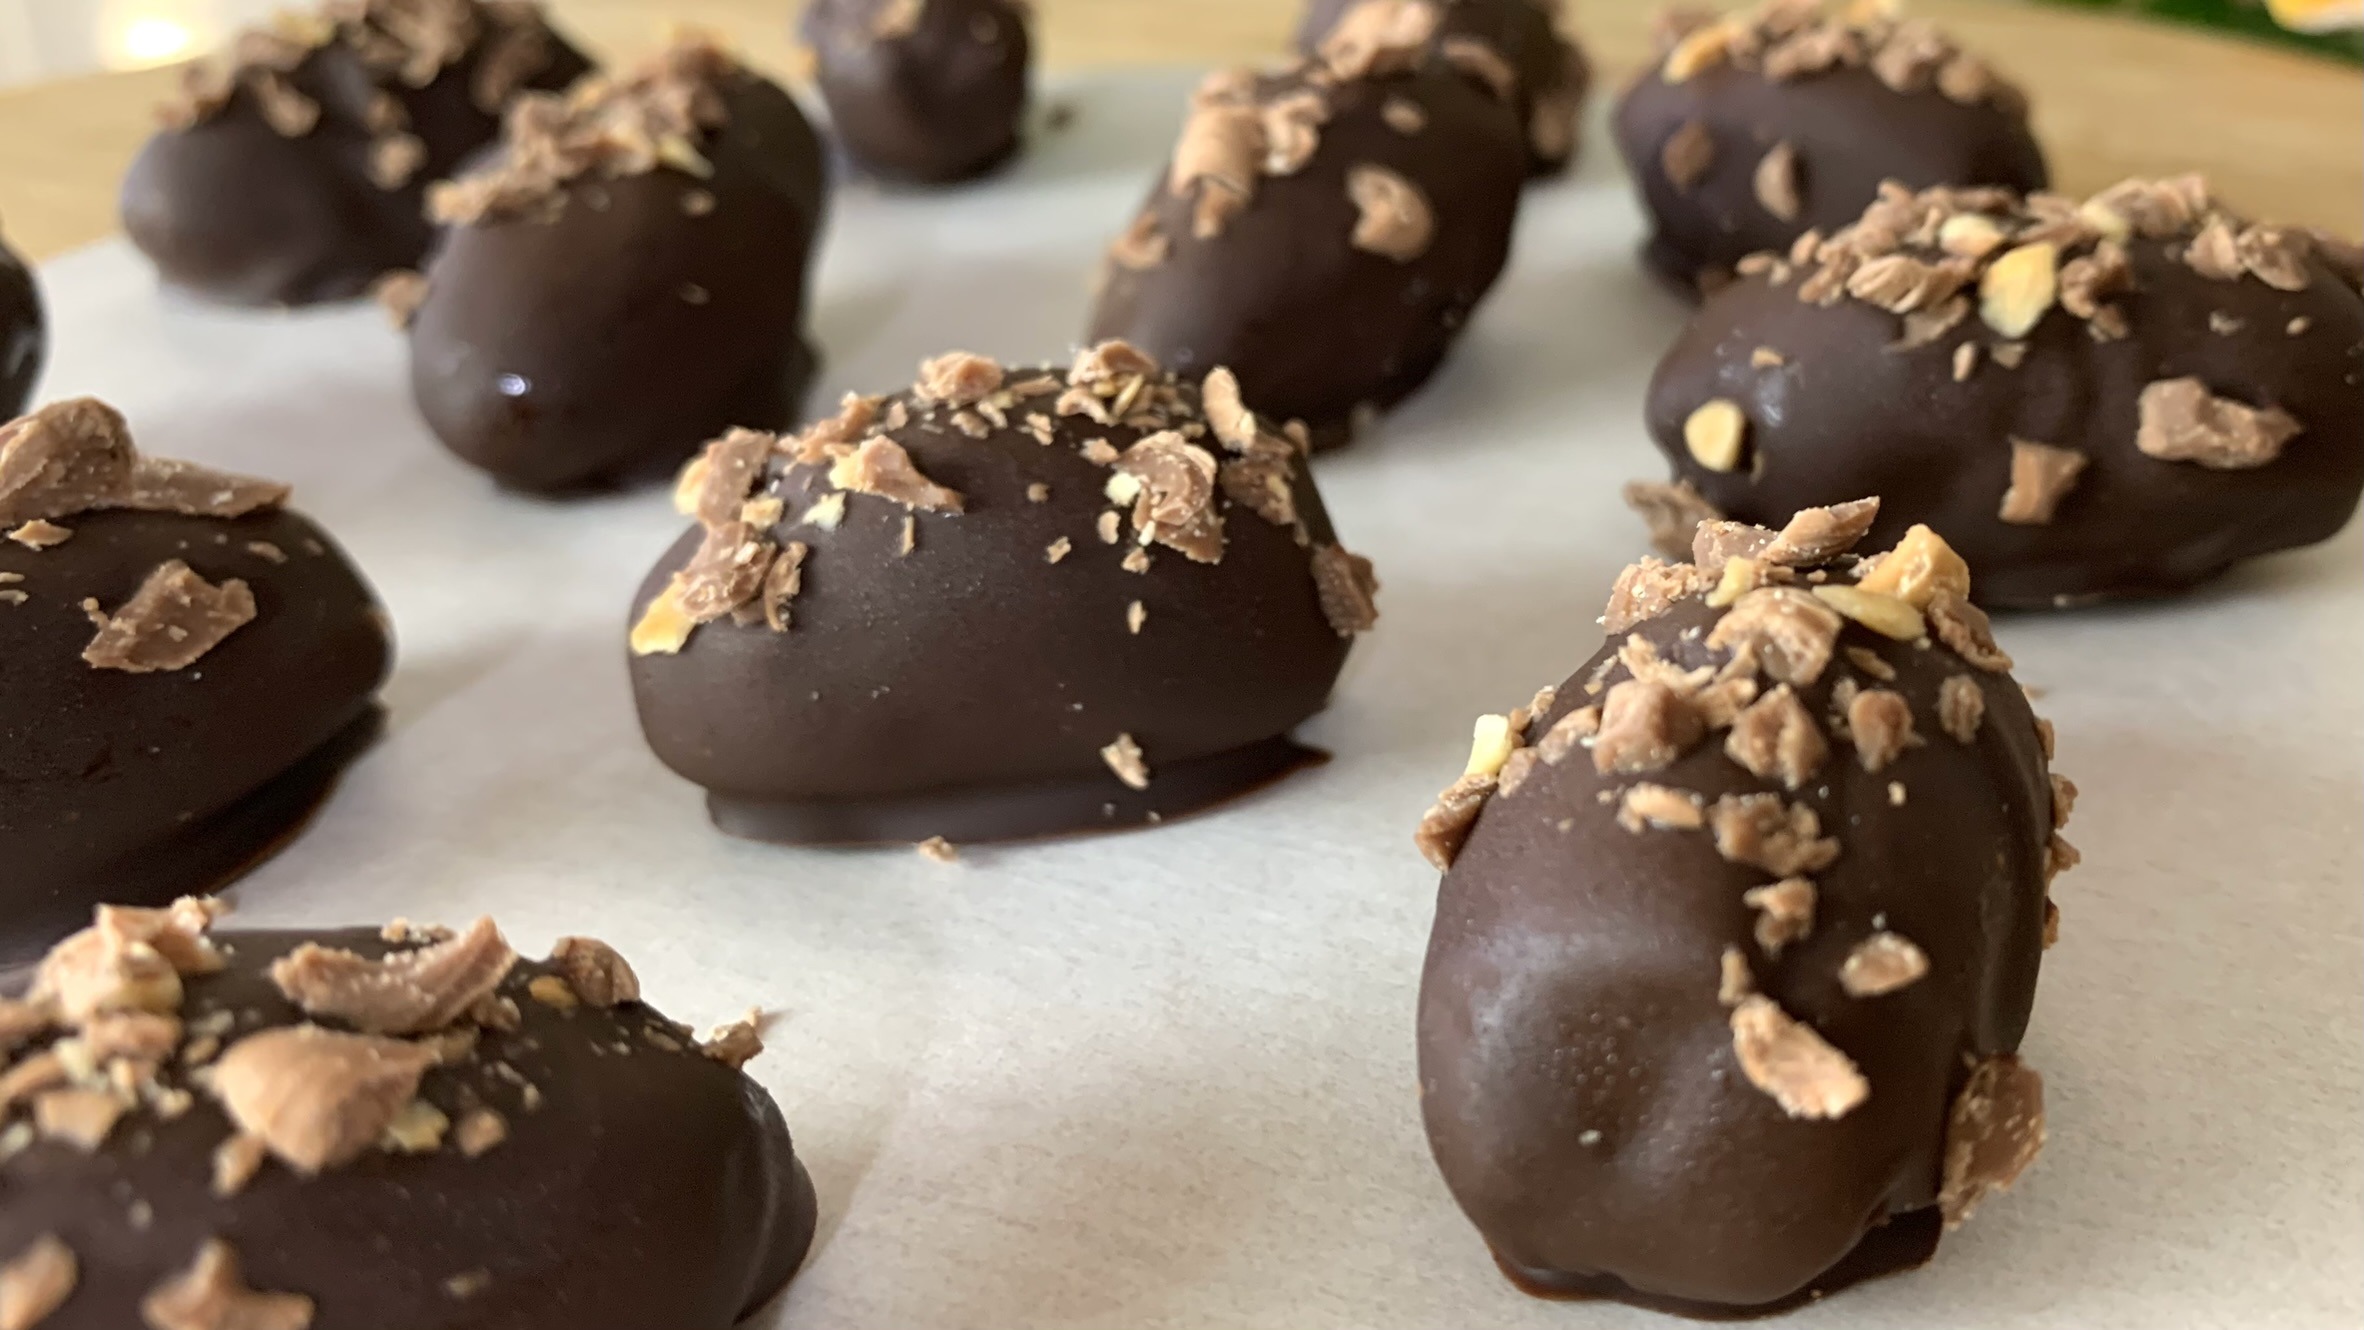
- Pour over additional melted chocolate to create a top chocolate layer, ensuring complete coverage of the peanut filling. This step gives the treats their characteristic Reese’s shape.
- Return the filled liners to the fridge for another 30 minutes to allow the chocolate to set completely.
Prep Time: 30 minutes
Chilling Time: 30 X 2 minutes
Servings: 17
Nutritional Information
Per 1 Serving:
- Energy: 141 calories
- Protein: 3.56 g
- Fat: 10.23 g
- Carbohydrates: 10.36 g
- Fiber: 1.4 g
Storage and Recommendations
- Store the homemade Reese’s treats in an airtight container in the refrigerator for up to one week or in the freezer for up to 3 months.
- Serve chilled as a delightful dessert or snack, perfect for any occasion.