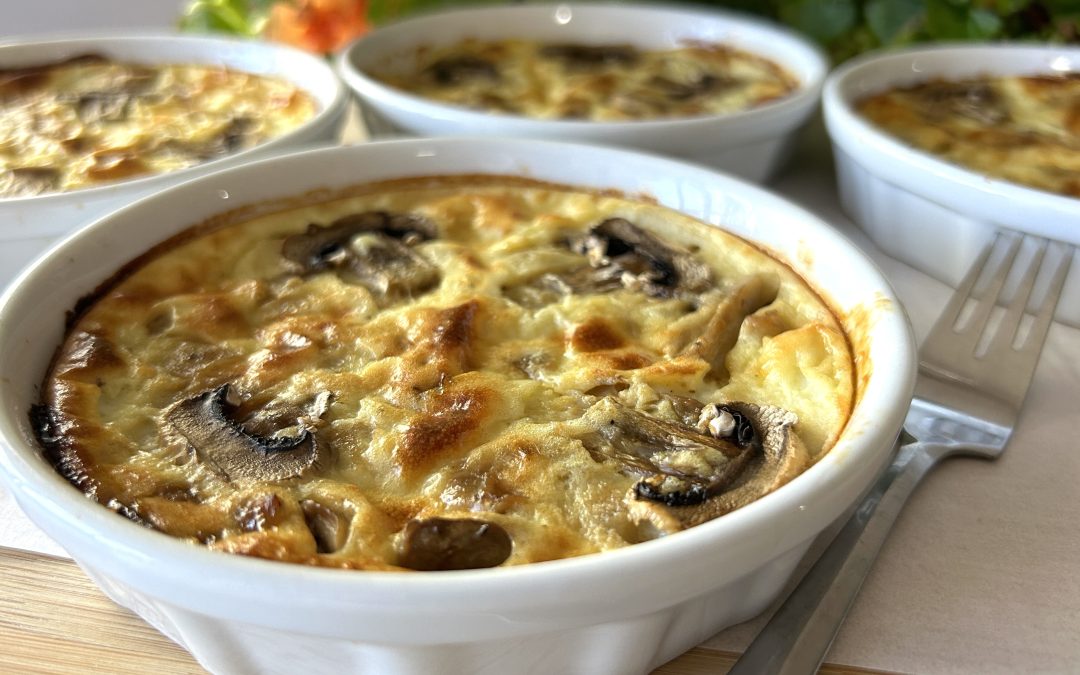
Mushroom Omelet

Mushroom Omelet

Mushroom Omelet

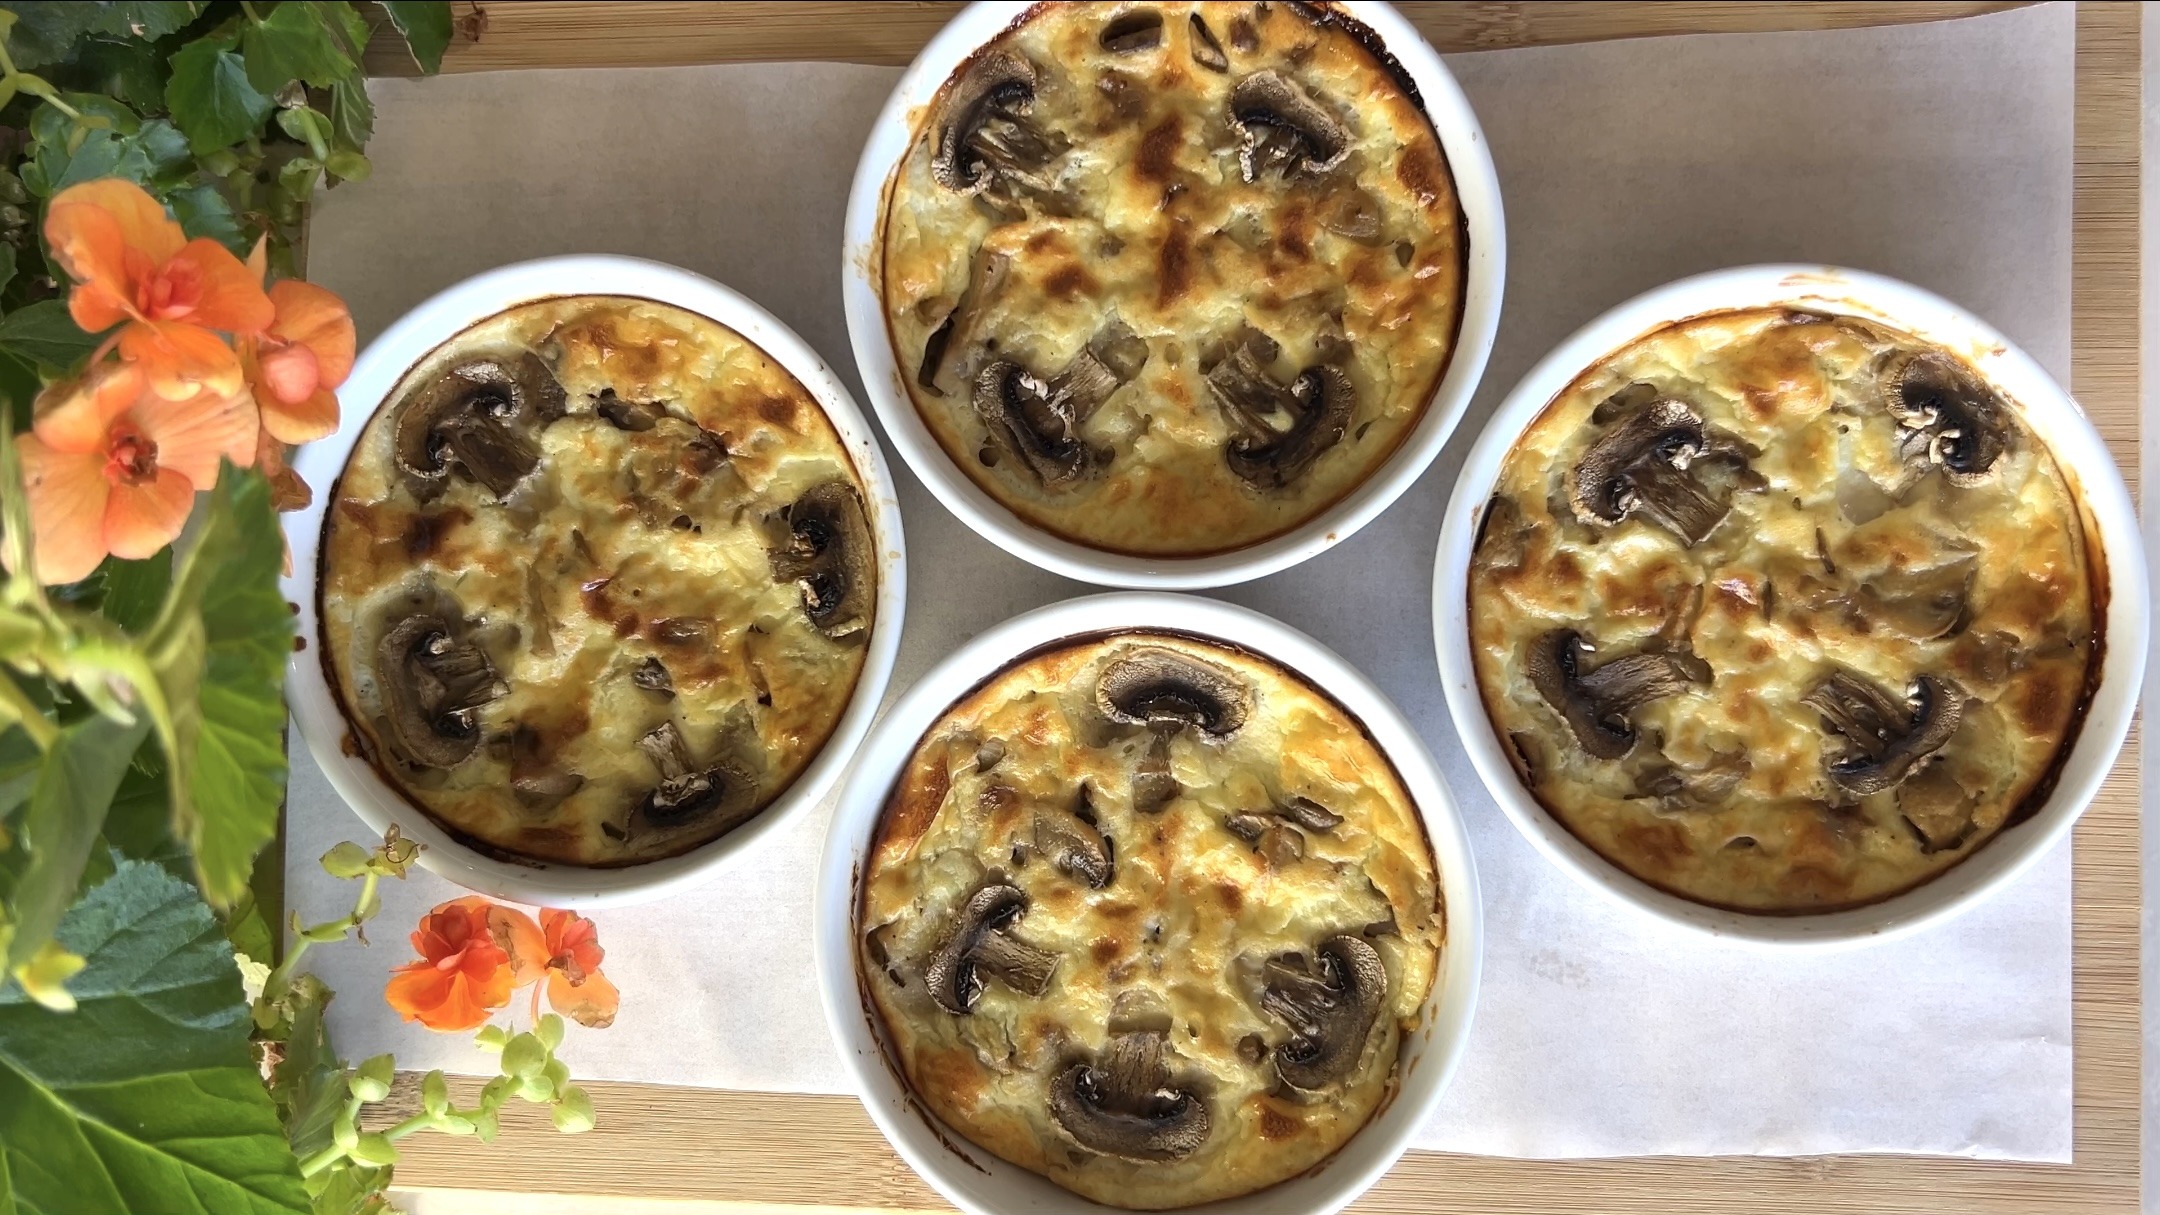
If you’ve ever found yourself scrambling for a quick, healthy, and satisfying meal, then this Mushroom Omelet is about to become your new go-to recipe. Not only is it incredibly easy to whip up, but it’s also packed with flavor and nutrients that will keep you energized throughout the day. Mushrooms bring a rich, earthy taste to this dish, perfectly complemented by fresh herbs and the delicate creaminess of eggs. Whether you’re making this for breakfast, lunch, or dinner, it’s a dish that never disappoints.

Now, let’s talk about why mushrooms should be a regular part of your diet. Mushrooms are often overlooked, but they are a powerhouse of nutrition. These little fungi are rich in antioxidants, particularly selenium, which is crucial for maintaining a healthy immune system. Selenium helps to protect your body’s cells from damage, reducing inflammation and boosting overall health. Additionally, mushrooms are one of the few natural sources of vitamin D, especially when they’ve been exposed to sunlight. Vitamin D is essential for bone health, aiding in calcium absorption and maintaining proper bone density.

Mushrooms are also low in calories and fat, making them an excellent addition to any diet, especially if you’re watching your weight. They provide a good amount of potassium, which helps regulate blood pressure and supports heart health.

Including mushrooms in your meals can also contribute to lower cholesterol levels, thanks to their high fiber content. In short, mushrooms are a nutritional goldmine, and this omelet is a delicious way to enjoy all the benefits they have to offer.

Ingredients

  • 4 large eggs
  • 240 g mushrooms
  • 80 g onion
  • 25 g parsley
  • 2 tbsp olive oil, plus 1 tbsp before adding the eggs, if desired
  • 1/2 tsp salt
  • Black pepper to taste
  • 1 large garlic clove (~4 g)

Directions

  1. Begin by preparing the ingredients. Slice the cleaned mushrooms, chop the onion, and parsley for added freshness and flavor.
  2. Heat olive oil in a saucepan or pan over medium-high heat. Add the chopped onion and sauté until soft and slightly browned.
  3. Add sliced mushrooms into the pan along with salt and black pepper. Continue sautéing under medium heat until the mushrooms are tender and slightly browned.
  4. Add the minced garlic to the pan and sauté until all the liquid from the mushrooms evaporates, and the mushrooms develop a rich brown color.
  5. Reduce heat to low, add parsley, and a bit of olive oil if desired. Stir to combine.
  6. Beat the eggs in a bowl and pour over the mushroom mixture. Use a spatula to evenly distribute the eggs over the mushrooms.
  7. Cover the pan and let the omelet cook over low heat for 5 to 7 minutes or until the top is set and cooked through.
  8. Once cooked, transfer the mushroom omelet onto a serving plate.

Prep Time: 15 minutes
Cooking Time:
20 minutes (Pan Cooking)
Servings:
4

Nutritional Information
Per 1 Serving:

  • Energy: 186 calories
  • Protein: 8.6 g
  • Fat: 15.16 g
  • Carbohydrates: 4.91 g
  • Fiber: 1.2 g

Storage and Recommendations

  • Store any leftover omelet in an airtight container in the refrigerator for up to 3 days.
  • Serve this mushroom omelet with a side salad or whole-grain toast for a complete meal.
  • For a twist, add cheese or other vegetables like bell peppers or spinach to the egg mixture.
Apple Oat Pancakes

Apple Oat Pancakes

Apple Oat Pancakes

Start your day with a burst of wholesome flavor and nutrition with these apple and oatmeal pancakes. Packed with fiber, vitamins, and minerals, these pancakes are the perfect guilt-free breakfast option. They are simple to make and will leave you feeling satisfied and energized throughout the morning.

Oats are the star ingredient in this recipe, and they bring a wealth of nutritional benefits. Rich in dietary fiber, particularly beta-glucan, oats help promote heart health by reducing cholesterol levels.

They also provide a slow-releasing source of energy, keeping you full and focused throughout the day. Oats are a great addition to your regular diet, offering essential vitamins, minerals, and antioxidants that support overall health and well-being.

Incorporating oats into your breakfast routine can also aid in digestion and support weight management by keeping hunger at bay. These apple oat pancakes are not only delicious but also an excellent way to start your day on a healthy note, making them a staple in your morning menu.

Ingredients

  • 1 cup (90 g) rolled oats
  • 2 apples (275 g, cleaned and cut into chunks)
  • 1 tsp baking powder

Directions

  1. Begin by blending the rolled oats into a fine flour texture.
  2. Clean and cut the apples into chunks, then use a hand blender or food processor to reduce them to a smooth purée.
  3. Gradually add the oat flour and baking powder to the apple purée, mixing well to combine.
  4. Add the remaining oat flour and mix again, being careful not to overmix the batter.
  5. Spoon equal amounts of the pancake batter onto a hot nonstick pan, then use a spatula to spread the mixture and shape it into pancake forms.
  6. Cook the pancakes over low-medium heat until the edges start to appear dry, approximately 1 to 2 minutes.
  7. Carefully flip the pancakes and cook for an additional 1 to 2 minutes, or until golden brown and cooked to your liking.
  8. Repeat the process with the remaining batter until all the pancakes are cooked.
  9. Serve with your favorite toppings.

Prep Time:20 minutes
Cooking Time:
35 minutes Pan Cooking
Servings:
6 Pancakes

Nutrition (Per 1 Serving)

  • Energy: 71 calories
  • Protein: 2.6 g
  • Fat: 1.08 g
  • Carbohydrates: 13.39 g
  • Fiber: 2.2 g
  • Vegan, Gluten-Free

Notes

  • Store leftover apple pancakes in the fridge for up to a week. They can also be frozen for up to 3 months.
  • Serve the pancakes with your favorite toppings. Try cream cheese and your favorite jam for a delightful combination of flavors.
Sesame Seed Energy Balls

Sesame Seed Energy Balls

Sesame Seed Energy Balls

Looking for a wholesome and energy-packed snack to fuel your day? These sesame seed energy balls are the perfect solution! Packed with the nutritional goodness of sesame seeds and rolled oats, these easy-to-make treats are ideal for satisfying your hunger while providing a boost of essential nutrients.

Sesame seeds are a nutritional powerhouse, rich in healthy fats, protein, and minerals such as calcium, iron, and magnesium. These tiny seeds are known for their high antioxidant content, which helps fight inflammation and supports overall health. Incorporating sesame seeds into your diet can promote heart health, strengthen bones, and provide a steady source of energy. Combined with rolled oats, which are a great source of fiber and complex carbohydrates, these energy balls are a nutritious snack that can keep you energized and satisfied throughout the day. Plus, they’re vegan and gluten-free, making them suitable for a variety of dietary needs.

With these energy balls, you’re not just indulging in a tasty treat, but also nourishing your body with ingredients that should be part of your regular diet. Whether you need a quick snack to get through a busy day or a nutritious option to satisfy your sweet tooth, these sesame seed energy balls are a delicious and healthy choice.

Ingredients

  • 1/2 cup (60 g) sesame seeds, plus 20 g extra for coating
  • 1/2 cup (50 g) rolled oats
  • 1/4 cup tahini
  • 1/3 cup maple syrup or honey
  • Pinch of salt (optional)
  • 1/4 tsp cardamom powder
  • 1/4 tsp cinnamon powder

Directions

  1. Begin by roasting sesame seeds on a hot pan over low to medium heat for 5 to 7 minutes, or until fragrant and lightly golden brown. Set aside.
  2. Next, roast rolled oats on the same pan under similar heat conditions for 5 to 7 minutes, until they become slightly toasted. Remove from heat and let cool.
  3. Transfer the roasted sesame seeds and rolled oats into a blender or food processor. Blend until you achieve a flour-like consistency.
  4. To the mixture, add tahini, maple syrup or honey for sweetness, a pinch of salt (optional), cardamom powder, and cinnamon powder. Blend again until the ingredients are well combined and form a sticky mixture.
  5. Transfer the mixture into a large bowl. Using a spoon, portion out equal quantities of the mixture and roll them between your palms to form balls.
  6. Coat the energy balls with the remaining roasted sesame seeds for added texture and flavor.

Prep Time

  • 20 minutes

Cooking Time

  • 10 minutes

Serving Size

  • 10 Servings

Nutritional Information (Per 1 Serving)

  • Energy: 133 calories
  • Protein: 3.51 g
  • Fat: 8.48 g
  • Carbohydrates: 12.59 g
  • Fiber: 2.1 g

Notes

  • Store your energy balls in an airtight container at room temperature for up to 3 days, in the fridge for up to a week. They can also be frozen for up to 3 months.
  • Enjoy your nutritious and delicious sesame seed energy balls as a satisfying snack any time of the day.
Baked Sweet Potato

Baked Sweet Potato

Baked Sweet Potato

With its harmonious blend of flavors and textures, these baked sliced sweet potatoes offer a unique culinary experience that combines the wholesome goodness of sweet potatoes with the comforting flavors of pizza. Sweet potatoes are an excellent source of vitamins A and C, potassium, and dietary fiber, making them not only delicious but also highly nutritious. These root vegetables are known for their antioxidant properties and ability to support healthy immune function, eye health, and digestion.

Incorporating sweet potatoes into your regular diet is a great way to boost your intake of essential nutrients while enjoying their natural sweetness and versatility in various dishes. With a crispy exterior and a soft, tender interior, these baked sweet potato slices are a perfect side dish to enjoy all year long!

Whether you’re looking for a healthy alternative to traditional potato dishes or a flavorful addition to your meal, these baked sweet potato slices are sure to satisfy.

Ingredients

  • 700 g raw sweet potatoes (approximately 550 g after skin and ends removed)
  • 3 tbsp olive oil
  • 1/2 tsp salt
  • 1/2 tsp paprika
  • 1 tsp pizza seasoning
  • 60 g Parmesan cheese or other cheese of your choice for topping

Directions

  1. Preheat the oven to 400°F (200°C).
  2. Wash and pat dry the sweet potatoes, then slice them into 1.5 cm thick slices.
  3. In a bowl, combine the olive oil, salt, paprika, and pizza seasoning. Stir well to ensure all the flavors are evenly distributed.
  4. Brush both sides of each sweet potato slice with the seasoned olive oil mixture and transfer onto a baking pan lined with parchment paper.
  5. Bake the sweet potato slices in the preheated oven for 20 minutes, allowing them to become tender and slightly crispy.
  6. After baking, remove the sweet potato slices from the oven and generously cover with Parmesan cheese or your preferred cheese.
  7. Switch the oven setting to broil and let it work for a maximum of 2 minutes, or just until the cheese is melted and bubbly to your liking.
  8. Serve the slices while still warm, as a delightful side dish that boasts the soft texture of baked sweet potatoes and the savory taste reminiscent of a classic pizza.

Prep Time

  • 20 minutes

Baking Time

  • 25 minutes

Servings

  • 12 slices

Nutritional Information (Per 1 Slice)

  • Energy: 91 calories
  • Protein: 2.17 g
  • Fat: 4.8 g
  • Carbohydrates: 10.11 g
  • Fiber: 1.4 g

Notes

  • Store any leftover sweet potato slices in an airtight container in the refrigerator for up to 3 days. Reheat in the oven or a toaster oven to regain crispiness.
  • These sweet potato slices are a versatile side dish that pairs well with a variety of main courses.
Bounty Bars

Bounty Bars

Bounty Bars

If you’ve ever found yourself reaching for a sweet treat but wished for something a bit more wholesome, then these homemade Bounty Bars are the perfect solution. These bars combine the rich flavors of coconut and dark chocolate to create a satisfying and guilt-free snack. With their chewy coconut filling and decadent chocolate coating, they are reminiscent of the popular store-bought version, but with a nutritious twist.

Coconut is the star ingredient here, and it brings a wealth of health benefits to the table. Rich in healthy fats, particularly medium-chain triglycerides (MCTs), coconut can provide a quick energy boost, support metabolism, and even aid in weight management. Additionally, coconut is high in dietary fiber, which can help keep you feeling full and satisfied for longer. Incorporating coconut into your diet is an excellent way to enjoy a sweet treat while also nourishing your body with essential nutrients.

These homemade Bounty Bars not only satisfy your sweet cravings but also offer a nutritious alternative to store-bought sweets. Enjoy the rich and creamy flavors with the added benefits of coconut’s nutritional goodness!

Ingredients

  • 1 ½ cups (120 g) shredded coconut
  • ⅓ cup (90 g) honey
  • ¼ cup coconut oil
  • ¾ cup (160 g) dark chocolate
  • 1 tsp. coconut oil for melting the chocolate
  • ¼ cup (30 g) slivered almonds (optional)

Directions

  1. Combine shredded coconut, coconut oil, and honey in a bowl. Mix well to combine. The texture will be sticky but don’t hold together yet.
  2. Refrigerate for 30 minutes to help the mixture hold together.
  3. Shape small quantities into bars with your hands or any other shapes you may prefer, then place the bars in the fridge for another 30 minutes.
  4. Meanwhile, place the slivered almonds onto a baking tray and roast them for 7 – 10 minutes in a preheated oven at 350°F (approximately 177°C).
  5. Melt the chocolate chunks with the coconut oil.
  6. Take the bars out of the fridge and dip each coconut bar into the melted chocolate until well coated, using a fork or dipping tool to ensure even coverage.
  7. Garnish with some slivered almonds on top for a crunchier taste.
  8. Transfer the tray to the fridge for 30 minutes to allow the chocolate to set.
  9. Once set, your homemade chocolate and coconut bars are ready to be enjoyed!

Prep Time and Servings

  • Servings: 10 Bars
  • Prep Time: 30 minutes
  • Chill Time: 30 minutes in the fridge

Nutrition Information (Per 1 Serving)

  • Energy: 270 calories
  • Protein: 2.73 g
  • Fat: 22.18 g
  • Carbohydrates: 18.24 g
  • Fiber: 4.1 g

Storage and Recommendations

  • Store your Bounty Bars in an airtight container in the fridge for up to one week or in the freezer for up to 3 months.
  • You can experiment with different coatings like nuts or dried fruits, according to your preferences.