Stuffed Sweet Potato
Stuffed Sweet Potato

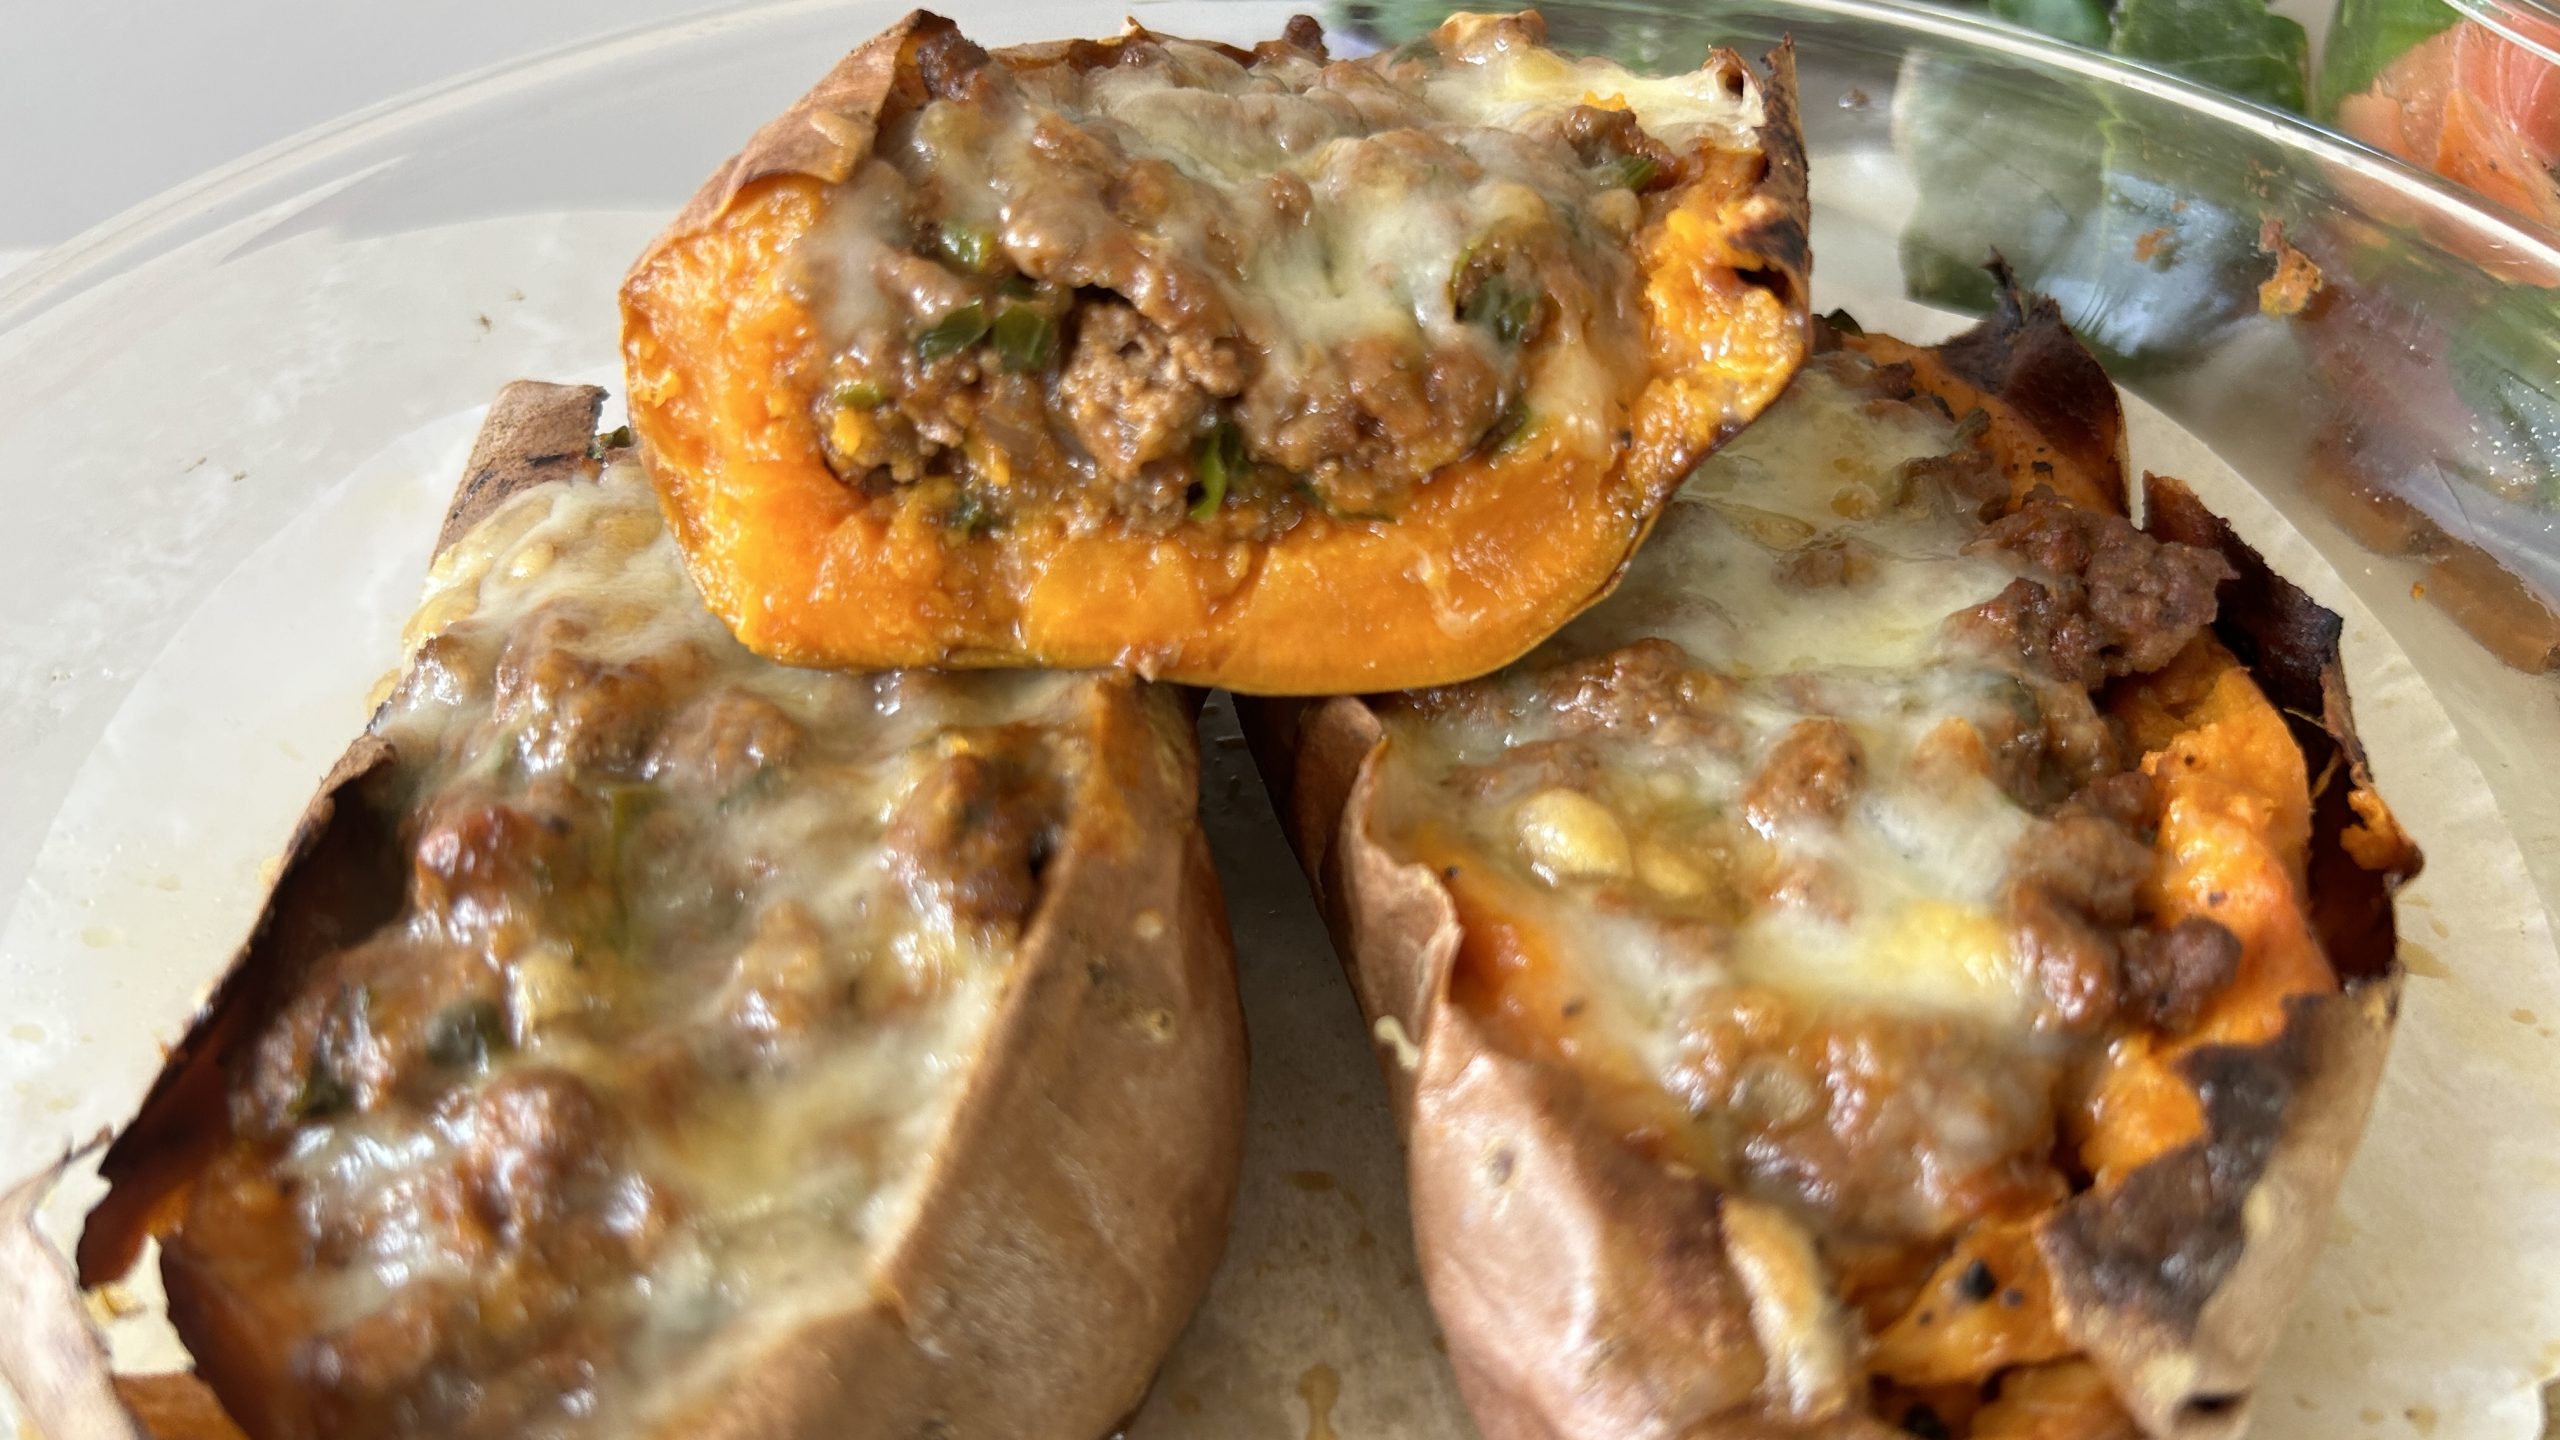
If you’re looking for a hearty, flavor-packed meal that’s both nutritious and delicious, this stuffed sweet potato recipe is a must-try! Sweet potatoes, with their naturally sweet flavor and velvety texture, form the perfect base for a savory stuffing made with seasoned ground beef and melted cheddar cheese. Not only is this dish comforting and satisfying, but it’s also incredibly easy to prepare, making it an ideal choice for busy weeknight dinners or a laid-back weekend meal.
Sweet potatoes are the star ingredient here, and they offer a wealth of health benefits that make them worth incorporating into your regular diet. Rich in fiber, vitamins A and C, and antioxidants, sweet potatoes support digestive health, boost your immune system, and promote glowing skin. Their low glycemic index means they provide steady energy without causing a spike in blood sugar levels, making them a great option for everyone, including those watching their blood sugar. Adding sweet potatoes to your diet can be a tasty way to improve your overall health while enjoying delicious meals like this one.
This recipe brings together the natural sweetness of sweet potatoes with the rich, savory flavor of ground beef, creating a meal that’s both comforting and nutritious. Try it out and enjoy the health benefits that come with every delicious bite!
Ingredients
- 620 g sweet potatoes (or 3 medium-sized sweet potatoes)
- 300 g ground beef
- 2 tbsp olive oil
- 60 g onion
- 20 g fresh parsley
- 1 large garlic clove
- 1/4 cup tomato paste (60 g)
- 1/4 tsp salt
- 1/2 tsp coriander powder
- 1/2 tsp paprika
- Black pepper (to taste)
- Water (up to ¼ cup)
- 60 g cheddar cheese (or your cheese of choice)
Directions
- Clean and bake sweet potatoes at 365°F (180°C) for 50-60 minutes or until tender.
- Finely chop the onion and parsley.
- Cook ground beef in olive oil for 5 minutes or until browned.
- Add chopped onion, garlic, and cook briefly.
- Stir in tomato paste, salt, coriander, paprika, and black pepper.
- Add water and keep cooking for another minute or two until the mixture is done.
- Mix in fresh parsley and set aside the ground beef mixture to cool down.
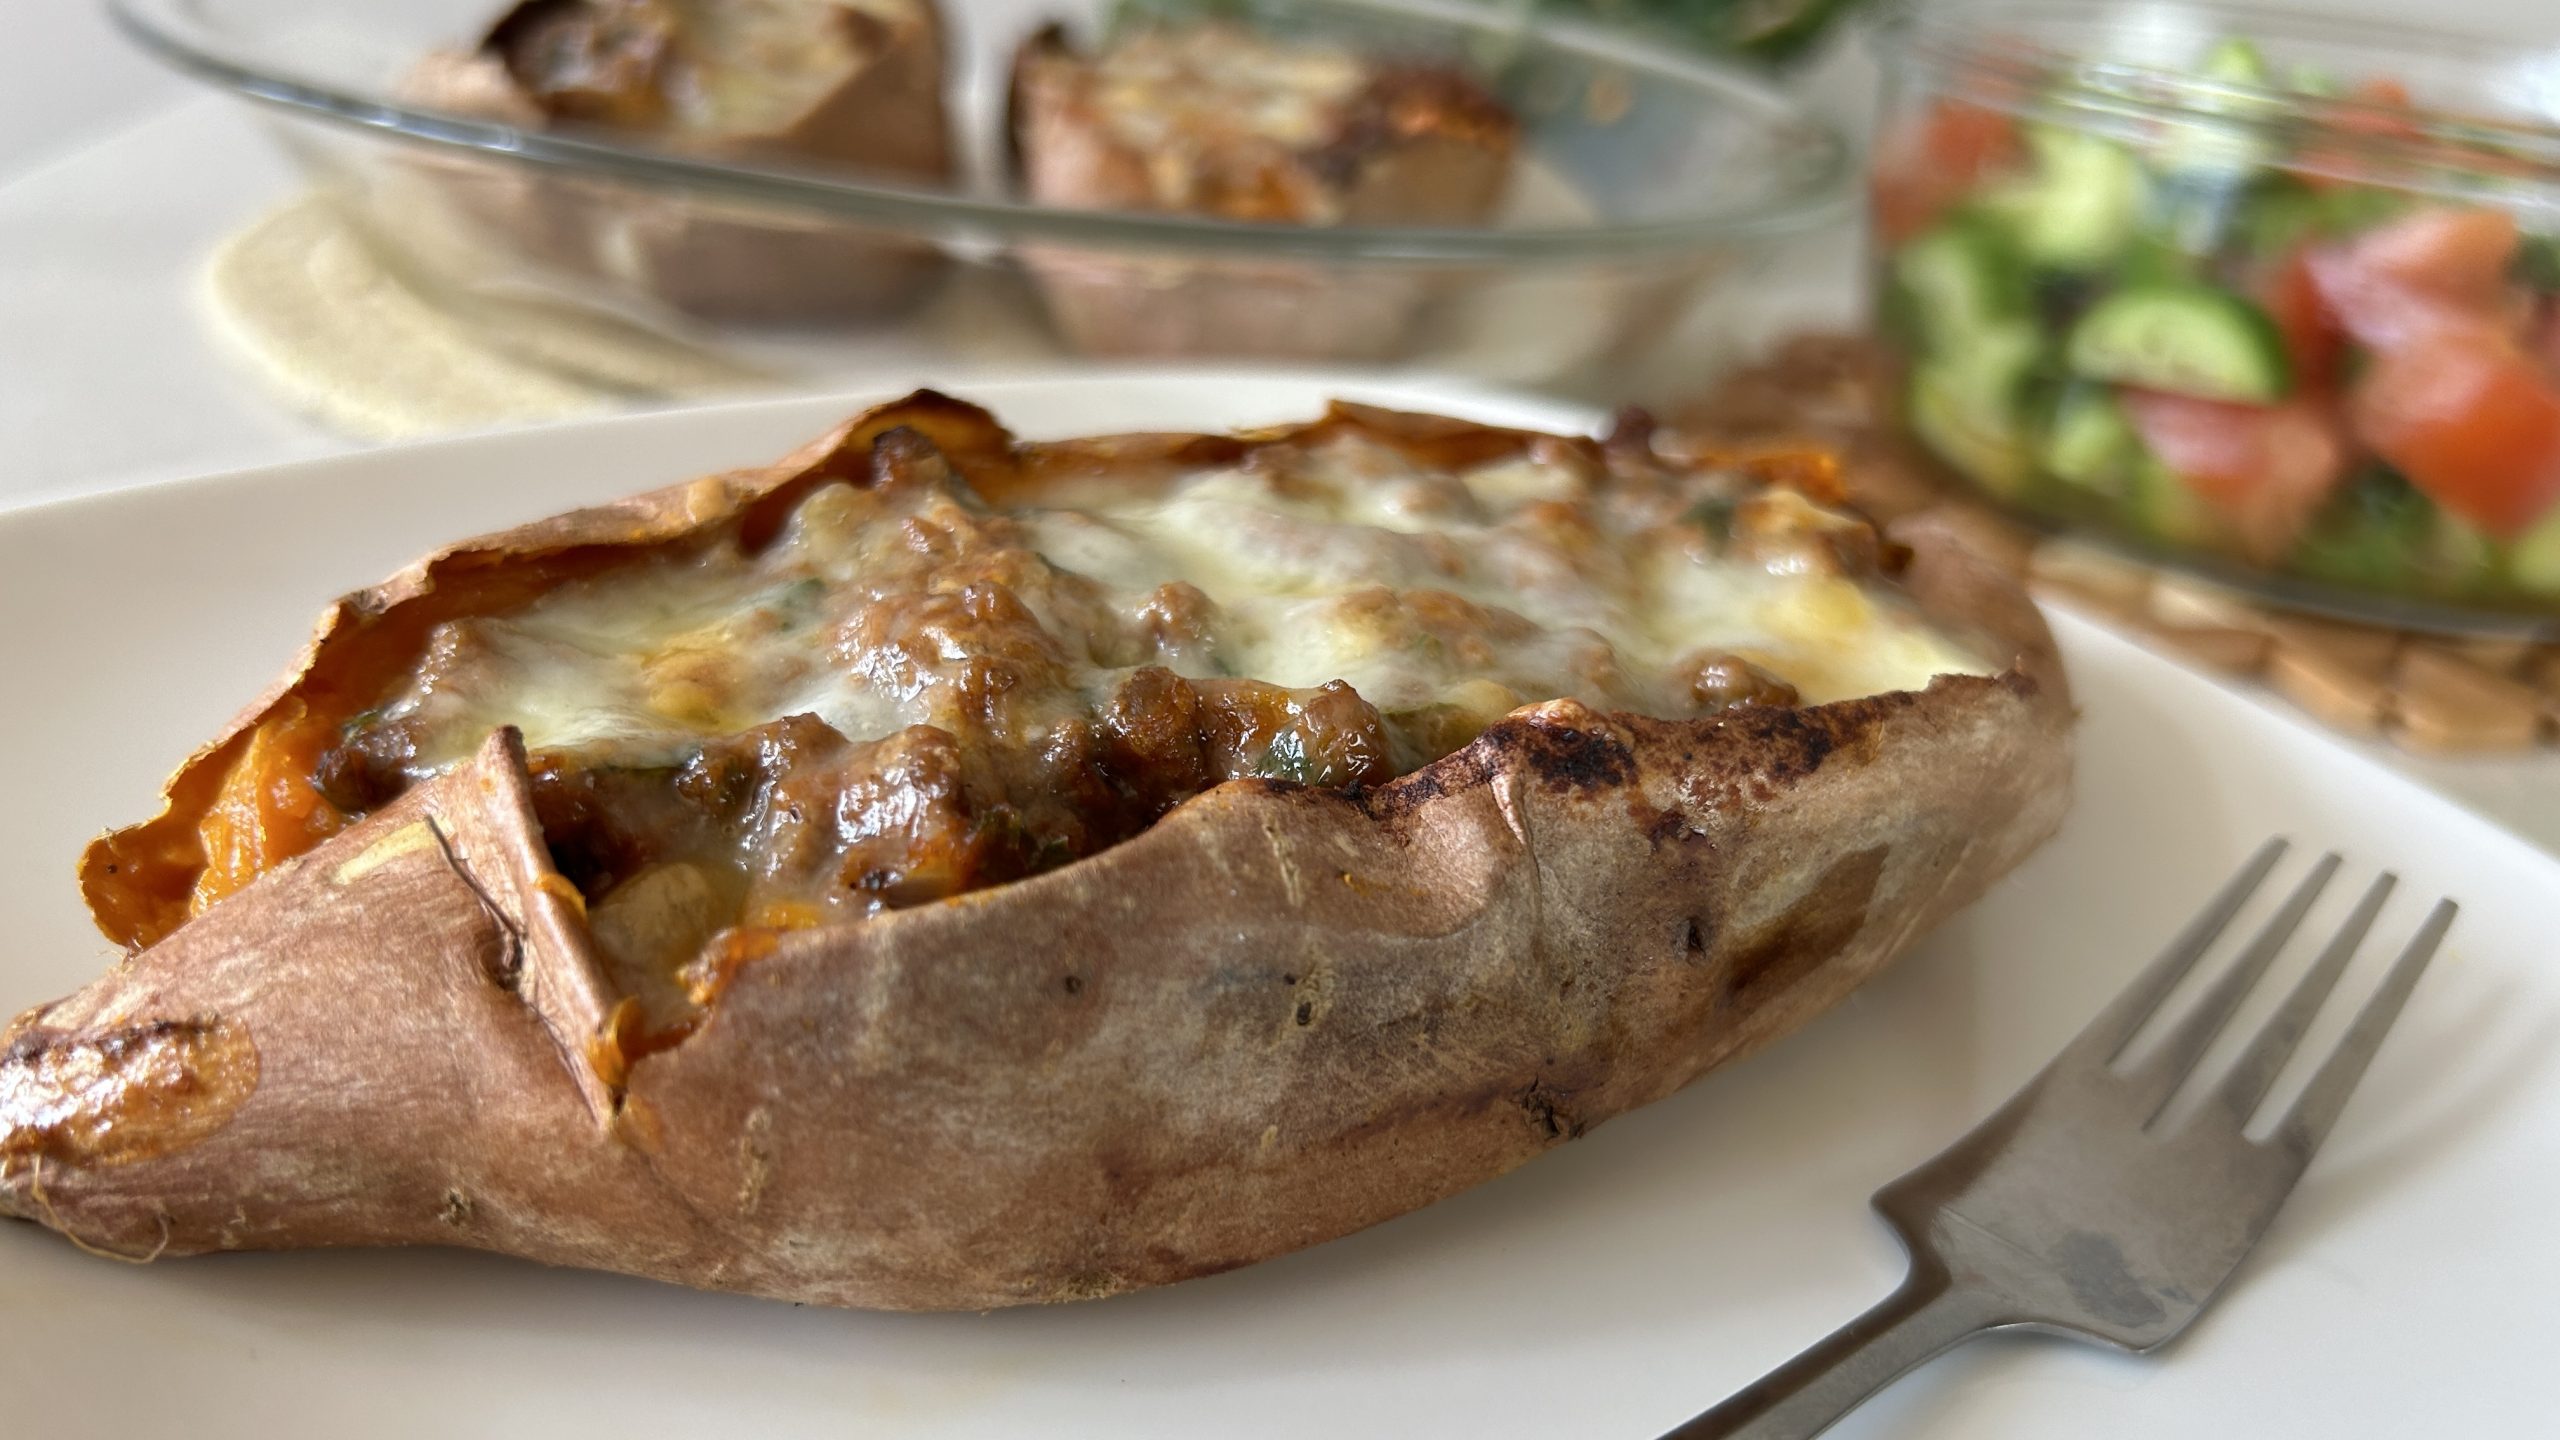
- Open baked sweet potatoes, mash the flesh with a fork, and season with salt and black pepper to taste.
- Stuff each sweet potato with the ground beef mixture and top with cheese.
- Broil at 400°F (200°C) for 5 minutes or until the cheese melts.
- Serve warm with a salad.
Prep Time
- 3 Servings
- 30 mins Prep
- 60 mins Baking
- 5 mins Broiling
Nutritional Information (Per 1 Serving)
- Energy: 479 calories
- Protein: 31.74 g
- Fat: 21.17 g
- Carbohydrates: 42.63 g
- Fiber: 5.9 g
Storage and Recommendations
- Store any leftover stuffed sweet potatoes in an airtight container in the fridge for up to 3 days.
- These stuffed sweet potatoes are great as a main dish and pair wonderfully with a summer salad.
- You can customize the stuffing with your favorite herbs and spices for extra flavors.