Chocolate Oatmeal Cake
Chocolate Oatmeal Cake

This cake, rich in texture and flavor, offers a guilt-free indulgence perfect for any occasion. Say goodbye to refined sugars, flour, or butter, and savor the luxurious taste of dates, oatmeal, olive oil, and dark chocolate. With its artisanal charm and rich flavors, this cake promises to elevate your sweet and happy moments with a blend of wholesomeness and decadence.
Oatmeal and dates are the stars of this recipe, both offering significant nutritional benefits. Oatmeal is packed with fiber, particularly beta-glucan, which helps to lower cholesterol levels and support heart health. Dates provide natural sweetness while being rich in essential nutrients like potassium, magnesium, and antioxidants. Together, they create a moist and flavorful cake that’s not only delicious but also nourishing.
Whether you’re looking for a healthier dessert option or a satisfying snack, this Chocolate Oatmeal Cake delivers both taste and nutrition in every bite. It’s a treat you can feel good about indulging in. Enjoy!
Ingredients
125 g pitted soft dates
200 ml hot milk
2 eggs
3 tbsp olive oil
1 1/2 cups (120 g) oat flour
4 tbsp (25 g) sifted cocoa powder
30 g chocolate chips
1/2 tbsp baking powder
Pinch of salt (optional)
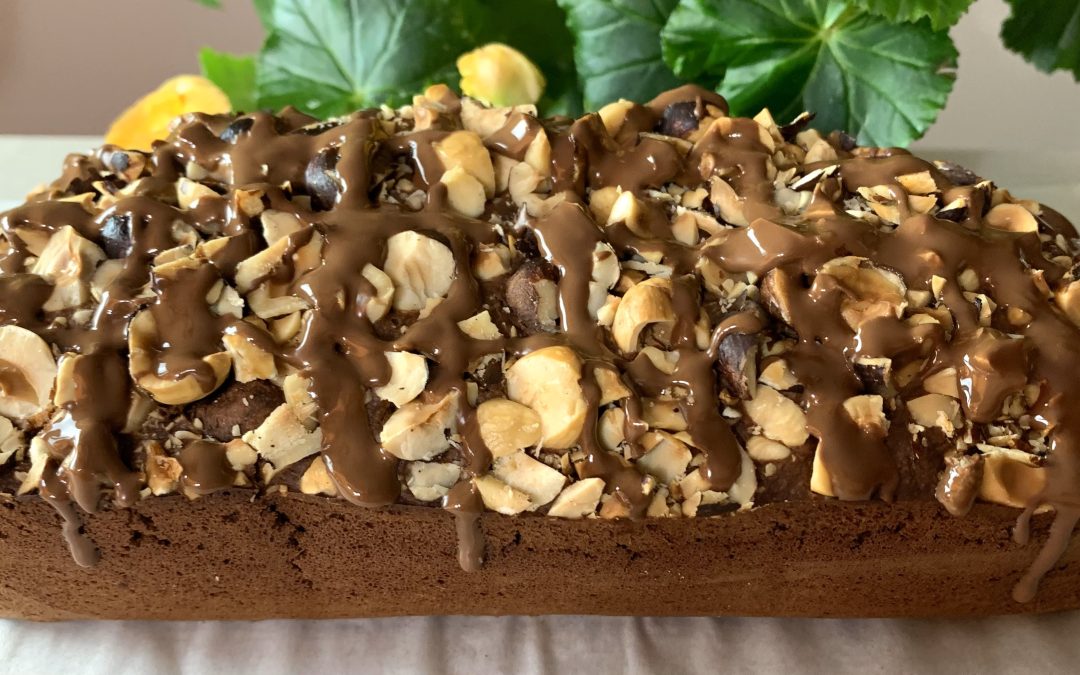
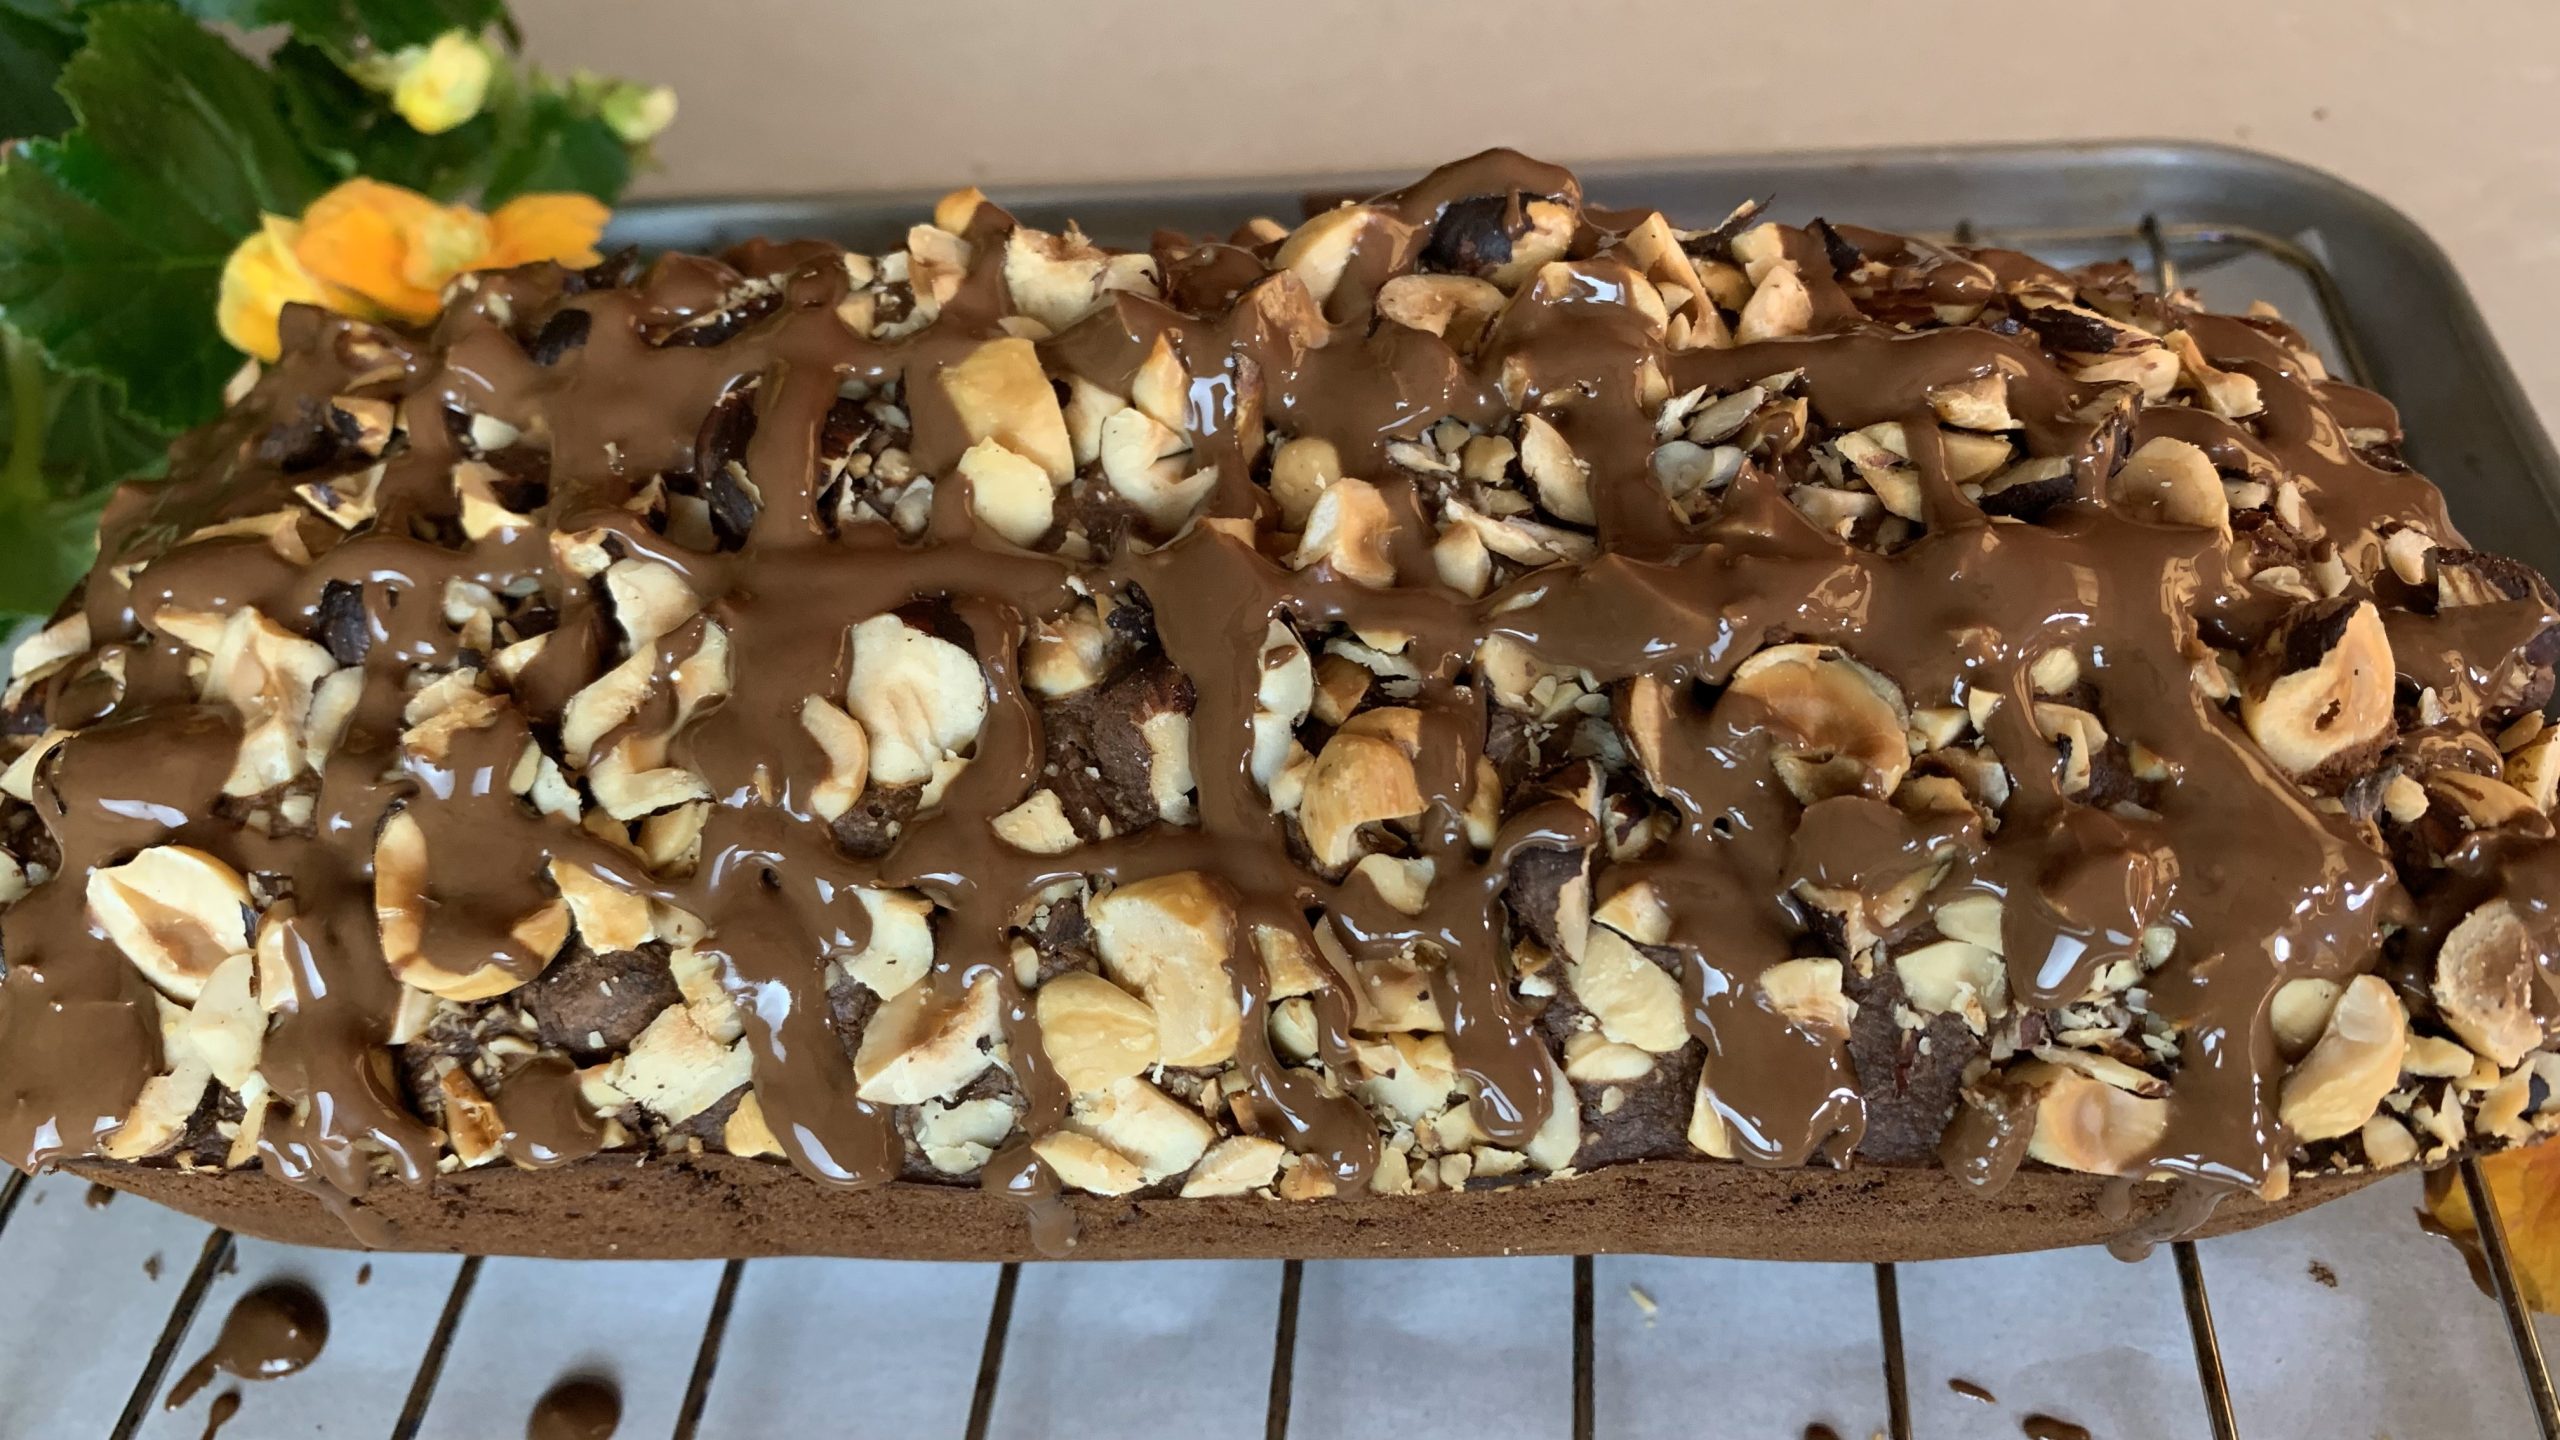
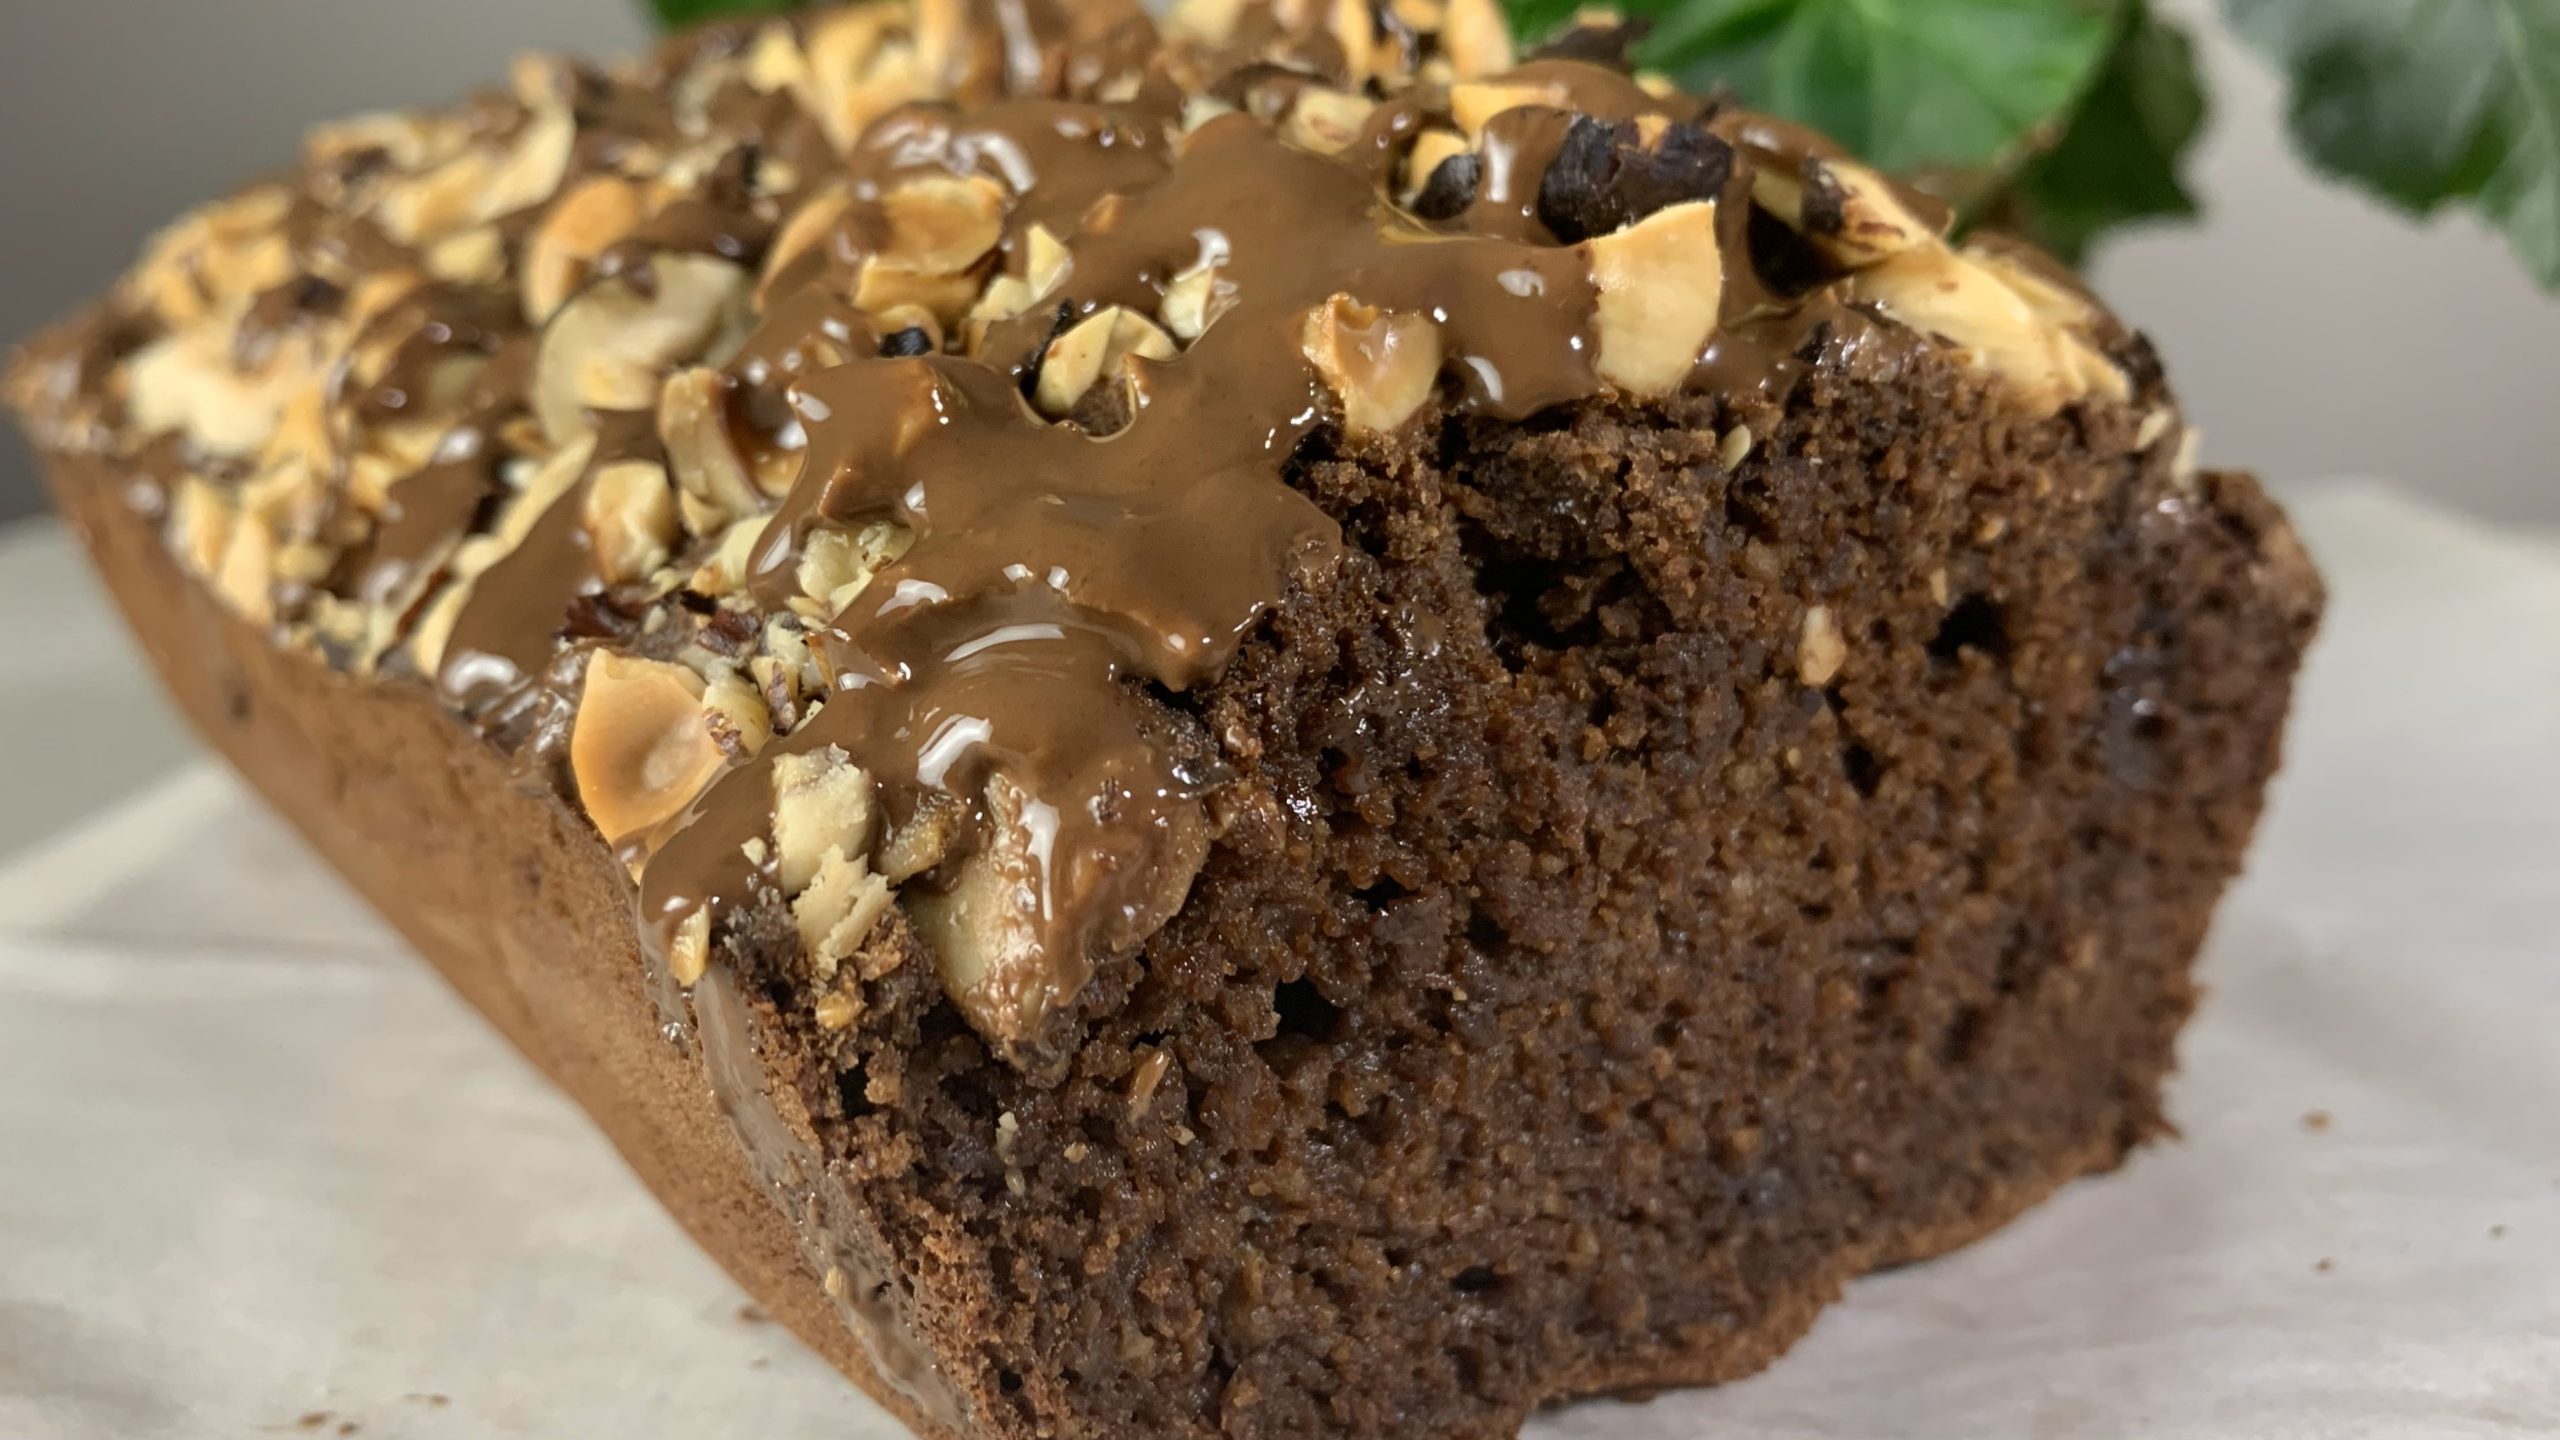
45 g chopped hazelnuts (or your choice of nuts)
60 g good quality dark chocolate
Directions
- Soak the pitted dates in hot milk for about 15 minutes to soften them.
- Blend the softened dates and milk until achieving a velvety smooth consistency, then transfer this mixture into a mixing bowl.
- Add the eggs, olive oil, and a pinch of salt to the bowl. Stir until all ingredients are well combined.
- Gradually incorporate a mixture of dried ingredients (oat flour, cocoa powder, and baking powder) into the wet mixture.
- Add dark chocolate chips and stir just enough to combine all the ingredients, avoiding overmixing.
- Brush a loaf pan (25 X 12.5 cm) with coconut oil and pour the batter into it.
- Generously sprinkle chopped hazelnuts (or your preferred nuts) over the top of the batter.
- Bake in a preheated oven at 350°F for approximately 45 minutes or until a toothpick emerges clean.
- Once fully baked, allow the cake to rest for 5 minutes, then transfer it to a cooling rack.
- Drizzle the melted dark chocolate over the top of the cake, creating a sophisticated diamond pattern.
Yields: 8 Servings
Prep Time: 30 minutes
Baking Time: 45 minutes
Nutritional Information
Per 1 Serving:
Energy: 249 calories
Protein: 6.98 g
Fat: 11.55 g
Carbohydrates: 31.58 g
Fiber: 3.8 g
Storage
- Store your chocolate oatmeal cake in an airtight container at room temperature for up to 10 days.
- Enjoy these delectable treats with a cup of tea or coffee for a delightful snack, or indulge in them whenever a craving strikes.