Potato & Oat Bread
Potato & Oat Bread

Indulge in the simplicity and deliciousness of homemade potato and oat cheesy bread, a nutritious treat perfect for packing in your lunchbox and that of your kids. This super easy recipe combines the wholesome goodness of potatoes and oats with a gooey cheesy center, creating a delightful snack that will satisfy both young and old alike.
Potatoes and oats are not just filling but also offer a variety of health benefits. Potatoes are a great source of vitamins C and B6, potassium, and fiber, which contribute to heart health and digestion. Oats, on the other hand, provide a slow-releasing energy, keeping you full longer, and are rich in beta-glucan, a type of soluble fiber that has been shown to help lower cholesterol levels. Together, these ingredients create a balanced and wholesome bread that’s as good for your body as it is for your taste buds.
Including more whole grains like oats and nutritious vegetables like potatoes in your diet is an excellent way to ensure you’re getting essential nutrients. This potato and oat bread is not only easy to make but also a great way to enjoy a healthier version of a cheesy bread treat. Enjoy!
Ingredients
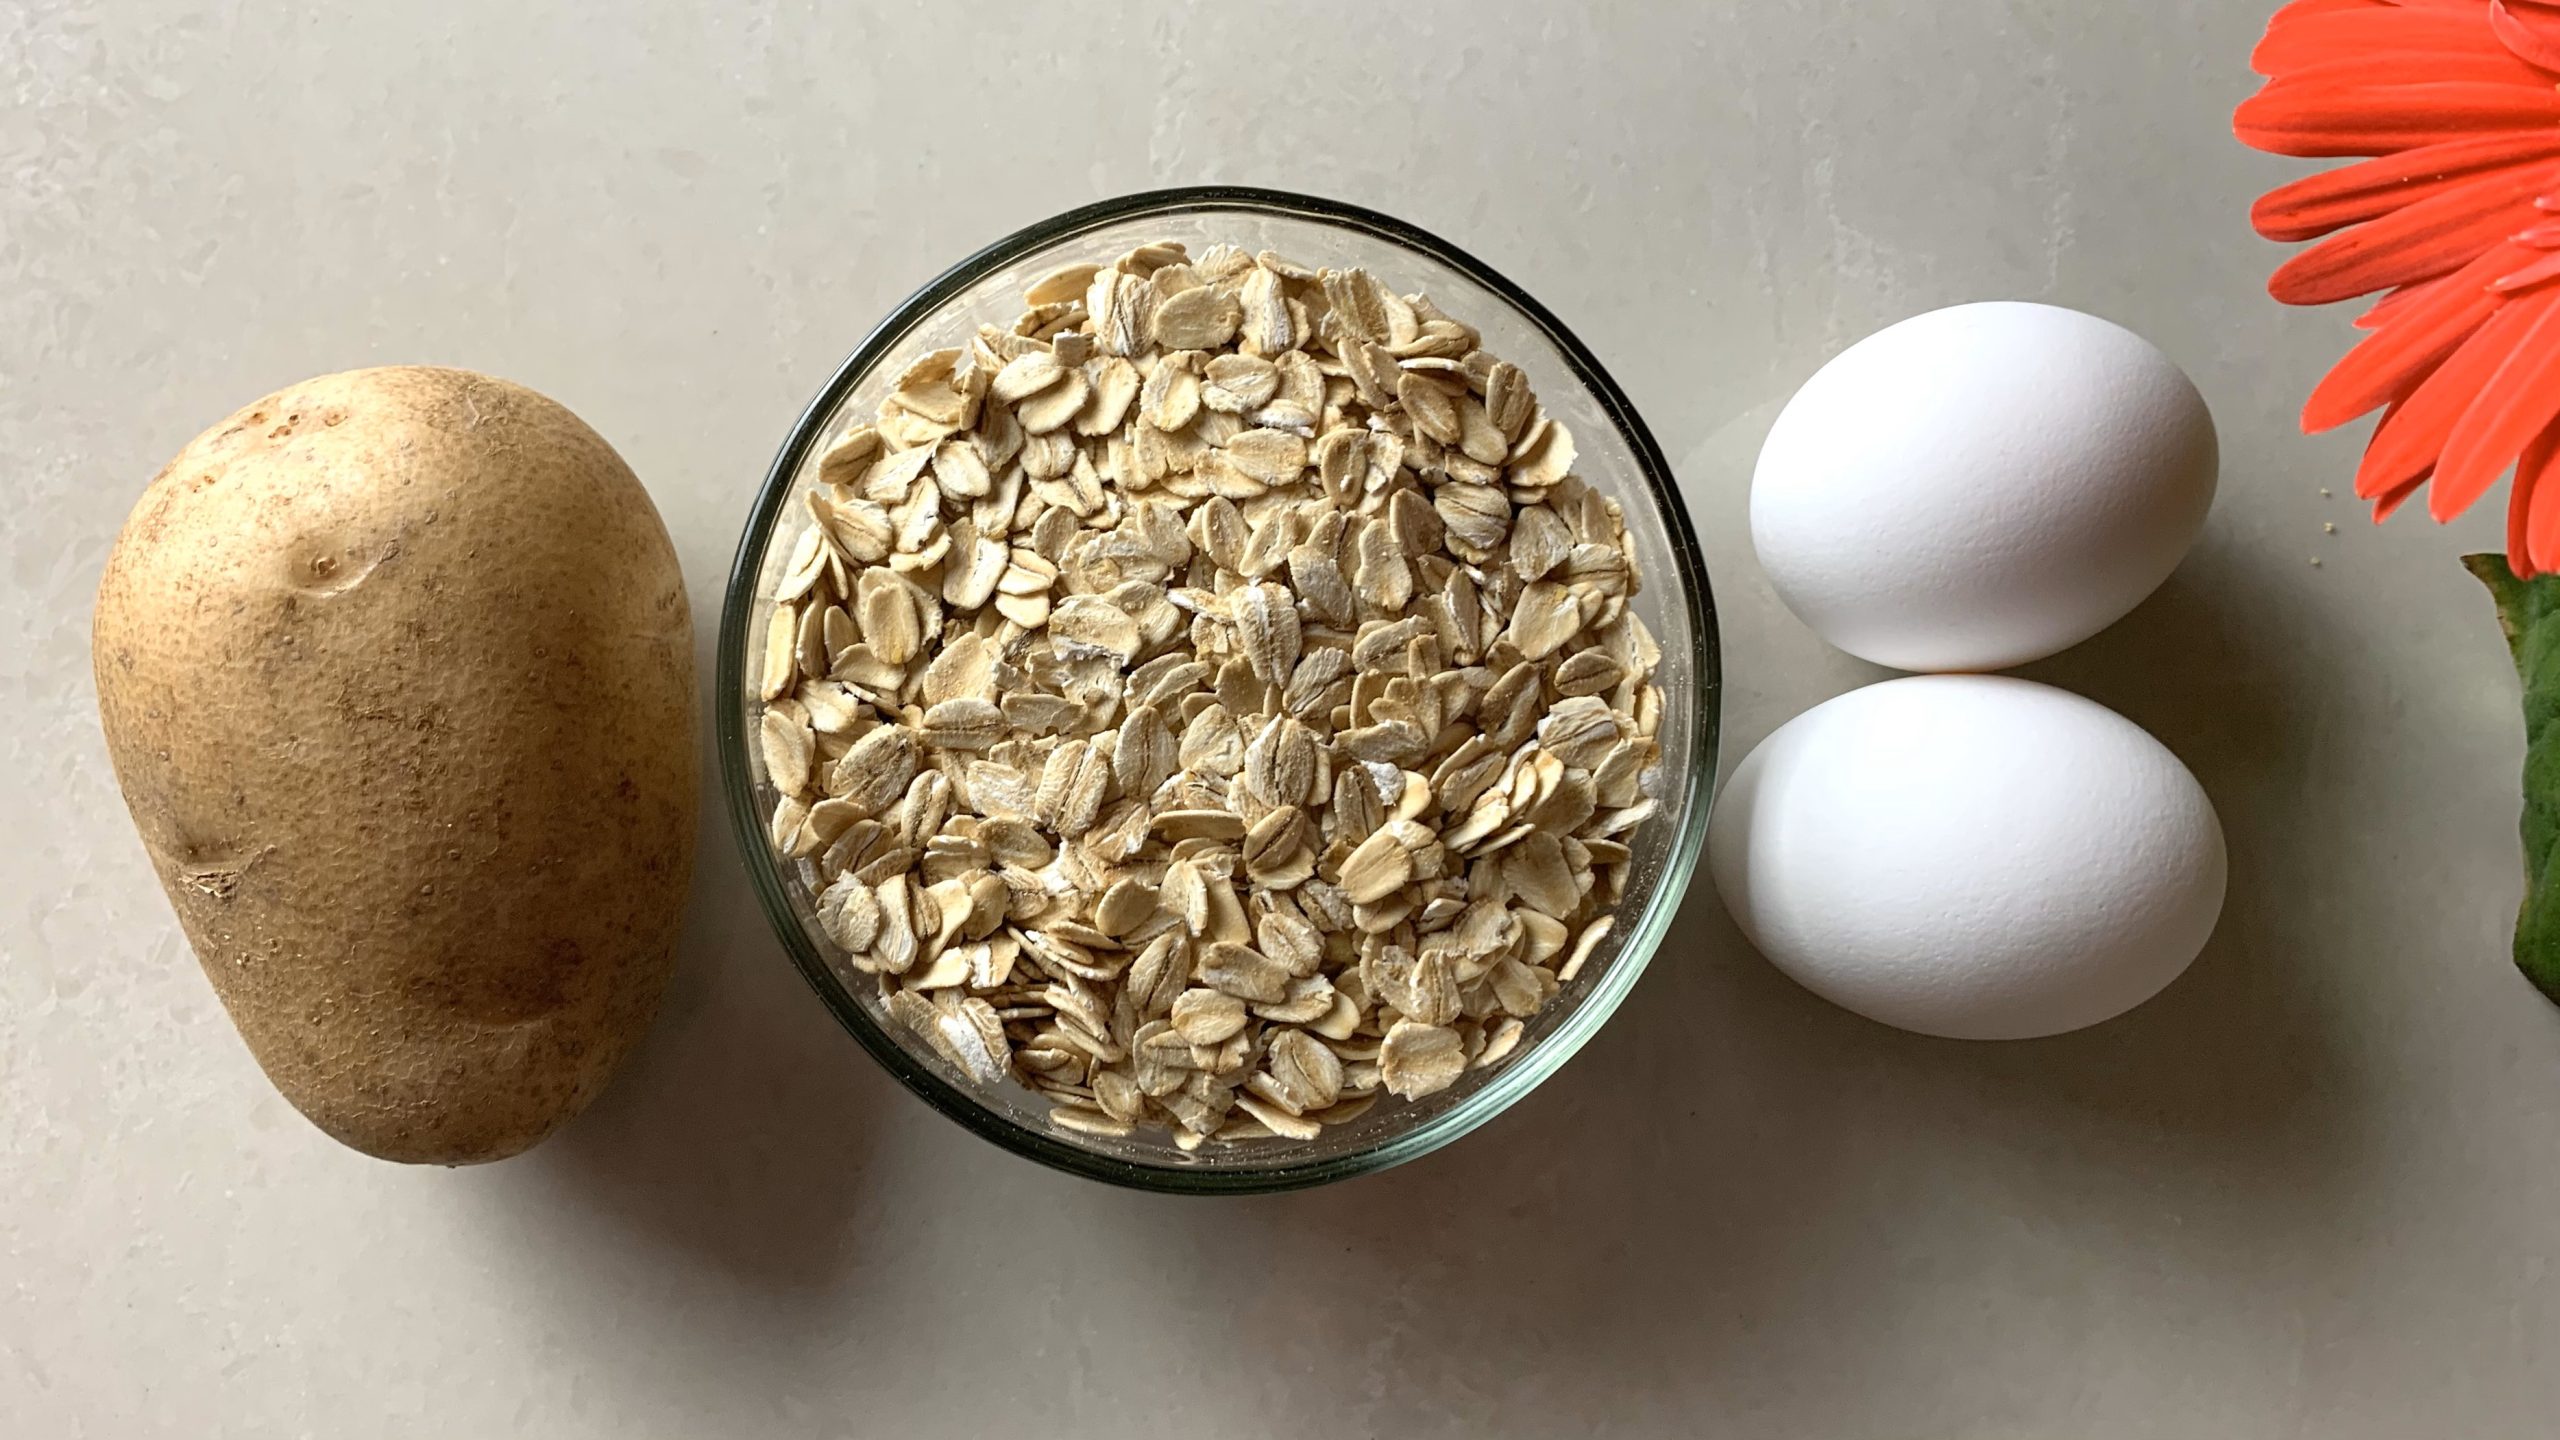
1 large potato (200 g)
1 cup oat flour (80 g)
1 tbsp. butter (15 g)
1 egg + 1 egg white
1/2 tsp. salt
Ground pepper to taste
1 tsp baking powder
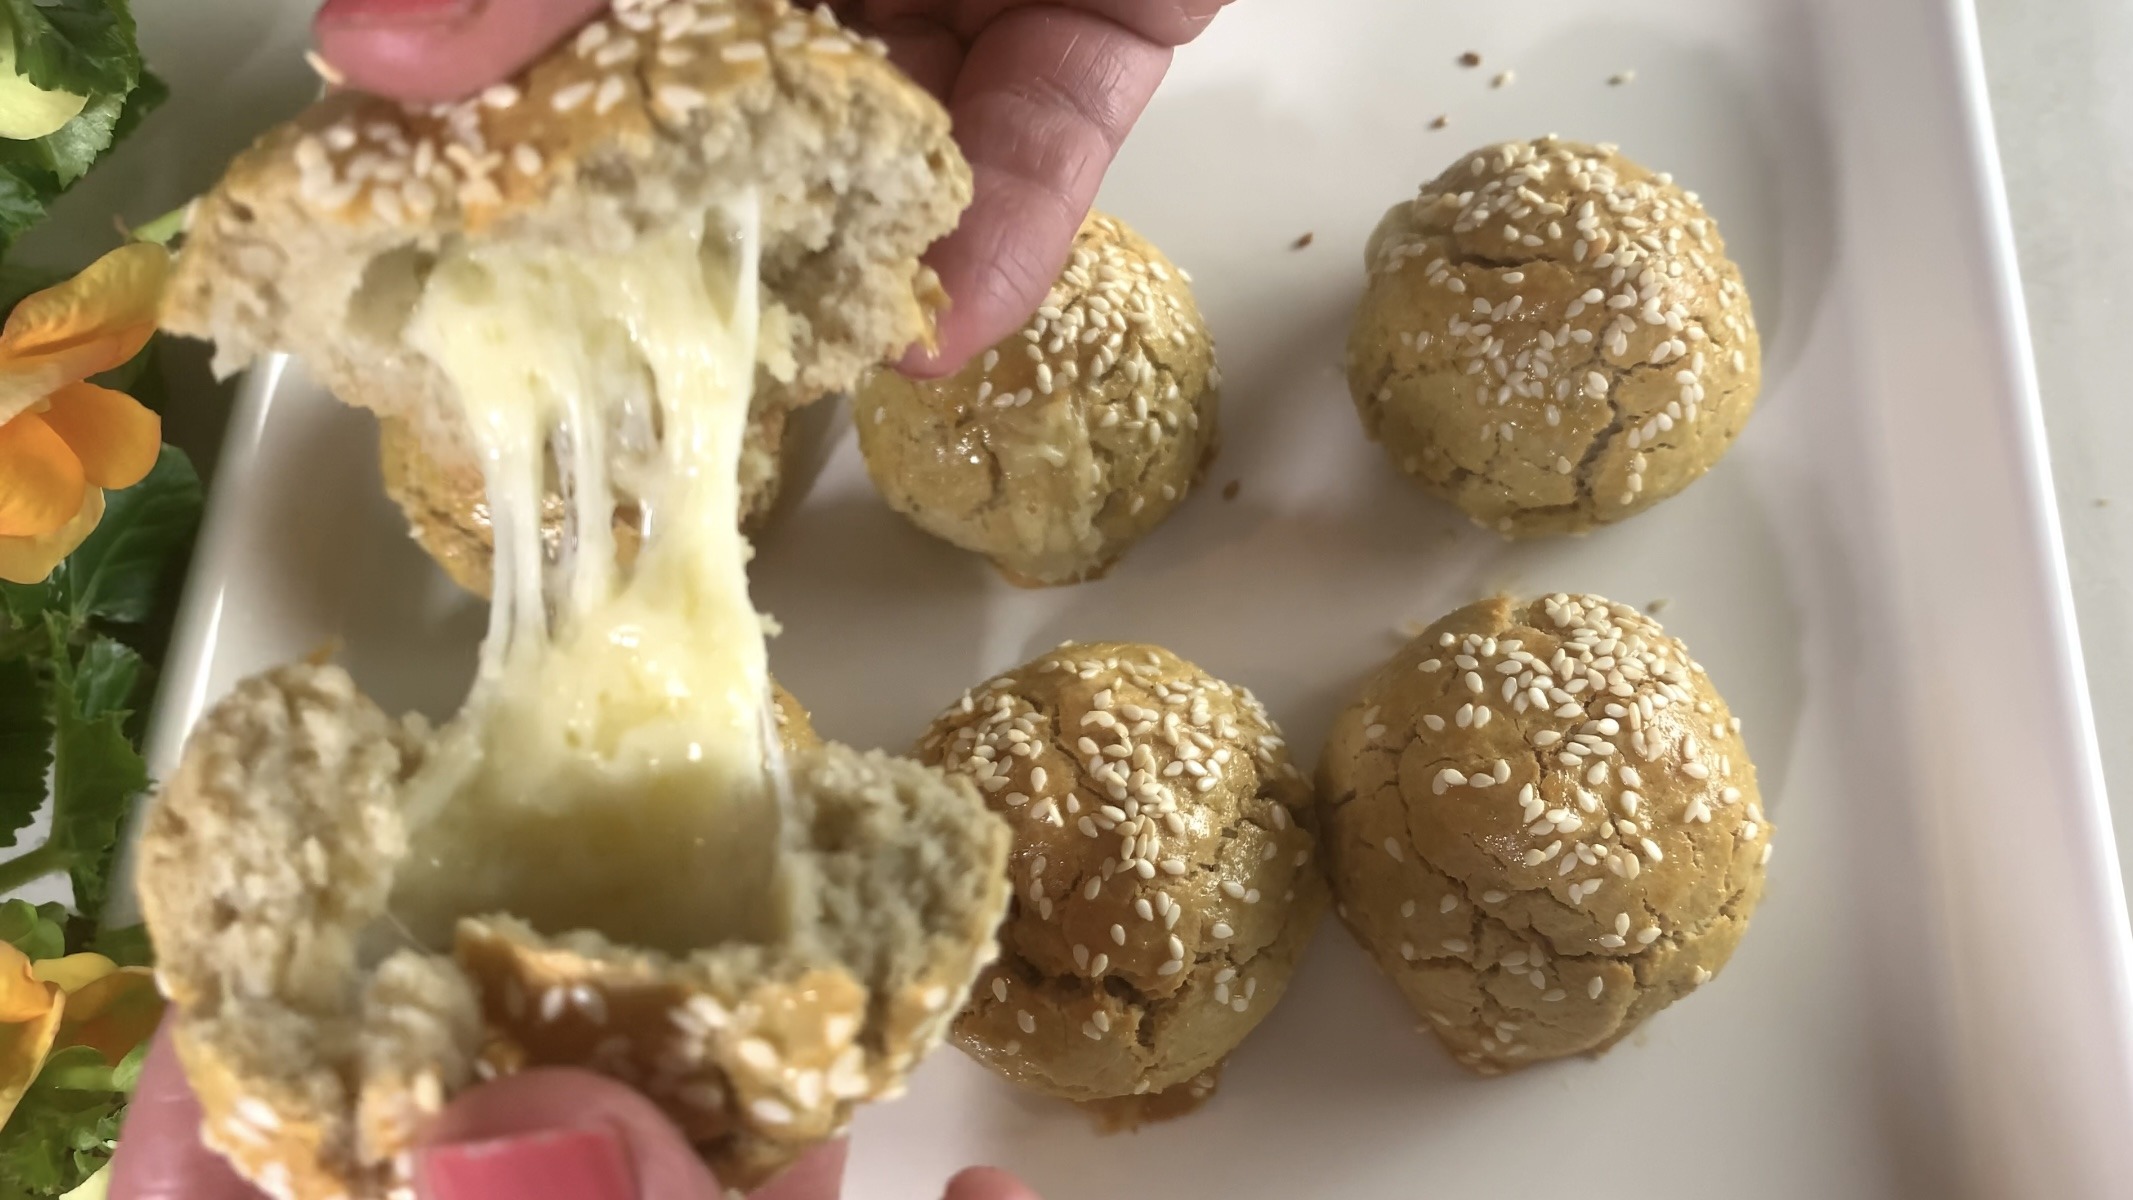
80 g cheddar cheese, cut into 8 pieces (10 g per bread)
1 egg yolk for brushing
1 tsp sesame seeds for topping
Directions
- Boil the large potato until tender. Drain and mash the potato into a smooth purée using a potato masher.
- While the potato is still hot, add butter to the mashed potato and stir until melted and well combined.
- To the potato mixture, add one whole egg, one egg white, salt, and ground pepper. Stir vigorously until thoroughly mixed.
- Gradually incorporate oat flour and baking powder into the mixture, stirring until a smooth dough forms.
- Spoon equal quantities of the dough and insert a piece of cheddar cheese into the center of each dough ball. Cover the cheese evenly to form smooth balls.
- Brush the bread balls with egg yolk and sprinkle sesame seeds on top for a golden, flavorful crust.
- Preheat the oven to 350°F (175°C).
- Place the bread balls on a baking sheet lined with parchment paper.
- Bake for 30 minutes or until the bread is golden brown and cooked through.
- Serve while still warm.
Yields: 8 Servings
Prep Time: 30 minutes
Baking Time: 30 minutes
Nutritional Information
Per 1 Serving:
Energy: 137 calories
Protein: 5.99 g
Fat: 7.24 g
Carbohydrates: 12.16 g
Fiber: 1.2 g
Storage
- Store any leftover potato and oat cheesy bread in an airtight container in the fridge for up to one week.
- Serve your potato oat bread while still hot, savoring the delightful moment when the melted cheddar oozes from the center!