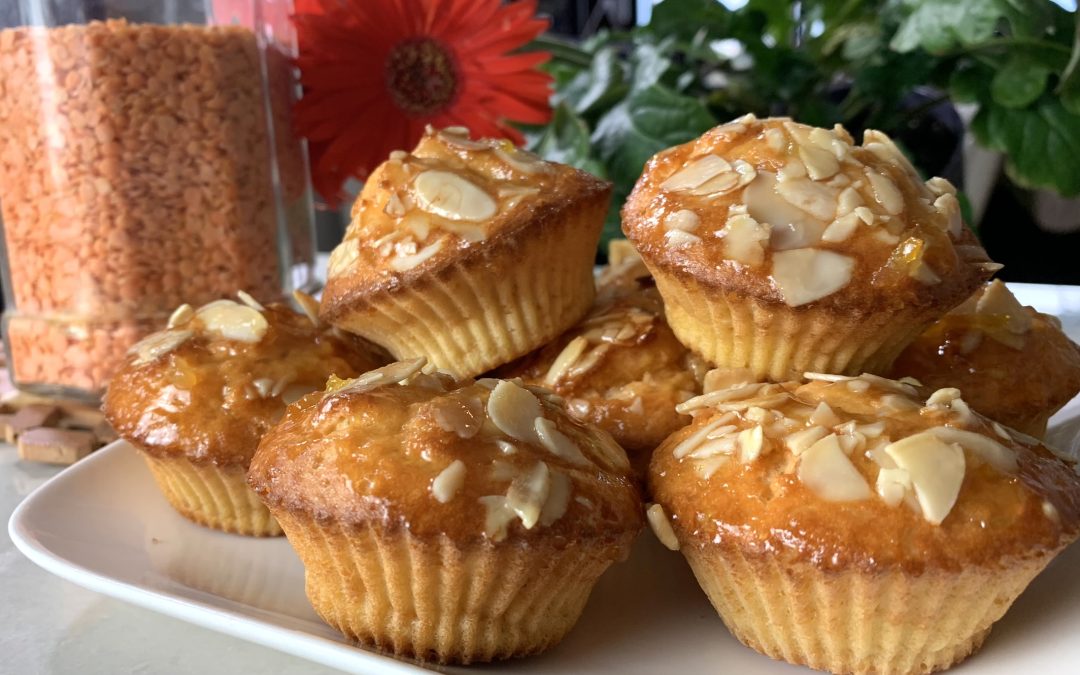
Peanut Chocolate Clusters

Say goodbye to store-bought peanut clusters and embrace the homemade goodness of this irresistible recipe. These Peanut Chocolate Clusters combine the natural sweetness of dates with the crunchy texture of roasted peanuts, all enveloped in a decadent layer of dark chocolate. These clusters are not only delicious but also offer a satisfying balance of flavors and textures that will make them your new favorite treat.

Peanuts, the star ingredient of this recipe, are more than just a tasty snack. They are packed with essential nutrients, including protein, healthy fats, and a variety of vitamins and minerals such as magnesium and vitamin E. Incorporating peanuts into your diet can help support heart health, maintain healthy blood sugar levels, and provide sustained energy throughout the day. The dark chocolate used in this recipe also adds a rich source of antioxidants, which can contribute to overall health and well-being.

With these Peanut Chocolate Clusters, you’re not just indulging in a sweet treat, you’re also fueling your body with nutrients that support a healthy lifestyle.

Make these clusters a part of your regular snack rotation for a delicious and nutritious boost, whether you need a mid-afternoon pick-me-up or a satisfying dessert after dinner.
Ingredients
- 1 cup (150 g) soft pitted dates
- 1 cup (160 g) roasted unsalted peanuts
- 1/2 cup (80 g) dark chocolate chips
- A pinch of kosher salt (optional)
Directions
-
- In a food processor, blend the soft pitted dates into a smooth paste. This will serve as both a sweetener and binder for the clusters.
- Transfer the date paste to a mixing bowl and add the roasted unsalted peanuts. Gently combine the ingredients until the peanuts are evenly coated with the date paste.
- With the mixture, form small, equally-sized clusters by pressing and shaping them with your hands. Aim for bite-sized pieces that are easy to enjoy.
- Melt the dark chocolate chips using the microwave or a double boiler until they reach a silky-smooth consistency.
- Coat each peanut-date cluster with the melted chocolate, ensuring they are completely covered.
- For a perfect flavor balance, sprinkle just a pinch of kosher salt over the clusters to add a touch of saltiness (this step is optional but recommended for contrast).
- Refrigerate the clusters for at least 1 hour to allow the chocolate to set and the flavors to meld together.
- Serve and enjoy these delectable homemade peanut clusters as a delightful treat for any occasion. They can be stored for later or shared with friends and family.
Prep Time, Serving, and Storage
- Prep Time: 20 minutes
- Set Time: 1 hour in the fridge
- Servings: Makes about 10 clusters
Nutritional Information (Per 1 Serving)
- Energy: 184 calories
- Protein: 4.89 g
- Fat: 11.41 g
- Carbohydrates: 18.33 g
- Fiber: 3.4 g
Storage & Recommendations
- Storage: Store your peanut clusters in an airtight container in the fridge for up to 1 week or in the freezer for up to 3 months.
- Serving Suggestion: Serve them as a satisfying snack or share them with friends and family as a delightful homemade treat.
Chickpea Chocolate Flan

Welcome back to the kitchen, where today we’re diving into an exciting, healthy twist on a beloved dessert classic flan! But this isn’t just any flan; this is a Chickpea Chocolate Flan that’s going to blow your mind. It’s creamy, it’s indulgent, and yes, it’s made with chickpeas! If you’re on a vegan diet or simply looking to make healthier dessert choices, this recipe is your golden ticket. The rich chocolate flavor is perfectly balanced by the smooth texture of the flan, making it an irresistible treat that you’d never guess was entirely plant-based.

Chickpeas are not just the star of savory dishes; they’re an incredible ingredient for desserts too. Rich in protein, fiber, and essential nutrients, chickpeas provide a substantial nutritional punch. They’re low in fat, high in fiber, and packed with vitamins and minerals like folate, iron, and magnesium. Incorporating chickpeas into your regular diet can help support heart health, improve digestion, and maintain stable blood sugar levels. So, not only is this flan delicious, but it’s also a dessert you can feel good about indulging in.

Whether you’re serving it at a dinner party or enjoying it as a snack, this Chickpea Chocolate Flan is bound to impress.
Ingredients
- EXACTLY 1 cup of soaked chickpeas (~½ cup dried chickpeas soaked overnight in the fridge)
- 3 cups of water
- A pinch of salt (optional)
- ¼ cup maple syrup (or any sweetener of your choice)
- 2 tbsp avocado oil (or other neutral oil of your choice)
- 3 tbsp of high-quality cocoa powder
- An extra drizzle of maple syrup for garnish (optional)
Directions:
- Begin by soaking half a cup of dried chickpeas overnight in the refrigerator. This is crucial for achieving the right texture. Once soaked, rinse the chickpeas thoroughly and strain well to remove any excess water.
- In a blender, combine EXACTLY 1 cup of soaked chickpeas with 3 cups of water and a pinch of salt. Blend until the mixture achieves a silky-smooth consistency.
- Next, strain the blended mixture to extract the chickpea milk, which will serve as the creamy, plant-based base for your flan.
- Transfer the chickpea milk to a saucepan, then add the maple syrup, avocado oil, and cocoa powder. Stir the ingredients until well combined.
- Place the saucepan over low to medium heat and gently heat the mixture until it begins to simmer. Continuously stir the mixture for approximately 10 minutes, allowing it to thicken into a smooth, béchamel-like texture.
- Once thickened, pour the mixture into a mold and refrigerate it for at least 3 hours to achieve the desired flan-like consistency.
- Before serving, you can dust the flan with cocoa powder and drizzle it with maple syrup if you like a little extra sweetness.
Prep Time: 20 minutes
Cooking Time: 15 minutes
Servings: 6
Nutritional Information (Per Serving):
- Energy: 144 calories
- Protein: 3.91 g
- Fat: 6.03 g
- Carbohydrates: 20.87 g
- Fiber: 2.8 g
Storage: Store any leftover flan in an airtight container in the refrigerator for up to 5 days.
Recommendations: This flan is naturally Vegan, Grain-Free, Gluten-Free, and Gelatin-Free, making it suitable for a variety of dietary needs. It’s a luxurious treat perfect for gatherings or a cozy night in. Enjoy this delectable treat as a delightful dessert or indulgent snack, perfect for sharing with friends and family.
Apple Cake
Apple Cake

Imagine curling up with a slice of cake that feels like a warm hug on a crisp day. That’s exactly the feeling our French Apple Cake brings to the table. It’s a delightful blend of tender apples and a soft, buttery batter that practically melts in your mouth. This cake is perfect for those moments when you want to treat yourself to something sweet, comforting, and just a little bit special.

Now, let’s talk about the real star of the show—apples! Not only do they add a natural sweetness and moisture to the cake, but they’re also a powerhouse of nutrition. Apples are packed with fiber, which helps keep everything moving smoothly (if you know what I mean!). They’re also rich in vitamin C, giving your immune system a nice boost and adding a healthy glow to your skin. Plus, they’re great for heart health, helping to keep cholesterol in check. So, when you bake this cake, you’re not just indulging in a delicious treat; you’re also nourishing your body with all the goodness that apples have to offer.

So go ahead, bake this cake, and enjoy every sweet, wholesome bite. It’s like a little slice of joy, straight from your oven to your plate.
Ingredients
- 4 large apples of your choice (~600 g)
- 1 ⅓ cups all-purpose flour
- ½ cup almond flour (optional)
- 3 eggs
- ½ cup maple syrup (or other sweetener of your choice)
- ½ cup coconut cream (or any other milk of your choice)
- 60 g butter
- 1 tbsp. baking powder
- ½ tbsp. vanilla extract
- Pinch of salt
- Powdered sugar for decoration
Directions
- Preheat the oven to 365°F (180°C) and grease or line a cake pan.
- Peel, core, and thinly slice the apples. Set them aside.
- In a mixing bowl, combine the all-purpose flour, almond flour (if using), baking powder, and a pinch of salt.
- In a separate bowl, whisk together the eggs, maple syrup, melted butter, coconut cream, and vanilla extract until smooth and well combined.
- Gradually add the dry ingredients to the wet ingredients, stirring until a smooth batter forms.
- Gently fold in the sliced apples until they are evenly distributed throughout the batter.
- Pour the batter into the prepared cake pan, spreading it out evenly.
- Bake for 50-60 minutes, or until a toothpick inserted into the center comes out clean.
- Let the cake cool, then dust with powdered sugar and serve.
Serving Information
- Servings: 8
- Prep Time: 30 minutes
- Baking Time: 1 hour
Nutritional Information (Per Serving)
- Energy: 332 calories
- Protein: 6.64 g
- Fat: 16.53 g
- Carbohydrates: 41.9 g
- Fiber: 3.5 g
Storage and Recommendations
- Store any leftover apple cake in an airtight container at room temperature for up to 2 days, or in the refrigerator for up to a week.
- For an extra indulgent touch, pair it with a dollop of whipped cream or a scoop of vanilla ice cream.
Potato Cheese Bites
Potato Cheese Bites

Savor the delightful taste of these cheesy potato bites, a simple yet scrumptious side dish or snack that will surely become a favorite. With a crispy exterior and a creamy, cheesy interior, each bite offers a burst of flavor that’s hard to resist.

Potatoes are not only a comfort food but also a great source of vitamins, minerals, and fiber. When paired with cheese, they create a delicious combination that satisfies cravings while offering a good dose of calcium and protein.

Whether you’re serving them as an appetizer or enjoying them as a snack, these cheesy potato bites are sure to be a hit.

Whether you’re looking to make a quick side dish for dinner or an indulgent snack for game night, these cheesy potato bites are versatile and perfect for any occasion. Serve them hot, and watch them disappear quickly!
Ingredients
- 470 g potato (red or yellow)
- 30 g melted butter (or non-dairy butter alternative)
- 75 g shredded mozzarella and cheddar cheese mixture (or your cheese of choice)
- 1/2 tsp salt
- Ground black pepper to taste
- Sriracha sauce for serving (optional)
Directions
- Begin by preheating your oven to 365°F (185°C) and line a baking sheet with parchment paper.
- Peel the potatoes and shred them using a hand grater or a food processor. Place the shredded potatoes in a bowl of cold water to remove excess starch. Drain thoroughly, squeezing out any remaining moisture with your hands or using a clean kitchen towel.
- In a large mixing bowl, combine the shredded potatoes, melted butter, shredded cheese mixture, salt, and ground black pepper. Gently mix until well combined.
- Take portions of the potato mixture and shape them into small rounds. Place the rounds onto the prepared baking sheet.
- Bake for 35 minutes or until the potato rounds are golden brown and crispy on the outside.
- Serve the cheesy potato bites hot, accompanied by your favorite sauce or a tangy sriracha sauce for an extra kick of flavor.
Prep Time
- 30 mins Prep
- 35 mins Baking
Nutritional Information (Per 1 Serving)
- Energy: 101 calories
- Protein: 3.43 g
- Fat: 4.94 g
- Carbohydrates: 11.02 g
- Fiber: 1.3 g
Storage
- Store any leftovers in an airtight container in the refrigerator for up to 2 days.
Notes
- Reheat potato bites in the oven or toaster oven to maintain crispiness.


These cookies are not just a treat; they are a wholesome addition to your diet. Whether you’re enjoying them as an afternoon snack or a guilt-free dessert, you’ll appreciate the blend of flavors and the health benefits each bite offers. Make these sunflower seed cookies a regular part of your baking routine to enjoy a delicious and nutritious snack that you can feel good about eating.