Four Seasons Crustless Quiche
Four Seasons Crustless Quiche

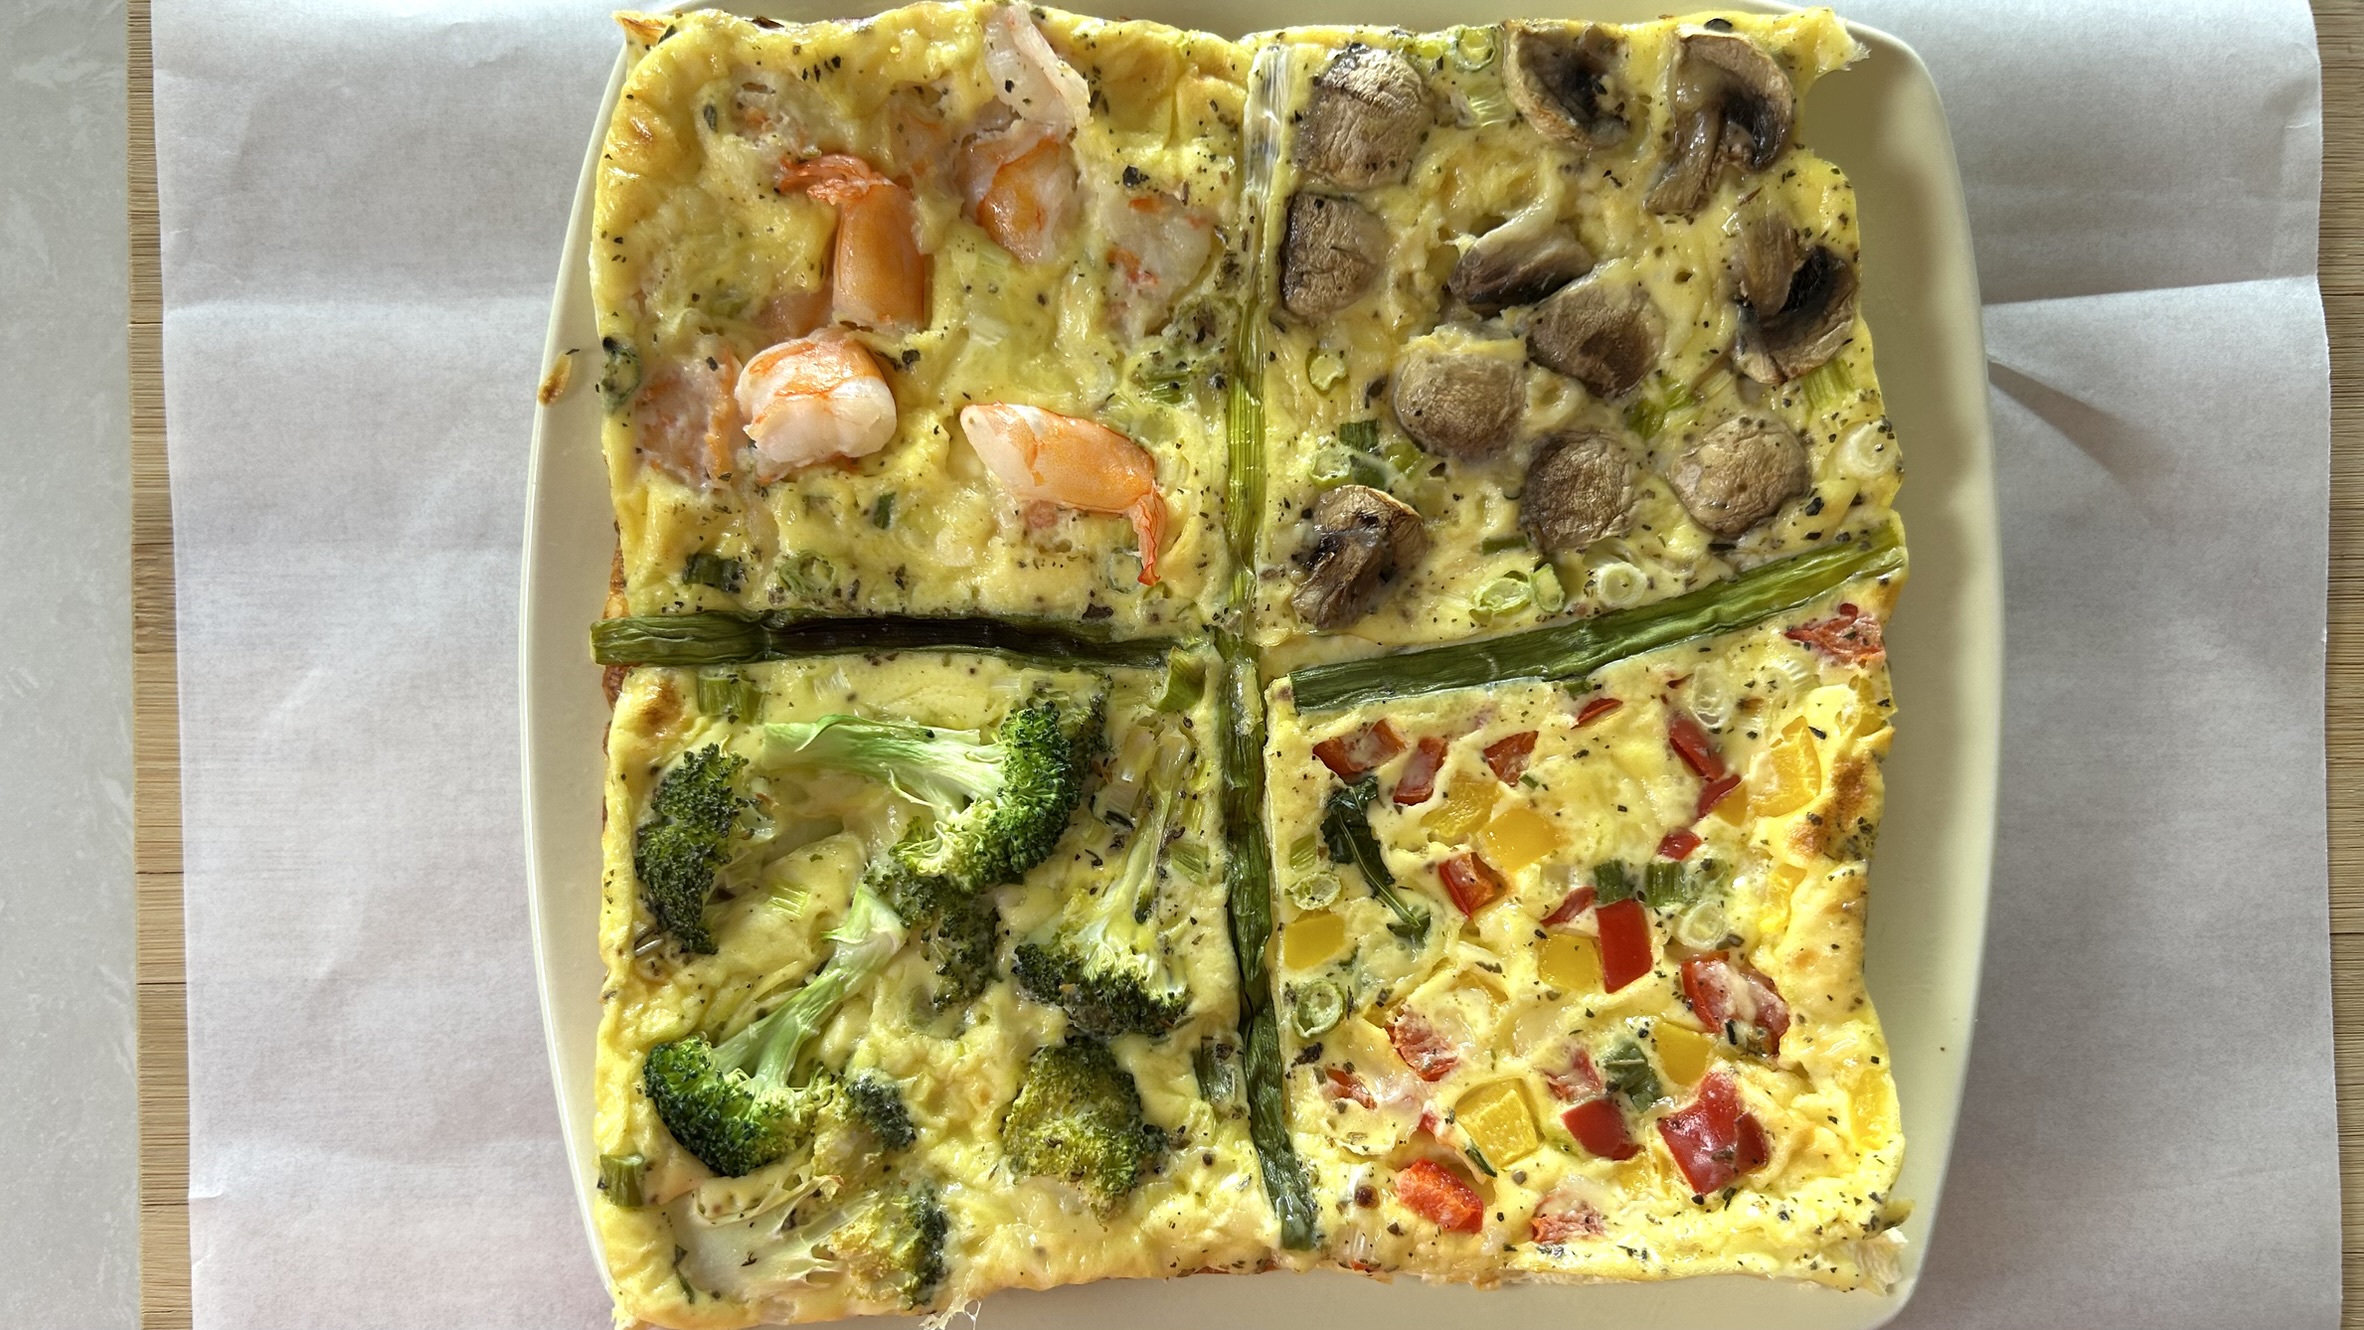
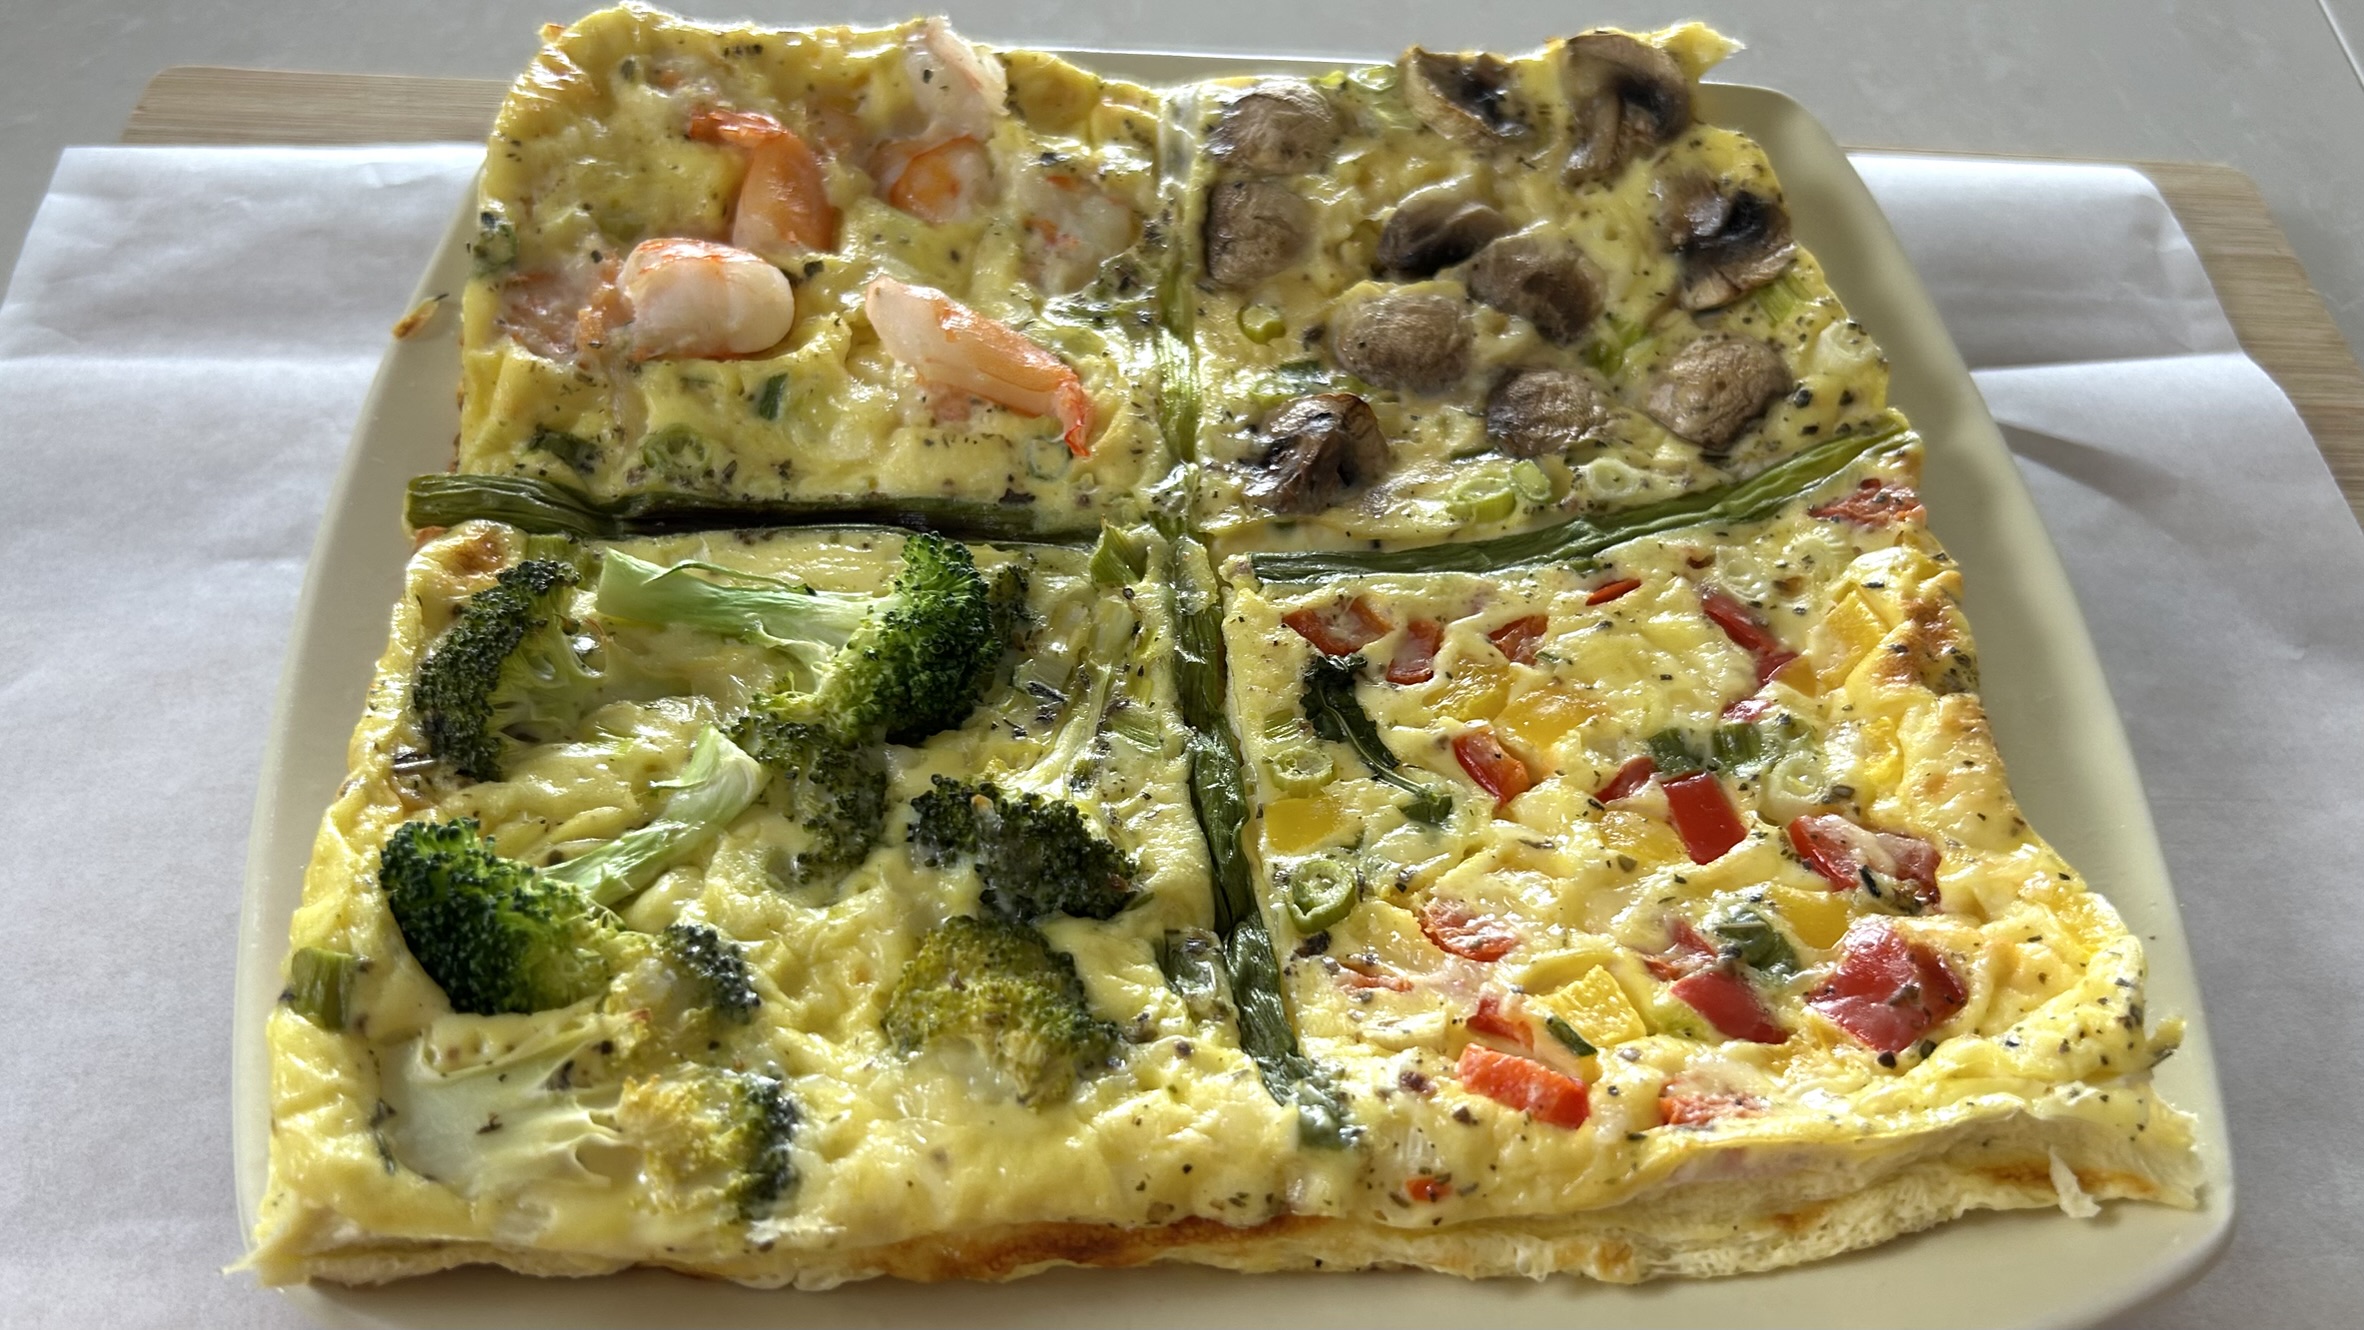
If you’re looking for a wholesome meal that’s easy to prepare, packed with protein, and guaranteed to please everyone at the table, this Four Seasons Crustless Quiche is a recipe you’ll find yourself making on repeat. Inspired by the famous Four Seasons Pizza, this colorful quiche transforms one creamy egg base into four delicious flavor combinations baked together in the same dish. Every slice is a little different, making it a fun way to satisfy different tastes without preparing multiple recipes. Whether you love colorful bell peppers, earthy mushrooms, tender broccoli, or juicy shrimp, this quiche offers something for everyone while keeping preparation incredibly simple.
Unlike a traditional quiche, this version skips the buttery crust, making it naturally gluten-free, lighter, and higher in protein while still delivering a rich, creamy texture. Greek yogurt adds extra creaminess and protein without the heaviness of cream, while cheddar cheese provides just the right amount of savory flavor. Everything comes together in one baking dish, making cleanup effortless and meal prep a breeze. Enjoy it warm for breakfast, pair it with a fresh salad for lunch, or serve it alongside roasted vegetables for a satisfying dinner. It also stores beautifully, making it an excellent make-ahead meal for busy weekdays.
One of the best things about this recipe is its versatility. The four sections can easily be customized according to the season, your family’s preferences, or whatever vegetables and proteins you already have in your refrigerator. Spinach, zucchini, cherry tomatoes, asparagus, smoked salmon, cooked chicken, feta, mozzarella, or fresh herbs all make delicious additions. It’s an excellent way to reduce food waste while creating a colorful, nutritious meal that’s as beautiful as it is delicious.
Why Eggs Deserve a Place in Your Regular Diet
Eggs are the nutritional powerhouse behind this recipe and one of nature’s most complete foods. They provide high-quality protein containing all nine essential amino acids, making them ideal for maintaining muscle mass, supporting recovery, and keeping you feeling satisfied for longer. Their impressive protein content also helps stabilize appetite, making them an excellent choice for a balanced breakfast or any meal throughout the day.
Beyond protein, eggs are naturally rich in vitamin B12, choline, selenium, vitamin D, riboflavin, and lutein. Choline plays a key role in brain development and memory, while lutein and zeaxanthin help support long-term eye health. Combined with antioxidant-rich vegetables, calcium-rich Greek yogurt, and protein-packed shrimp, this quiche becomes a balanced meal filled with vitamins, minerals, healthy fats, and antioxidants. Including eggs regularly as part of a varied, balanced diet is a simple and affordable way to support overall health while enjoying delicious, satisfying meals.
Ingredients
Egg Base
- 6 large eggs
- 1 cup (220 g) thick Greek yogurt
- 2 tablespoons olive oil
- ½ teaspoon salt
- Freshly ground black pepper, to taste
- ¼ teaspoon dried Italian herbs (or your favorite dried or fresh herbs)
Vegetables & Toppings
- 2 green onions, finely chopped (reserve the long green leaves)
- 50 g red and yellow bell peppers, finely chopped
- 50 g mushrooms, finely chopped
- 50 g broccoli, cut into small florets
- 65 g cooked shrimp, diced
- About 60 g shredded cheddar cheese
Directions
- Preheat your oven and prepare a 9 × 9-inch (22 × 22 cm) square baking dish by lining it with parchment paper.
- Wash and prepare all the vegetables. Finely chop the green onions, reserving the long green leaves, dice the bell peppers and mushrooms, cut the broccoli into small florets, and chop the cooked shrimp. Keep each topping separate.
- In a large mixing bowl, whisk together the eggs, Greek yogurt, olive oil, salt, black pepper, and dried herbs until smooth and fully combined.
- Pour the egg mixture into the prepared baking dish and spread it evenly.
- Arrange the reserved green onion leaves across the center of the dish to form a cross, creating four equal sections.
- Sprinkle most of the shredded cheddar cheese evenly over the egg mixture, followed by the chopped green onions.
- Fill one section with the chopped bell peppers.
- Fill the second section with the chopped mushrooms.
- Fill the third section with the broccoli florets.
- Fill the final section with the diced cooked shrimp.
- Sprinkle the remaining cheddar cheese evenly over the entire quiche.
- Bake until the center is fully set and the edges are lightly golden.
- Let the quiche cool for several minutes before slicing. Serve warm or allow it to cool completely before storing for meal prep.
Prep Time, Baking Time & Servings
- Preparation Time: 20 minutes
- Baking Time: 30 minutes
- Total Time: 50 minutes
- Servings: 4
Nutritional Information (Per Serving)
- Calories: 291
- Protein: 20.74 g
- Fat: 19.97 g
- Carbohydrates: 7.26 g
- Fiber: 0.7 g
Storage
- Store leftover quiche in an airtight container in the refrigerator for up to 4 days.
- Freeze individual slices for up to 2 months.
- Thaw overnight in the refrigerator before reheating.
- Reheat gently in the microwave, oven, or air fryer until warmed through.
Notes & Recommendations
- This recipe is naturally gluten-free since it contains no flour or crust.
- Feel free to swap the vegetables according to the season or what you have on hand.
- Great additions include spinach, zucchini, asparagus, cherry tomatoes, cooked chicken, smoked salmon, feta, mozzarella, or fresh herbs.
- For extra protein, add more cooked shrimp or substitute with diced chicken or turkey.
- Serve with a crisp green salad, roasted vegetables, or fresh fruit for a complete meal.
- This quiche is perfect for breakfast, brunch, lunch, dinner, or weekly meal prep because it tastes delicious both warm and cold.


 Almond flour, the star ingredient of this recipe, contributes much more than wonderful flavor. Naturally rich in healthy monounsaturated fats, plant-based protein, vitamin E, magnesium, manganese, and antioxidants, almonds provide lasting energy while supporting heart health, healthy skin, brain function, and muscle performance. Compared to refined wheat flour, almond flour contains fewer carbohydrates and more fiber, helping create a more satisfying filling that may support steadier blood sugar levels. Including almonds regularly in your diet is an excellent way to increase your intake of healthy fats and essential nutrients while enjoying naturally delicious foods. Combined with the lightness of rice paper, these croissants become a wonderful example of how wholesome ingredients can transform a beloved classic into a healthier homemade treat.