Flaxseed Bread
Jun 26, 2026
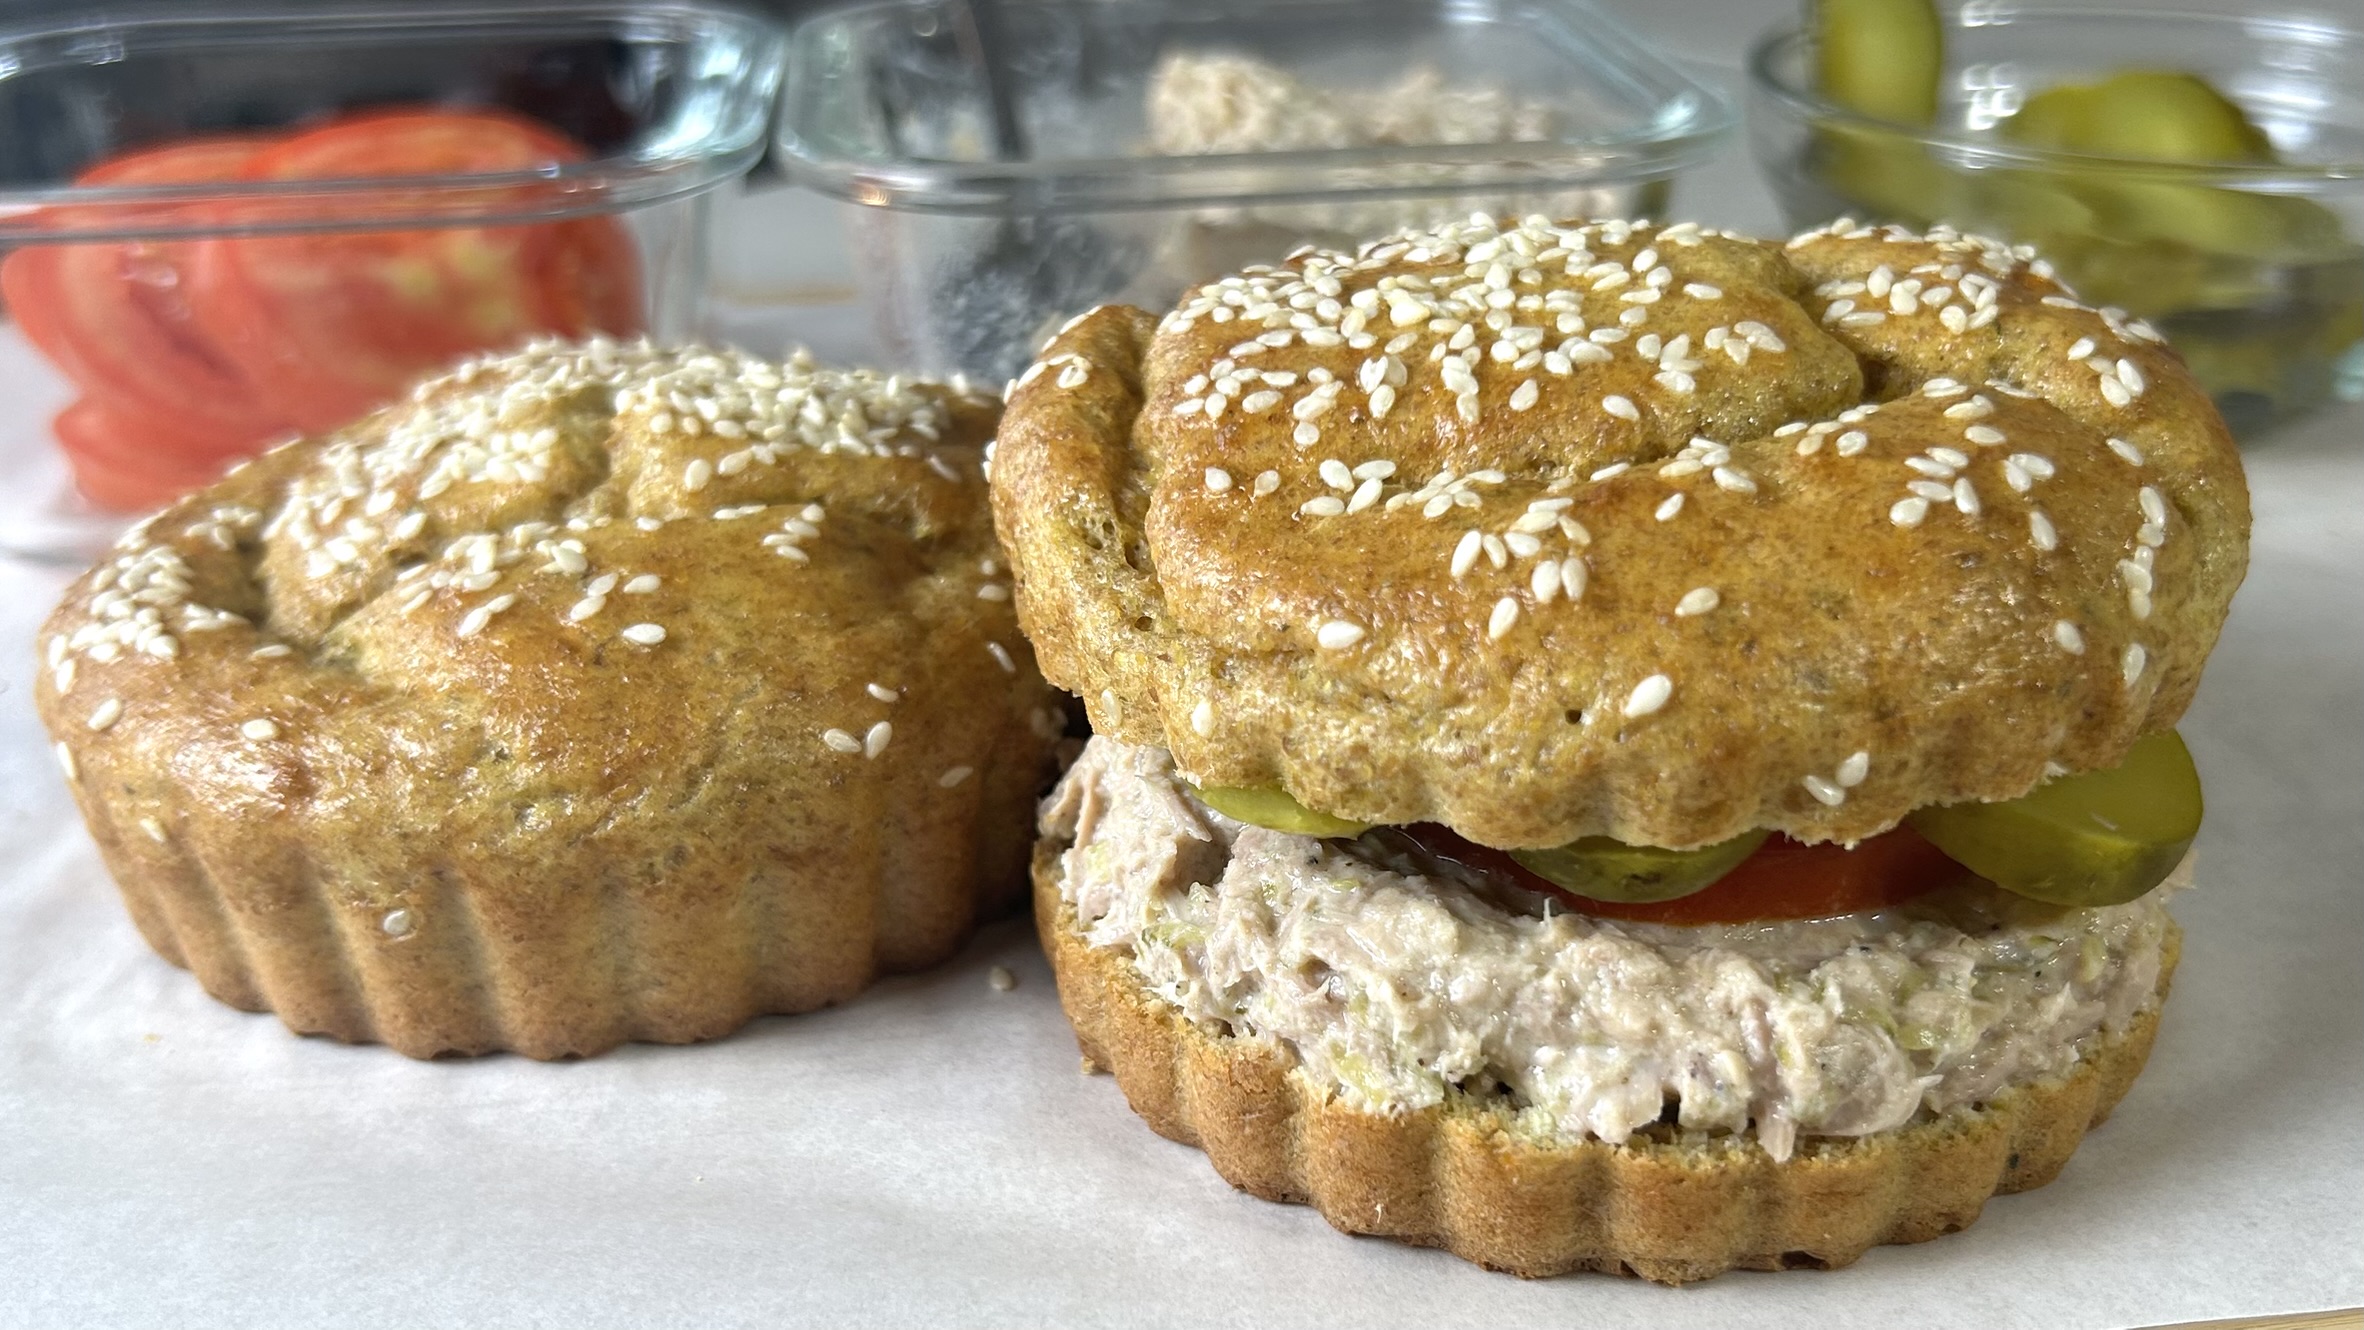
Flaxseed Bread

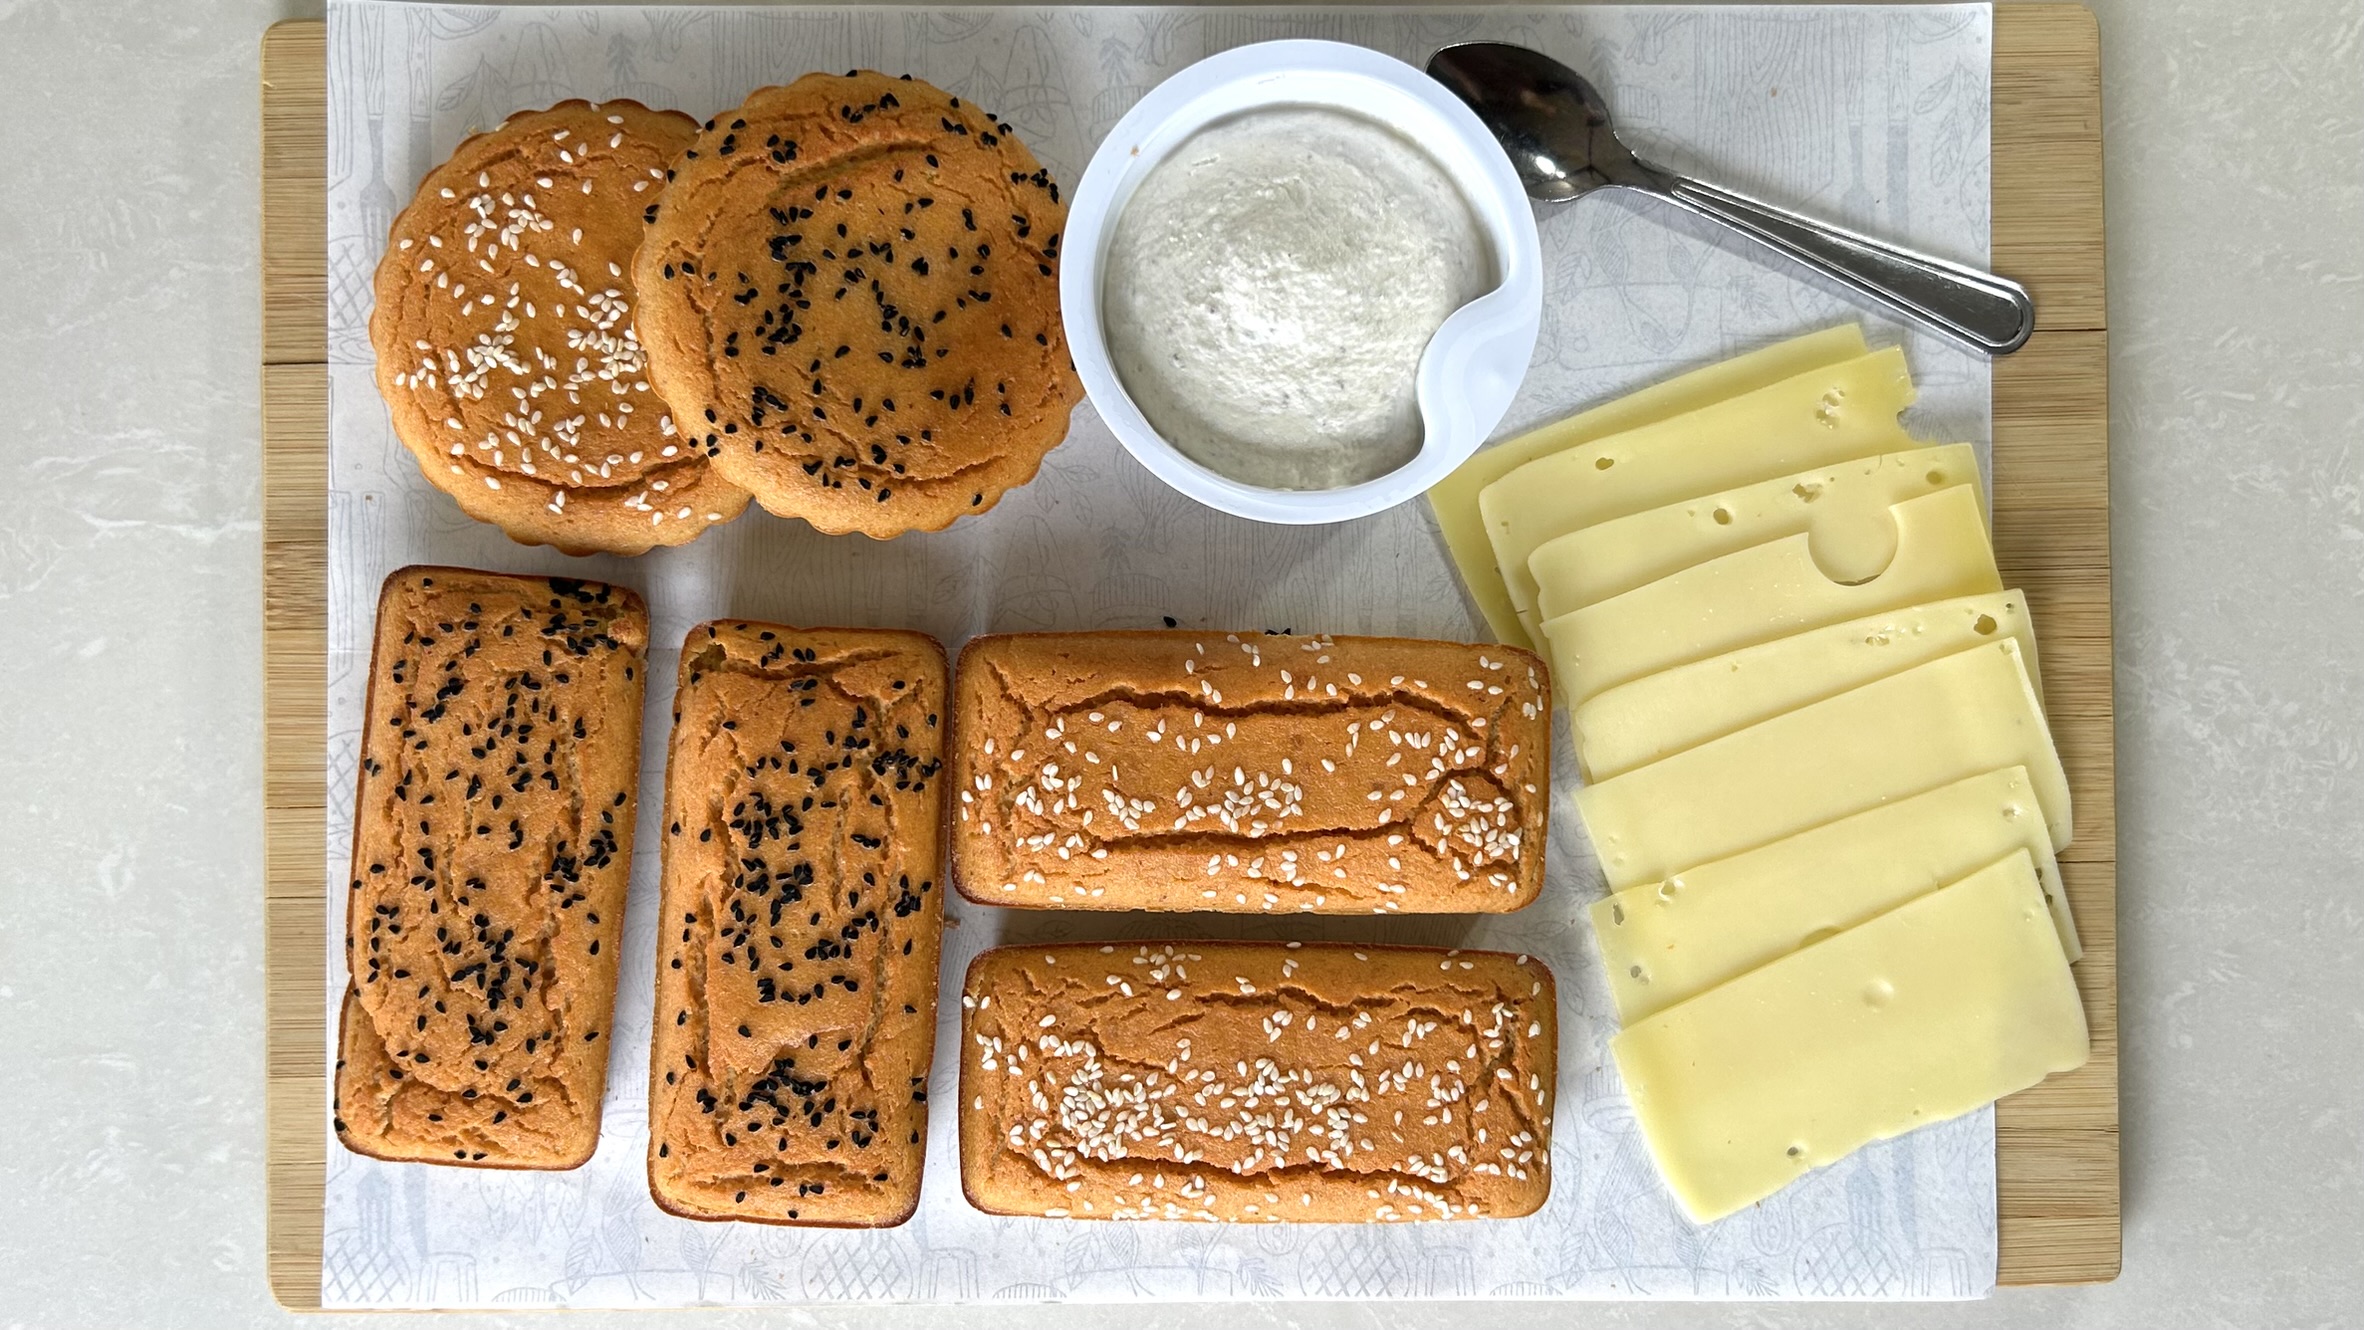
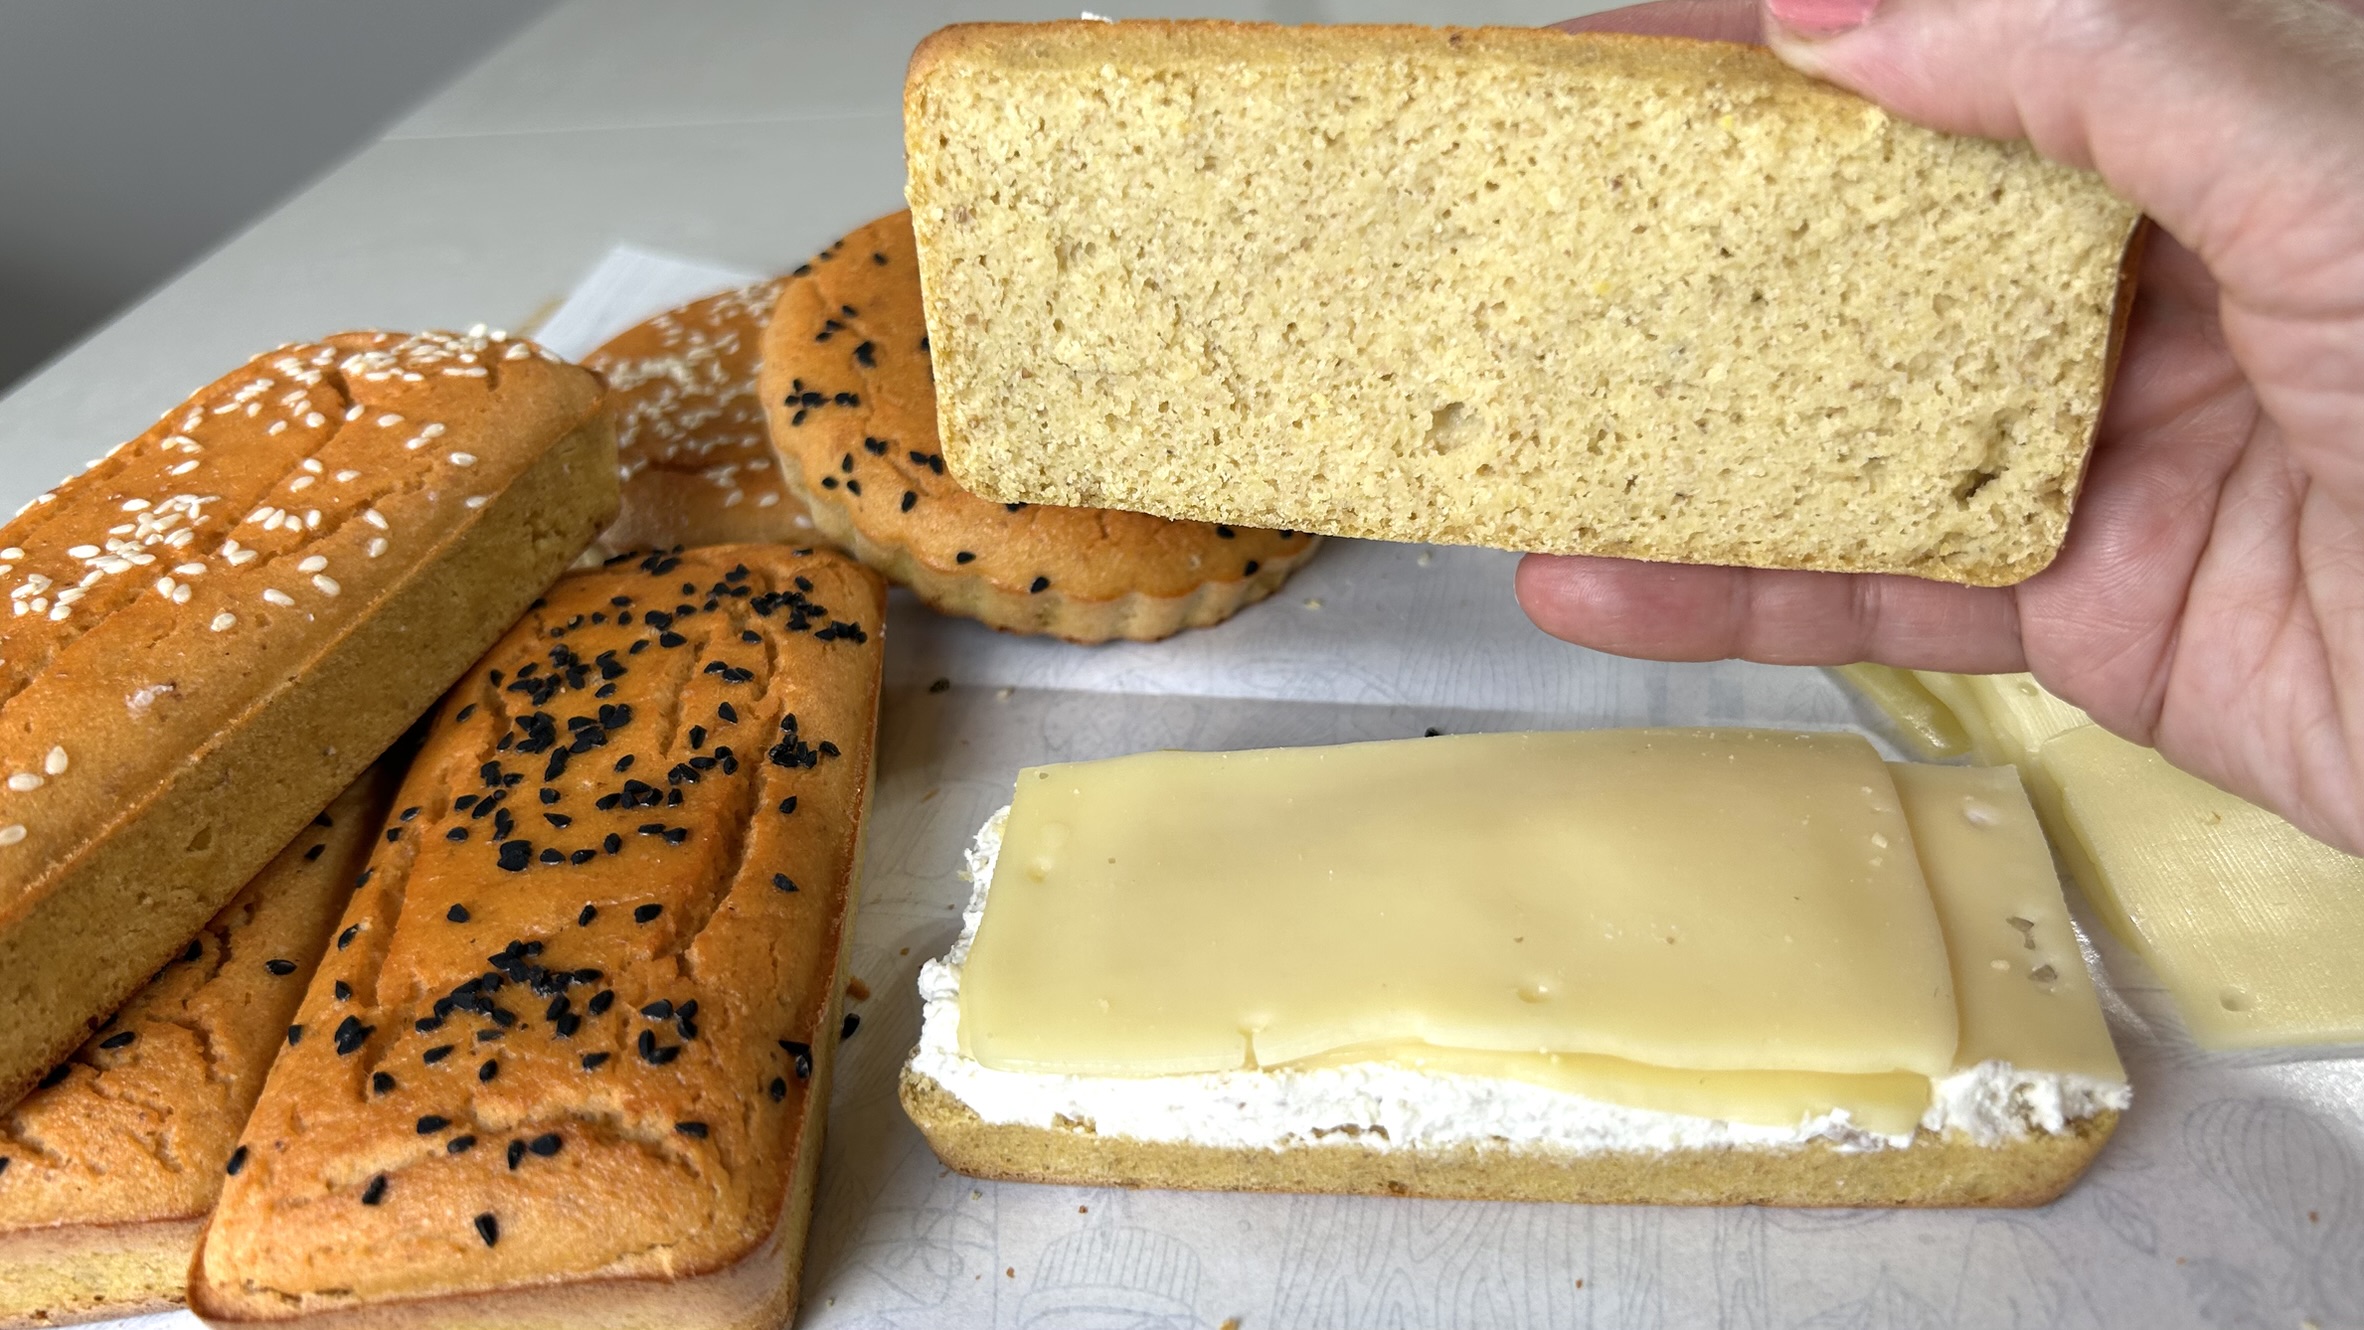
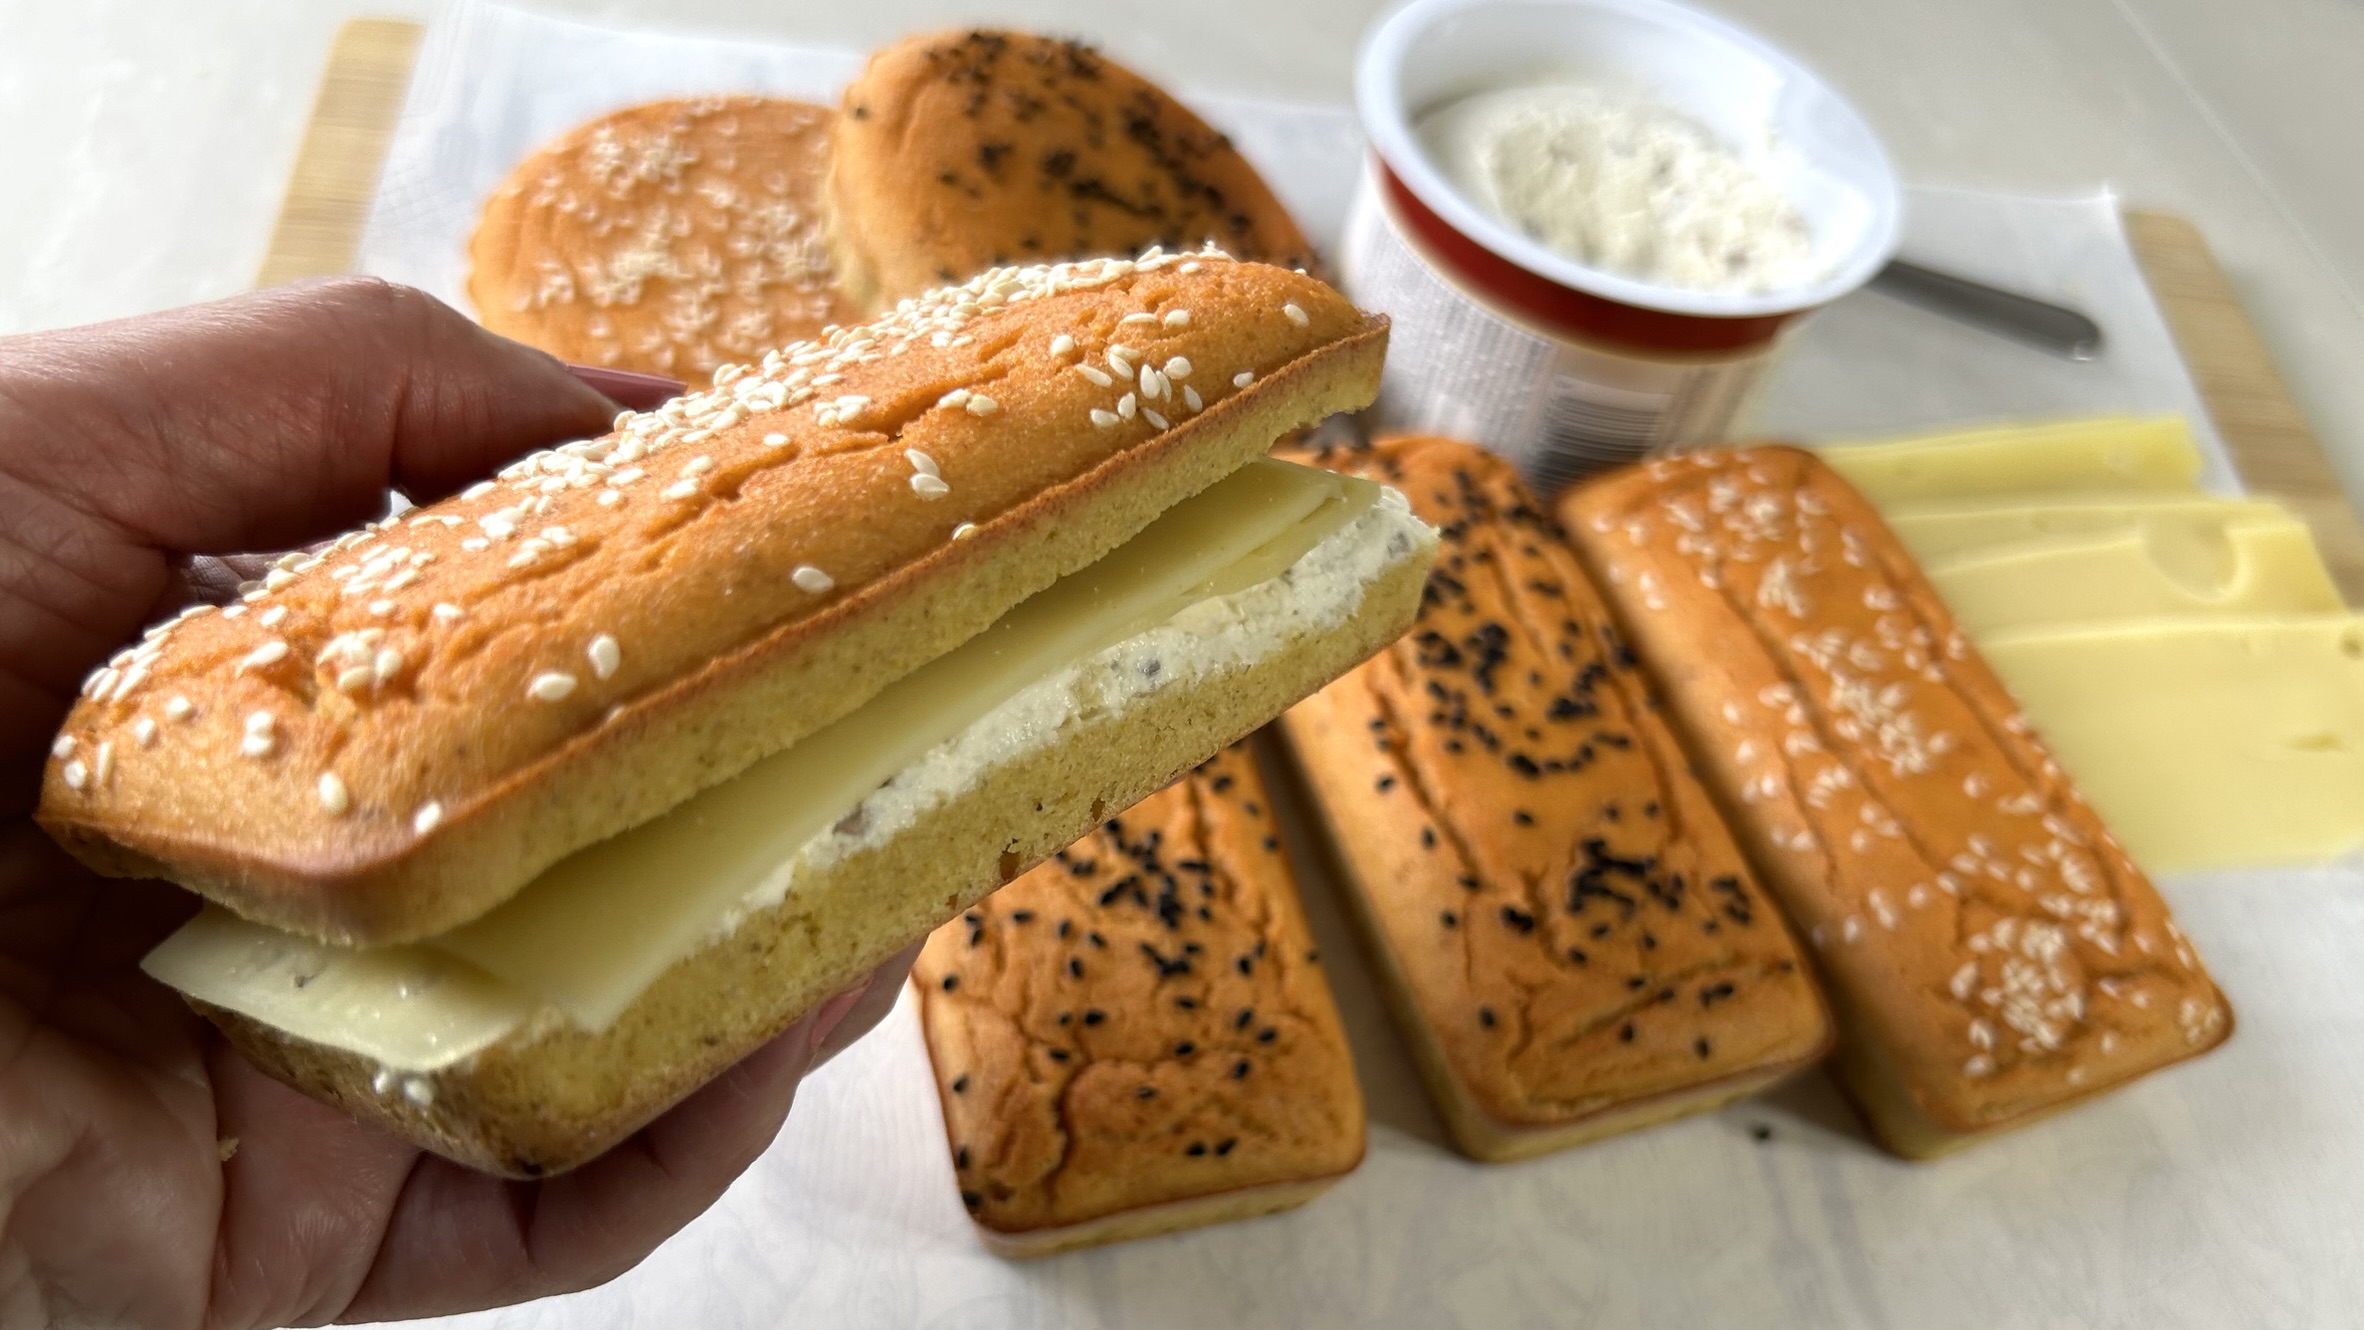
If you’re looking for a wholesome bread that’s incredibly easy to make while being naturally gluten-free, high in protein, and wonderfully satisfying, this Flaxseed Bread is about to become one of your favorite recipes. Unlike traditional breads that rely on refined wheat flour, this recipe uses freshly ground flaxseeds as its foundation, creating a soft, tender bread with a pleasantly light texture that works beautifully for sandwiches, breakfast toast, burgers, savory spreads, or simply enjoyed warm with your favorite toppings.
One of the best things about this recipe is its simplicity. With only a handful of everyday ingredients, you can prepare fresh homemade bread in under an hour without kneading, rising time, or complicated techniques. The combination of eggs and Greek yogurt helps create a moist, fluffy crumb while adding extra protein, making each serving both nourishing and filling. A touch of oregano adds subtle savory flavor, but you can easily customize the recipe with your favorite herbs and spices to suit any meal.
This bread is also an excellent option for anyone following a gluten-free lifestyle or simply trying to reduce their intake of refined carbohydrates without giving up the comfort of freshly baked bread. Thanks to its balanced combination of protein, healthy fats, and fiber, it provides lasting energy and helps keep you satisfied for longer, making it a fantastic choice for breakfast, lunch, or healthy snacks throughout the day.
The true star of this recipe is flaxseed, one of nature’s most nutrient-dense superfoods. Despite their tiny size, flaxseeds are packed with plant-based protein, dietary fiber, heart-healthy omega-3 fatty acids, vitamins, minerals, and exceptionally powerful antioxidants called lignans. Their impressive fiber content helps support healthy digestion, promotes regular bowel movements, nourishes beneficial gut bacteria, and contributes to longer-lasting fullness after meals. Research has also associated regular flaxseed consumption with improved heart health, healthier cholesterol levels, better blood sugar management, and reduced inflammation throughout the body. Because flaxseeds are among the richest natural sources of lignans, they have been extensively studied for their potential protective effects on overall health, particularly in supporting hormone balance. Including flaxseeds regularly in your diet is a simple and delicious way to increase your intake of healthy fats, fiber, and essential nutrients while supporting long-term wellness.
Ingredients
- 4 tbsp (40 g) whole flaxseeds
- 2 large eggs
- 2 tbsp Greek yogurt
- ¼ tsp salt
- ¼ tsp dried oregano (or your favorite herbs or spices)
- ½ tsp baking powder
- 1 tsp sesame seeds (or any seeds of your choice)
- Oil for greasing the ramekins
Directions
- Preheat your oven to 350°F (180°C).
- Place the flaxseeds in a coffee grinder, spice grinder, or high-speed blender and grind until they become a fine flour.
- In a medium mixing bowl, combine the eggs, Greek yogurt, salt, and dried oregano.
- Whisk thoroughly until the mixture becomes completely smooth and well combined.
- Add the freshly ground flaxseed flour along with the baking powder.
- Stir vigorously until a thick, uniform dough forms. The flaxseed flour will quickly absorb the moisture, creating a slightly sticky but easy-to-spoon batter.
- Lightly grease two small circular quiche ramekins (approximately 10 cm / 4 inches in diameter), or use silicone ramekins.
- Divide the dough evenly between the prepared ramekins.
- Smooth the tops using the back of a spoon.
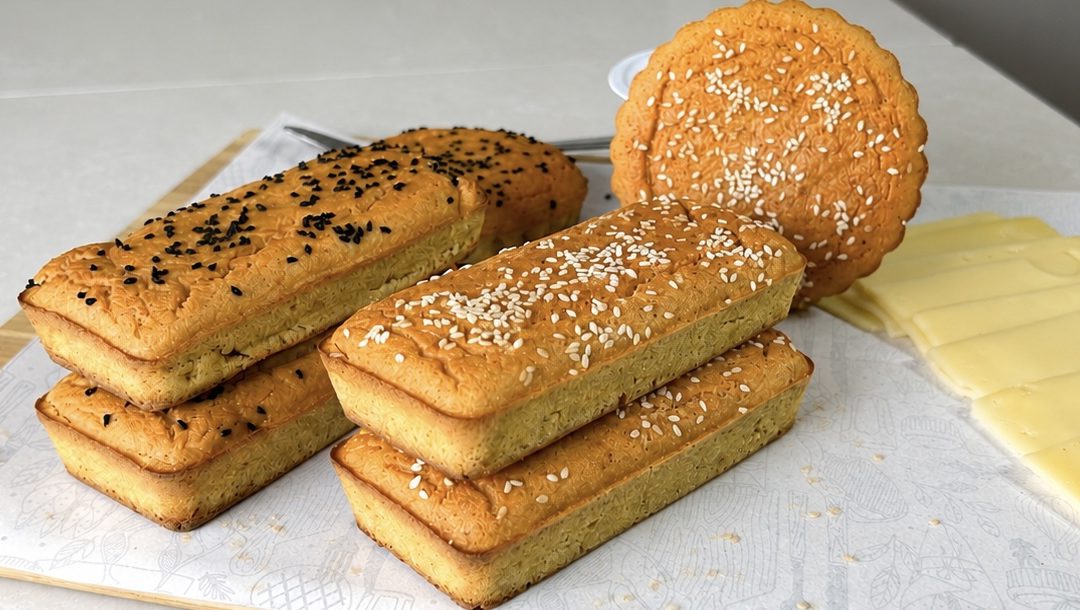
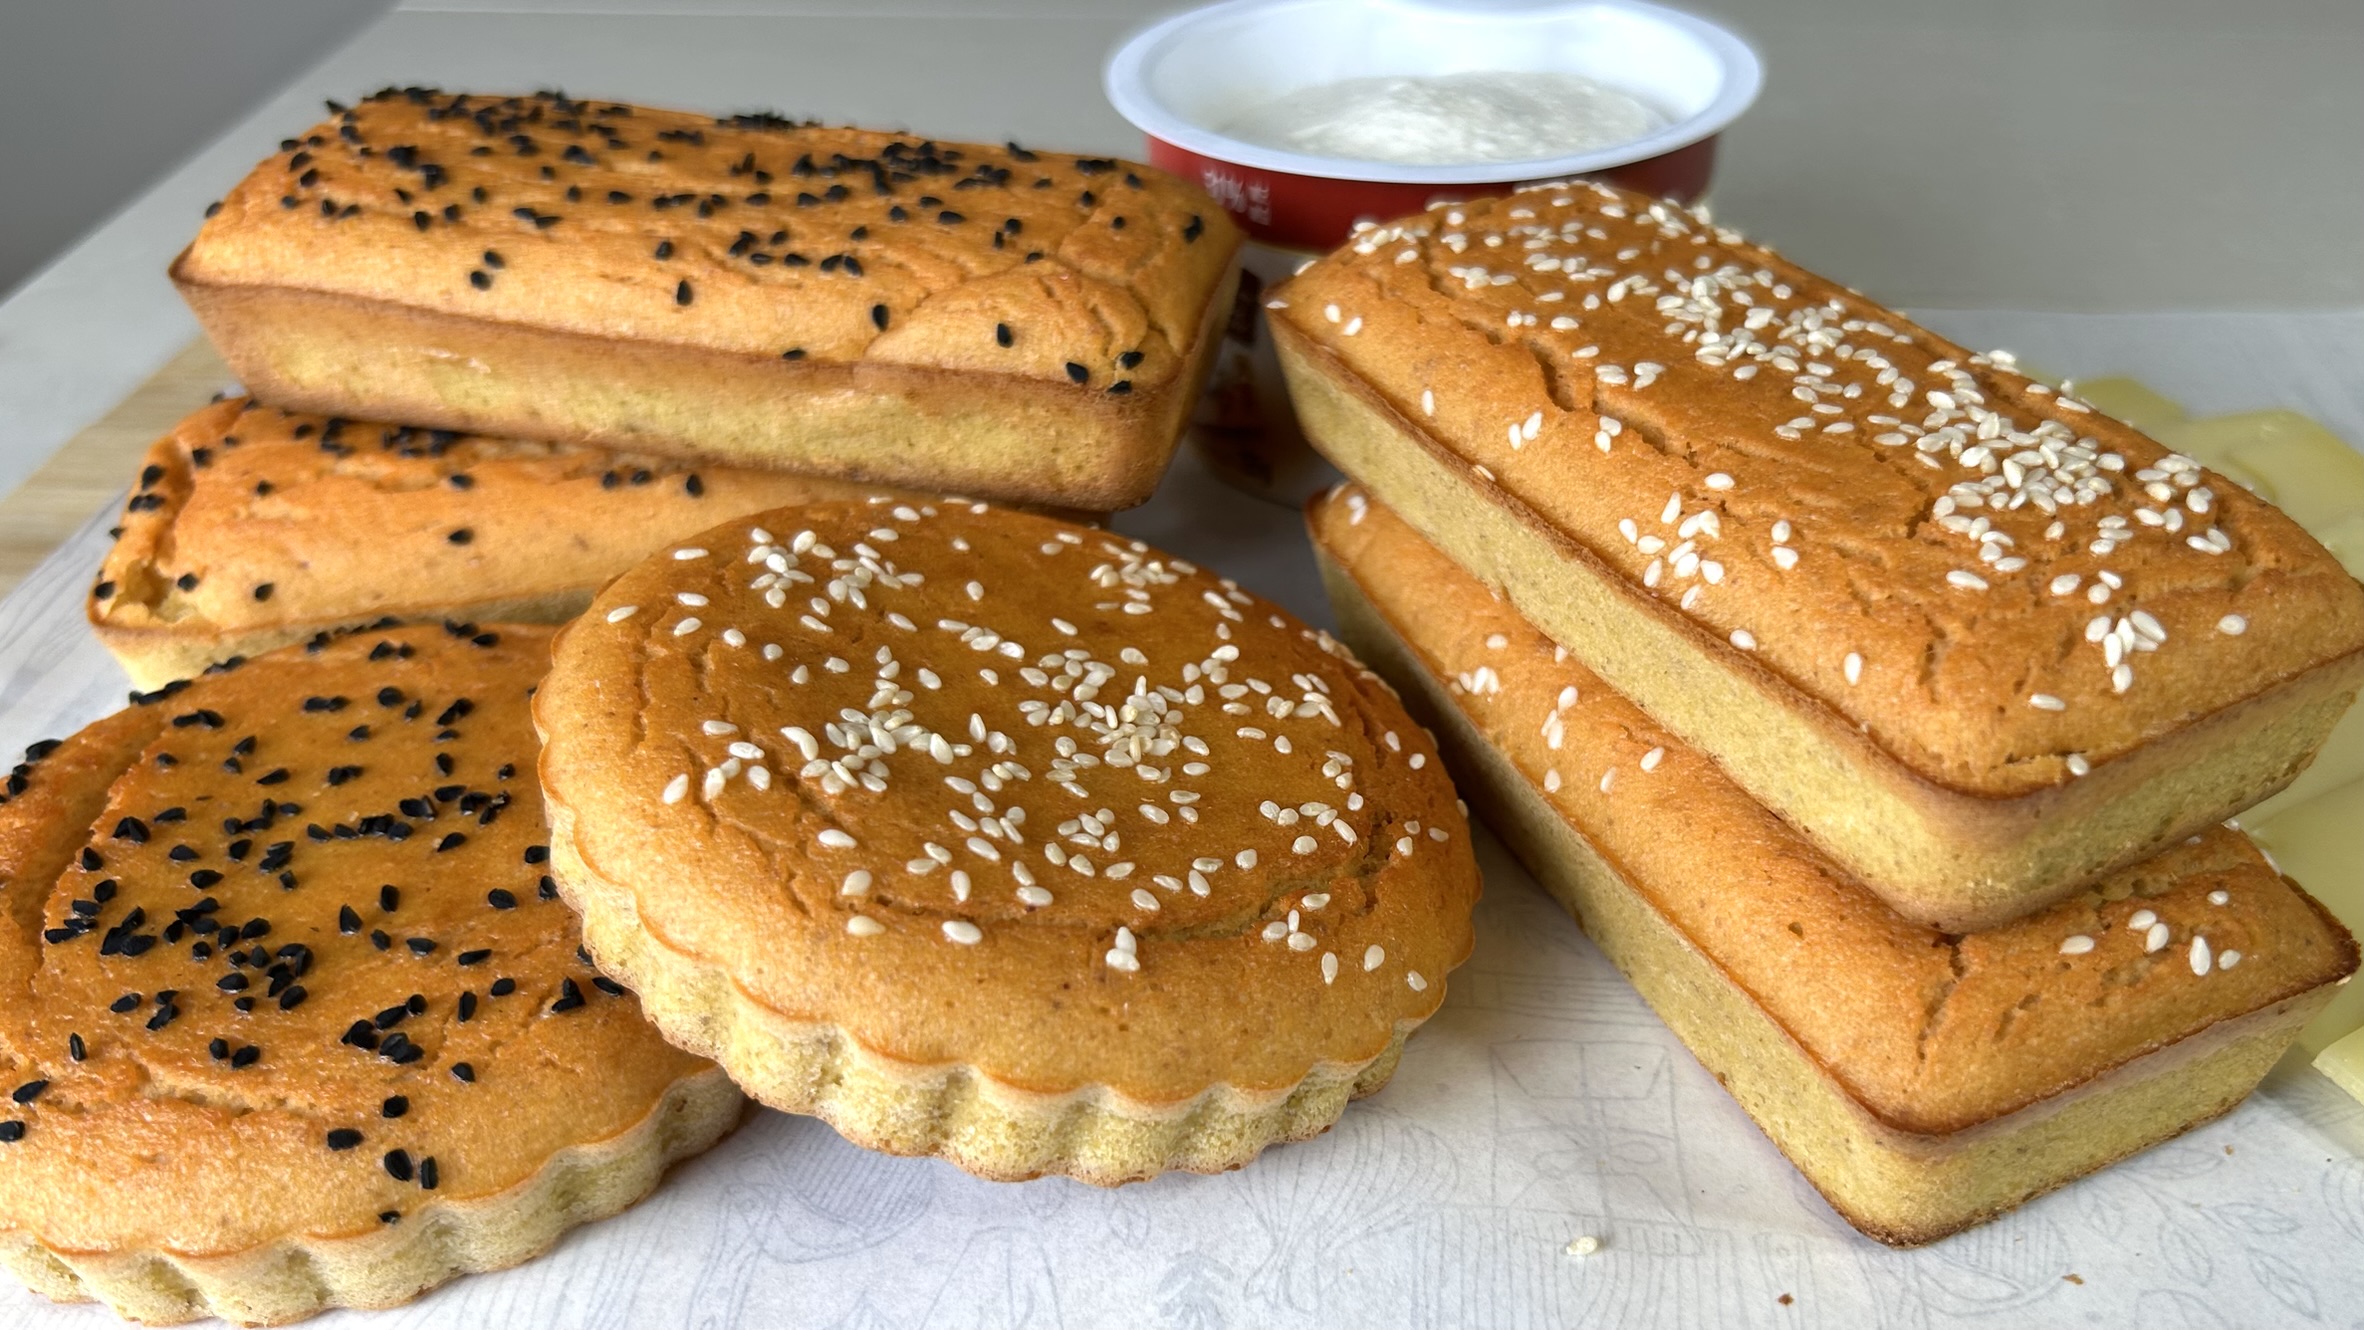
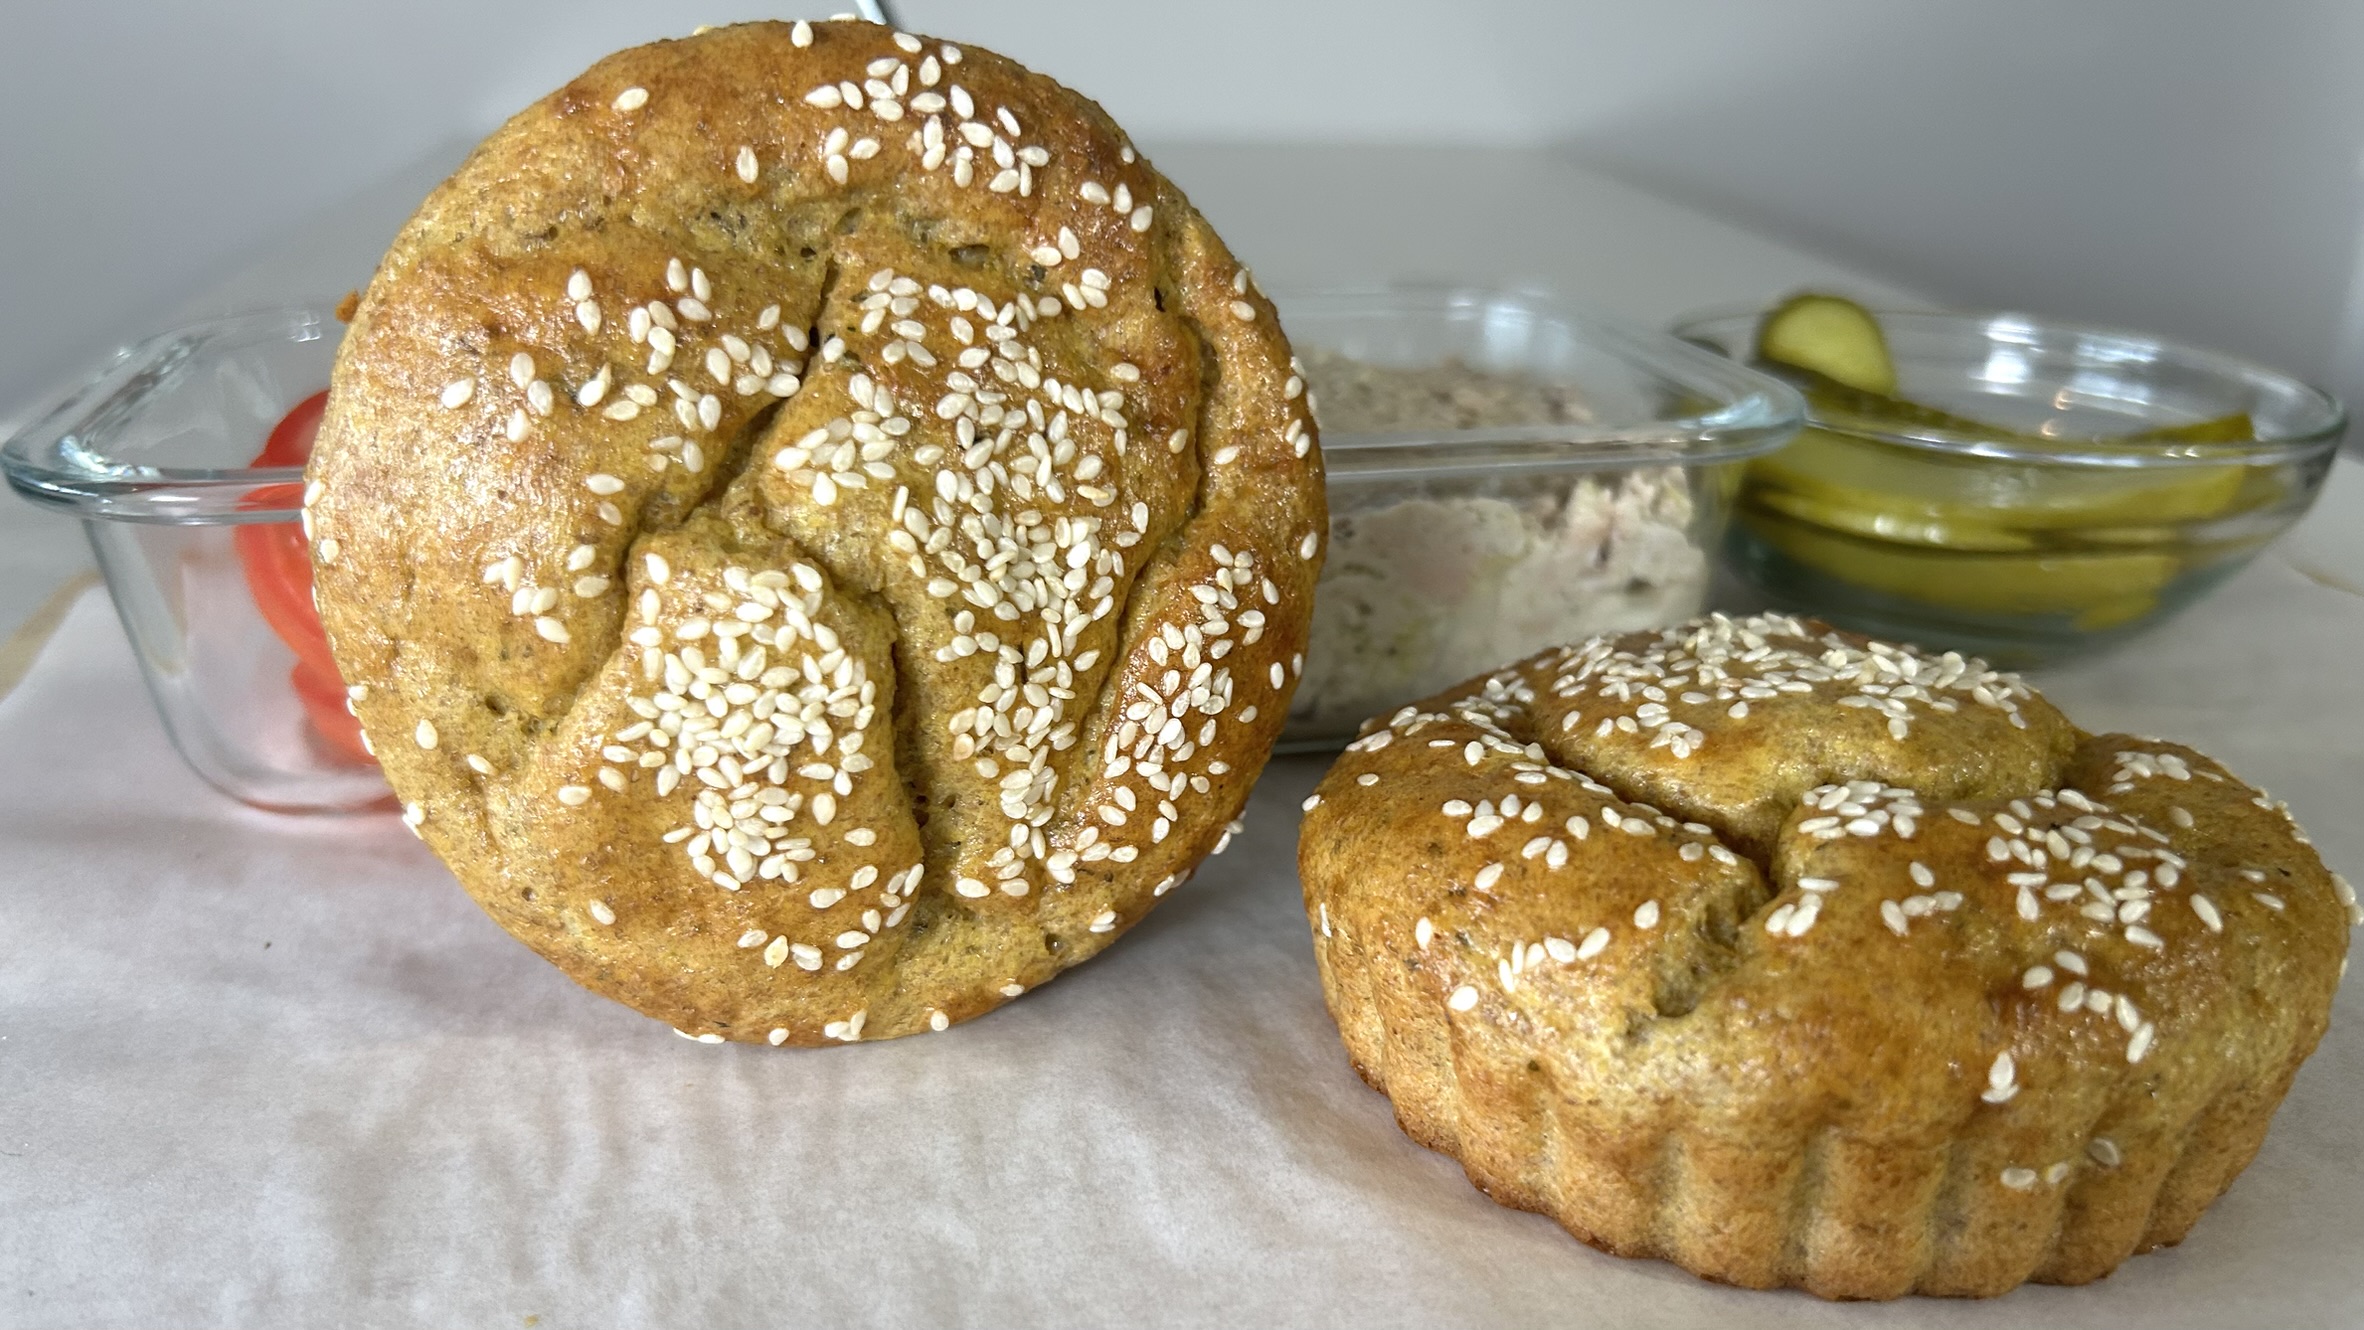
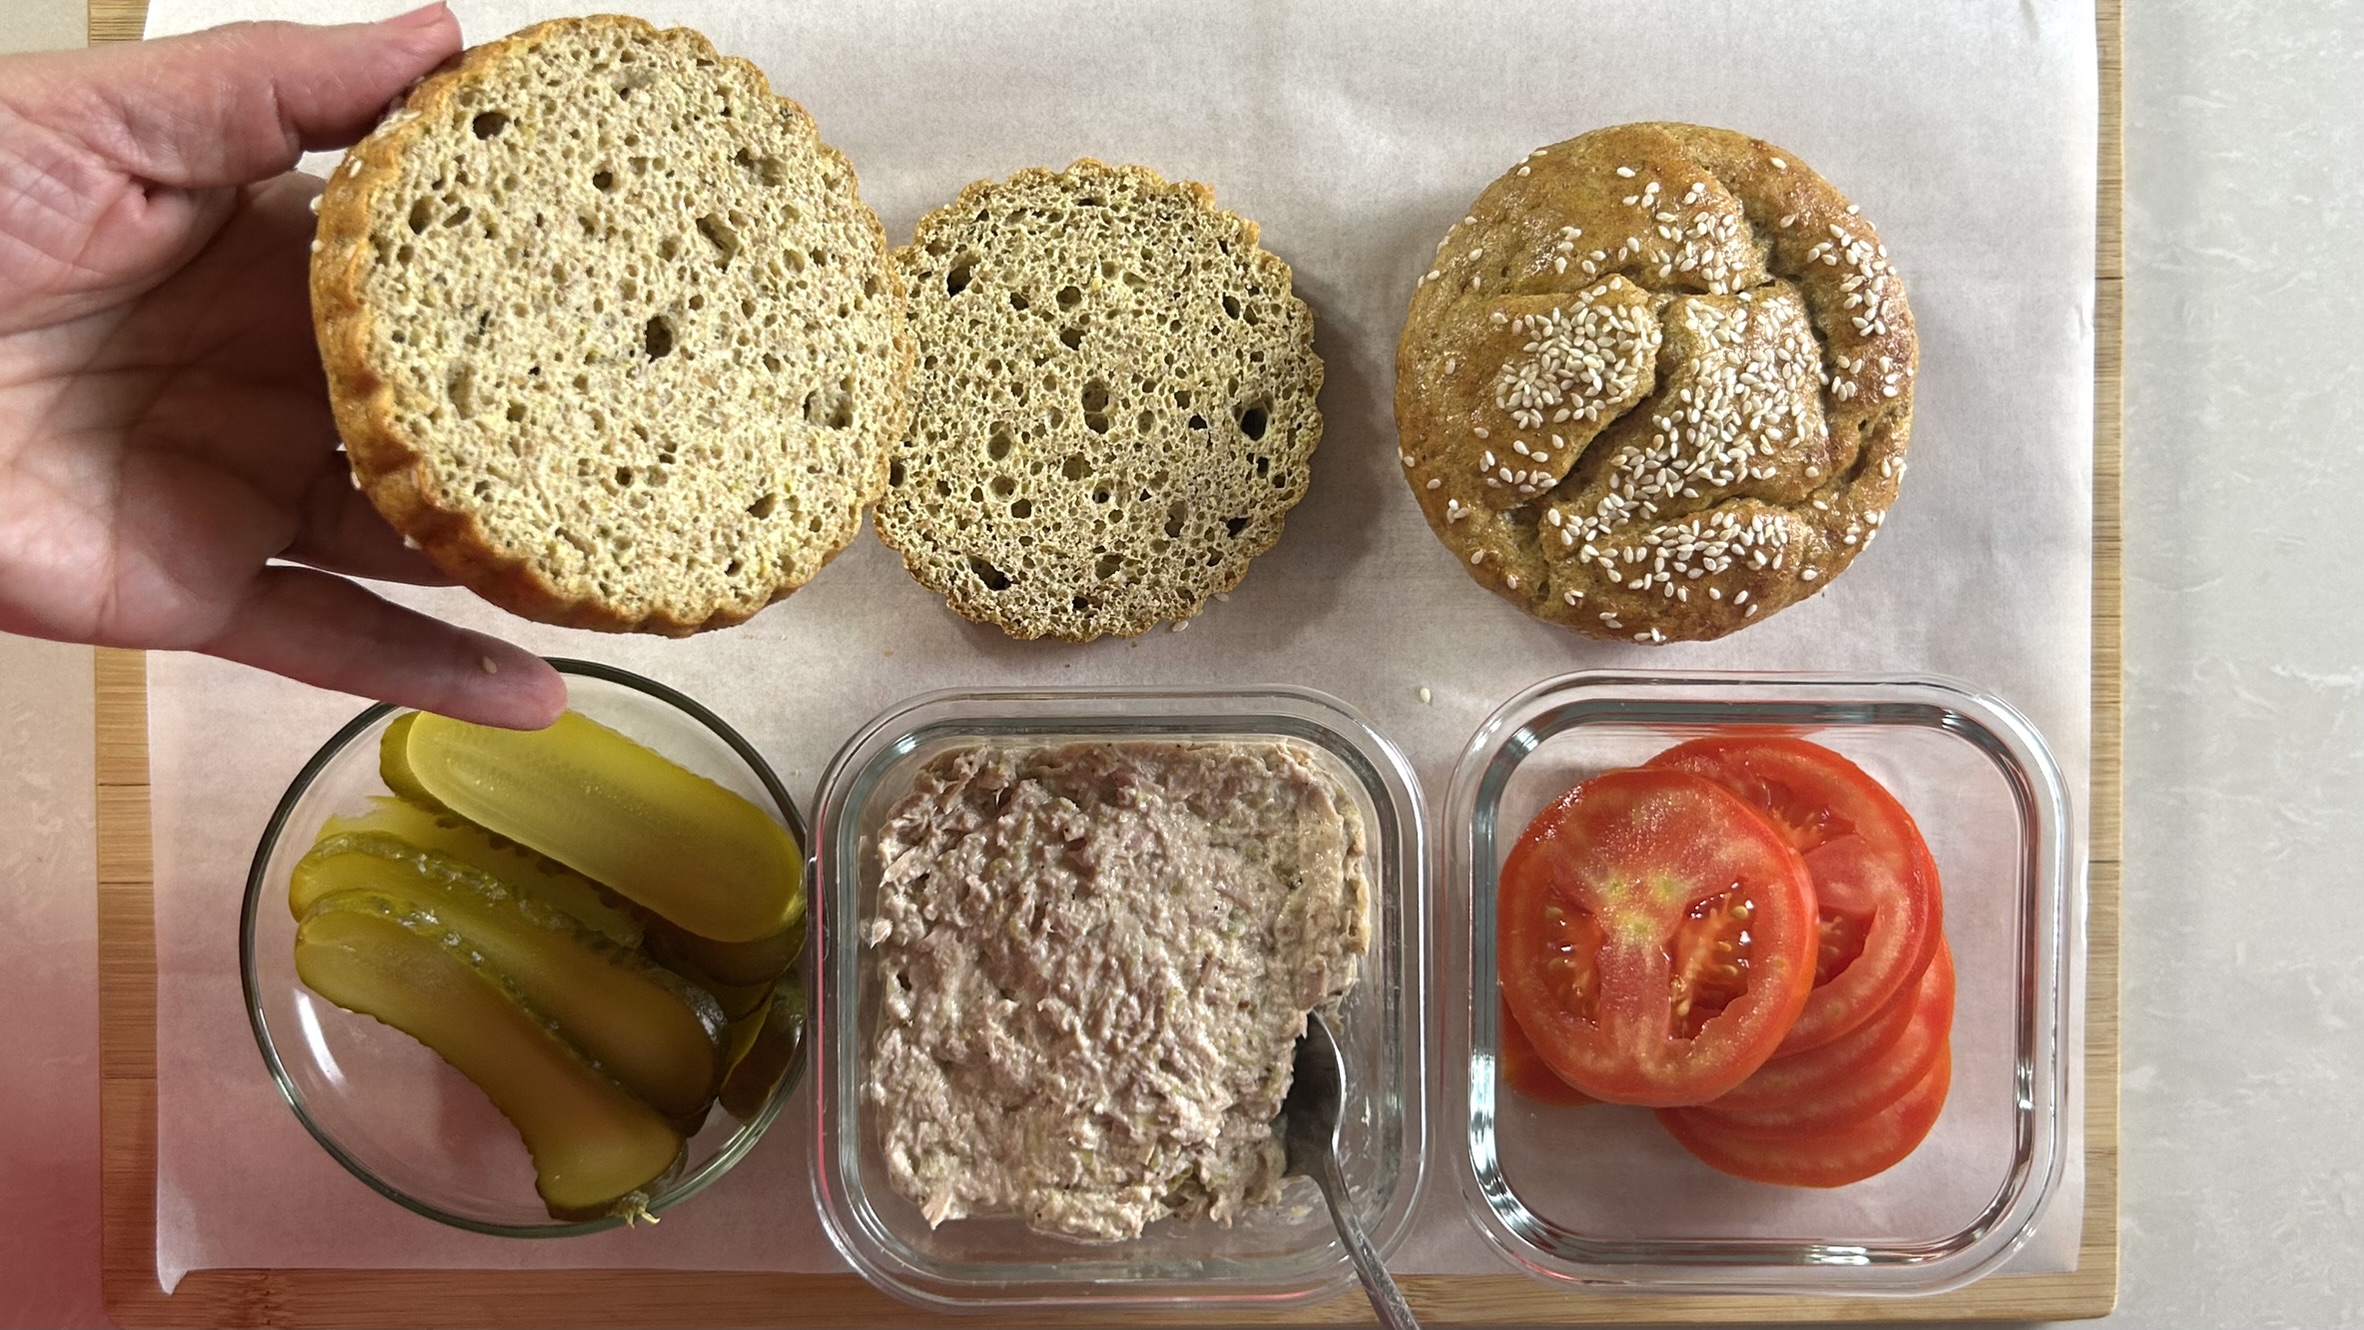
- Sprinkle evenly with sesame seeds or any seeds you enjoy.
- Bake for 30–35 minutes, or until the tops are lightly golden and the bread feels firm when gently pressed.
- Allow the breads to cool for several minutes before removing them from the ramekins and serving.
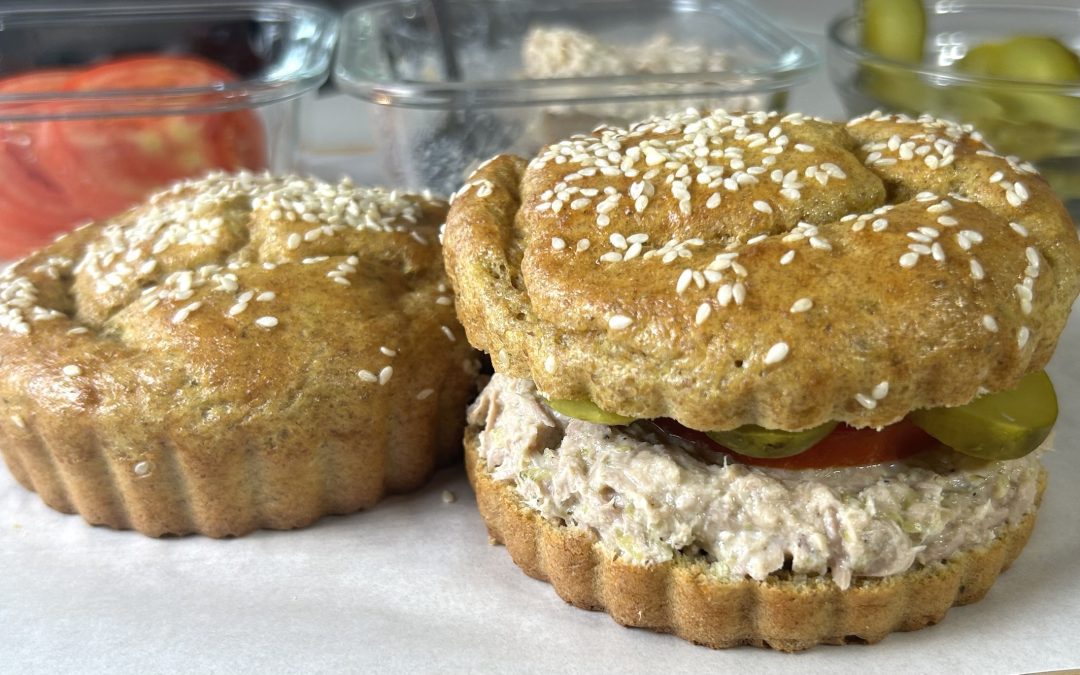
Recipe Information
Yield: 2 breads
Preparation Time: 15 minutes
Baking Time: 30–35 minutes
Dietary Information: Naturally gluten-free, high in protein, low in carbohydrates, rich in dietary fiber.
Nutritional Information
Per Bread
- Calories: 197
- Protein: 11.11 g
- Fat: 14.05 g
- Carbohydrates: 8.16 g
- Fiber: 5.7 g
Storage & Recommendations
- Store the breads in an airtight container at room temperature for up to 5 days.
- Freeze individually for up to 3 months. Thaw at room temperature or warm gently before serving.
- Feel free to replace the oregano with garlic powder, Italian seasoning, rosemary, thyme, paprika, or your favorite herbs and spices.
- Sprinkle with sunflower seeds, pumpkin seeds, poppy seeds, or everything bagel seasoning for extra flavor and texture.
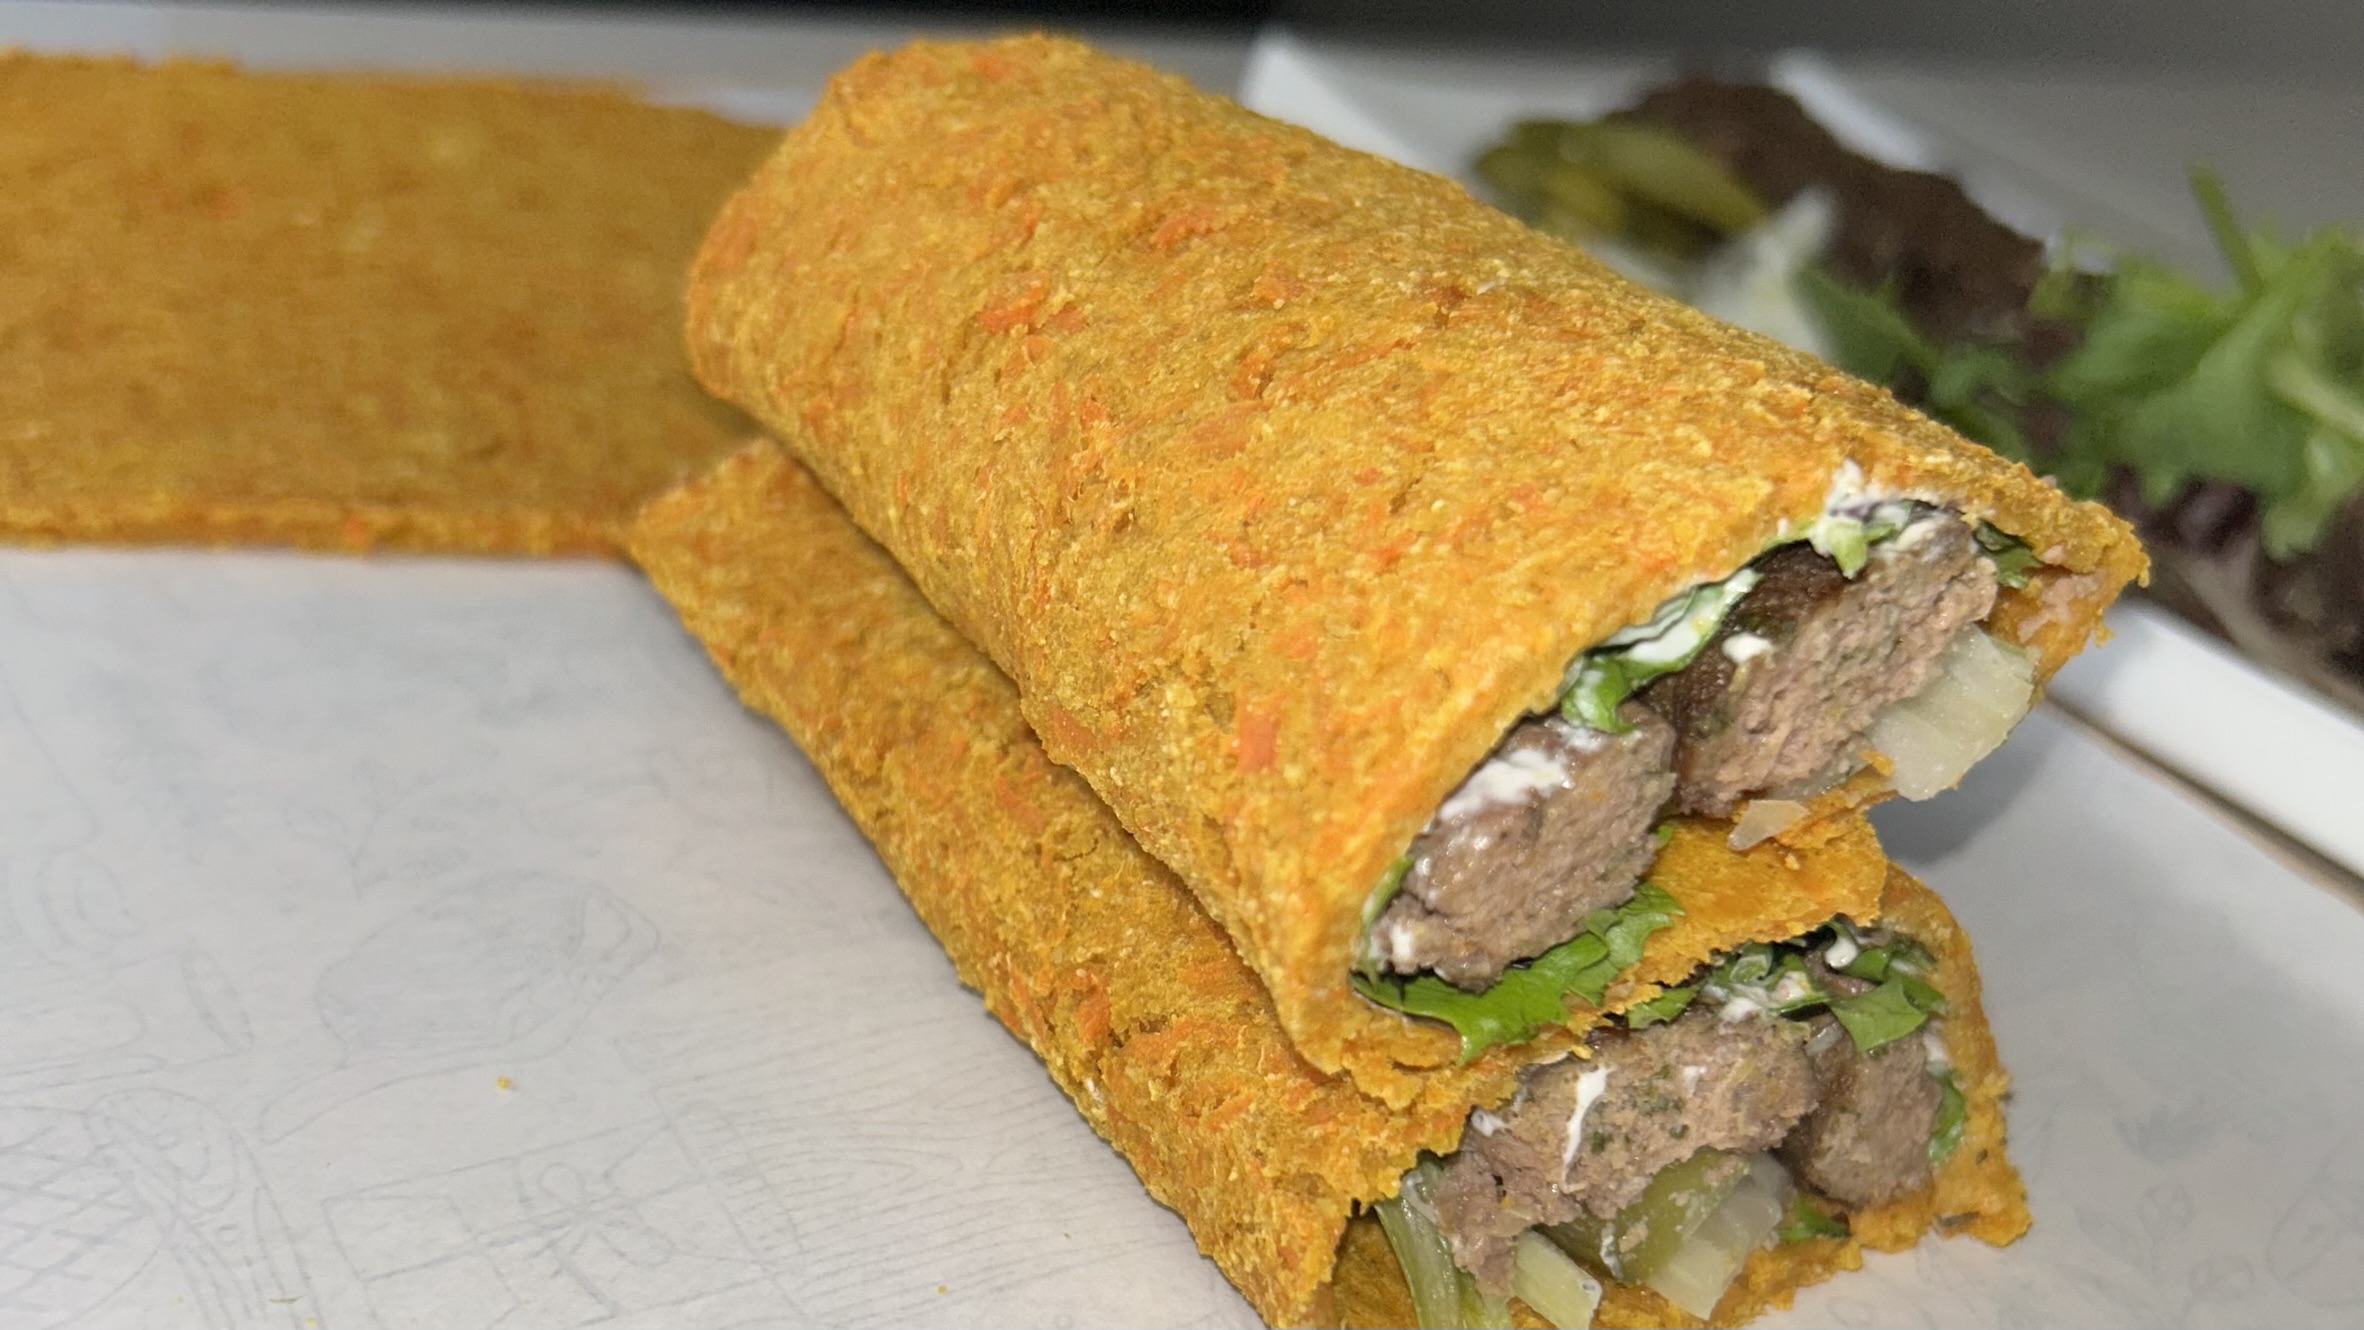
- These breads make an excellent base for sandwiches, breakfast toast, burgers, or savory snacks.
- For an extra crispy exterior, lightly toast the bread before serving.
- Because flaxseed flour absorbs moisture quickly, grind the flaxseeds just before preparing the recipe for the freshest flavor and best texture.