Cottage Cheese & Oat Flatbreads

Cottage Cheese & Oat Flatbreads

Cottage Cheese & Oat Flatbreads

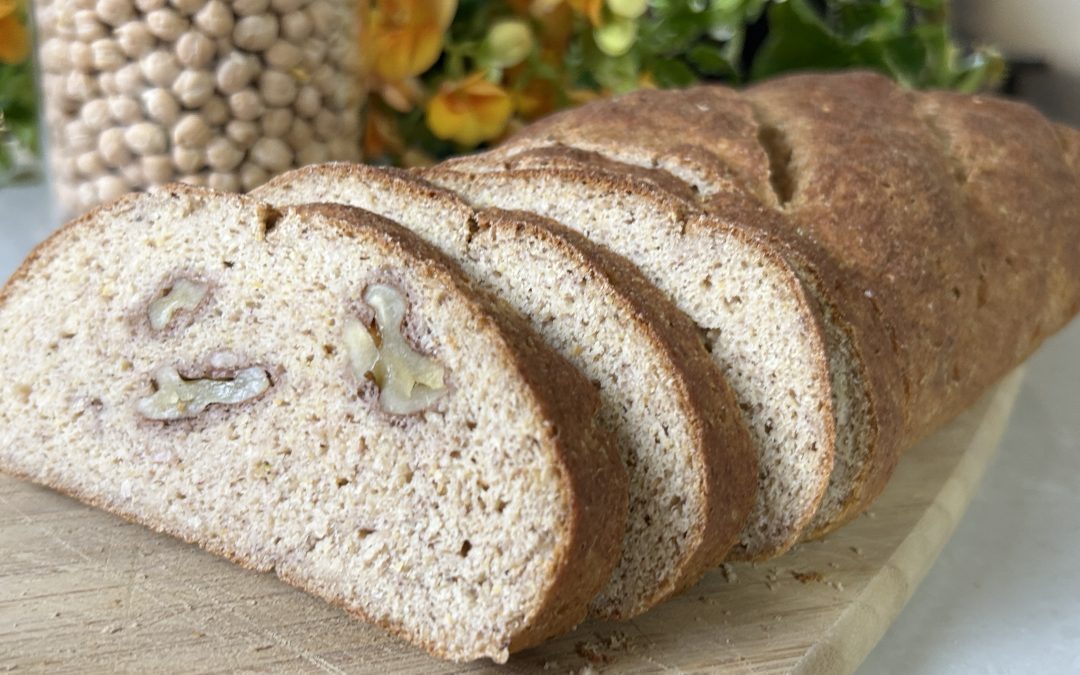
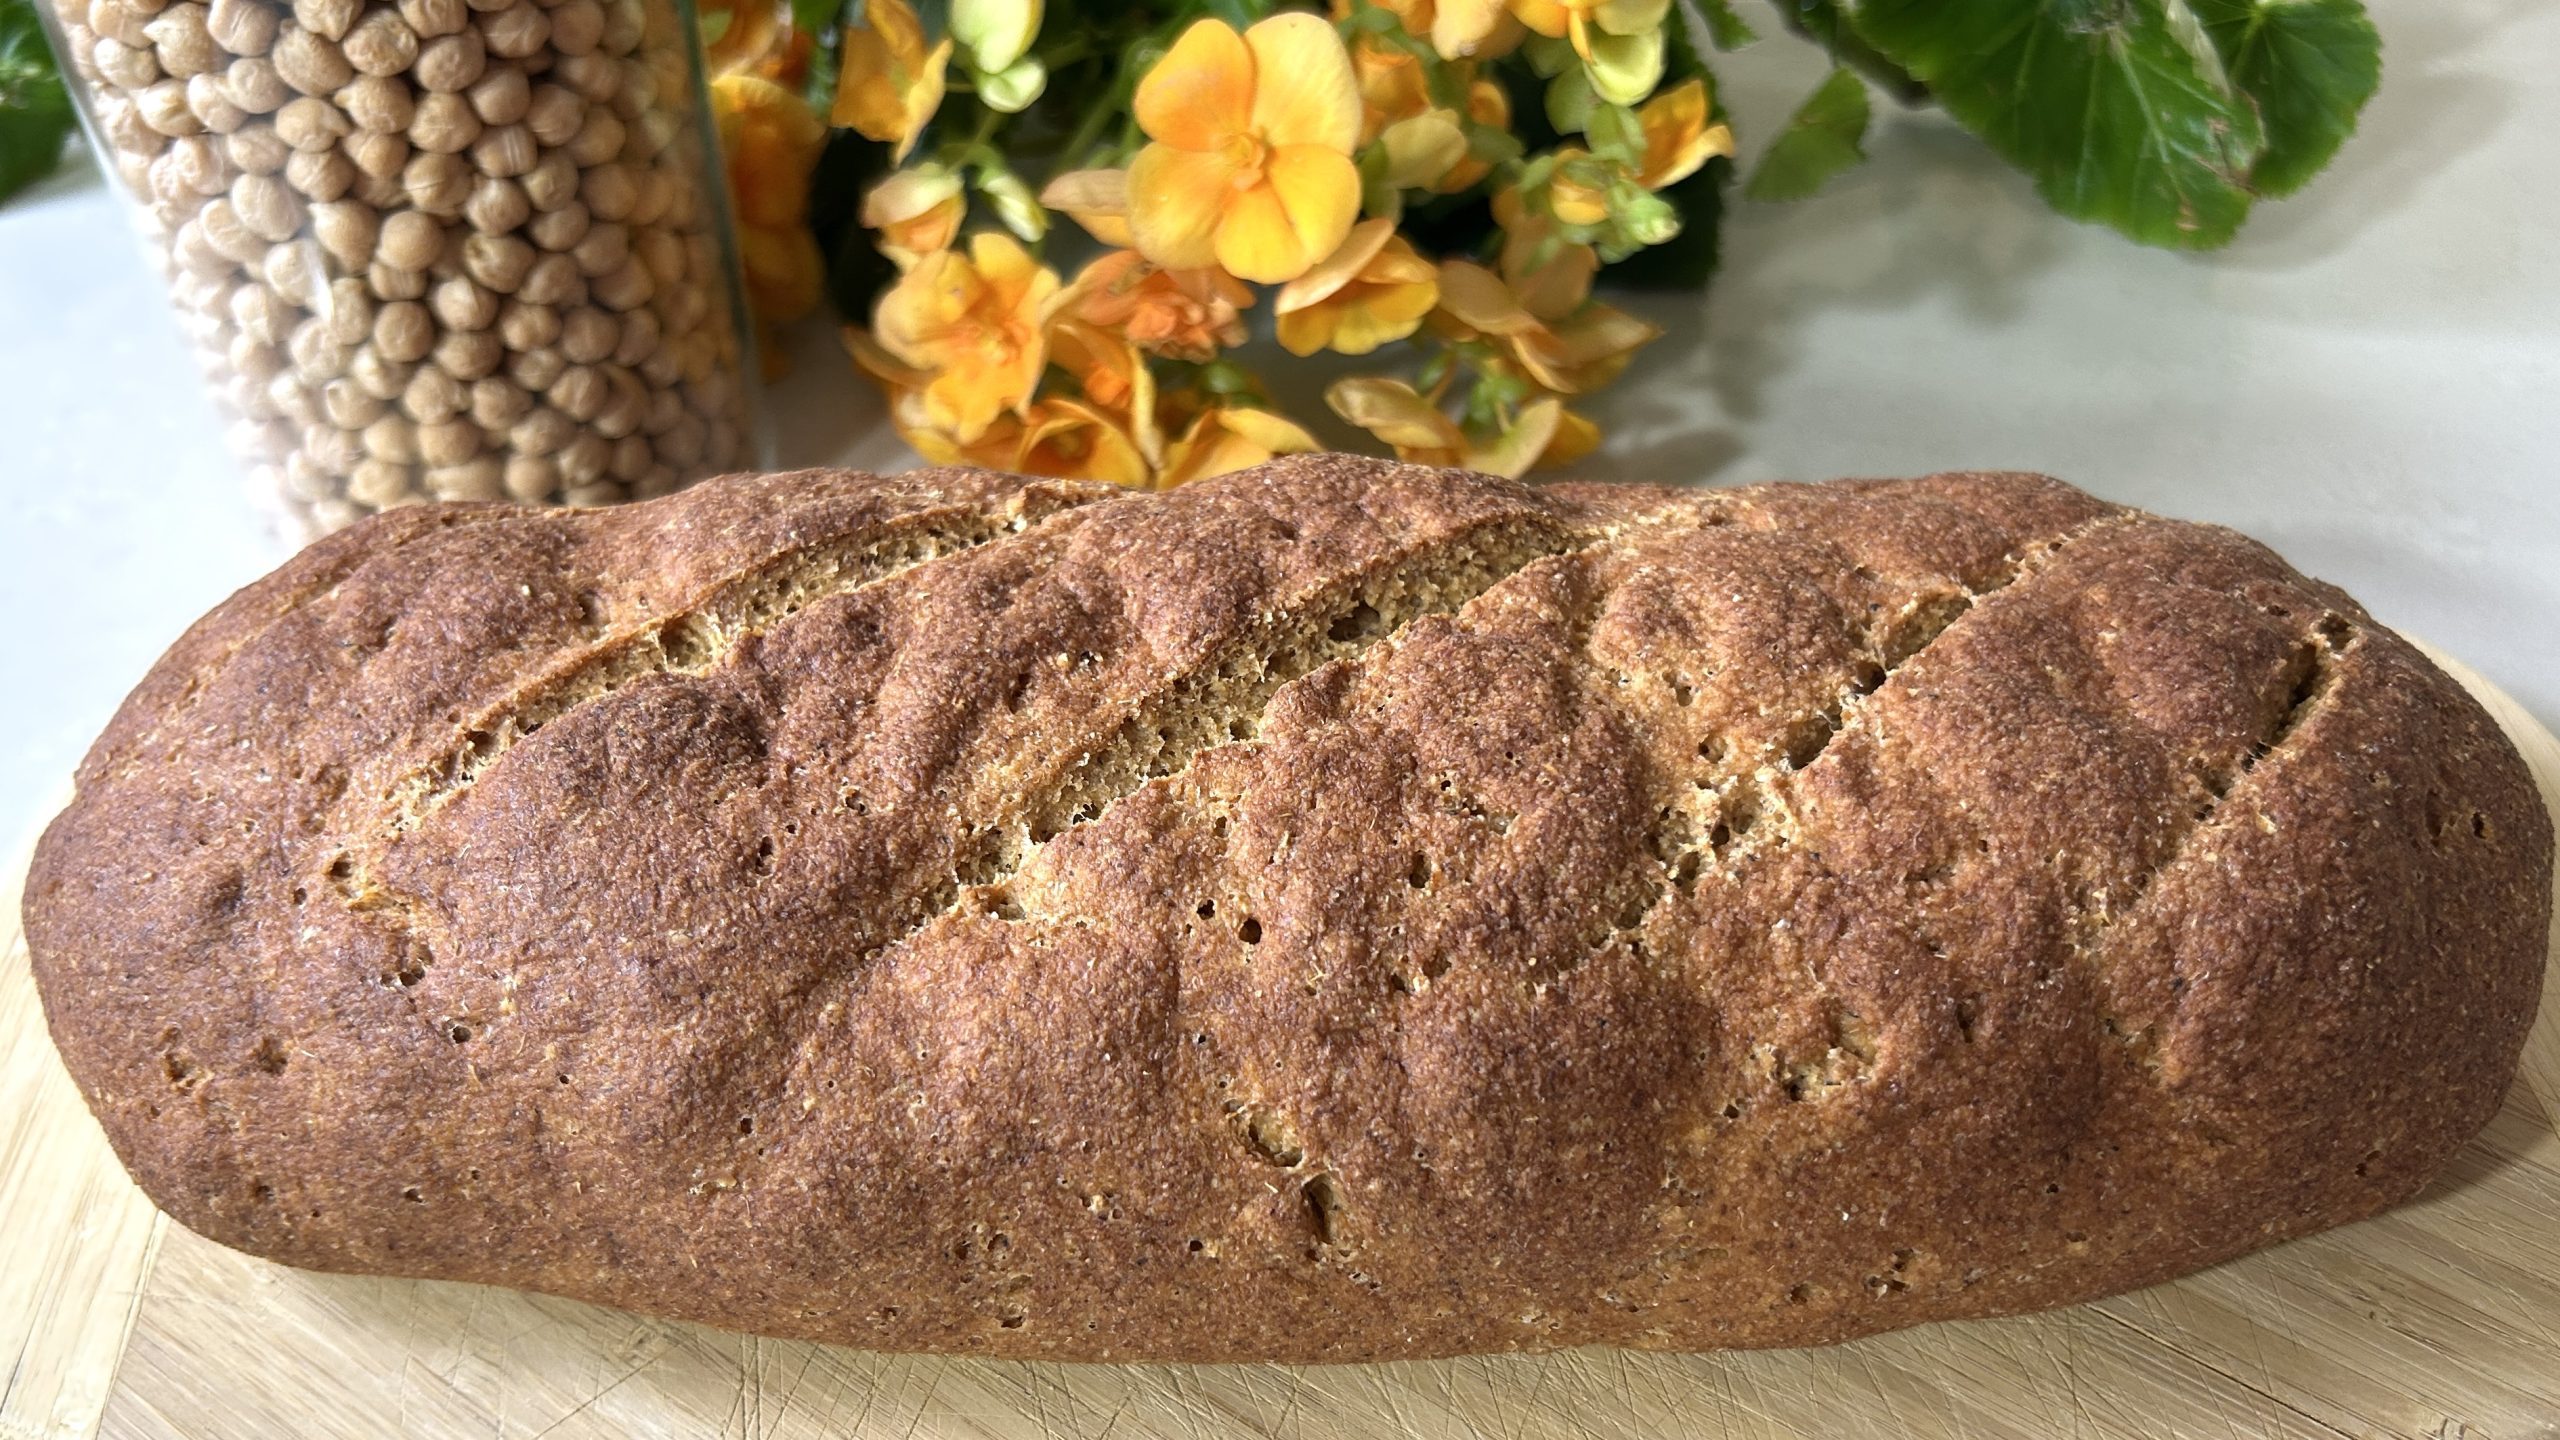
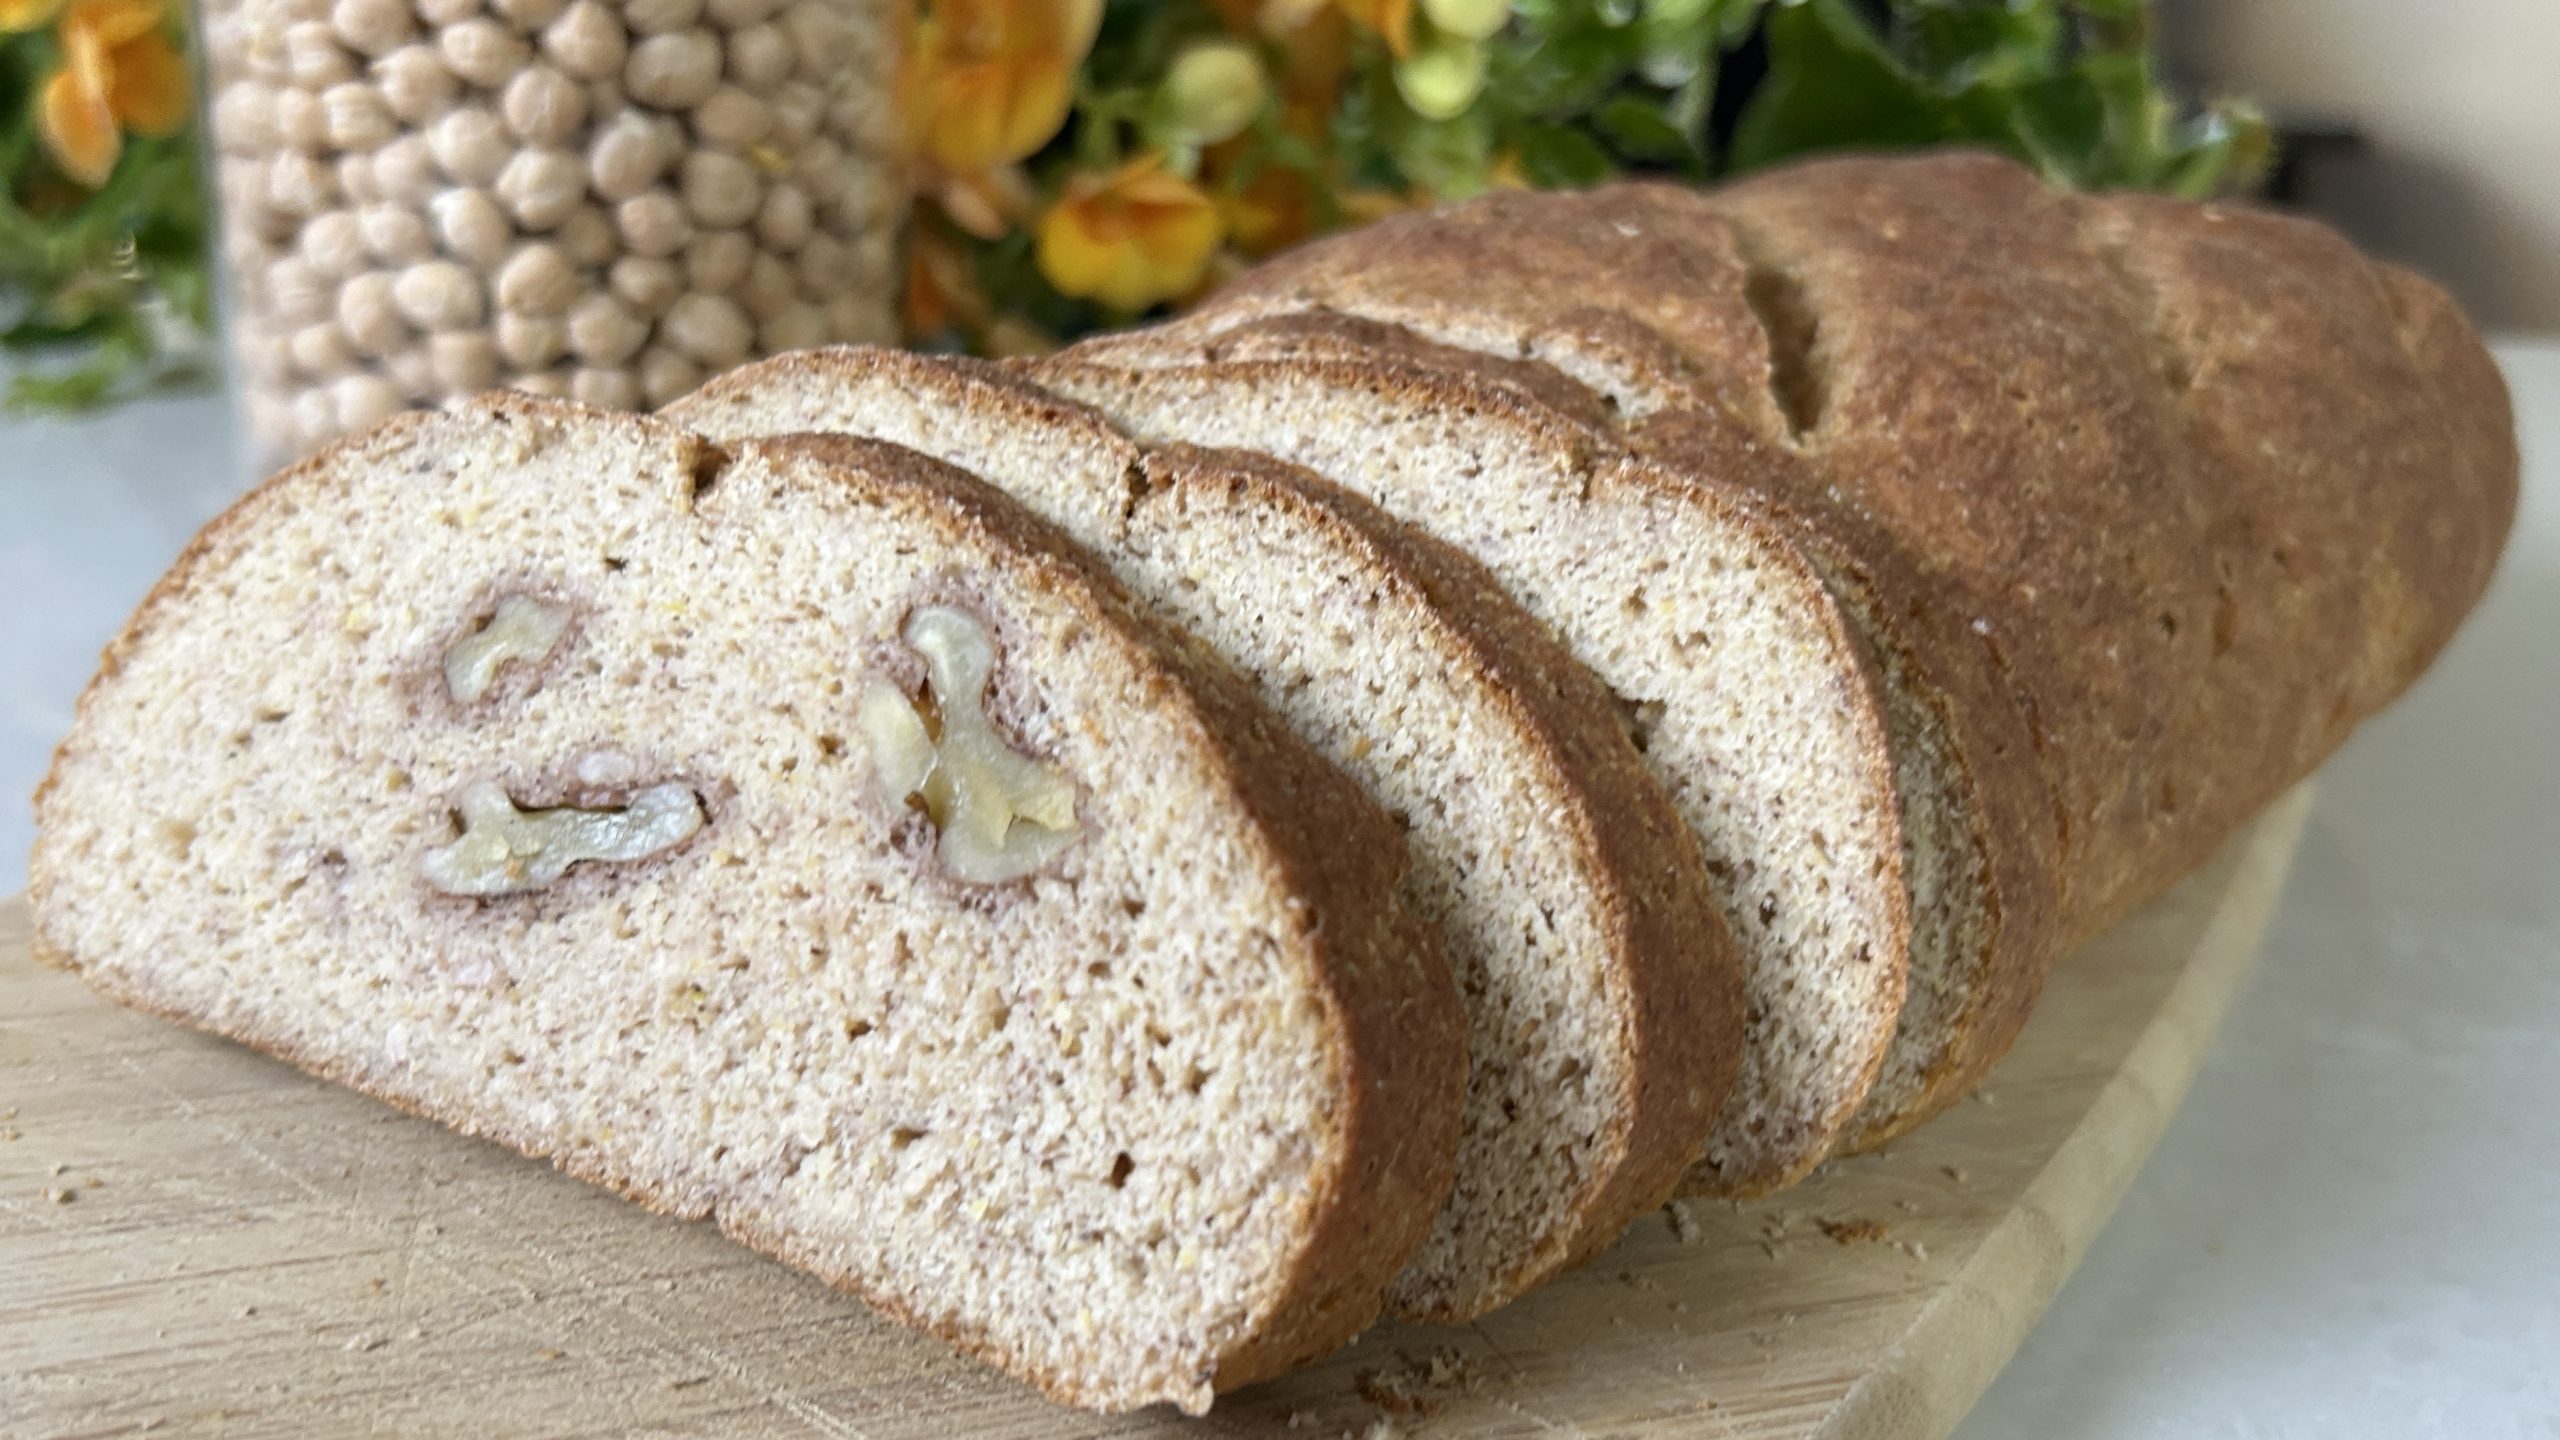
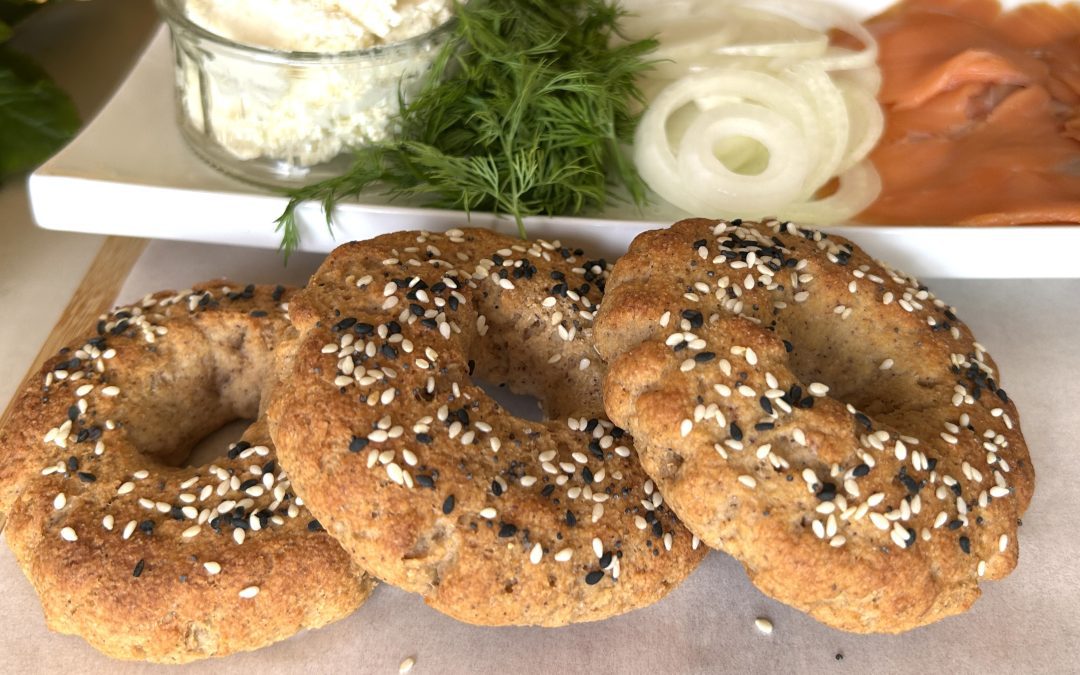
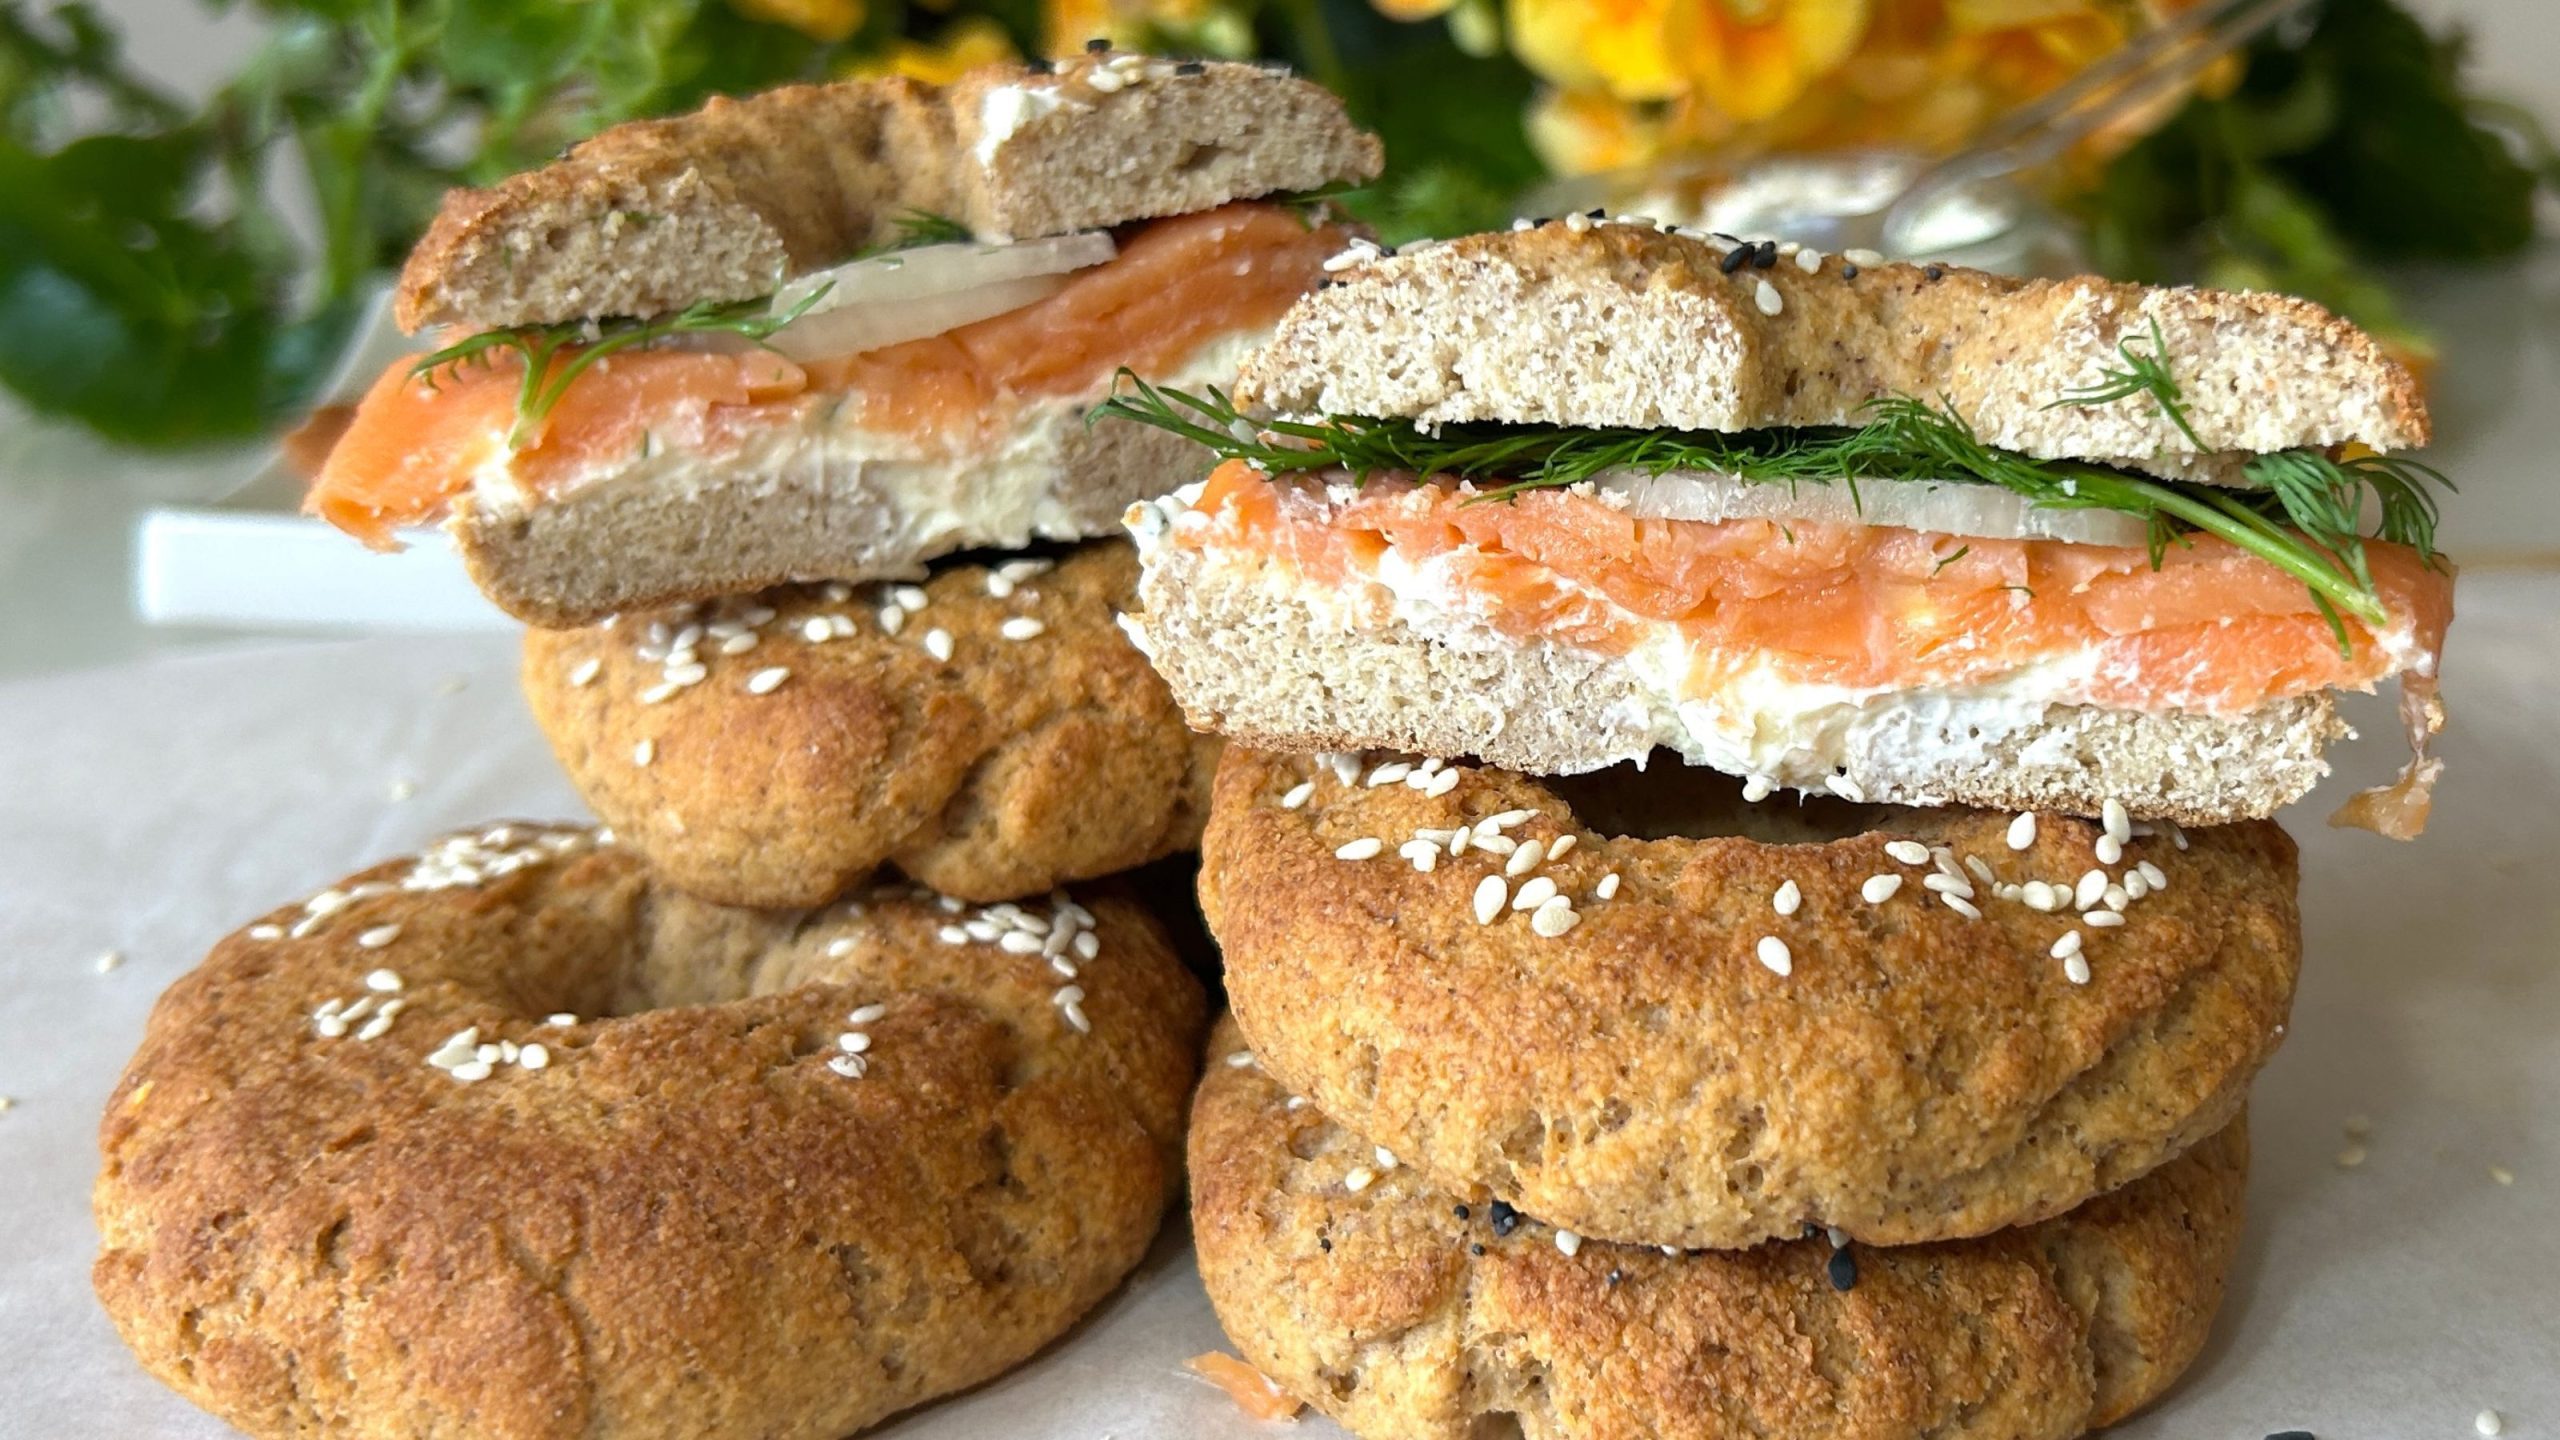
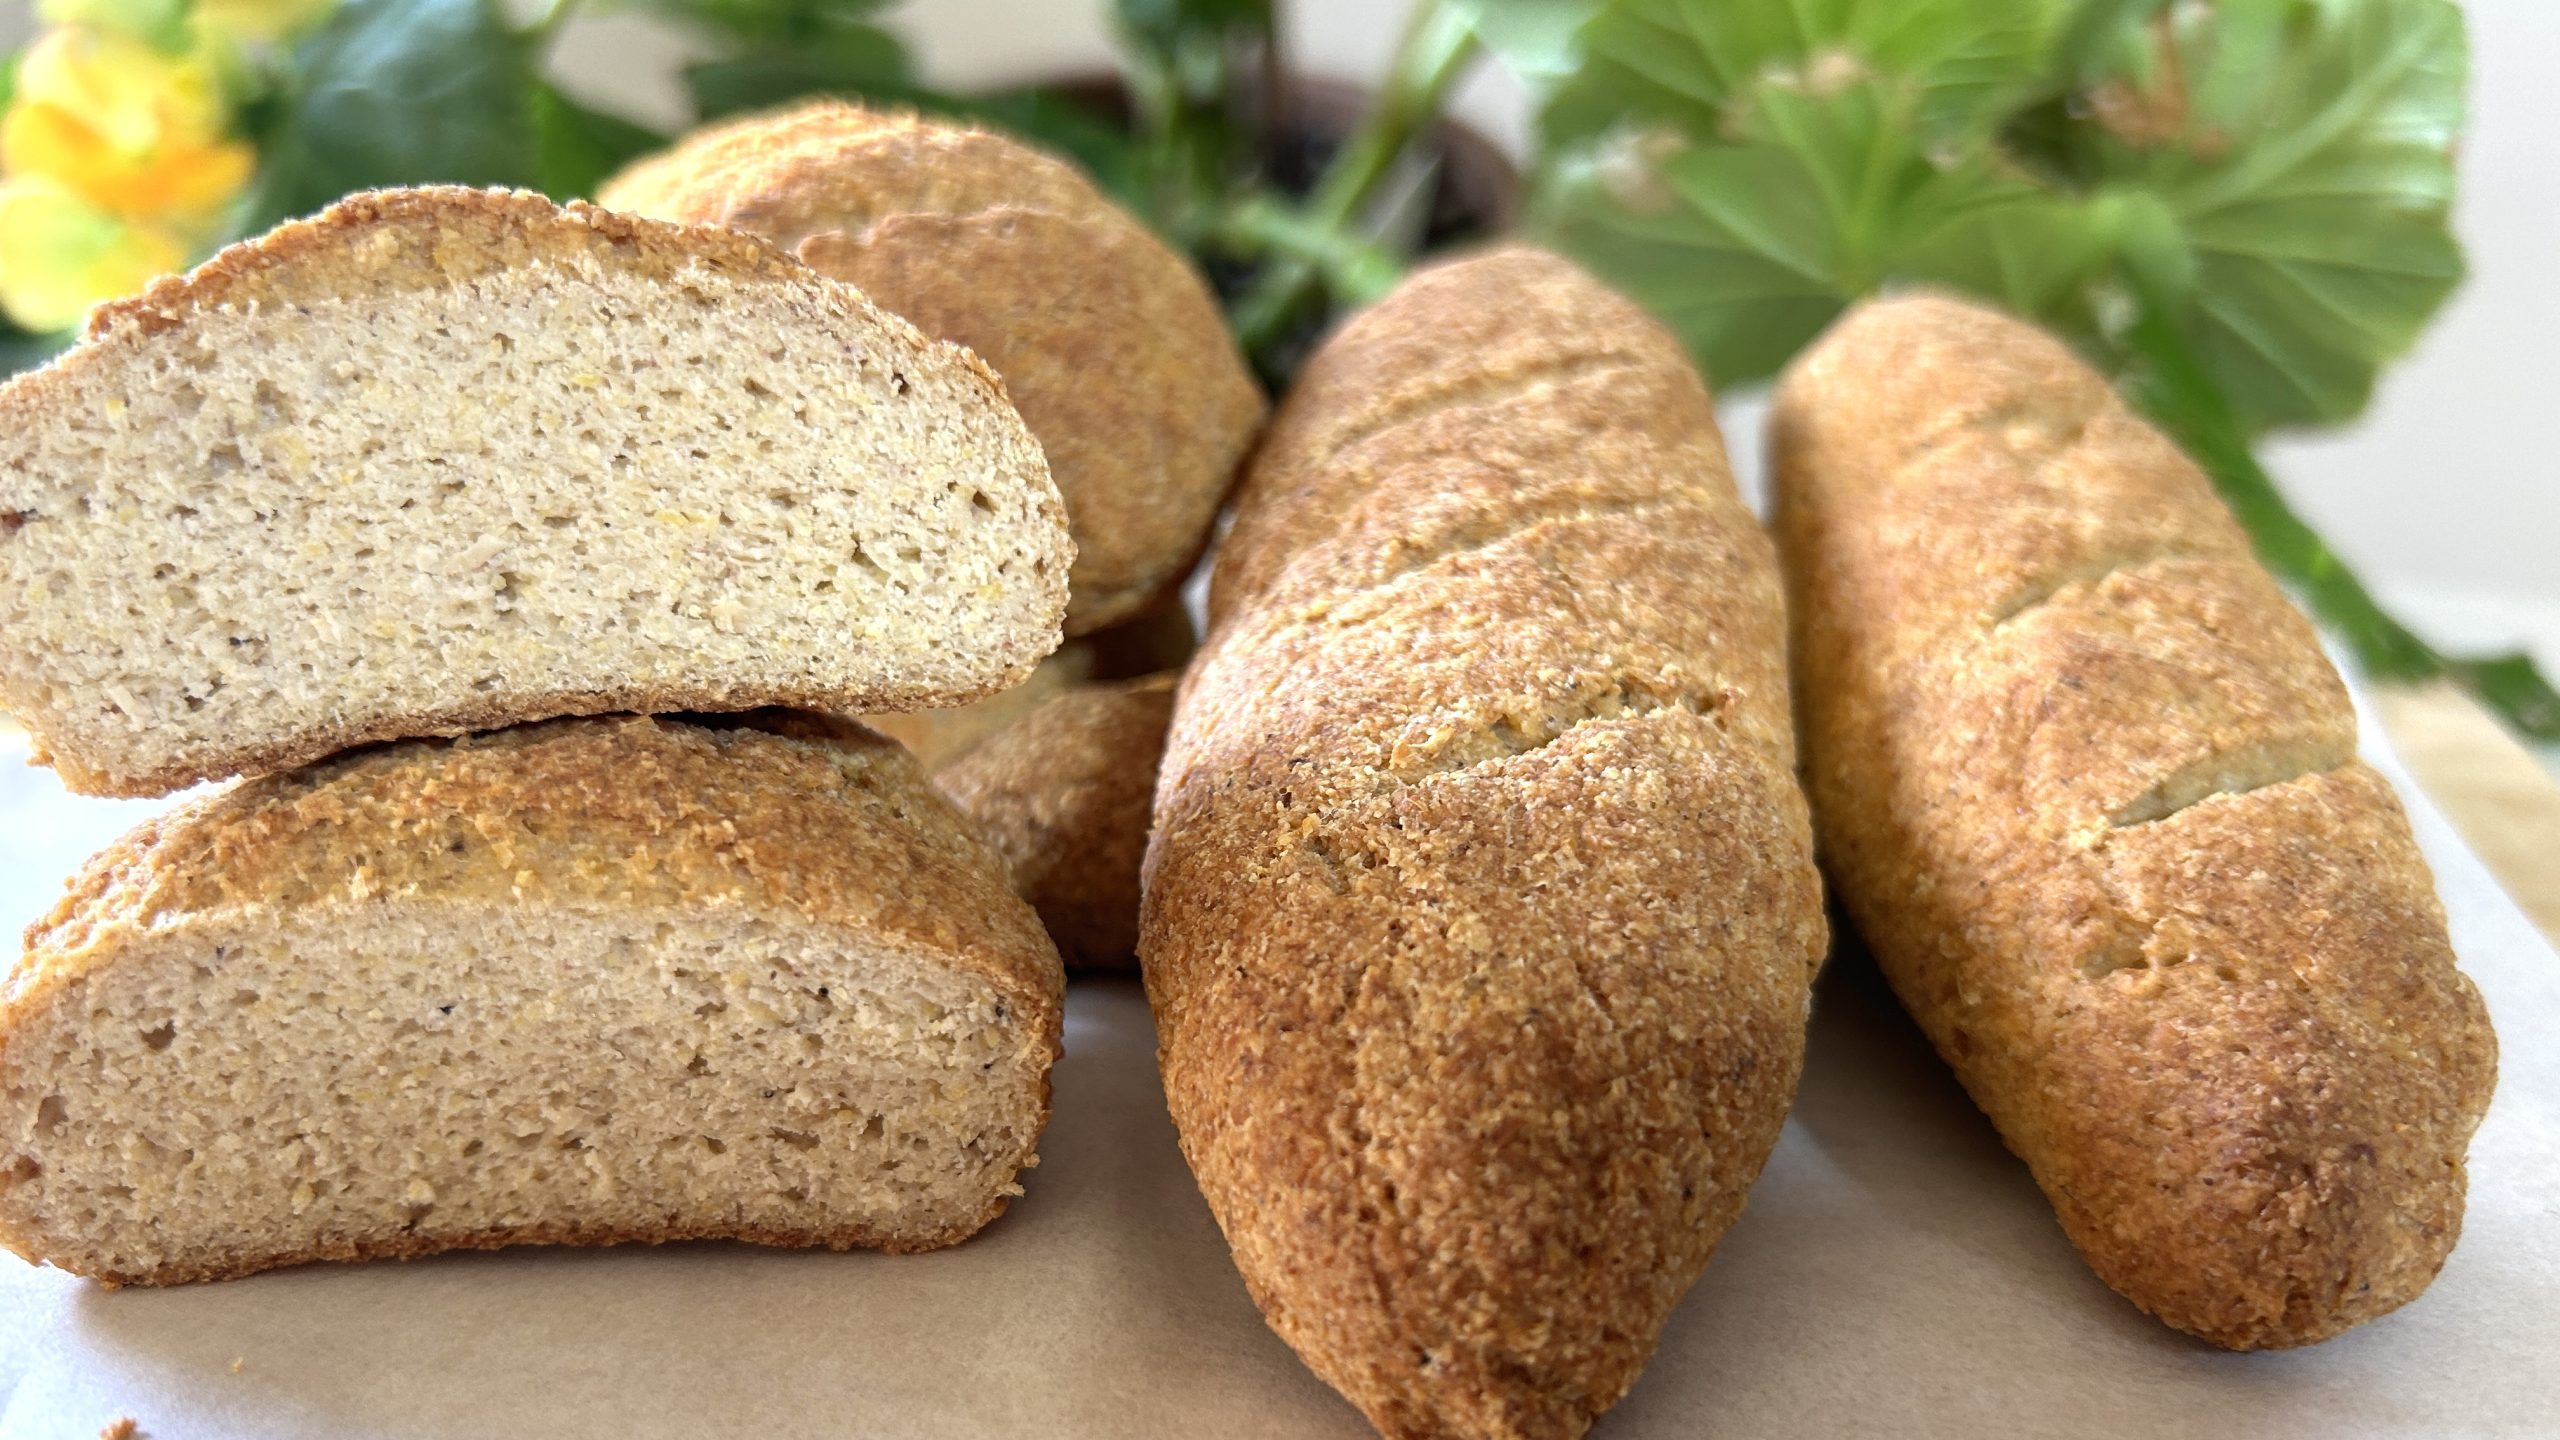
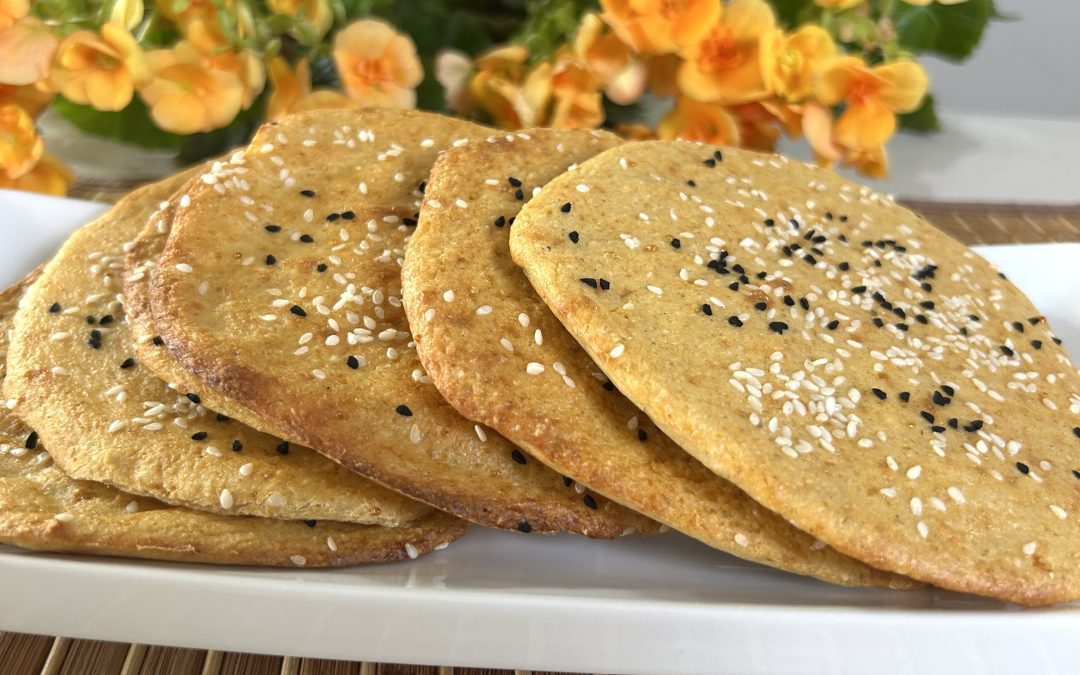
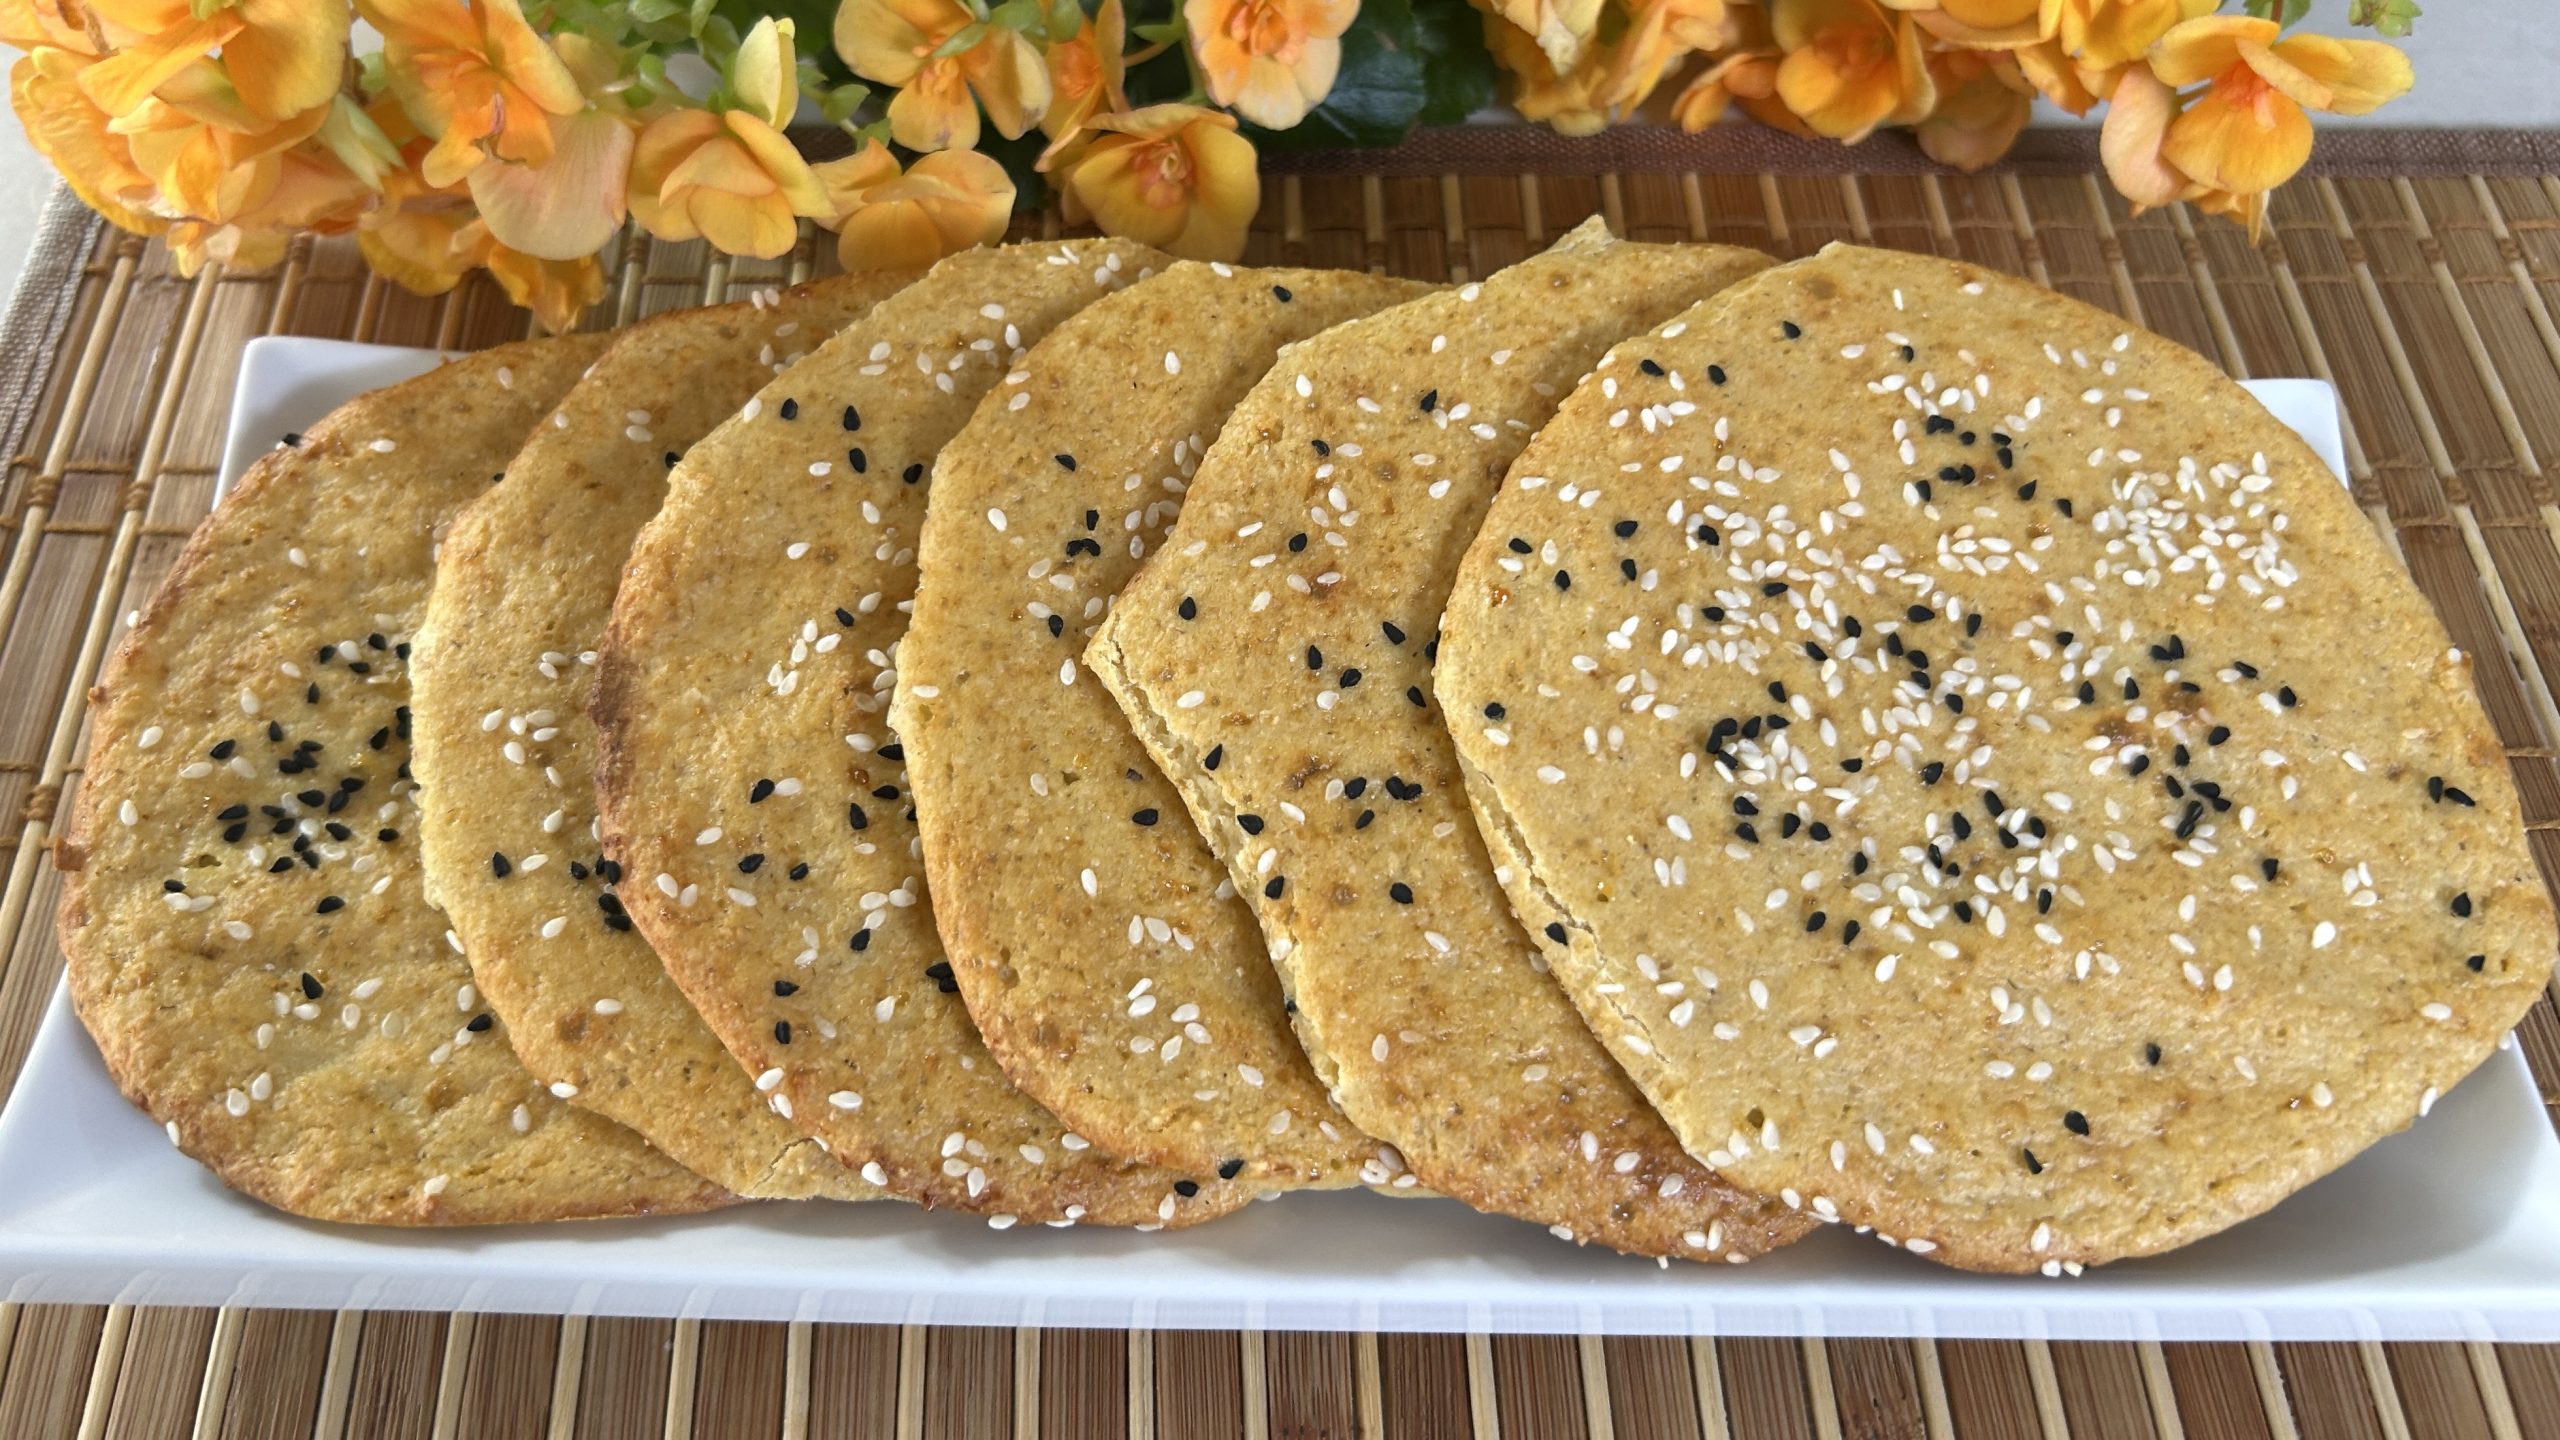
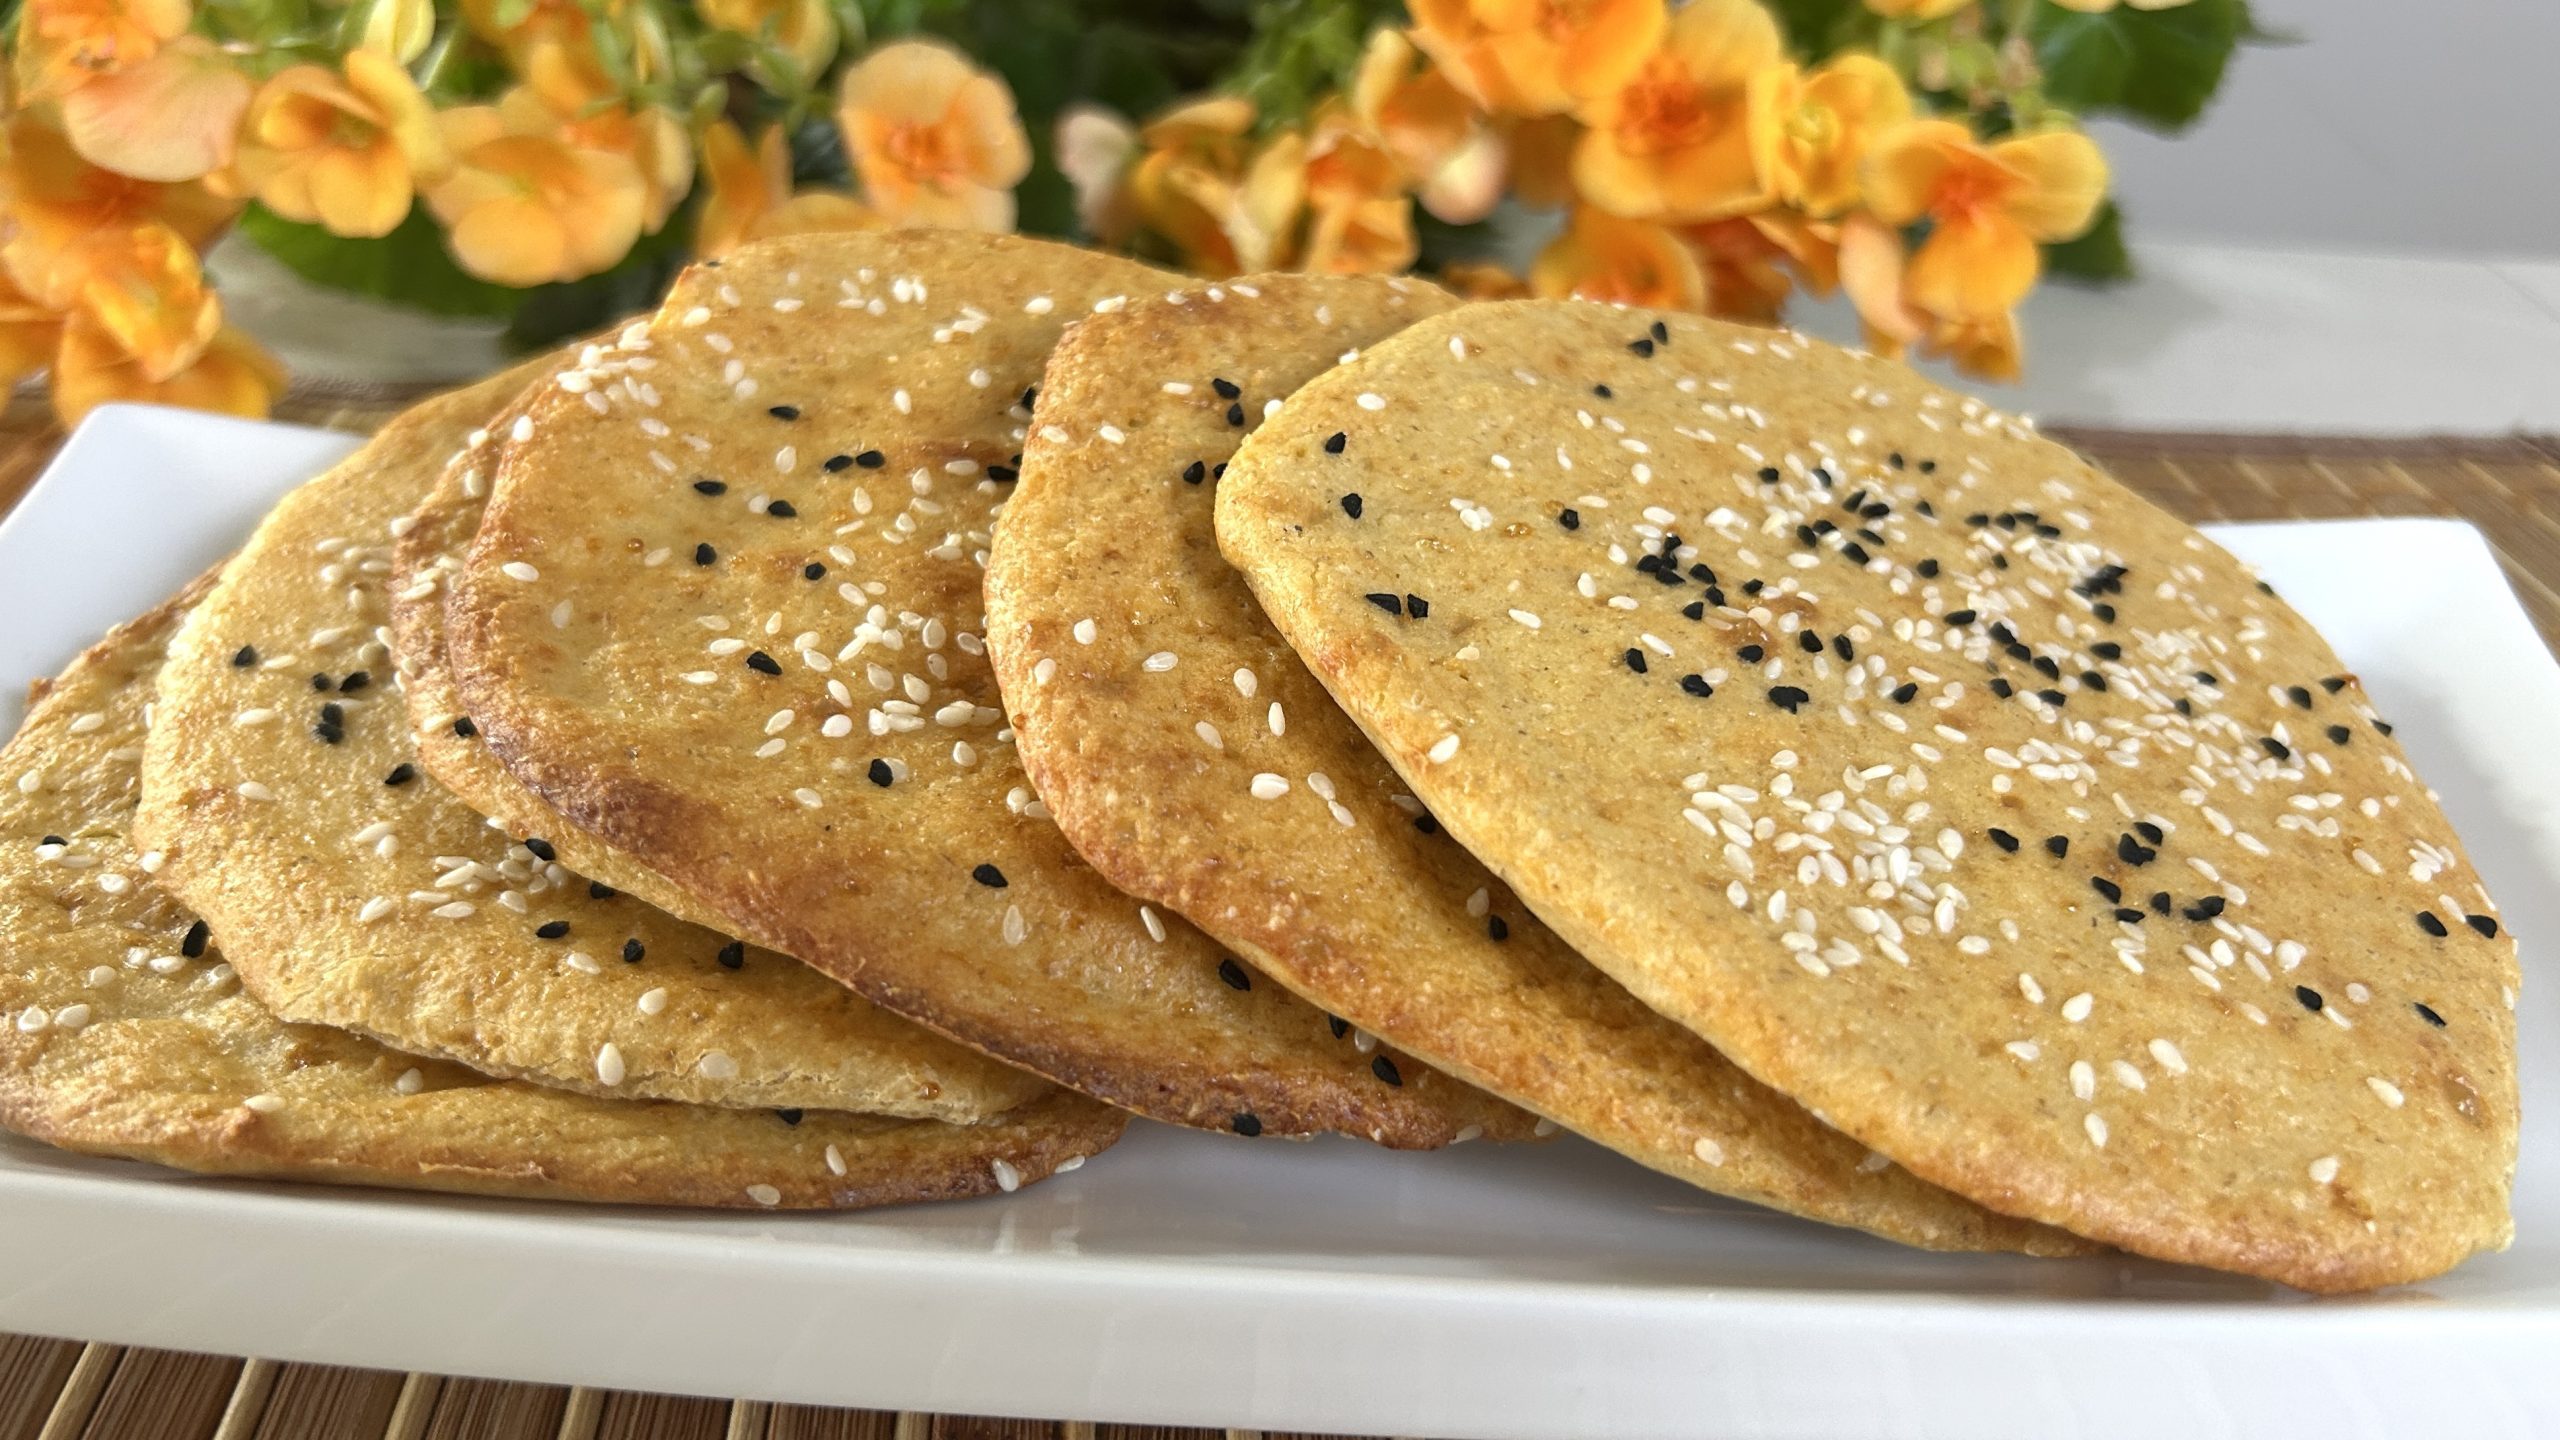
There’s something so satisfying about a flatbread that’s both delicious and packed with nutrients! These Cottage Cheese & Oat Flatbreads are the perfect combination of soft, flexible, and slightly crispy edges, making them a fantastic base for sandwiches, dips, or even mini pizzas. The magic happens with just a few simple ingredients: oat flour, cottage cheese, and eggs—bringing together fiber, protein, and healthy fats in one easy-to-make recipe.

What makes this recipe even more special is the power of oats. Oats aren’t just a staple for breakfast; they’re an incredibly nutritious grain loaded with soluble fiber, complex carbohydrates, and essential minerals like magnesium, iron, and zinc. Their beta-glucan content helps regulate blood sugar levels, promotes gut health, and supports heart function by lowering cholesterol. Including oats in your diet can provide sustained energy throughout the day while keeping digestion in check. If you haven’t made oat-based flatbreads yet, this is your sign to start!

This recipe is gluten-free and packed with high-protein ingredients, making it an excellent choice for a balanced diet. These flatbreads are simple, versatile, and a great way to add more whole foods to your daily routine.

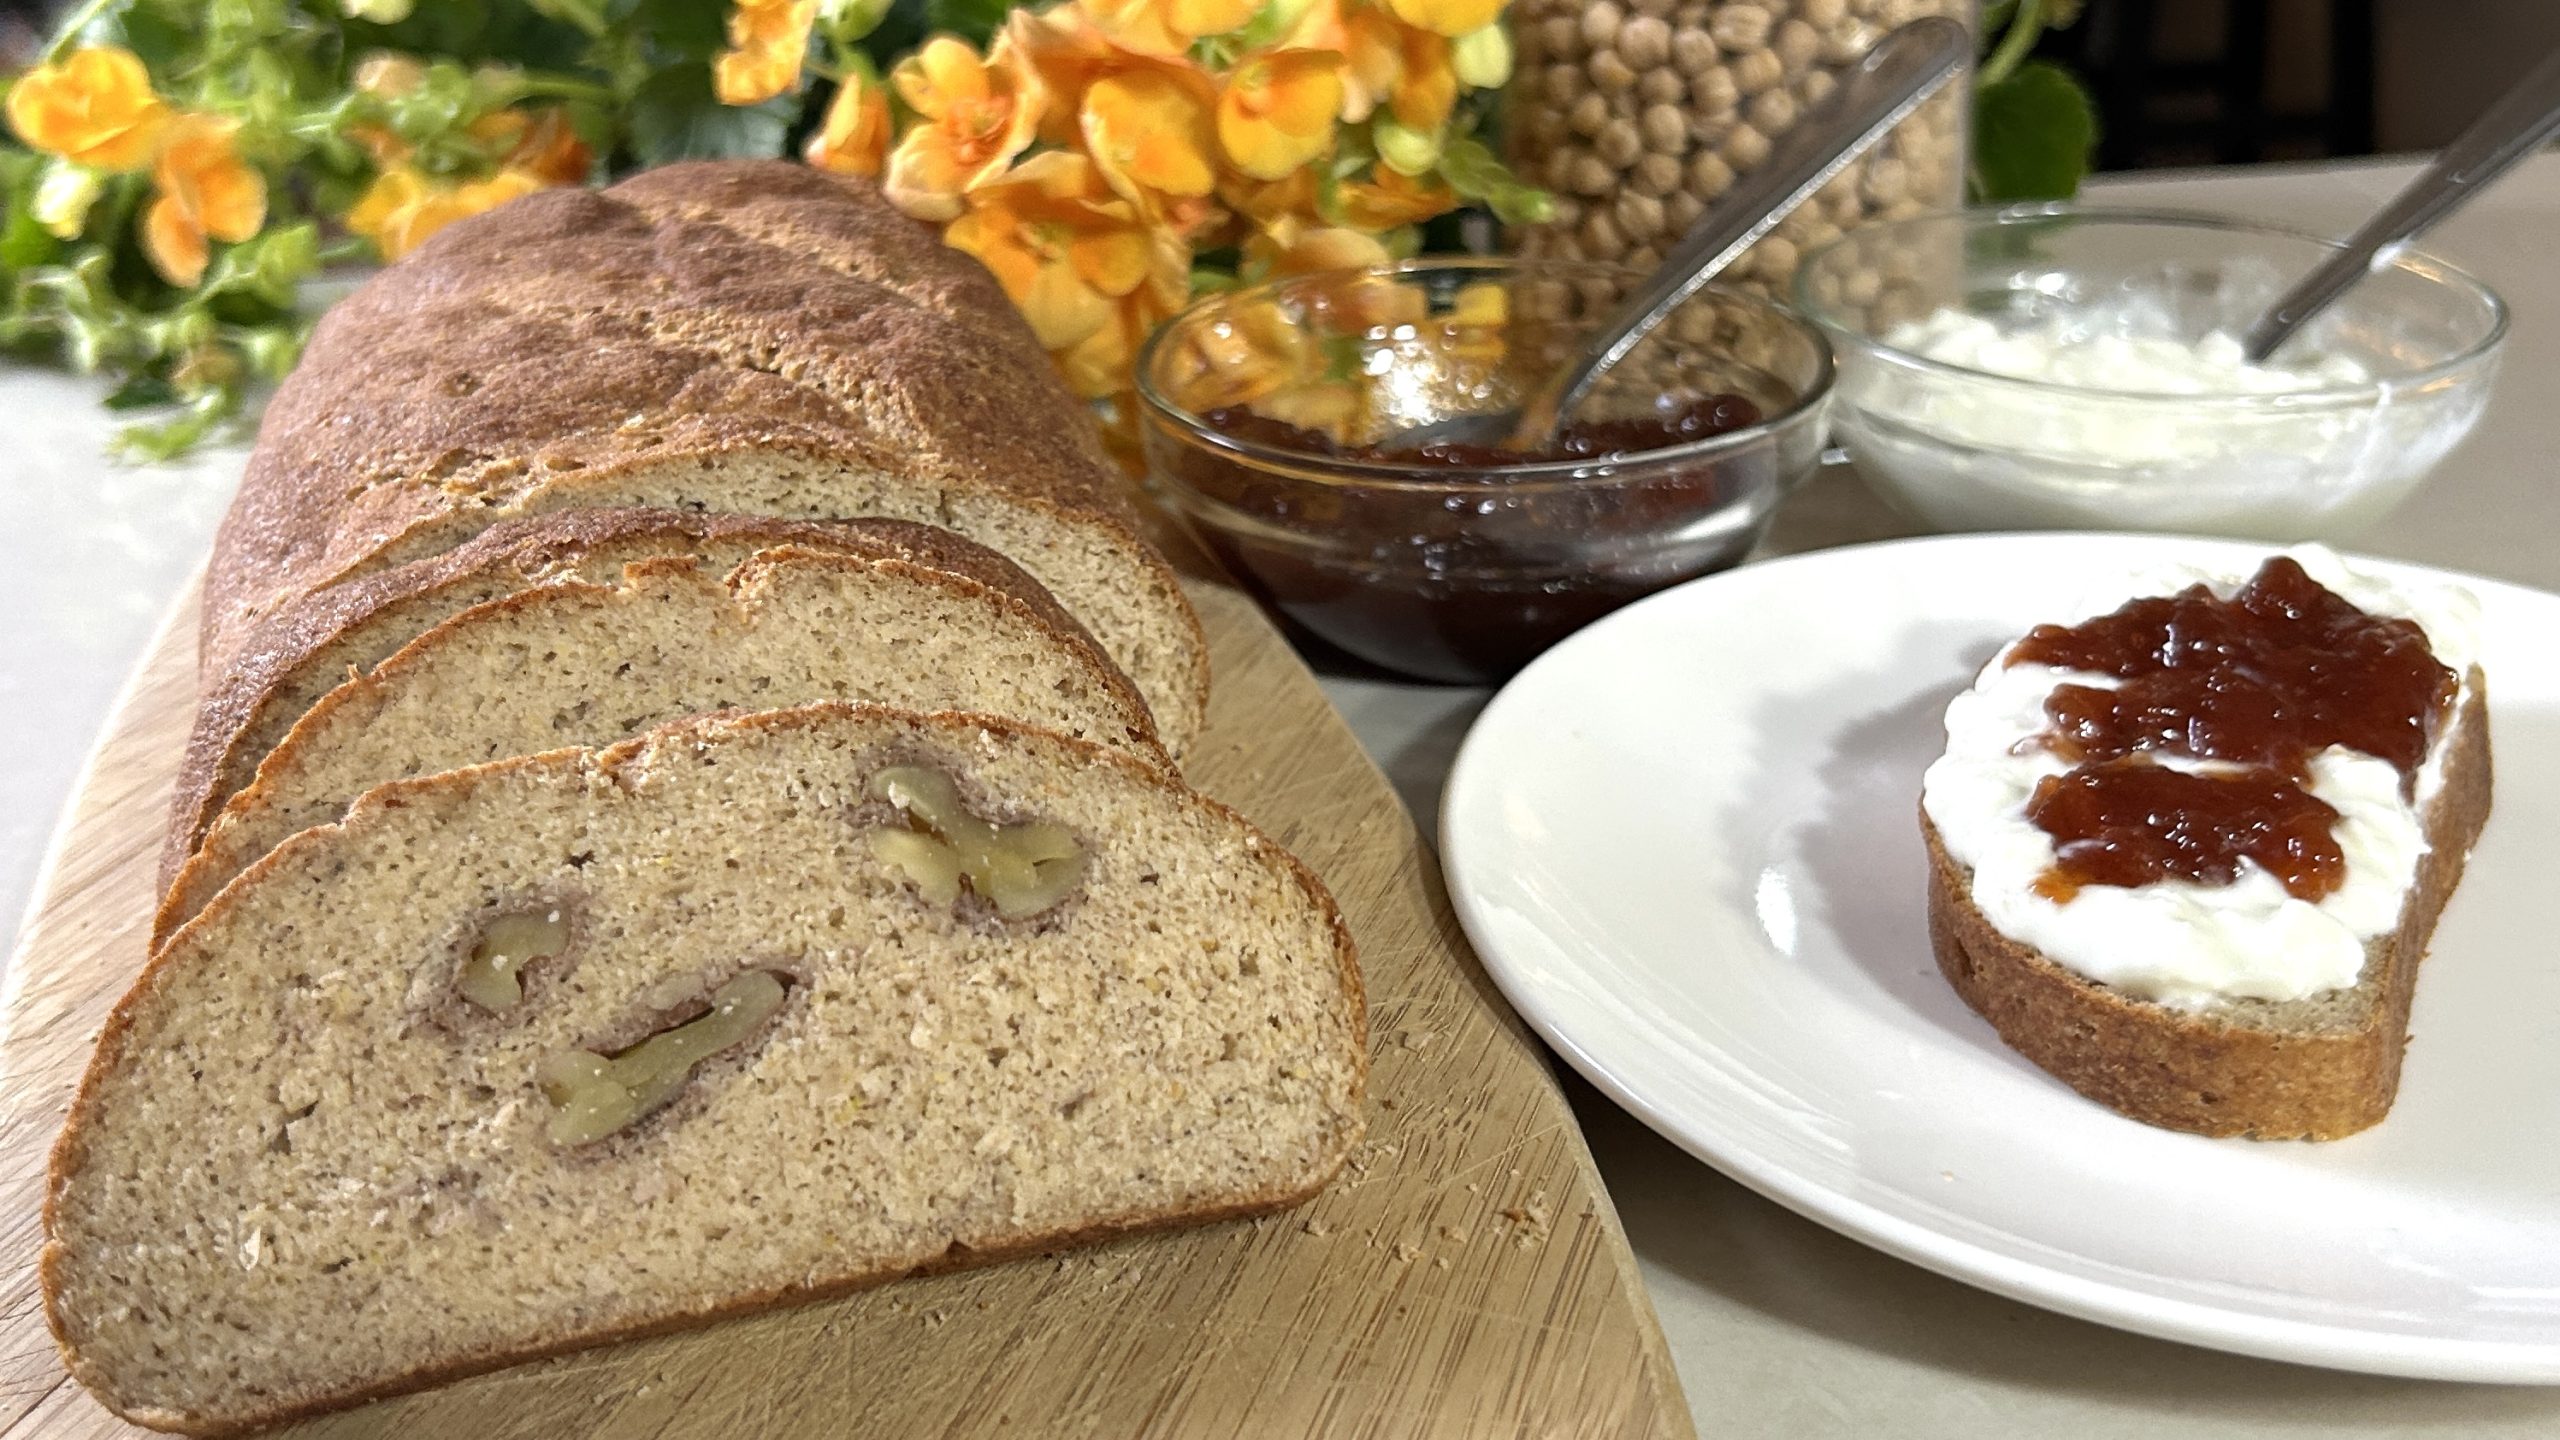
Pair these flatbreads with hummus, avocado, or your favorite spread, and you’ll have a nourishing meal that feels as good as it tastes.

Try them out and let me know how you enjoy them!

Ingredients

  • 1 cup (90 g) rolled oats (or oat flour)

  • 1 cup (200 g) cottage cheese

  • 2 eggs

  • 1/4 tsp. salt (or to taste)

  • 1 tsp. baking powder

  • 1 tbsp. sesame seeds (or your favorite seeds and herbs)

  • 1 tbsp. black sesame seeds (or your favorite seeds and herbs)

Directions

  • If using rolled oats, blend them in a blender or coffee grinder until they turn into fine oat flour.

  • In a mixing bowl, combine the cottage cheese and eggs. Blend until smooth and creamy.

  • Add the oat flour, salt, and baking powder to the mixture. Stir gently until everything is evenly combined, avoiding overmixing.

  • Preheat the oven to 350°F (175°C).

  • Line a large baking tray (37 cm x 26 cm) with parchment paper.

  • Pour a portion of the batter inside a circular cake cutter (12 cm or 4.7 inches in diameter) placed on the tray. Use the back of a spoon to spread it evenly and form a circular flatbread shape.

  • Repeat with the remaining batter to create multiple flatbreads.

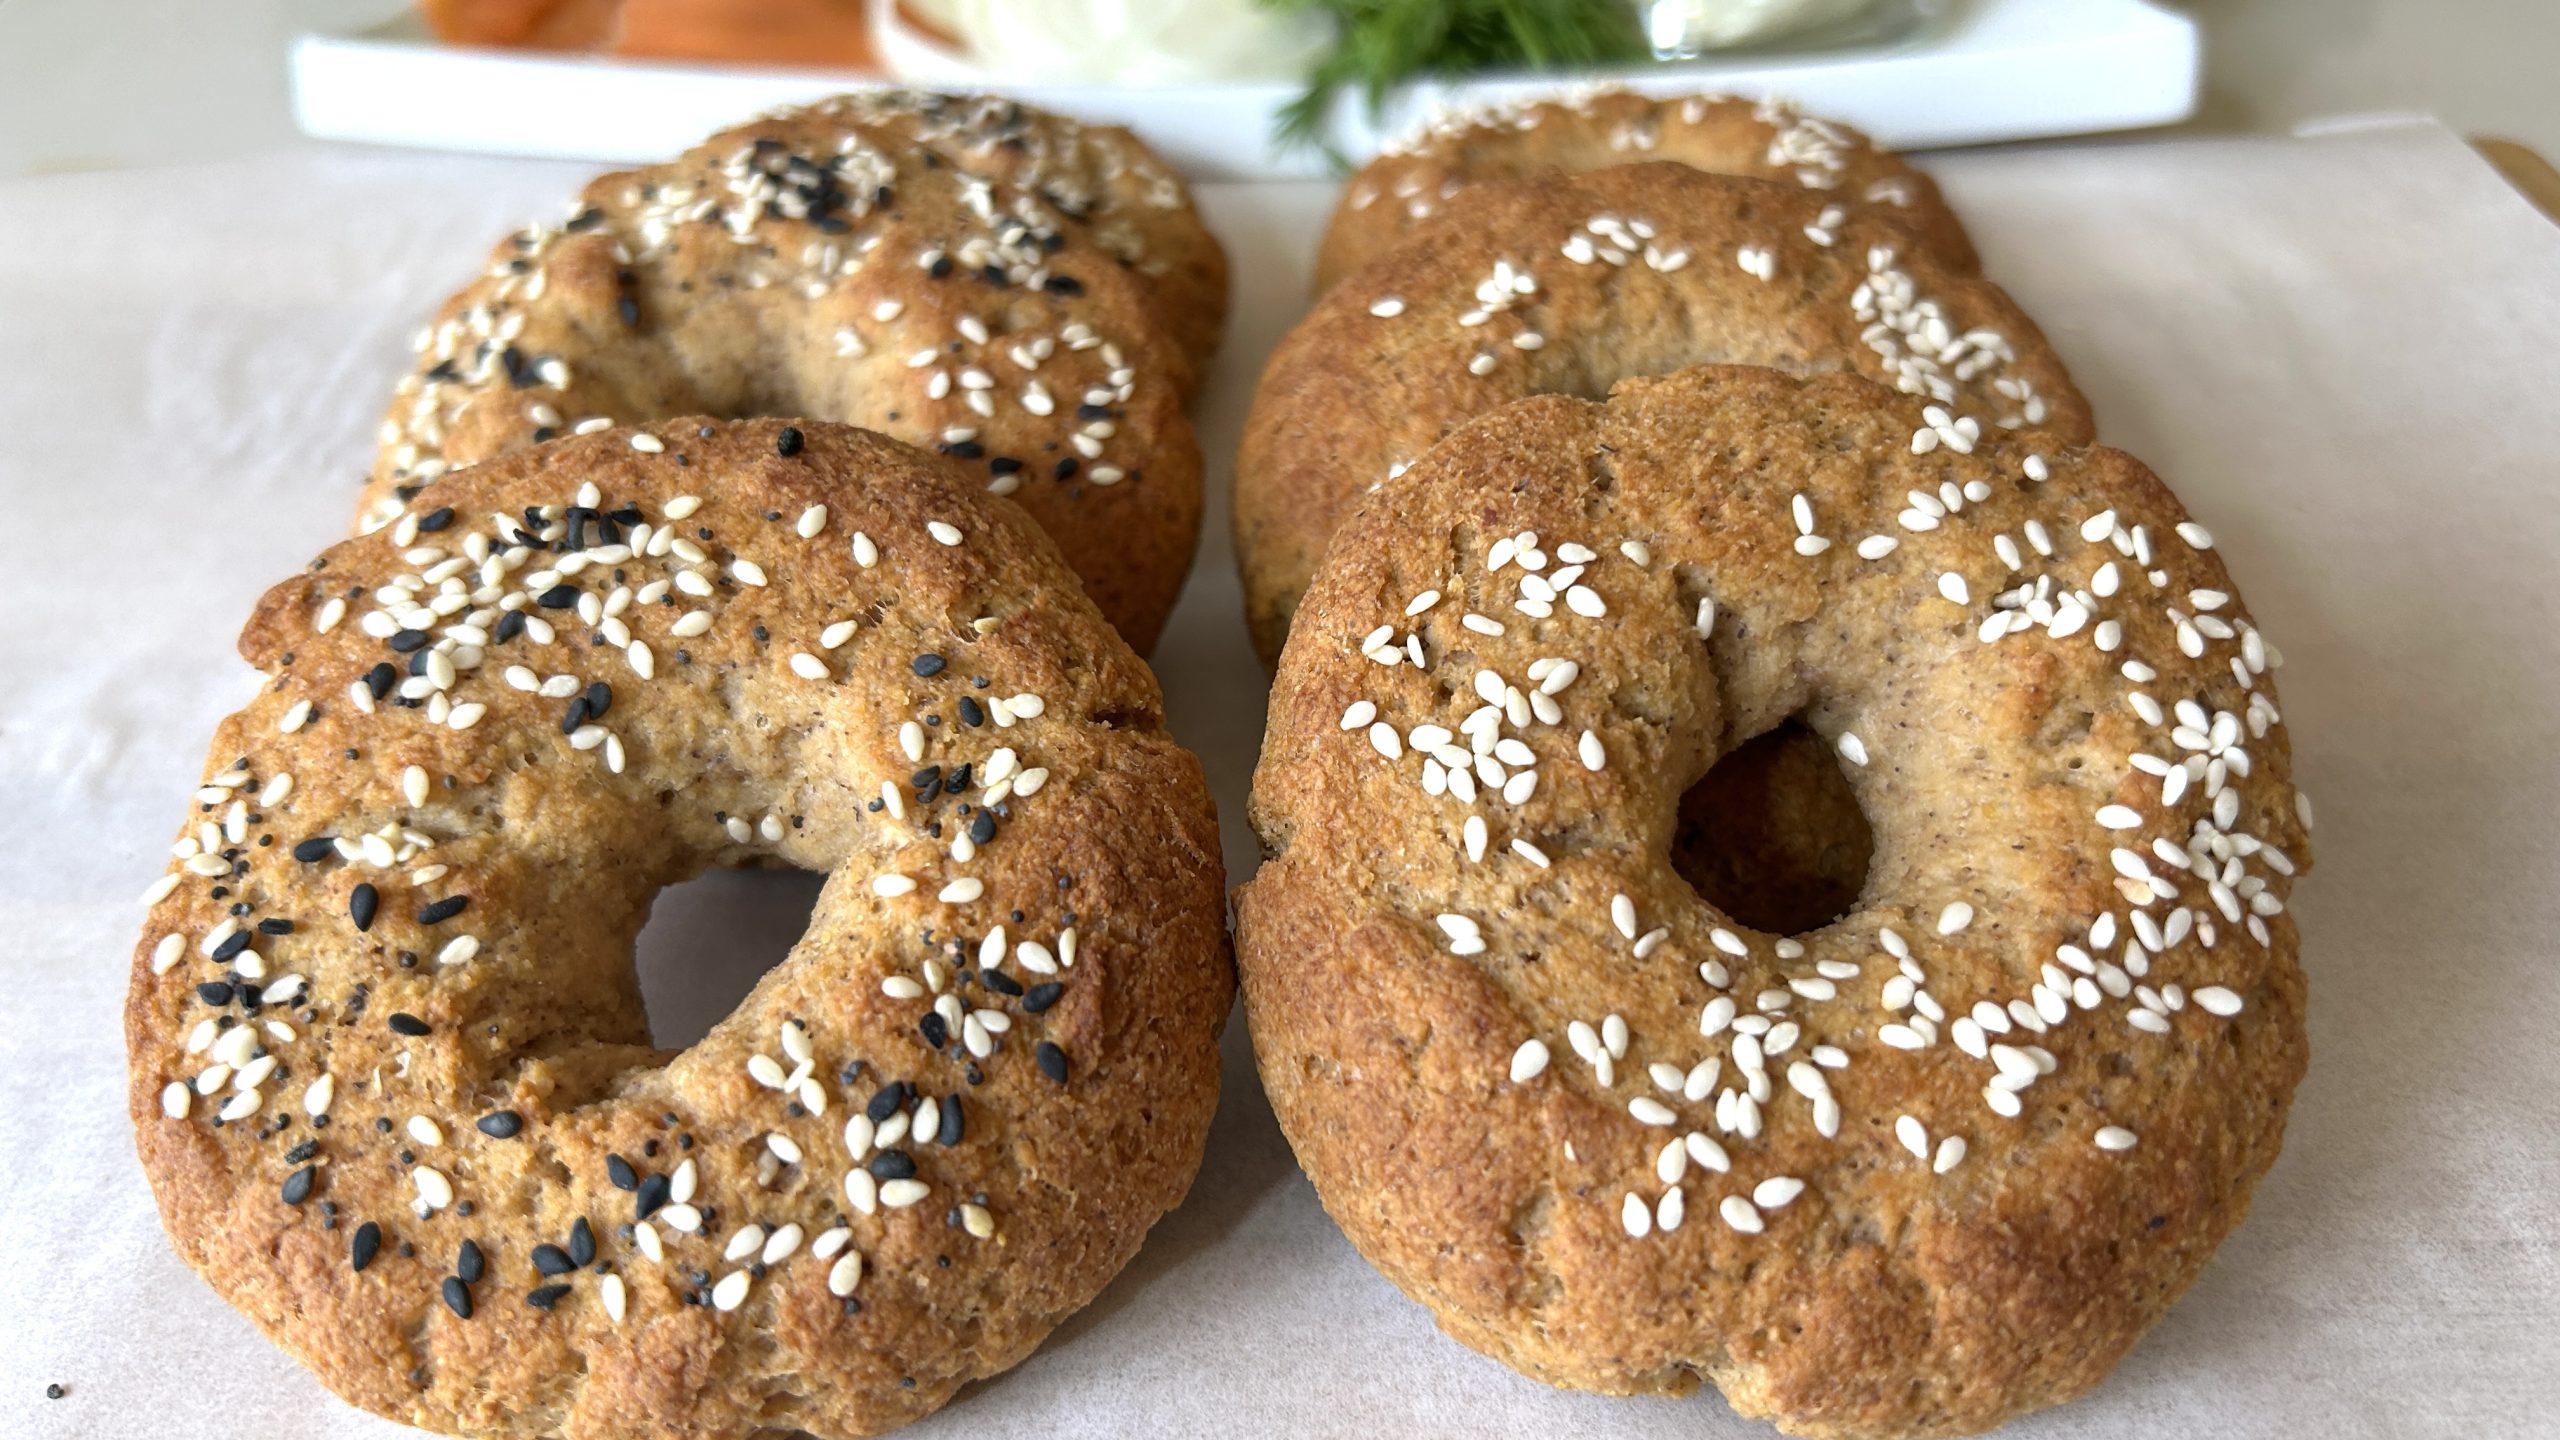
  • Sprinkle the tops with sesame seeds, black sesame seeds, or your choice of seeds and herbs.

  • Bake for 25 to 30 minutes until firm and lightly golden.

  • Let the flatbreads cool slightly before enjoying them with your favorite toppings.

    Prep Time: 15 minutes
    Baking Time: 30 minutes
    Servings: 6

    Nutritional Information (Per Serving)

    • Energy: 120 calories

    • Protein: 8.52 g

    • Fat: 4.61 g

    • Carbohydrates: 11.68 g

    • Fiber: 1.7 g

    Storage

    • Store in an airtight container in the refrigerator for up to 5 days.

    • For longer storage, freeze flatbreads with parchment paper between them for up to 3 months. Reheat in a toaster or oven.

    • Use as a sandwich base, pizza crust, or dipper for soups and spreads.

    Chickpea Loaf Bread

    Chickpea Loaf Bread

    Chickpea Loaf Bread

    If you’ve ever craved a hearty, nourishing bread that’s both gluten-free and packed with plant-based protein, this Chickpea Loaf Bread is a must-try! It has the perfect combination of a slightly dense yet soft texture, making it ideal for sandwiches, toasting, or enjoying on its own with your favorite spreads. The nutty aroma that fills your kitchen as it bakes is simply irresistible!

    What makes this bread so special? Instead of traditional flour, it’s made with raw chickpeas that are soaked, blended, and transformed into a dough. This technique creates a surprisingly airy yet satisfying loaf. A touch of olive oil adds richness, while psyllium husk acts as the perfect binding agent, giving the bread its structure without requiring gluten. And let’s not forget the walnuts (optional), but highly recommended, for a delightful crunch!

    Chickpeas are a nutritional powerhouse that deserve a regular spot in your diet. Packed with plant-based protein, fiber, and essential vitamins like folate and iron, they support muscle growth, digestive health, and sustained energy levels. They also help regulate blood sugar levels, making them a fantastic ingredient for those looking for balanced meals. Plus, chickpeas contain prebiotics, feeding the good bacteria in your gut and promoting overall digestive well-being. If you’re aiming to incorporate more plant-based, iron-rich foods into your diet, chickpeas are a game-changer!

    This gluten-free, nutrient-dense loaf is the perfect way to enjoy homemade bread while boosting your daily intake of plant-based protein and fiber. Try it with nut butter, avocado, or a drizzle of olive oil for a wholesome meal. Happy baking!

    Ingredients:

    • 1 ½ cups (350 g) raw chickpeas
    • ½ cup (120 ml) lukewarm water
    • ¼ tsp. salt
    • 1 ½ tbsp. (14 g) instant yeast
    • 1 tsp. honey (or preferred sweetener)
    • 3 tbsp. olive oil
    • 30 g coarse psyllium husk
    • 40 g walnut halves (optional)

    Directions:

    1. Soak the raw chickpeas overnight in a bowl of water. For best results, place them in the fridge while soaking.
    2. Drain and rinse the soaked chickpeas thoroughly, ensuring they’re well-strained before using.
    3. In a food processor, blend the chickpeas with lukewarm water until smooth and creamy.
    4. Add the salt, instant yeast, honey (or sweetener of choice), olive oil, and psyllium husk. Blend again until a thick, sticky dough forms.
    5. Transfer the dough to a clean working surface. Wet your hands slightly to prevent sticking.
    6. Flatten the dough into a large rectangle and, if using, press walnut halves evenly across the surface.
    7. Roll the dough tightly over itself to form a loaf shape. Gently massage the surface with wet hands to smooth it out.
    8. Place the shaped loaf onto a parchment-lined baking pan, cover it with a towel, and let it rise in a warm spot for 30 minutes.
    9. Preheat the oven to 350°F (180°C). Score the top of the loaf with a knife, then bake for 45-55 minutes, or until golden brown and firm.
    10. Let the bread cool slightly before slicing. Enjoy it fresh or toasted with your favorite accompaniments!

    Prep Time: Soak overnight + 20 minutes prep
    Baking Time: 45-55 minutes
    Servings: 14 slices

    Nutritional Information (per slice):

    • Energy: 154 calories
    • Protein: 6.31 g
    • Fat: 7 g
    • Carbohydrates: 17.86 g
    • Fiber: 4.2 g

    Storage Tips:

    • Store at room temperature in an airtight container for up to 2 days.
    • For longer freshness, refrigerate for up to one week.
    • Freeze individual slices for up to 3 months. Toast them straight from frozen when needed!


    Yellow Split Pea Bagels

    Yellow Split Pea Bagels

    Yellow Split Pea Bagels

    If you’ve been searching for a unique, protein-rich, and gluten-free alternative for homemade bagels, I have an incredible recipe for you: Yellow Split Pea Bagels! I know, using split peas for bagels might sound unconventional, but trust me, this ingredient transforms into a beautifully soft and chewy bagel that is packed with nutrition and flavor.

    Many of you have asked for an alternative to red lentils when making gluten-free bread, and yellow split peas are the perfect answer. These little legumes are not only affordable and easy to find, but they also have a mild, neutral taste that makes them a fantastic base for baking. Unlike some gluten-free flours that can have overpowering flavors, yellow split peas blend seamlessly into recipes, creating a slow-releasing source of energy that won’t spike blood sugar levels. That means you’ll feel satisfied for longer without those energy crashes.

    To give these bagels the perfect structure, we’re combining yellow split peas with psyllium husk, a fiber-rich ingredient that binds the dough together, giving it a soft, elastic texture, without the need for gluten! The result? A hearty, nourishing bagel that works beautifully for sandwiches, breakfast spreads, or as a delicious snack on its own.

    Why You Should Add Yellow Split Peas to Your Diet

    Yellow split peas are not just a delicious ingredient; they’re a powerhouse of nutrients! They are an excellent source of plant-based protein, making them a great option for vegans and vegetarians looking to meet their protein needs. They are also rich in fiber, which supports digestion, promotes gut health, and keeps you full longer. Plus, they’re packed with iron, an essential mineral that helps prevent anemia and supports overall energy levels.

    But that’s not all, yellow split peas are also a great source of folate, an important B vitamin that plays a crucial role in cell growth and development, making them particularly beneficial for pregnant women. Additionally, their low glycemic index makes them a fantastic food choice for maintaining stable blood sugar levels, which is especially important for those managing diabetes or blood sugar fluctuations.

    So, if you’re looking for a wholesome, protein-packed, and fiber-rich bagel that will nourish your body and keep you feeling great, these yellow split pea bagels are just what you need!

    Ingredients (Makes 6 Bagels)

    • 1 cup (180 g) raw yellow split peas
    • 1/3 cup (80 ml) lukewarm water
    • 1/2 tsp. Himalayan salt (or salt of choice)
    • 1 tbsp. (8 g) instant yeast
    • 1 tsp. honey (or other sweetener)
    • 2 tbsp. olive oil (or oil of choice)
    • 30 g psyllium husk (coarse version)
    • 1/2 tsp. sesame seeds (or your seeds of choice)
    • 1/2 tsp. everything bagel seasoning

    Directions

    1. Soak the yellow split peas overnight (preferably in the fridge). Rinse the soaked peas thoroughly under running water and strain them well.
    2. Blend the soaked peas in a food processor with lukewarm water until smooth and creamy.
    3. Add the salt, yeast, honey, olive oil, and psyllium husk to the mixture. Blend again until a sticky dough forms.
    4. Transfer the dough to a working surface. Lightly oil your hands to prevent sticking, then form the dough into a smooth loaf. Divide it into six equal portions.
    5. Shape each portion into a circle and create a hole in the center using your thumb or a kitchen utensil.
    6. Arrange the bagels on a parchment-lined baking pan. Cover with a towel and let them rise in a warm place for 30 minutes.
    7. Brush the bagels with water, sprinkle with sesame seeds or bagel seasoning, and bake at 350°F (175°C) for 30-35 minutes, or until golden and fully cooked.
    8. Let the bagels cool slightly before serving with your favorite toppings.

    Prep & Baking Time

    • Soaking time: Overnight
    • Prep time: 20 minutes
    • Baking time: 35 minutes

    Nutritional Information (Per 1 Bagel)

    • Calories: 180
    • Protein: 8.39 g
    • Fat: 6.67 g
    • Carbohydrates: 22.53 g
    • Fiber: 9.5 g

    Storage & Recommendations

    • Store at room temperature in an airtight container for up to 2 days.
    • Refrigerate for up to 1 week or freeze for up to 3 months in a sealed bag or container.
    • Enjoy with sweet toppings like almond butter and honey or savory spreads like hummus, avocado, or cream cheese.
    Red Lentil Cheese Bread

    Red Lentil Cheese Bread

    Red Lentil Cheese Bread

    Who said cheese bread needs to be made with traditional flours? This recipe is here to surprise you by swapping grain-based flours with the humble red lentil. The result is a protein-packed, gluten-free delight that doesn’t compromise on taste or texture. These cheese breads are soft, savory, and oh-so-satisfying, perfect for breakfast, a midday snack, or a cozy dinner side. With no kneading or dough-handling required, this is one of those recipes that feels almost too easy to be true.

    But let’s take a moment to appreciate the real star of this recipe: red lentils. These little powerhouses are a nutritional treasure. Packed with plant-based protein and fiber, they’re a fantastic way to stay energized and keep your digestion running smoothly.

    Red lentils are also a rich source of essential nutrients like iron, magnesium, and folate, making them a great addition to your diet, especially for those seeking to boost their nutrient intake. They’re naturally low in fat and free from gluten, making them a versatile and wholesome ingredient that fits into various dietary lifestyles. Incorporating red lentils into your meals is an easy step toward a healthier, well-rounded diet, and these cheese breads are a delicious way to do just that.

    Ingredients:

    • ¾ cup (140 g) raw red lentils
    • 2 large eggs
    • 2 tbsp olive oil
    • ⅓ cup (90 g) cottage cheese
    • 50 g shredded cheddar cheese
    • 50 g shredded mozzarella cheese
    • ¼ tsp Himalayan salt
    • ¼ tsp dried onion powder
    • ¼ tsp dried garlic powder
    • ¼ tsp dried oregano
    • ½ tbsp baking powder
    • Oil and parchment paper for lining muffin cups

    Directions:

    • Soak the red lentils in water for at least 4 hours at room temperature or overnight in the refrigerator.
    • Rinse the lentils under running water and drain thoroughly.
    • Blend the lentils and eggs in a blender or with a hand blender until smooth and creamy.
    • Add olive oil, cottage cheese, cheddar cheese, mozzarella cheese, Himalayan salt, onion powder, garlic powder, oregano, and baking powder to the mixture. Stir until well combined.
    • Lightly grease muffin cups with oil and line them with parchment paper to prevent sticking.
    • Divide the batter evenly among the prepared muffin cups.
    • Preheat your oven to 350°F (180°C) and bake for 35 minutes, or until the breads are golden brown and a toothpick inserted in the center comes out clean.
    • Let the cheese breads cool down for 5 minutes before serving. They are best enjoyed while still warm.

    Prep Time: 20 minutes
    Baking Time: 30 minutes
    Soaking Time: Overnight or at least 4 hours
    Servings: 7

    Nutritional Information (Per Serving)

    • Energy: 188 calories
    • Protein: 11.7 g
    • Fat: 9.84 g
    • Carbohydrates: 13.47 g
    • Fiber: 2.2 g

    Storage Recommendations

    • Store the cheese breads in the refrigerator for up to one week.
    • Freeze for up to three months in an airtight container.
    • Reheat before serving to restore their cheesy and delicious flavor.
    Chickpea Mini Breads

    Chickpea Mini Breads

    Chickpea Mini Breads

    There’s something magical about baking bread from scratch, especially when the result is not just delicious but also packed with nutrition. These Chickpea Mini Breads are a revelation in the world of gluten-free baking. They combine a delicate crust with a tender, airy interior that feels like a warm hug for your taste buds. Whether you’re making a quick sandwich, enjoying them with your favorite spread, or serving them alongside a hearty soup, these mini breads are sure to elevate any meal.

    The star of this recipe, chickpeas, is a true nutritional powerhouse. As a rich source of plant-based protein, they’re an excellent choice for anyone looking to maintain muscle health or simply add more protein to their diet. Beyond protein, chickpeas offer high levels of dietary fiber, promoting a healthy gut and aiding digestion. They’re also brimming with essential vitamins and minerals, including folate, iron, phosphorus, and magnesium, nutrients vital for energy production, bone health, and reducing the risk of chronic illnesses.

    Incorporating chickpeas into your meals can also support weight management by keeping you fuller for longer, thanks to their fiber and protein combo. Not to mention, they help stabilize blood sugar levels, making them an excellent choice for individuals managing diabetes or those looking to sustain energy throughout the day. As a versatile ingredient, chickpeas deserve a regular spot in your kitchen. Whether they’re ground into flour, roasted for snacks, or transformed into these delightful mini breads, their potential is endless.

    These breads aren’t just about nourishment, they’re about creating moments. Imagine pulling warm, golden loaves from the oven, the smell of freshly baked bread filling your home. Whether it’s a quick breakfast, a lunchbox hero, or a dinner side, these mini breads are your trusty companion in the kitchen. Let’s dive into this wholesome journey and whip up something extraordinary together!


    Ingredients:

    • 1 cup (180 g) raw chickpeas
    • ⅓ cup (80 ml) lukewarm water
    • ⅓ cup (20 g) psyllium husk
    • ¼ tsp. Himalayan salt
    • 1 tbsp. instant yeast
    • 1 tsp. honey
    • 1 tbsp. olive oil

    Directions:

    1. Soak the raw chickpeas in room-temperature water overnight in the fridge.
    2. Rinse the soaked chickpeas thoroughly and strain them well.
    3. Blend the chickpeas with lukewarm water in a food processor until smooth.
    4. Add salt, instant yeast, honey, olive oil, and psyllium husk to the chickpea mixture. Blend again until a sticky dough forms.
    5. Transfer the dough to a bowl and press it into a smooth, cohesive mass.
    6. Divide the dough into six portions. Shape each into buns or mini baguettes using oiled hands.
    7. Place the shaped dough on a parchment-lined baking tray. Cover with a towel and let rise in a warm spot for 30 minutes.
    8. Preheat your oven to 350°F (180°C). Score the breads if desired to create a decorative crust.
    9. Bake for 30 minutes or until golden brown and cooked through.
    10. Allow the breads to cool slightly before serving.

    Prep Time and Baking Information:

    • Prep Time: 20 minutes (plus overnight soaking, 30 minutes proofing)
    • Bake Time: 30 minutes
    • Servings: 6

    Nutritional Information (Per Serving):

    • Energy: 150 calories
    • Protein: 6.95 g
    • Fat: 4.21 g
    • Carbohydrates: 26.68 g
    • Fiber: 4.1 g

    Storage Recommendations:

    • Store in an airtight container at room temperature for up to 3 days.
    • For longer storage, refrigerate for up to 1 week or freeze for up to 3 months. Thaw before use.

    Notes:

    • Enjoy these breads with cheese, hummus, salmon, avocado, or your favorite toppings.
    • Perfect for sandwiches, snacks, or even breakfast!