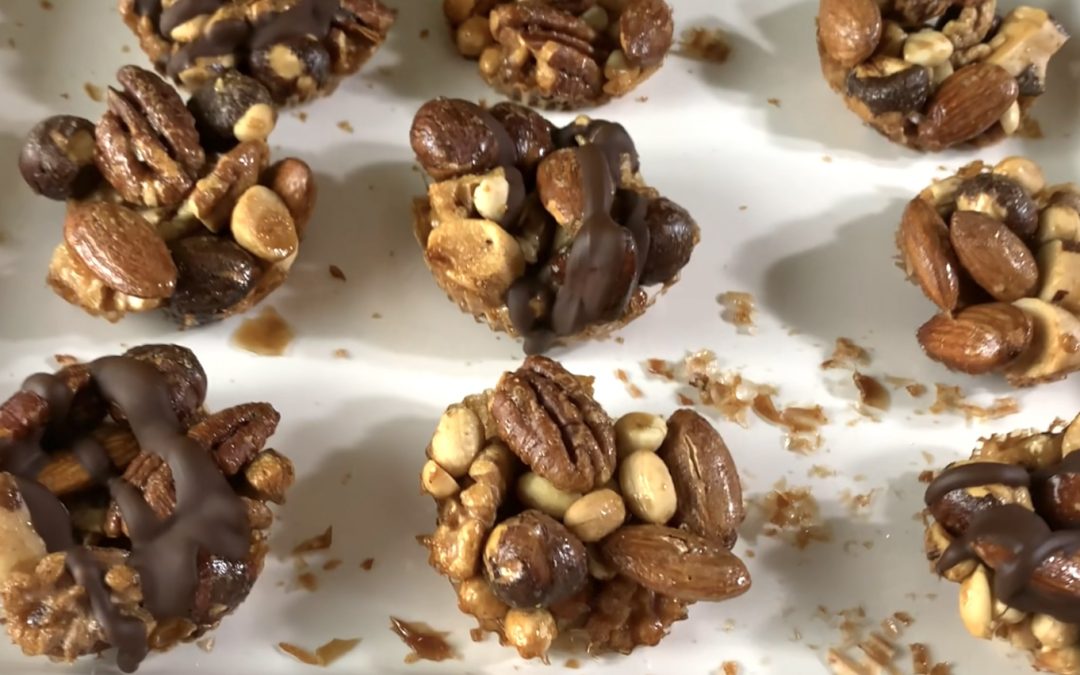
Mixed Nuts Crunch
Mixed Nuts Crunch

Prepare to embark on a journey of crunchy delight with our Maple Nut Crunch recipe! By combining an array of wholesome nuts with the rich sweetness of maple syrup, you’ll create extraordinary treats that are not only delicious but also wholesome and nutritious. These nut crunches are perfect for satisfying sugar cravings and sharing with loved ones. With their irresistible crunch and natural goodness, they are sure to win hearts.
Nuts are the star ingredients in this recipe, offering a wealth of nutritional benefits. They are packed with healthy fats, protein, and fiber, making them a great snack option that supports heart health, provides sustained energy, and helps you feel full longer. Nuts also contain various vitamins and minerals, such as vitamin E, magnesium, and selenium, which are important for overall well-being.
Incorporating a variety of nuts into your diet is a simple way to enjoy a range of nutrients in one tasty treat. This Mixed Nuts Crunch recipe is not only easy to make but also customizable, allowing you to use your favorite nuts and seeds to create endless flavor possibilities.
These Mixed Nuts Crunch treats are a perfect way to enjoy a healthy, crunchy snack that’s full of flavor and nutrition. Enjoy them on their own, or share them with friends and family!
Ingredients
1/4 cup or 30 g raw almonds
1/4 cup or 30 g raw walnuts (halved)
1/4 cup or 30 g hazelnuts
1/4 cup or 30 g raw Brazilian nuts (cut into 2 or 3 pieces)
1/4 cup or 30 g raw peanuts
1/4 cup or 30 g raw pecans
A pinch of kosher salt (optional)
4 tbsp maple syrup
15 g melted dark chocolate for drizzling (optional)
Directions
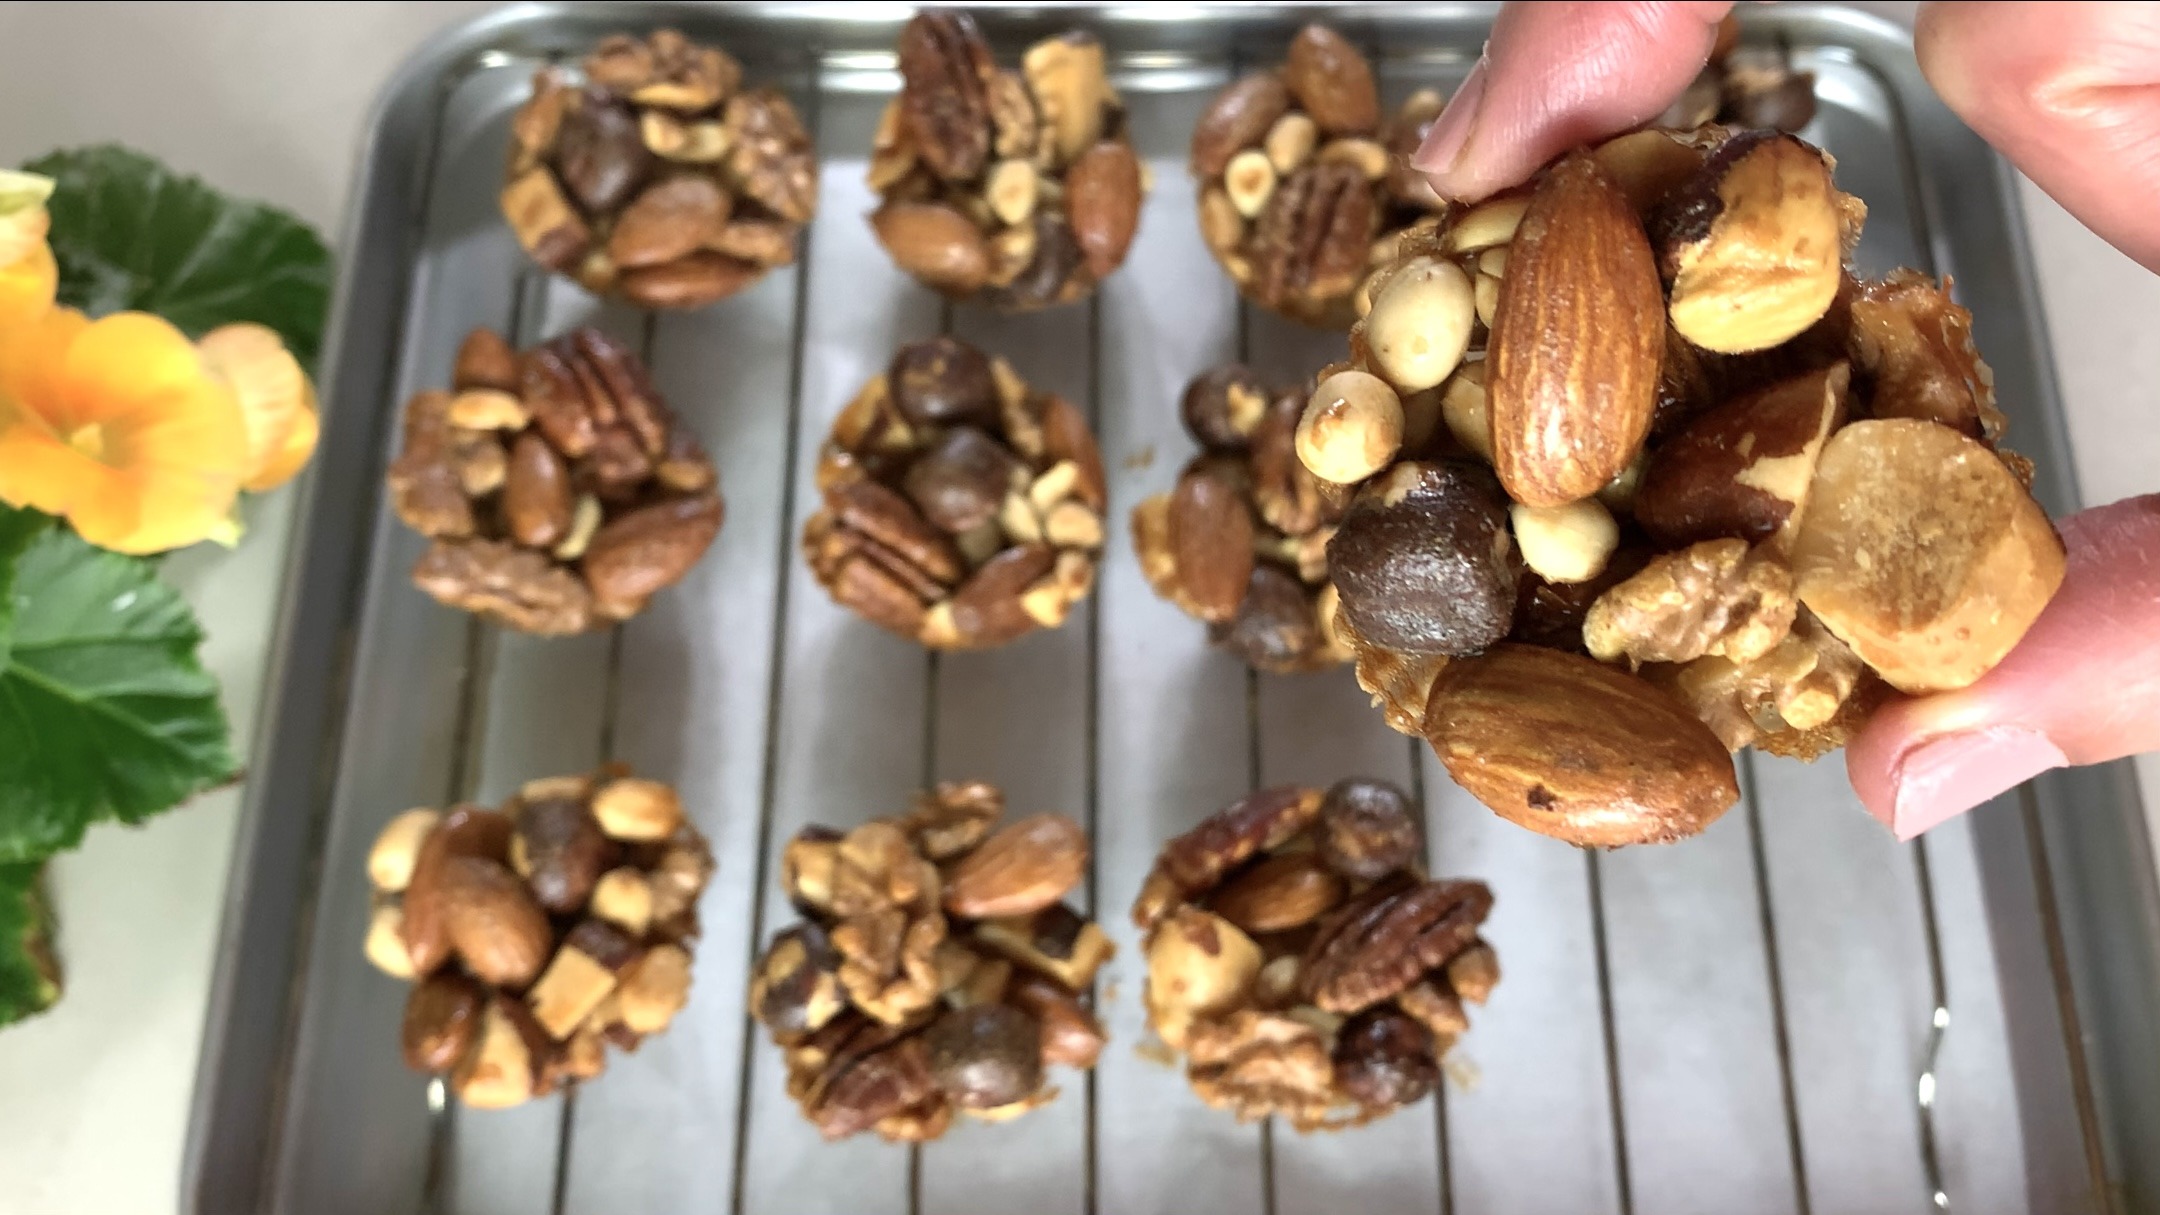
- In a mixing bowl, combine raw almonds, raw walnuts (halved), hazelnuts, raw Brazilian nuts (cut into pieces), raw peanuts, and raw pecans. You can make your own combination with your favorite nuts and seeds.
- Sprinkle a pinch of kosher salt over the nuts.
- Pour maple syrup into the bowl, ensuring each nut is coated evenly.
- Stir the ingredients thoroughly to coat the nuts evenly with maple syrup.
- Spoon similar-sized portions into silicone baking cups for uniform baking.
- Preheat oven to 350°F / 180°C.
- Bake the nut mixture for 15 to 20 minutes or until the nuts turn crispy.
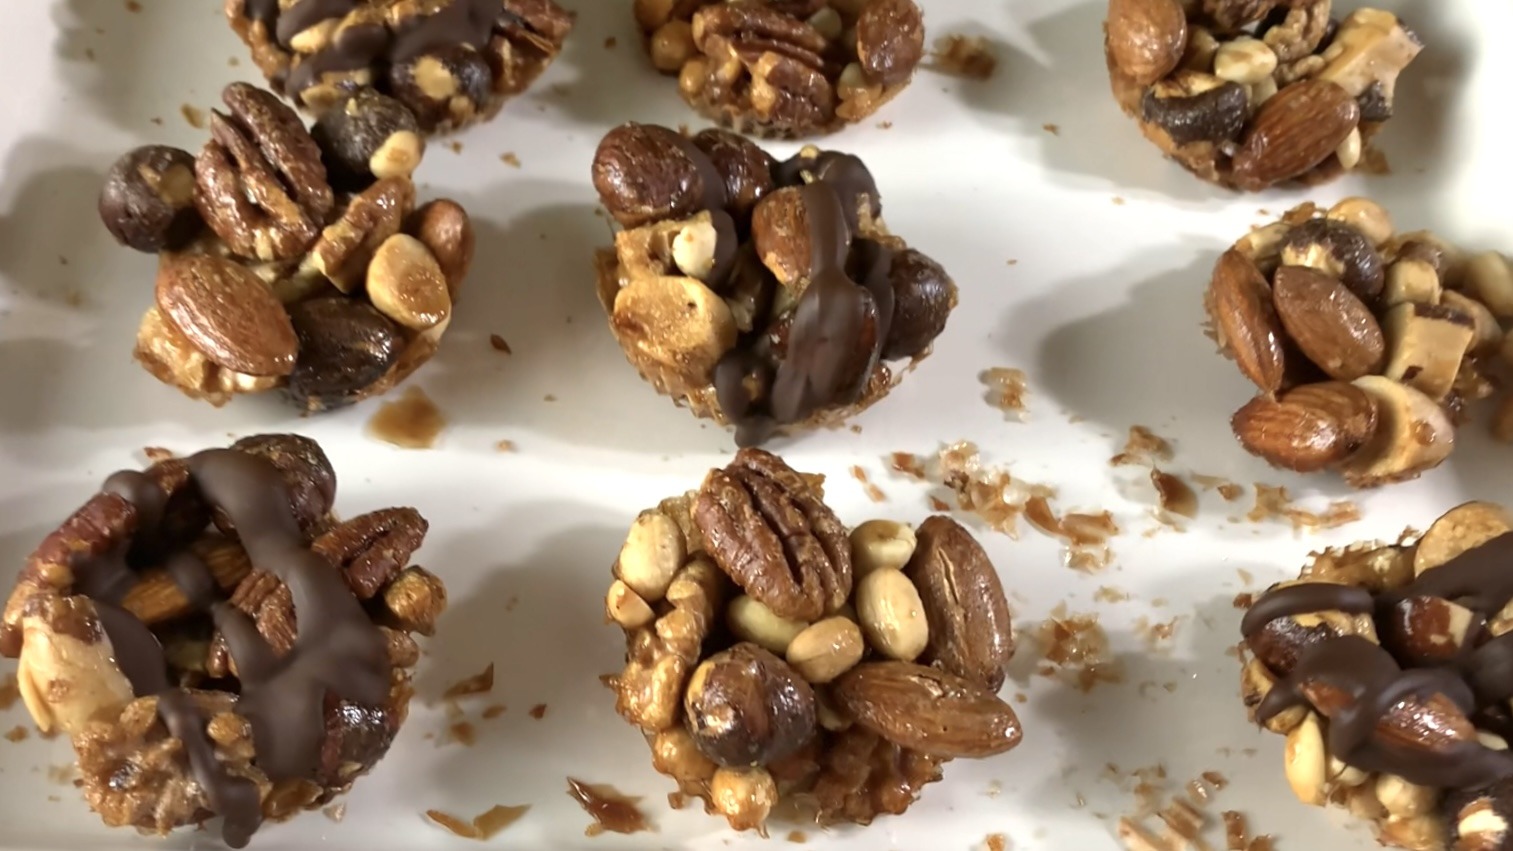
- Allow the nut crunches to cool down completely and set before handling.
- If desired, drizzle melted dark chocolate over all or some of the nut crunches for an extra chocolaty taste.
Yields: 12 Servings
Prep Time: 20 minutes
Baking Time: 15-20 minutes
Nutritional Information
Per 1 Serving:
Energy: 104 calories
Protein: 2.19 g
Fat: 8.17 g
Carbohydrates: 10.98 g
Fiber: 1.2 g
Storage
- Store the leftover crunches in an airtight container at room temperature for up to one week.
- Customize with your favorite nuts for endless flavor possibilities.