Turkish Dried Fig Pudding
Turkish Dried Fig Pudding

If you’re looking for an easy, naturally sweet dessert that feels incredibly indulgent while being made with just a handful of wholesome ingredients, this creamy dried fig pudding is a recipe you’ll want to make again and again. Inspired by the beloved Turkish dessert İncirli Muhallebi, this simple pudding transforms just dried figs and warm milk into a silky, rich, naturally caramel-like treat without the need for gelatin, cornstarch, refined sugar, or artificial thickeners. As the blended mixture chills, the natural fibers and pectin found in the figs work together with the proteins in the milk to create a beautifully smooth and spoonable pudding that tastes far more decadent than its ingredient list suggests.
One of the things I love most about this recipe is how effortless it is. After soaking the figs until they’re soft and tender, everything comes together in a blender in just a few minutes. The result is a naturally sweet dessert with an irresistibly creamy texture and a deep honey-caramel flavor that’s entirely thanks to the figs themselves. It’s perfect as an afternoon snack, a light dessert after dinner, or even a wholesome breakfast served with nuts and fresh fruit.
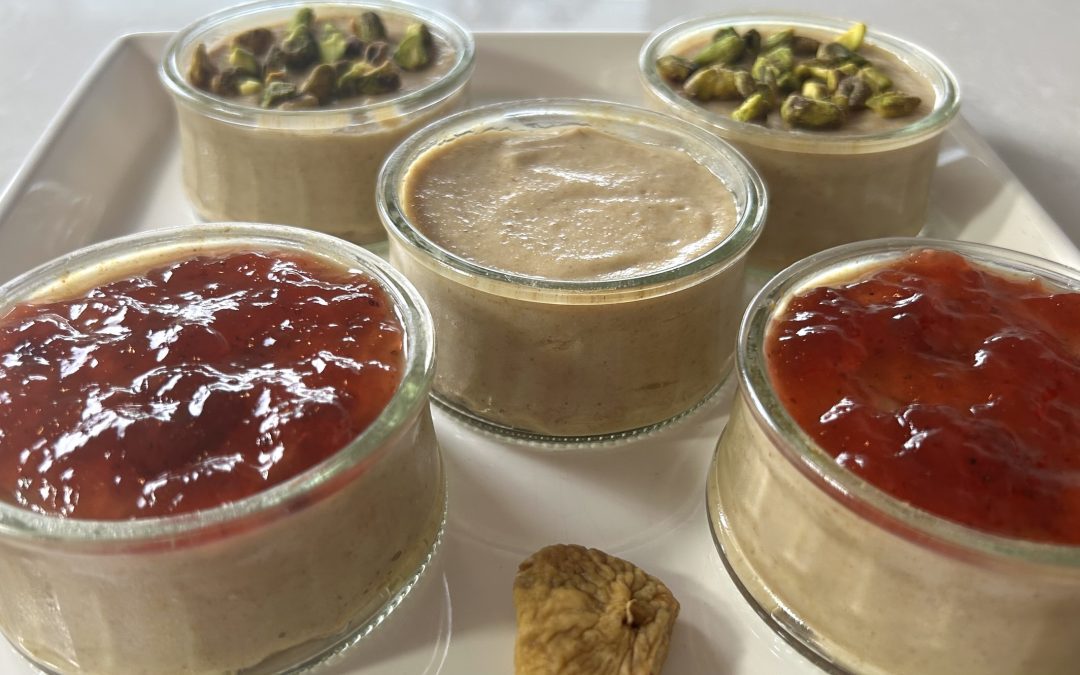
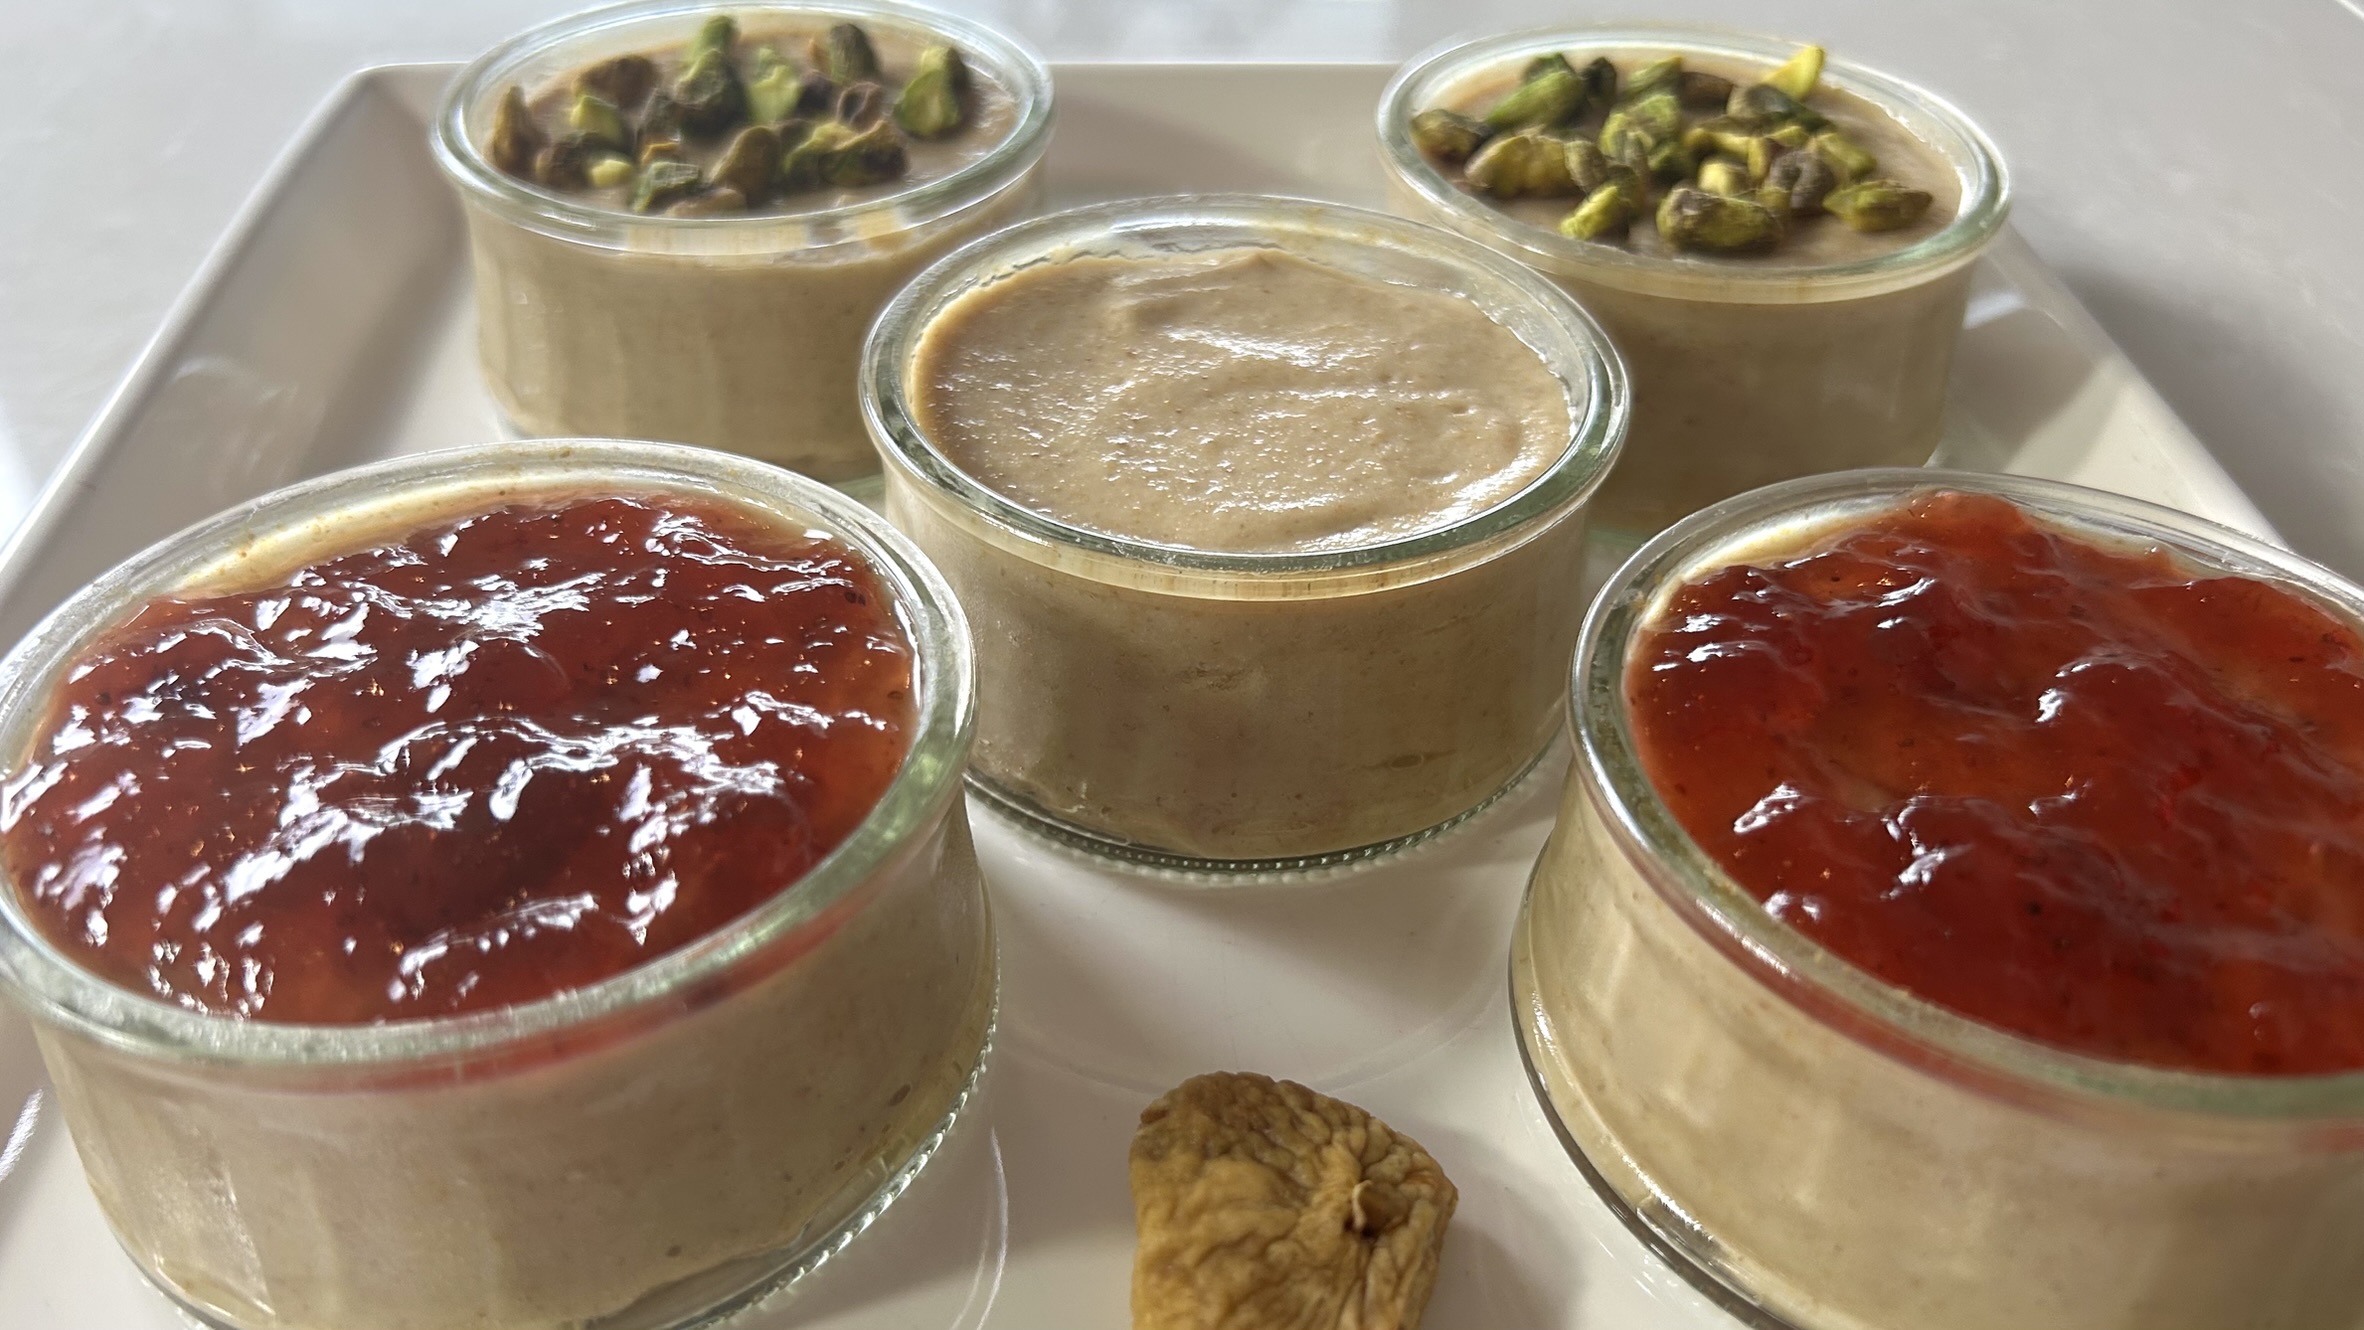
Another reason this pudding deserves a place in your regular recipe collection is its versatility. Enjoy it plain to appreciate the rich flavor of the figs, garnish it with crunchy toasted pistachios for a classic Middle Eastern touch, spread a thin layer of strawberry jam on top for a delicious fruity contrast, or personalize it with your favorite toppings. Whether you’re preparing it for your family or serving guests, this elegant dessert always looks impressive despite requiring very little effort.
Why Dried Figs Deserve a Place in Your Regular Diet
Dried figs are among nature’s most nutritious naturally sweet foods. They’re an excellent source of dietary fiber, helping support healthy digestion, promote fullness, and contribute to balanced blood sugar responses when enjoyed as part of a balanced meal. Unlike many processed desserts, figs offer sweetness together with valuable vitamins, minerals, and antioxidants rather than empty calories.
They are particularly rich in potassium, calcium, magnesium, copper, and iron—minerals that play important roles in maintaining healthy muscles, supporting normal nerve function, strengthening bones, producing energy, and helping the body transport oxygen. Dried figs also provide beneficial plant compounds called polyphenols, which help protect cells against oxidative stress and support overall health.
When combined with milk, this pudding becomes even more nutritionally balanced. Milk contributes high-quality complete protein, calcium, phosphorus, vitamin B12, and additional nutrients that help support strong bones, healthy muscles, and long-lasting satiety. Together, dried figs and milk create a naturally satisfying dessert that nourishes the body while satisfying sweet cravings in a wholesome way. Including dried figs regularly as part of a varied diet is an easy and delicious way to increase your intake of fiber, essential minerals, and protective antioxidants.
Ingredients
- 180 g dried figs
- Hot water (for soaking)
- 400 ml milk (dairy or your favorite plant-based milk)
- 2 tbsp toasted chopped pistachios (optional)
- 2 tsp strawberry jam (optional)
- Optional: your favorite toppings
Directions
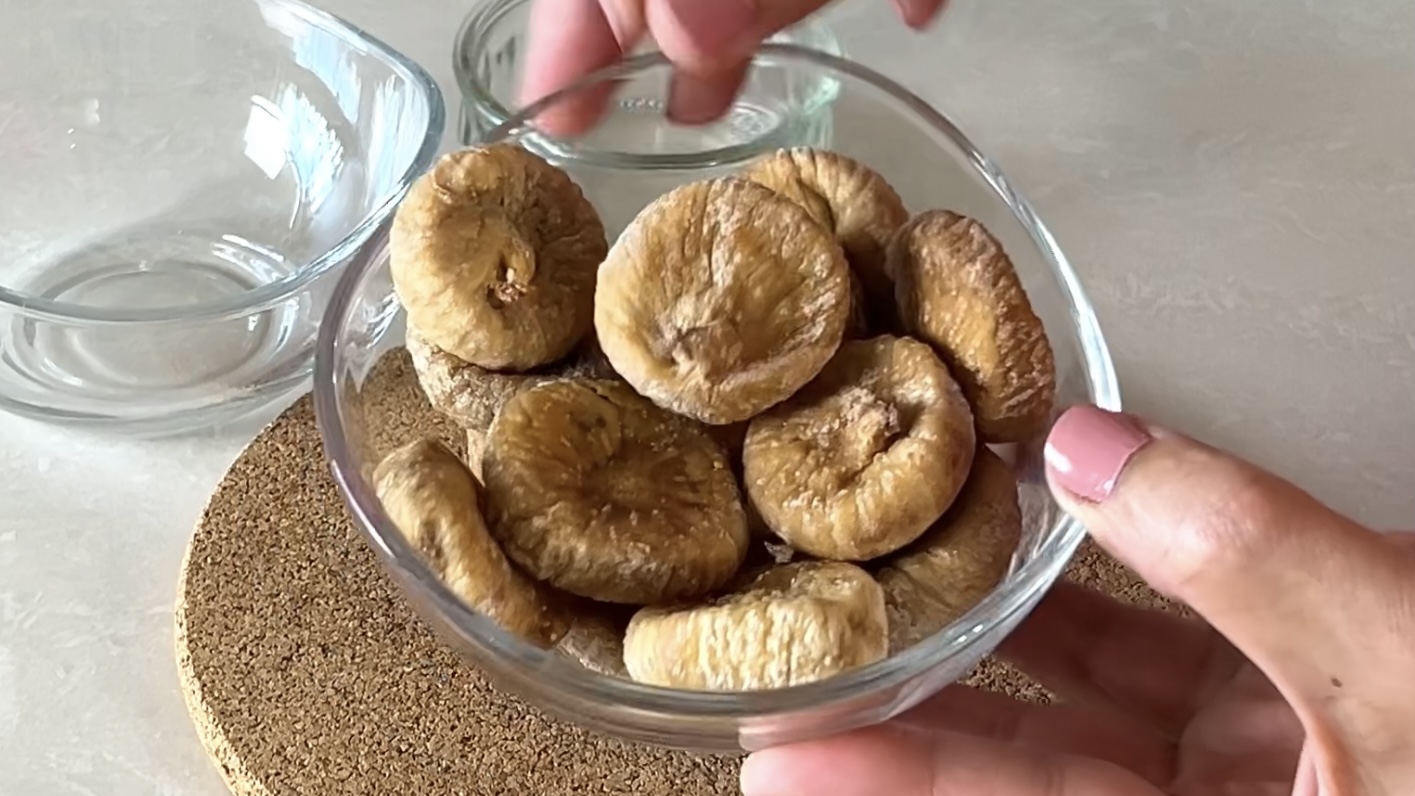
- Place the dried figs in a bowl and cover them completely with hot water.
- Let them soak for 30 minutes to 1 hour, or until they become soft and plump.
- Drain the figs well and discard the soaking water.
- Cut the softened figs into large chunks and transfer them to a blender.
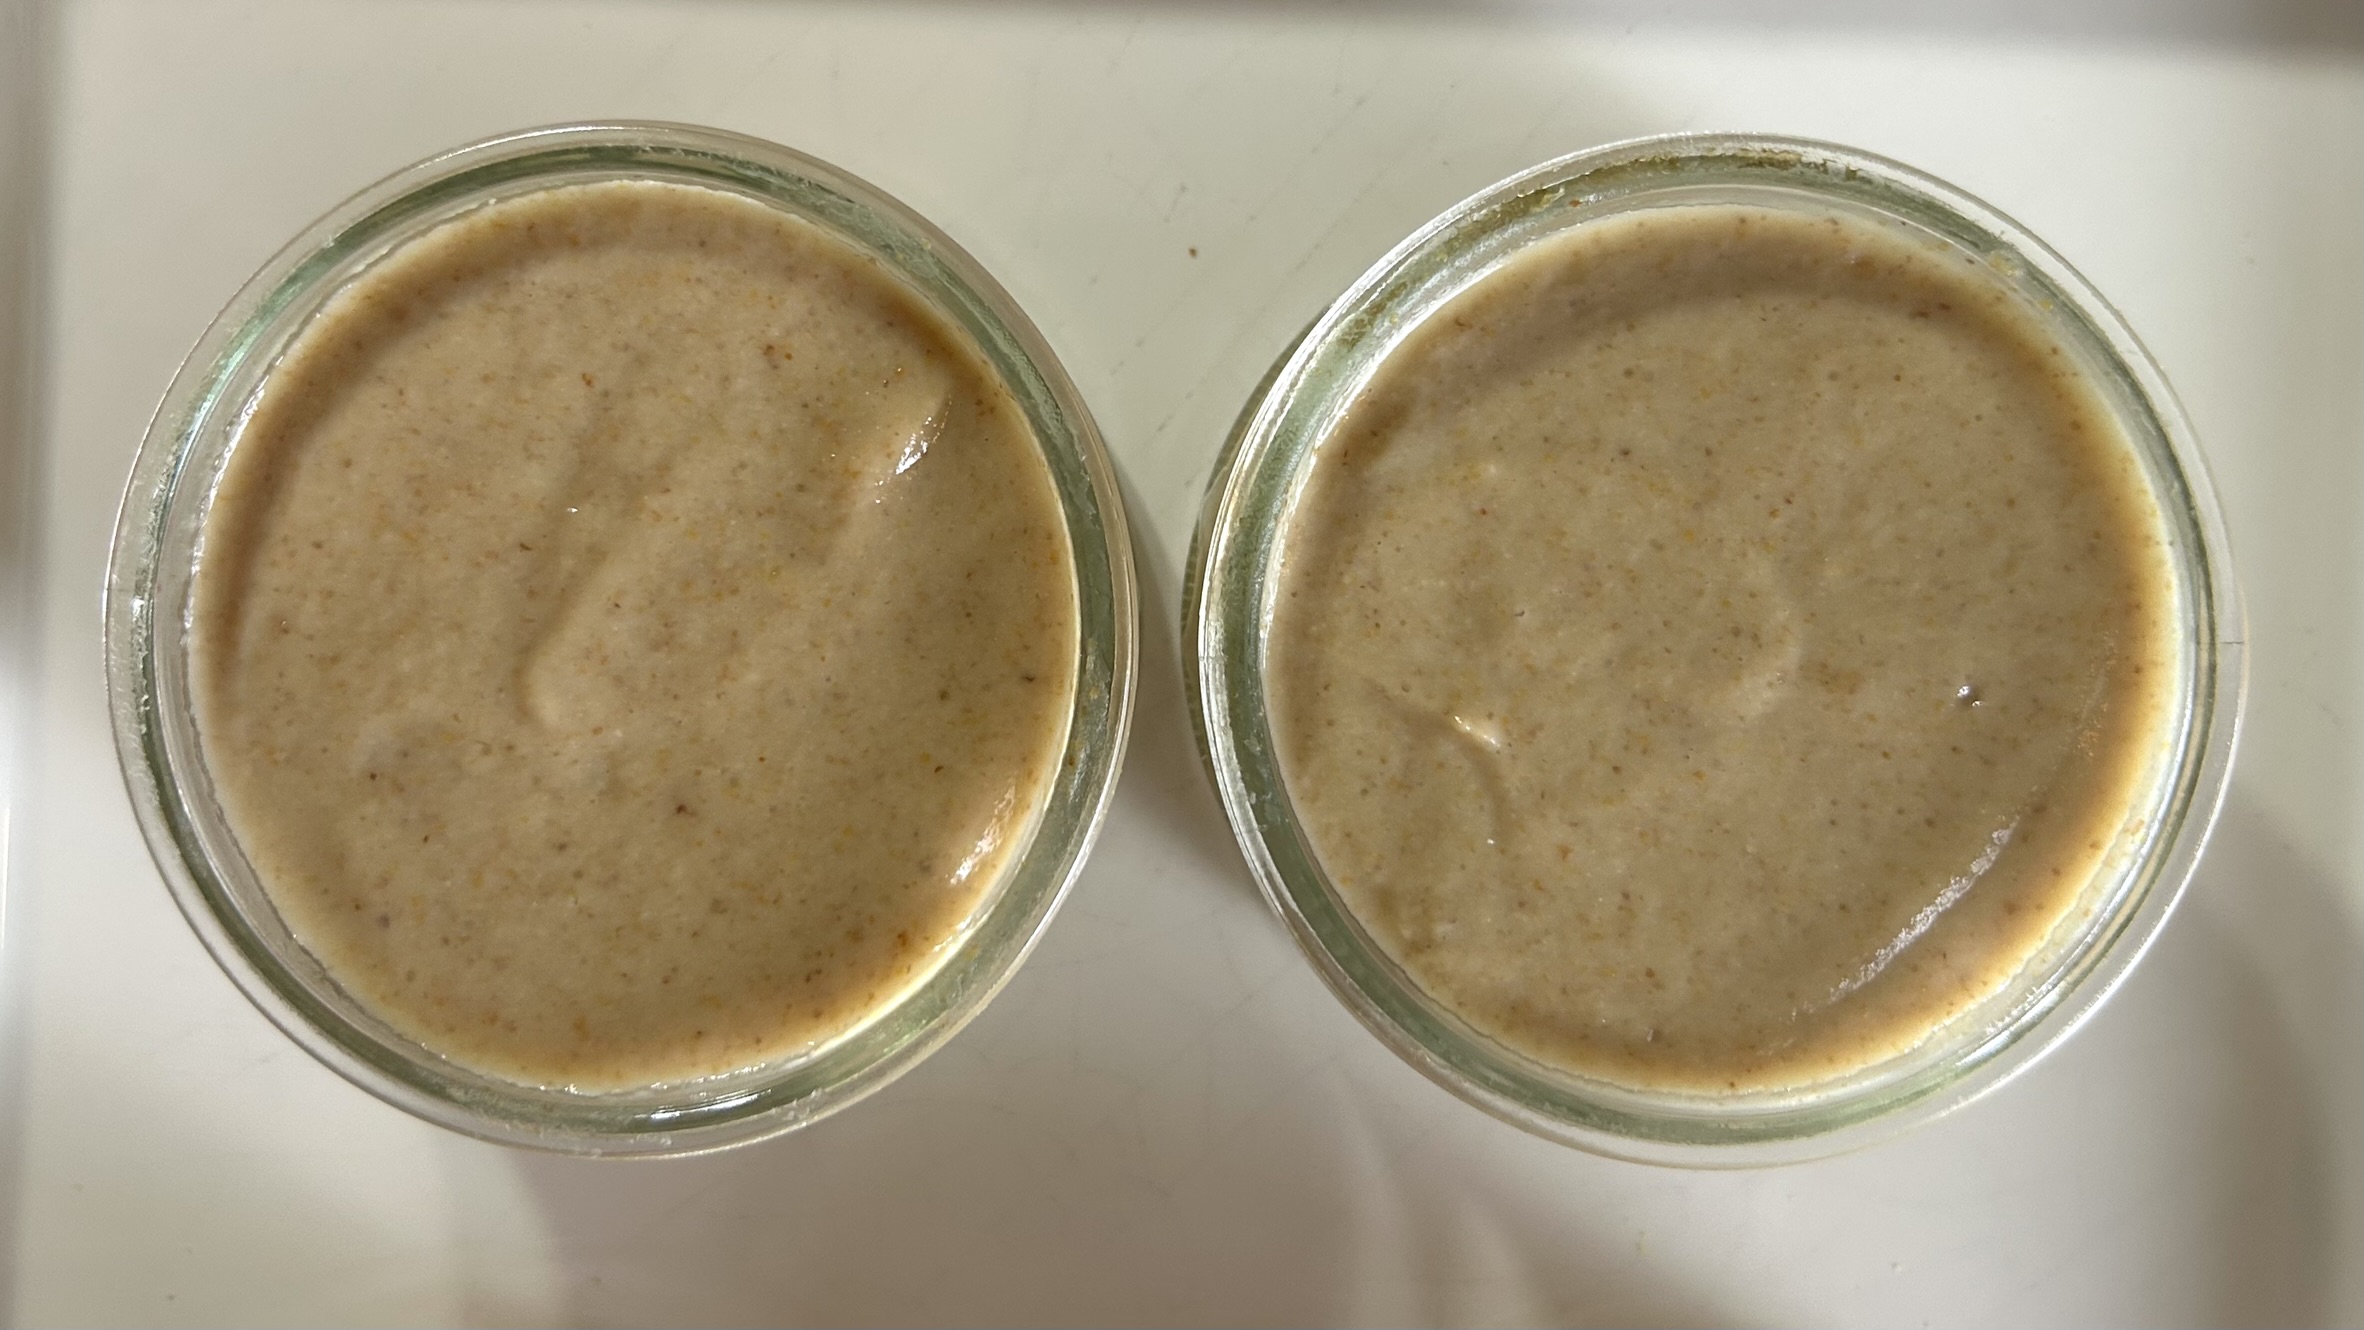
- Warm the milk over medium heat until it is lukewarm. Remove it from the heat just before it begins to simmer. Do not let it boil.
- Pour the warm milk over the chopped figs.
- Blend until the mixture becomes completely smooth, creamy, and no visible pieces of figs remain.
- As the mixture begins to naturally thicken, immediately divide it among small serving glasses, ramekins, or dessert bowls.
- Cover each serving with parchment paper to prevent the surface from drying out.
- Refrigerate for at least 3 hours to allow the pudding to fully set and develop its rich, silky consistency.
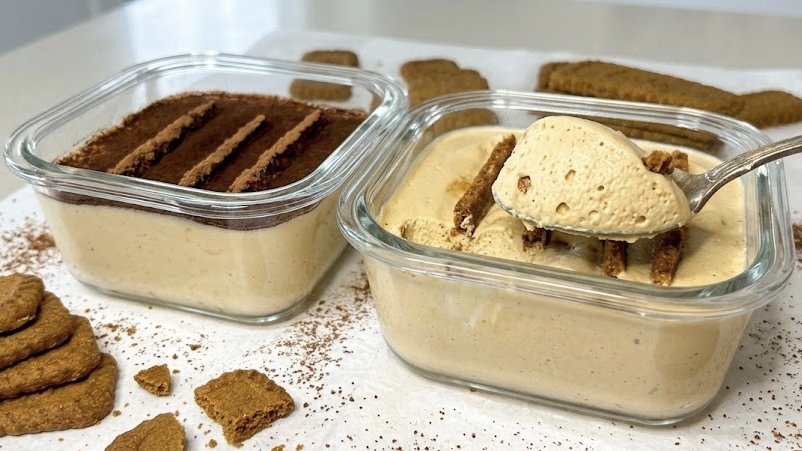
- Serve chilled as is, or garnish with toasted chopped pistachios, a thin layer of strawberry jam, or your favorite toppings.
Prep Time, Chilling Time & Servings
- Preparation Time: 10 minutes
- Soaking Time: 30 minutes to 1 hour
- Chilling Time: 3 hours
- Total Time: Approximately 3 hours 40 minutes (including soaking and chilling)
- Servings: 5
Nutritional Information
Per Serving (Approximate)
- Calories: 130
- Protein: 3.93 g
- Fat: 1.98 g
- Carbohydrates: 26.98 g
- Fiber: 3.5 g
Nutrition values are approximate and may vary depending on the type of milk and optional toppings used.
Storage and Recommendations
- Store covered in the refrigerator for up to 5 days.
- This pudding is best enjoyed thoroughly chilled.
- Add pistachios, jam, or any crunchy toppings just before serving to preserve their texture.
- Serve with fresh berries, chopped walnuts, almonds, or a drizzle of tahini for additional flavor and nutrition.
- If using sweetened plant-based milk, keep in mind that the pudding will be sweeter than when made with unsweetened milk.
- Because dried figs are naturally rich in fiber and natural sugars, this dessert is best enjoyed in moderation as part of a balanced diet.
- For the creamiest texture, blend the mixture until completely smooth before dividing it into serving dishes.