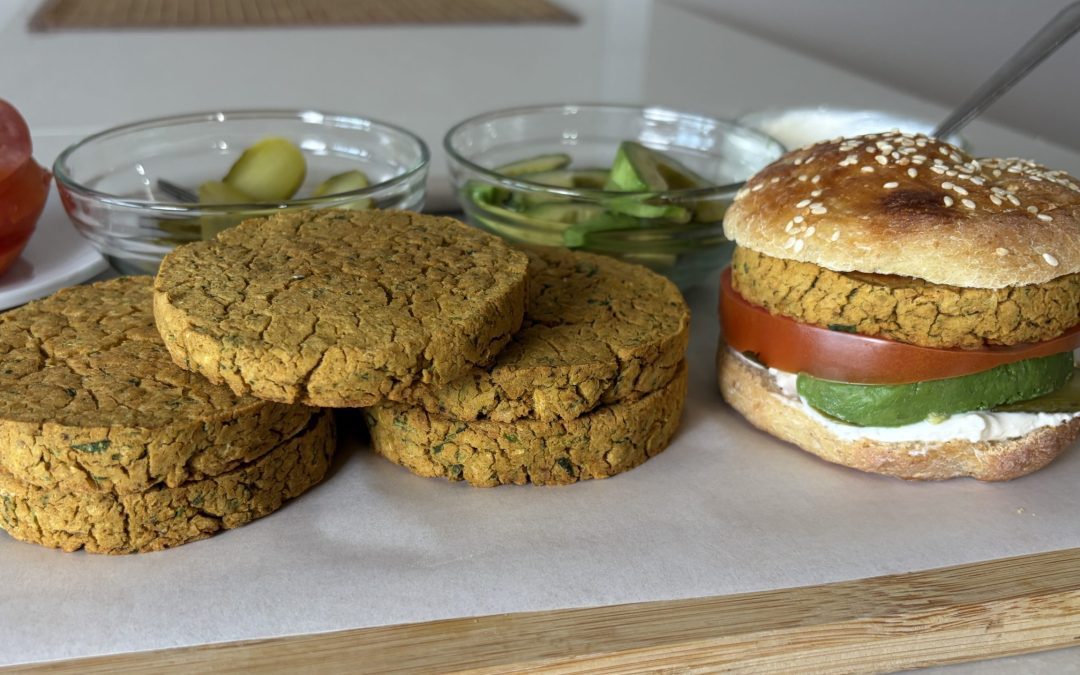
Baked Falafel Burgers

Baked Falafel Burgers

Baked Falafel Burgers
Falafel is one of the Middle East’s most iconic and beloved street foods, enjoyed for generations thanks to its irresistible combination of fragrant herbs, warm spices, and satisfying texture. Traditionally, falafel is prepared by blending chickpeas with fresh parsley, garlic, onion, and aromatic seasonings before shaping the mixture into small patties or balls and deep-frying them until crispy and golden. Whether tucked into warm pita bread, served alongside fresh salads, or enjoyed as part of a colorful mezze platter, falafel has become a favorite around the world for its rich flavor and wholesome plant-based ingredients.
Today we’re giving this classic recipe a practical and healthier twist by transforming it into thick, hearty baked falafel burgers that are perfect for sandwiches, meal prep, or quick weeknight dinners. Instead of deep frying, these burgers are baked until lightly crisp around the edges while remaining tender and flavorful inside. They’re made with scratch-cooked chickpeas, making them an excellent recipe for anyone who enjoys batch cooking legumes ahead of time and freezing portions for future meals. Best of all, there’s no flour or starch needed to hold everything together—the chickpeas naturally create a firm, cohesive mixture while preserving the authentic taste of traditional falafel.
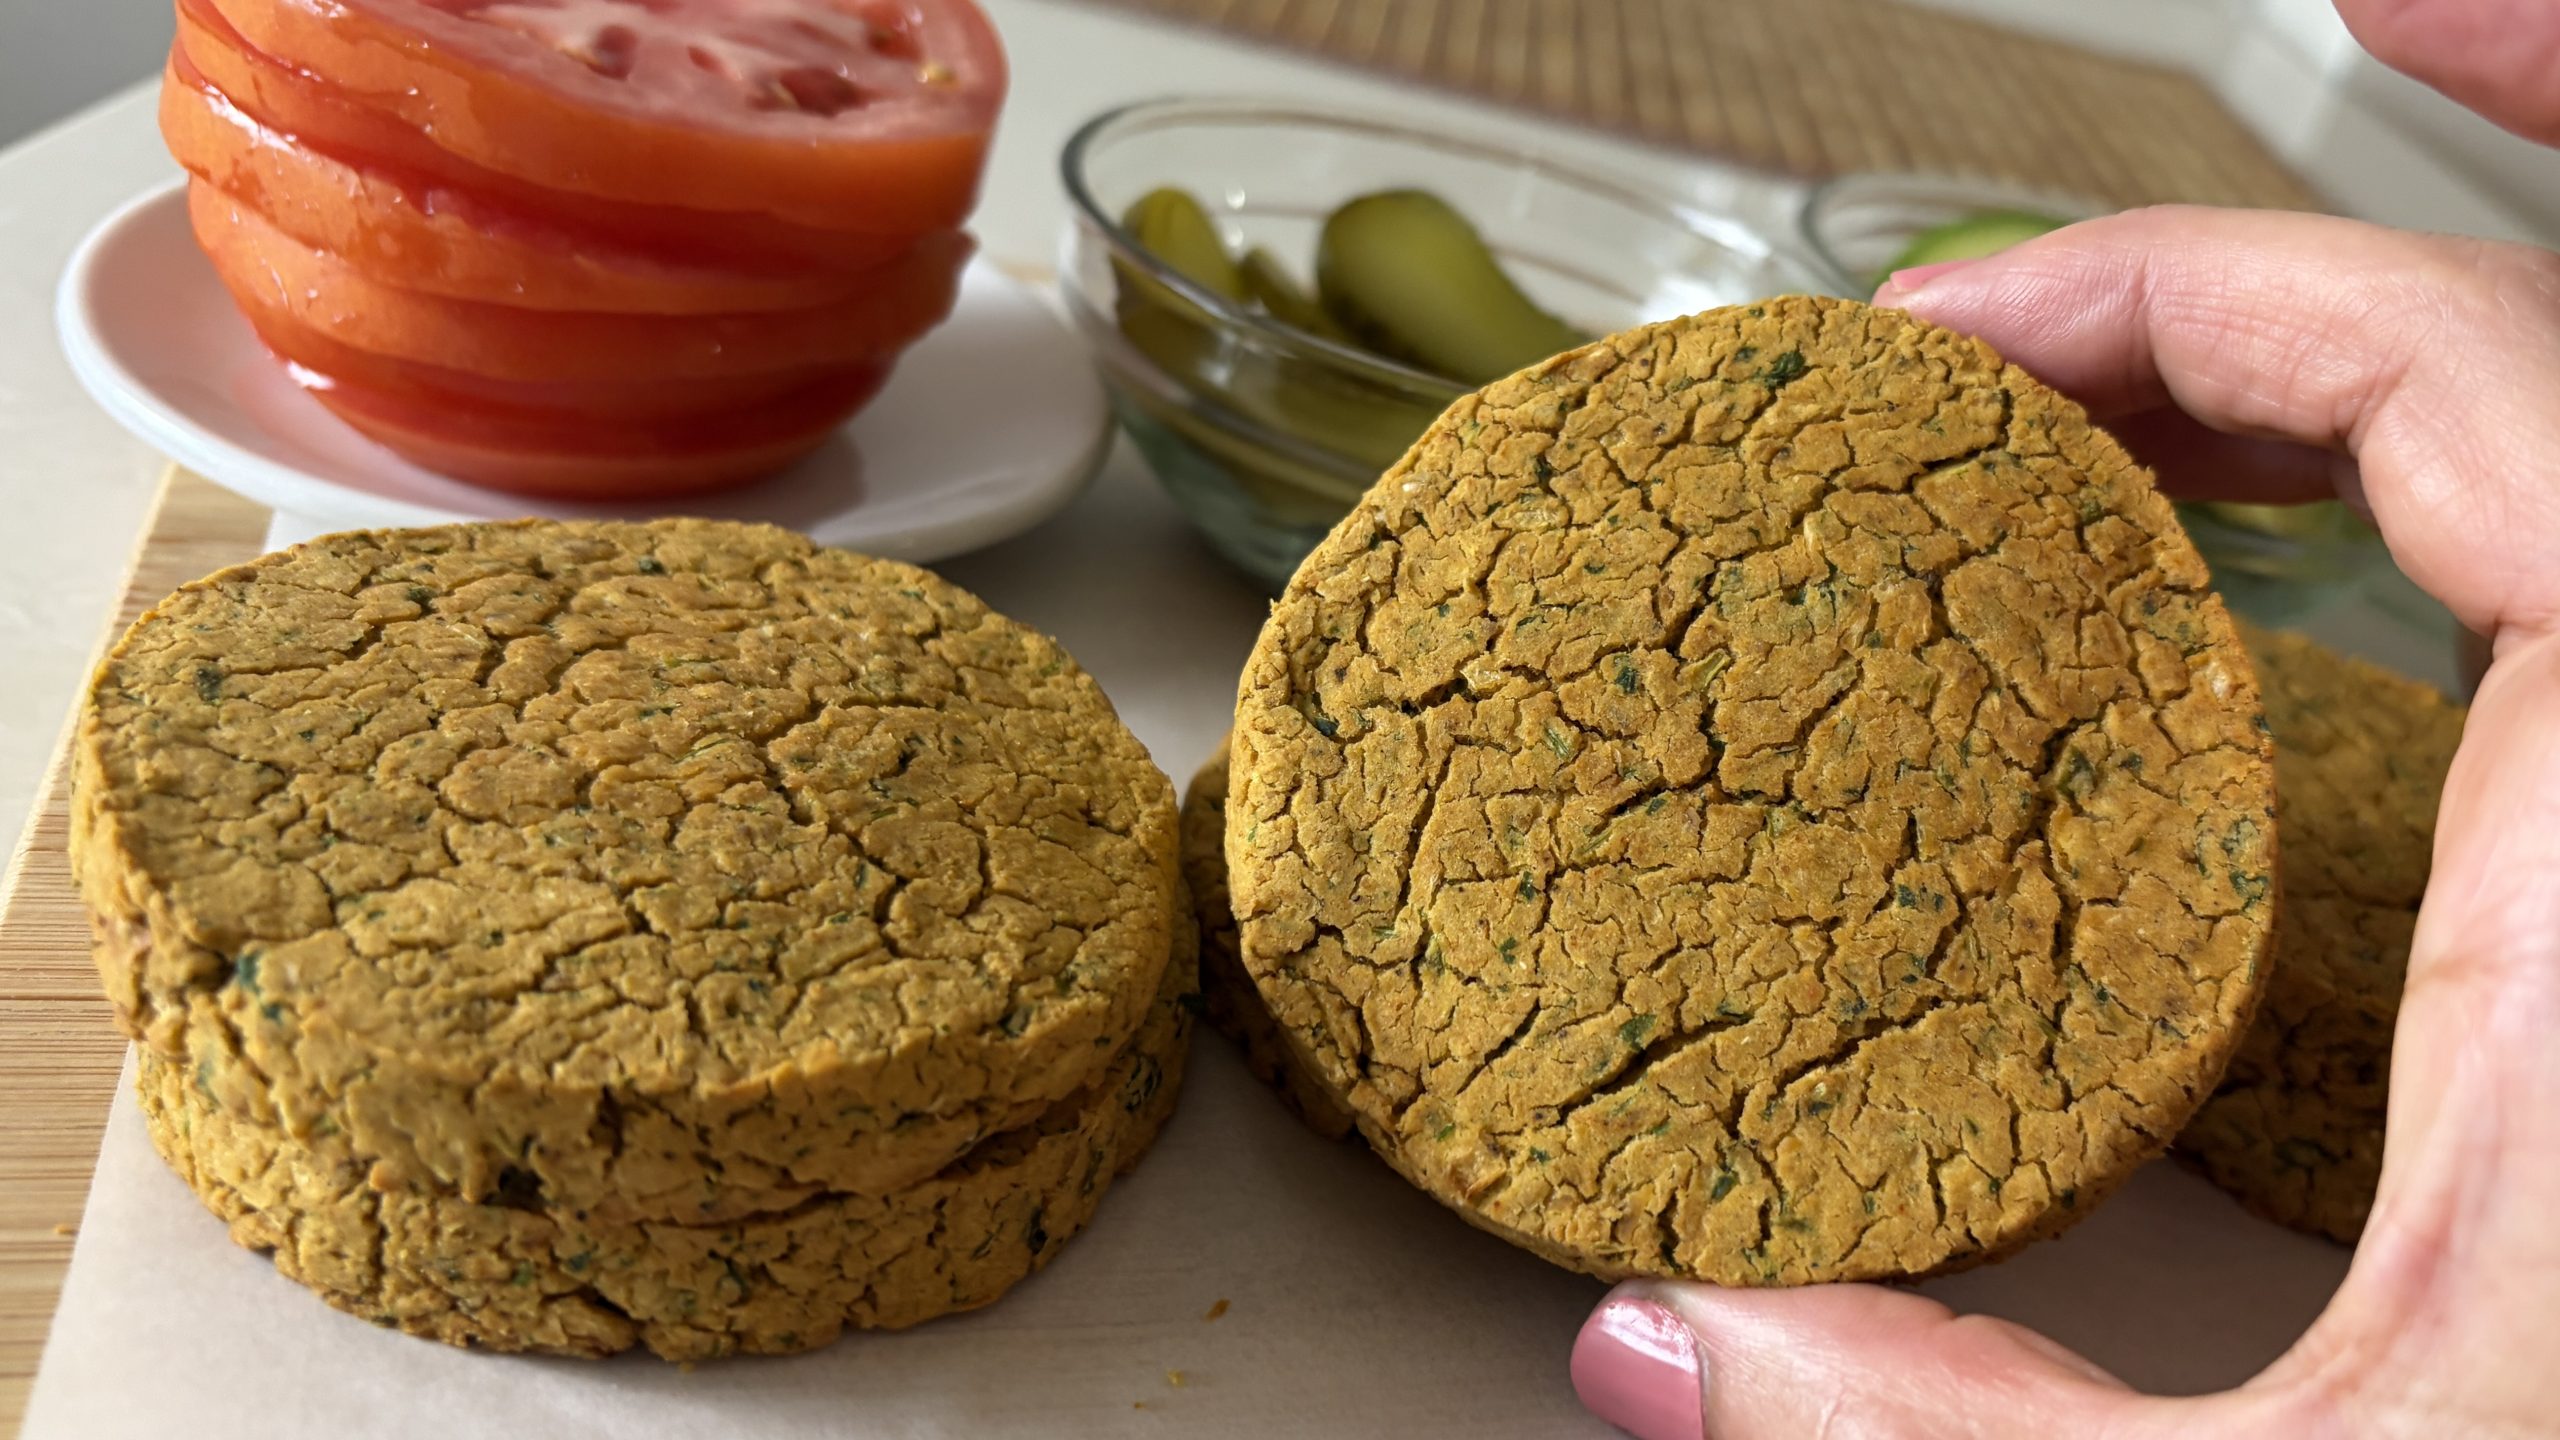
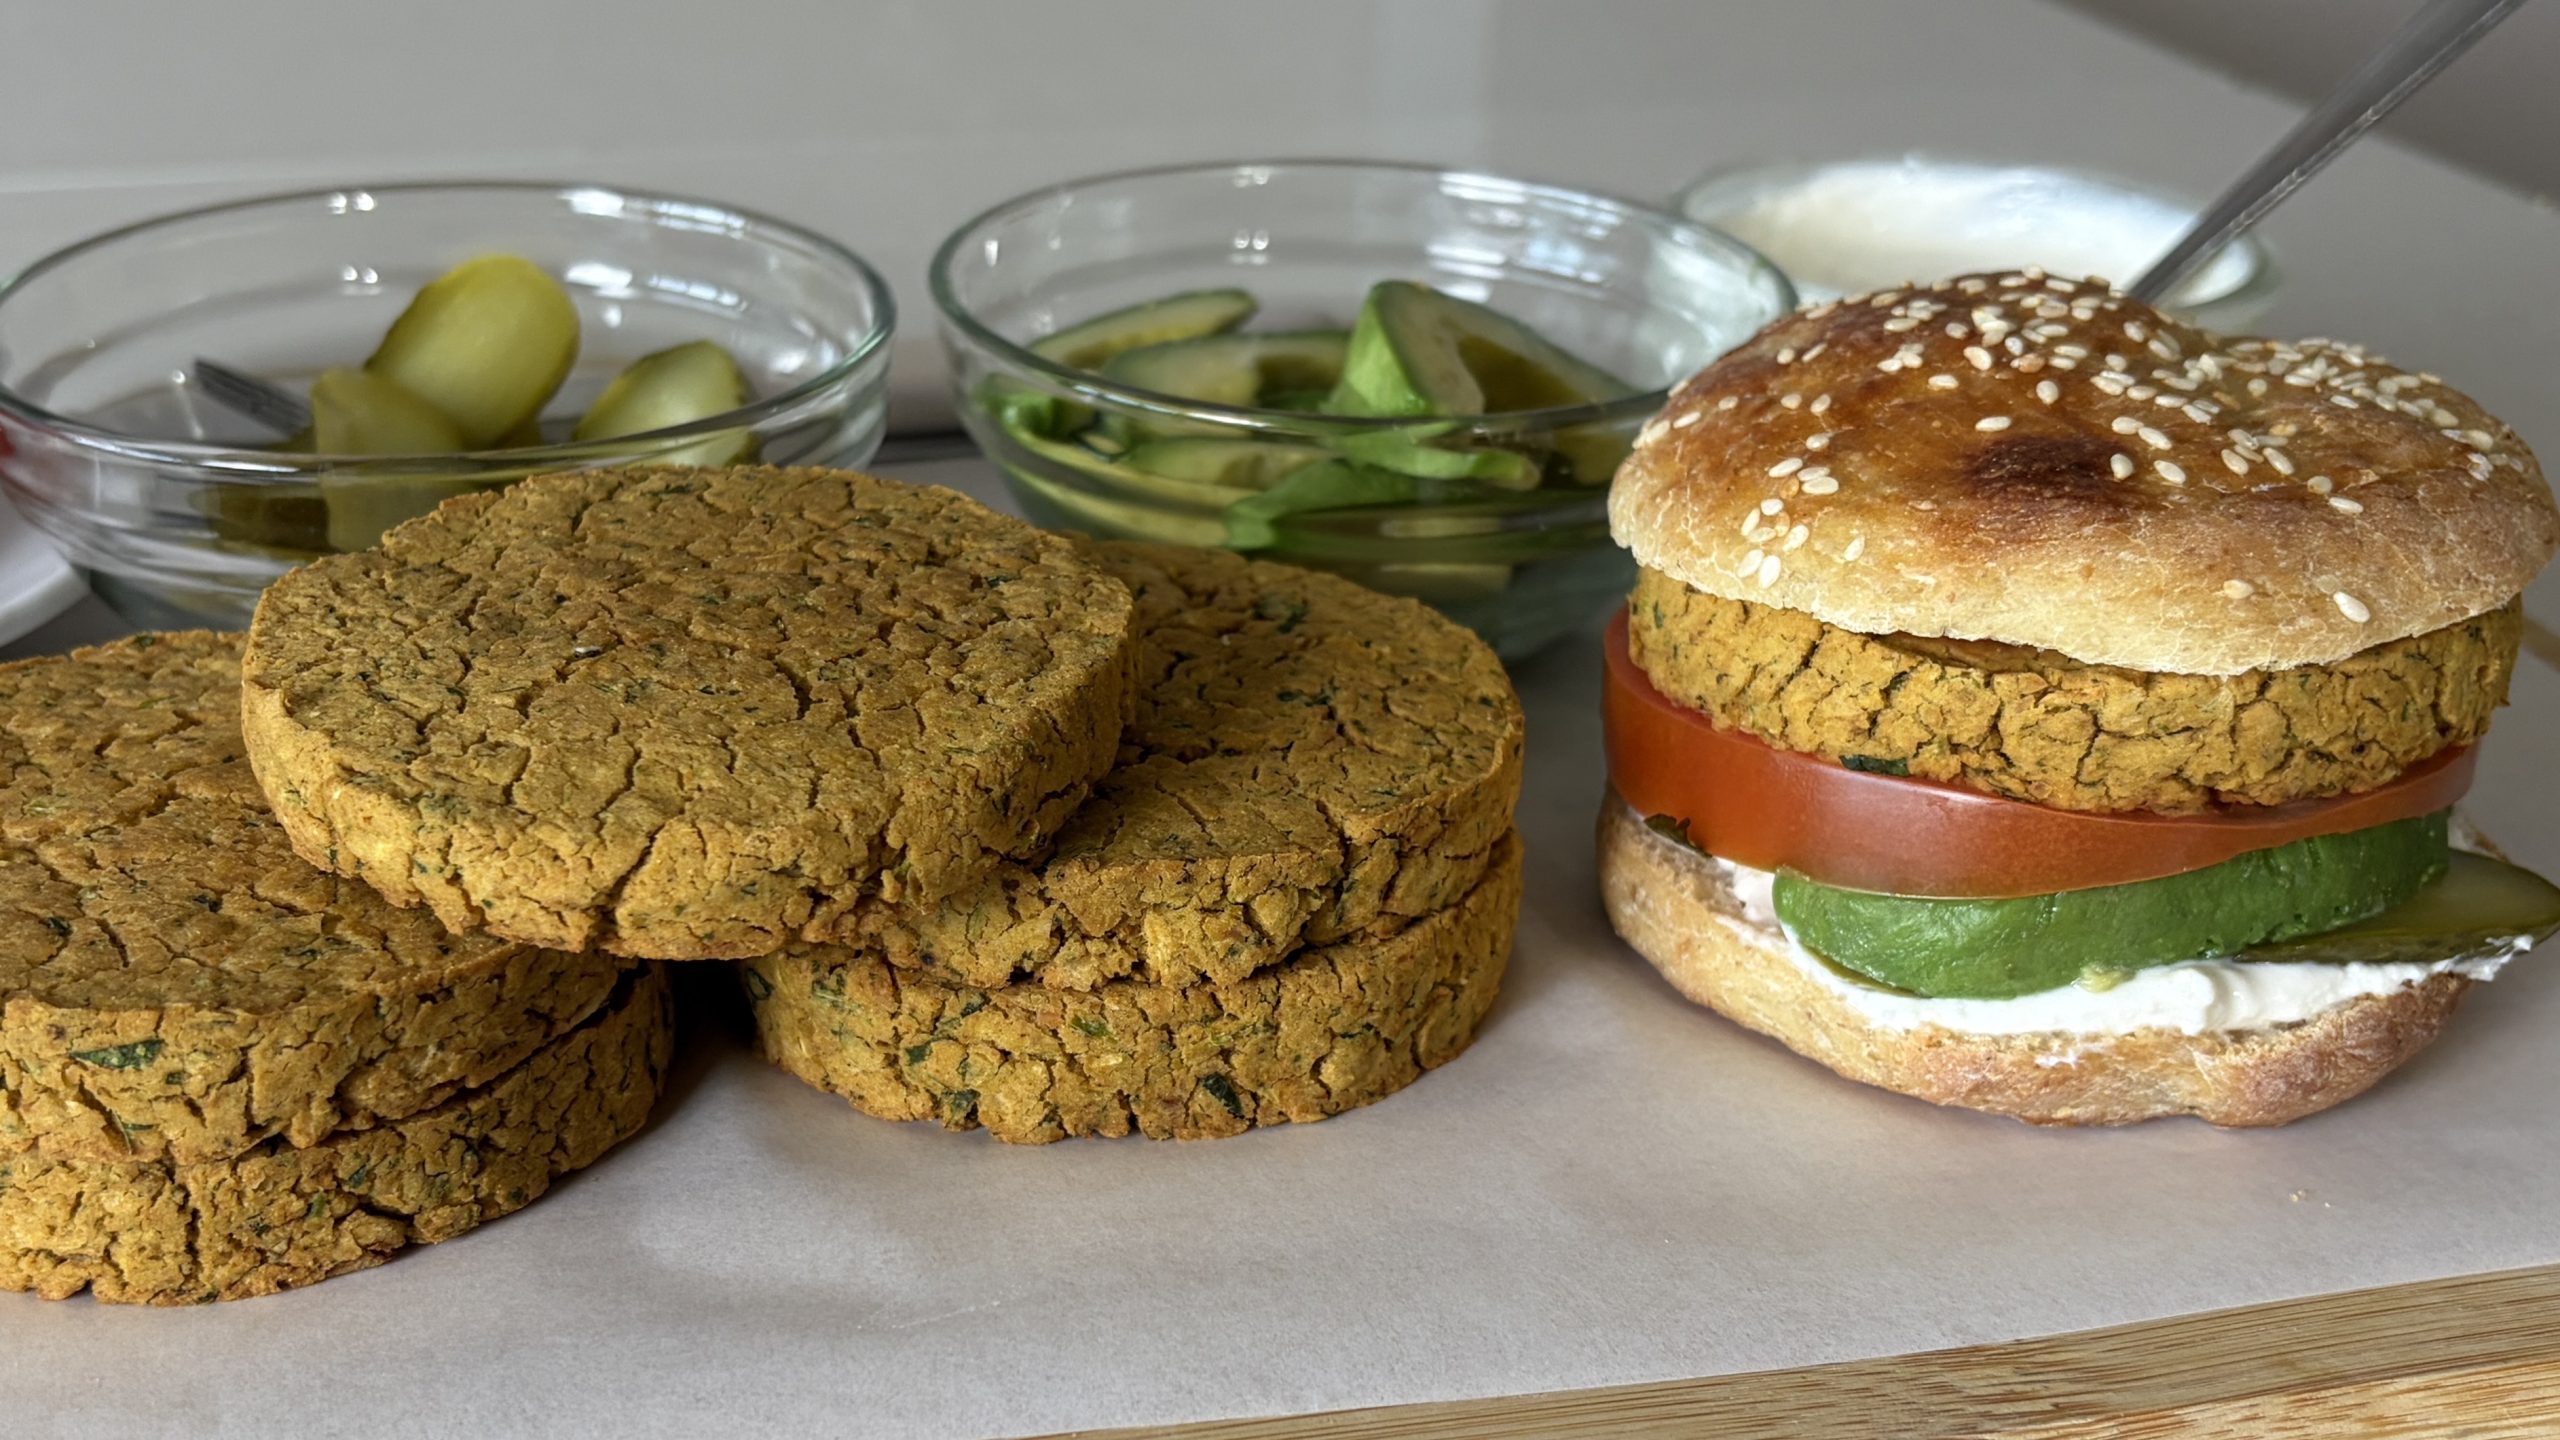
These homemade falafel burgers are incredibly versatile and can be served inside your favorite burger buns, gluten-free bread, lettuce wraps, or alongside fresh vegetables for a lighter meal. Pair them with creamy Greek yogurt garlic sauce, hummus, tahini, avocado, tomatoes, cucumbers, lettuce, pickles, or even homemade ketchup for a colorful burger that’s packed with flavor and nutrition. Whether you’re looking for an easy vegetarian lunch, a satisfying meatless dinner, or a healthy meal-prep recipe to keep in the freezer, these baked falafel burgers deliver restaurant-quality taste with simple pantry ingredients.
One of the biggest nutritional stars of this recipe is chickpeas. These humble legumes are naturally rich in plant-based protein, dietary fiber, iron, folate, magnesium, phosphorus, manganese, potassium, and several B vitamins that support energy production and overall health. Their combination of protein and fiber promotes long-lasting fullness, helps stabilize blood sugar levels, supports healthy digestion, and contributes to heart health by helping maintain healthy cholesterol levels. Chickpeas also provide important minerals involved in immune function, muscle performance, and red blood cell production. Including chickpeas regularly in your diet is an easy and affordable way to increase your intake of nutrient-dense plant foods while reducing reliance on heavily processed ingredients. Combined with antioxidant-rich parsley, heart-healthy olive oil, and flavorful spices, these baked falafel burgers become a wholesome meal that’s nourishing, satisfying, and easy to enjoy any day of the week.

Ingredients

For Homemade Cooked Chickpeas (Optional)

  • 1 cup (190 g) dried chickpeas (yields approximately 2 cups or 335 g cooked)
  • Water, for soaking and cooking

For the Falafel Burgers

  • 2 cups (335 g) cooked chickpeas (homemade or canned, rinsed and drained)
  • 40 g onion, chopped
  • 2 garlic cloves
  • 25 g fresh parsley, chopped
  • ½ tsp salt
  • ½ tsp black pepper
  • ½ tsp paprika
  • 1 tsp ground coriander
  • ½ tsp baking powder
  • 2 tbsp olive oil

Directions

  1. Soak the dried chickpeas overnight in plenty of water if preparing them from scratch.
  2. Drain the soaked chickpeas and cook them in an Instant Pot with fresh water until tender. Drain well and allow them to cool slightly.
  3. If cooking extra chickpeas, divide them into freezer-friendly portions for future recipes.
  4. Add the cooked chickpeas, onion, garlic, parsley, olive oil, baking powder, salt, pepper, paprika, and ground coriander to a food processor. Blend until the mixture becomes smooth and cohesive while remaining soft enough to shape. No flour or starch is needed.
  5. Preheat the oven to 350°F (175°C) and line a large baking tray (approximately 37 × 25 cm) with parchment paper.
  6. Place a burger ring mold (about 10 cm / 4 inches in diameter) on the tray and fill it with the falafel mixture, pressing gently to form thick patties about 1–1½ cm thick.
  7. Carefully remove the mold and repeat until all the mixture has been used, leaving space between each burger.
  8. Bake for about 30 minutes, or until the burgers are lightly golden around the edges and feel firm when gently touched.
  9. Allow the burgers to cool for a few minutes before handling. This helps them firm up and makes assembling the sandwiches easier.
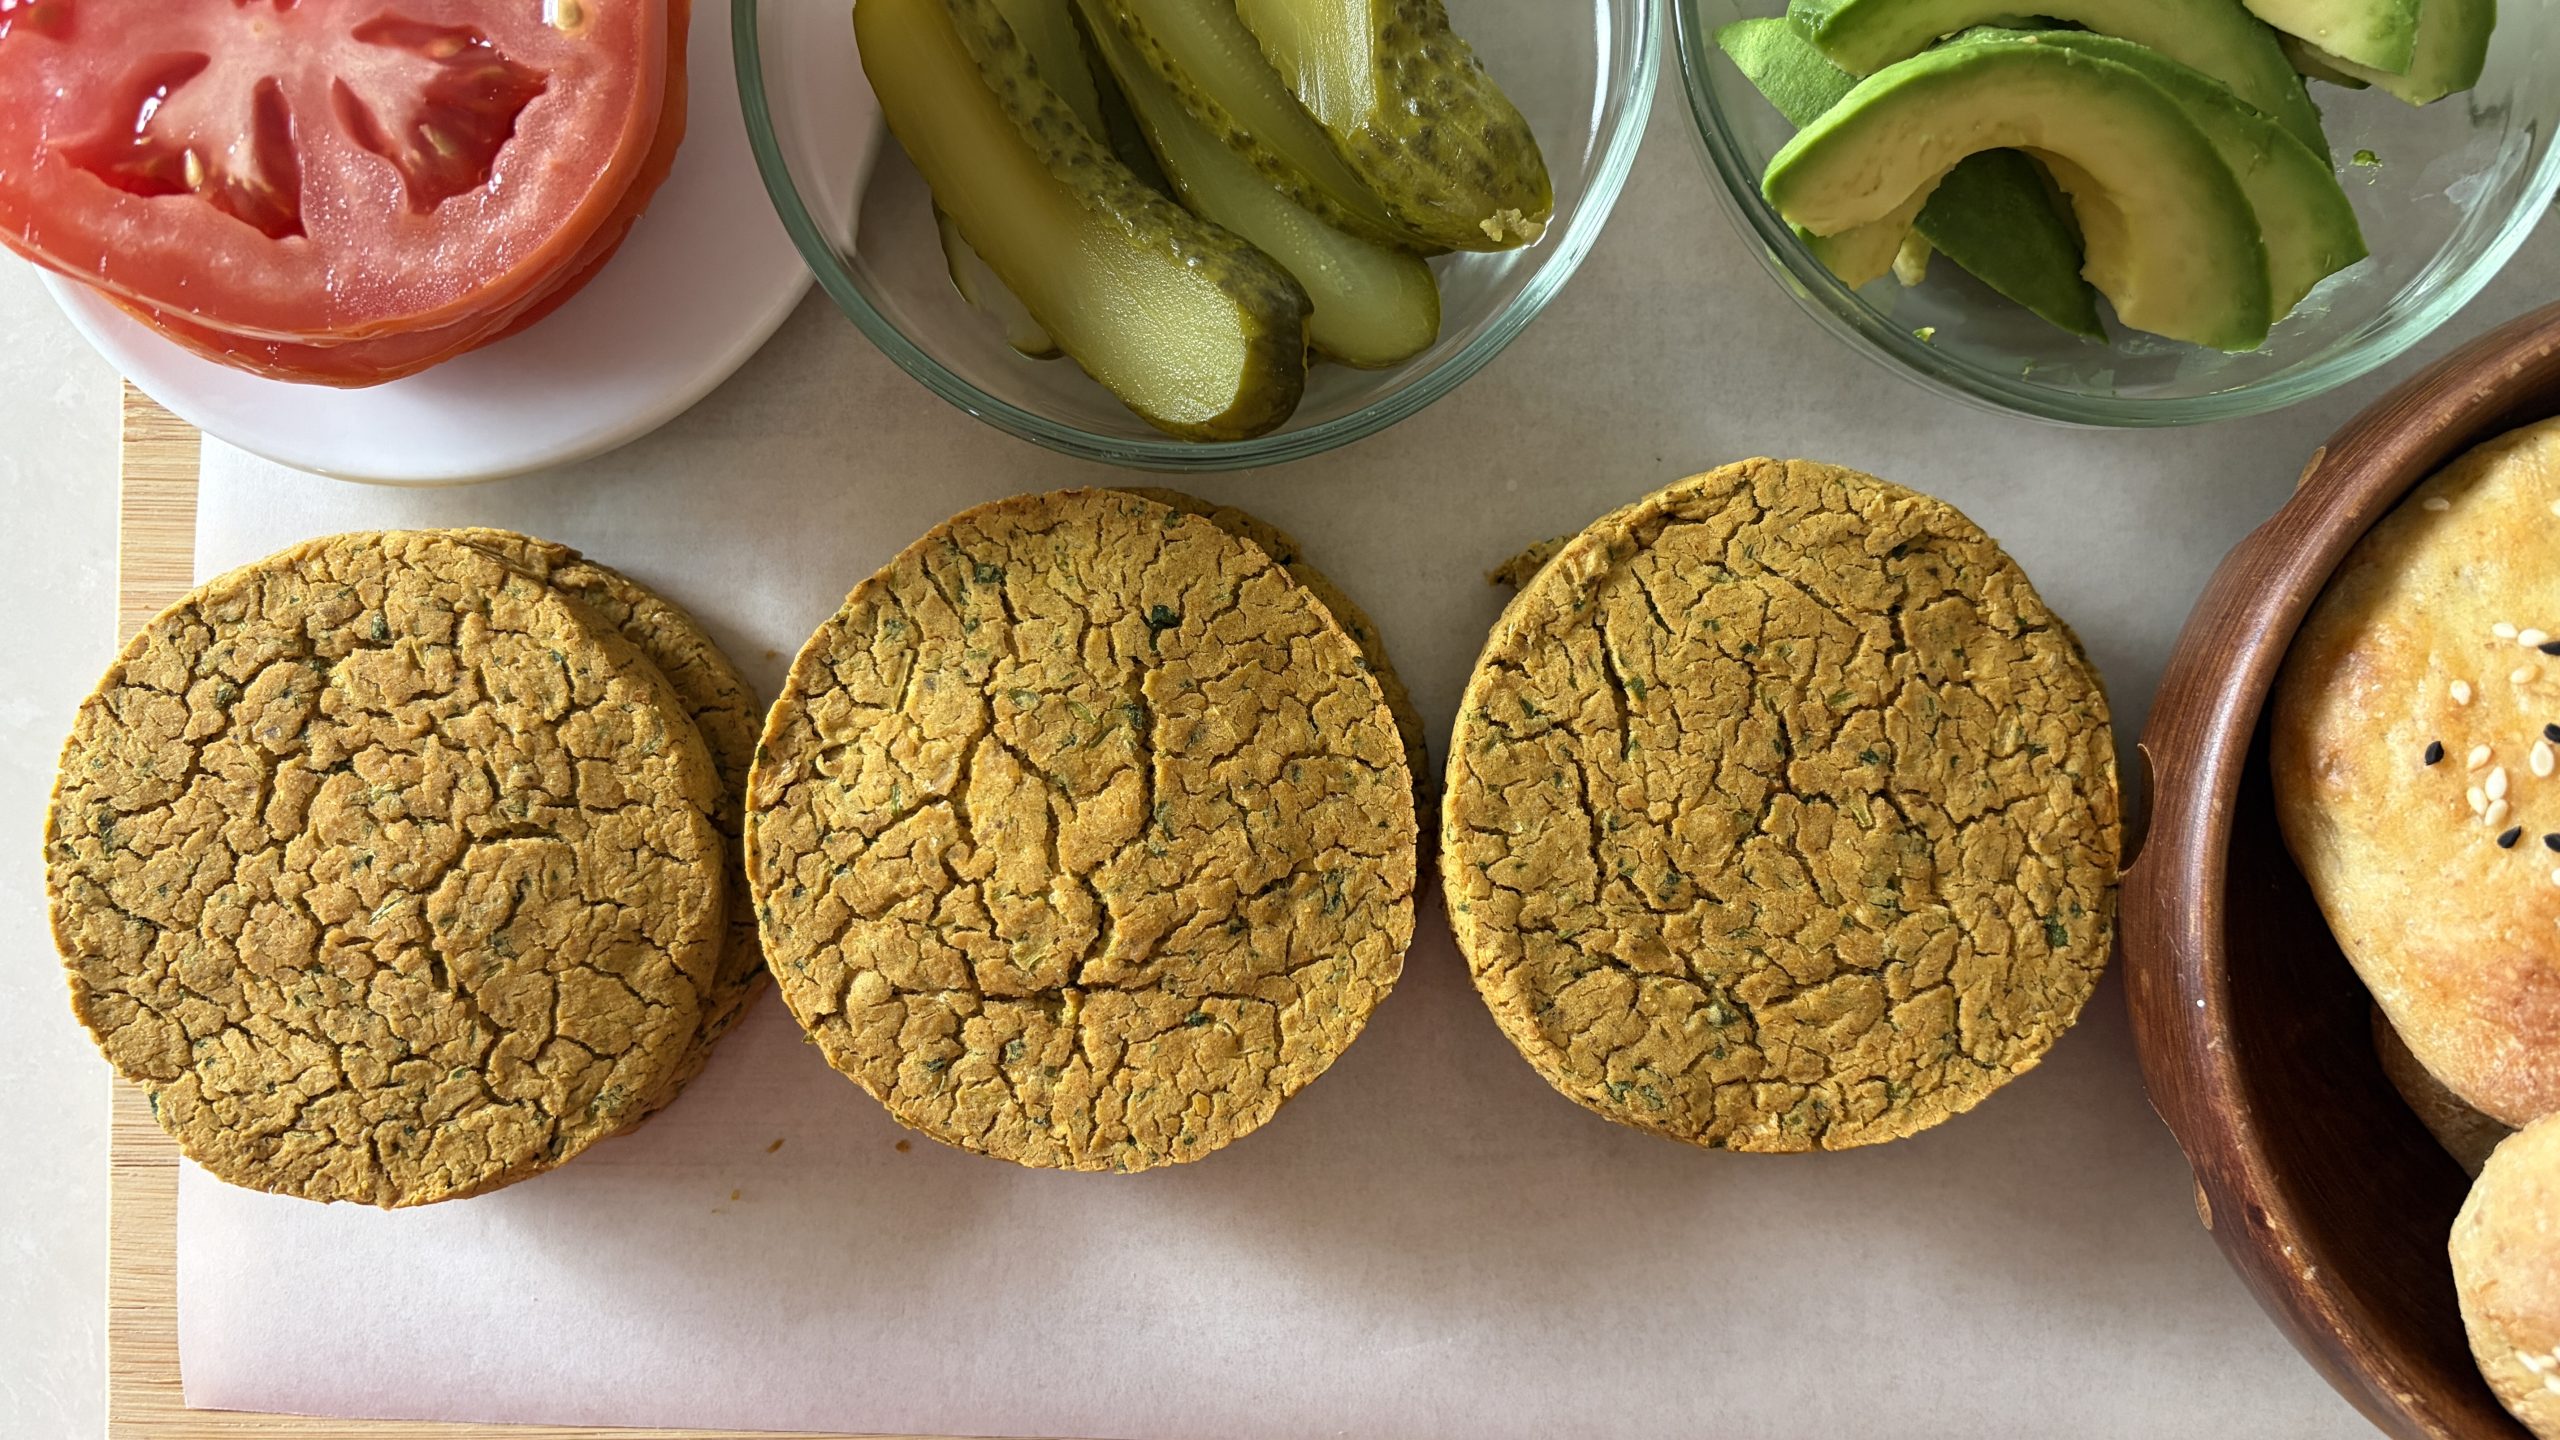
  10. Small cracks may appear during baking because the recipe contains no flour or starch. This is completely normal and does not affect the texture or flavor.
  11. Serve warm with your favorite toppings such as Greek yogurt garlic sauce, avocado, tomatoes, lettuce, cucumbers, pickles, hummus, tahini, or homemade ketchup.

Prep Time, Baking Time & Servings

  • Prep Time: 20 minutes (plus overnight soaking if using dried chickpeas)
  • Cooking Time (Chickpeas): About 20 minutes in an Instant Pot
  • Baking Time: 30 minutes
  • Oven Temperature: 350°F (175°C)
  • Servings: 6 falafel burgers

Nutritional Information (Per Burger)

  • Calories: 140 kcal
  • Protein: 5.32 g
  • Fat: 6.08 g
  • Carbohydrates: 17.26 g
  • Fiber: 4.7 g

Storage & Recommendations

  • Dietary Information: Vegan, naturally gluten-free, dairy-free, and flour-free.
  • Store leftover falafel burgers in an airtight container in the refrigerator for up to 5 days.
  • Freeze cooked burgers in freezer-safe containers or bags for up to 3 months.
  • Allow the burgers to cool for several minutes after baking before handling to help them become firmer.
  • Batch-cook chickpeas and freeze them in measured portions to make this recipe even quicker next time.
  • These burgers pair wonderfully with Greek yogurt garlic sauce (or a dairy-free alternative), hummus, tahini sauce, avocado, tomatoes, lettuce, cucumbers, onions, pickles, sprouts, or homemade ketchup.
  • Serve with a fresh salad, roasted vegetables, baked sweet potato fries, or crispy potato wedges for a complete meal.
Four Seasons Crustless Quiche

Four Seasons Crustless Quiche

Four Seasons Crustless Quiche

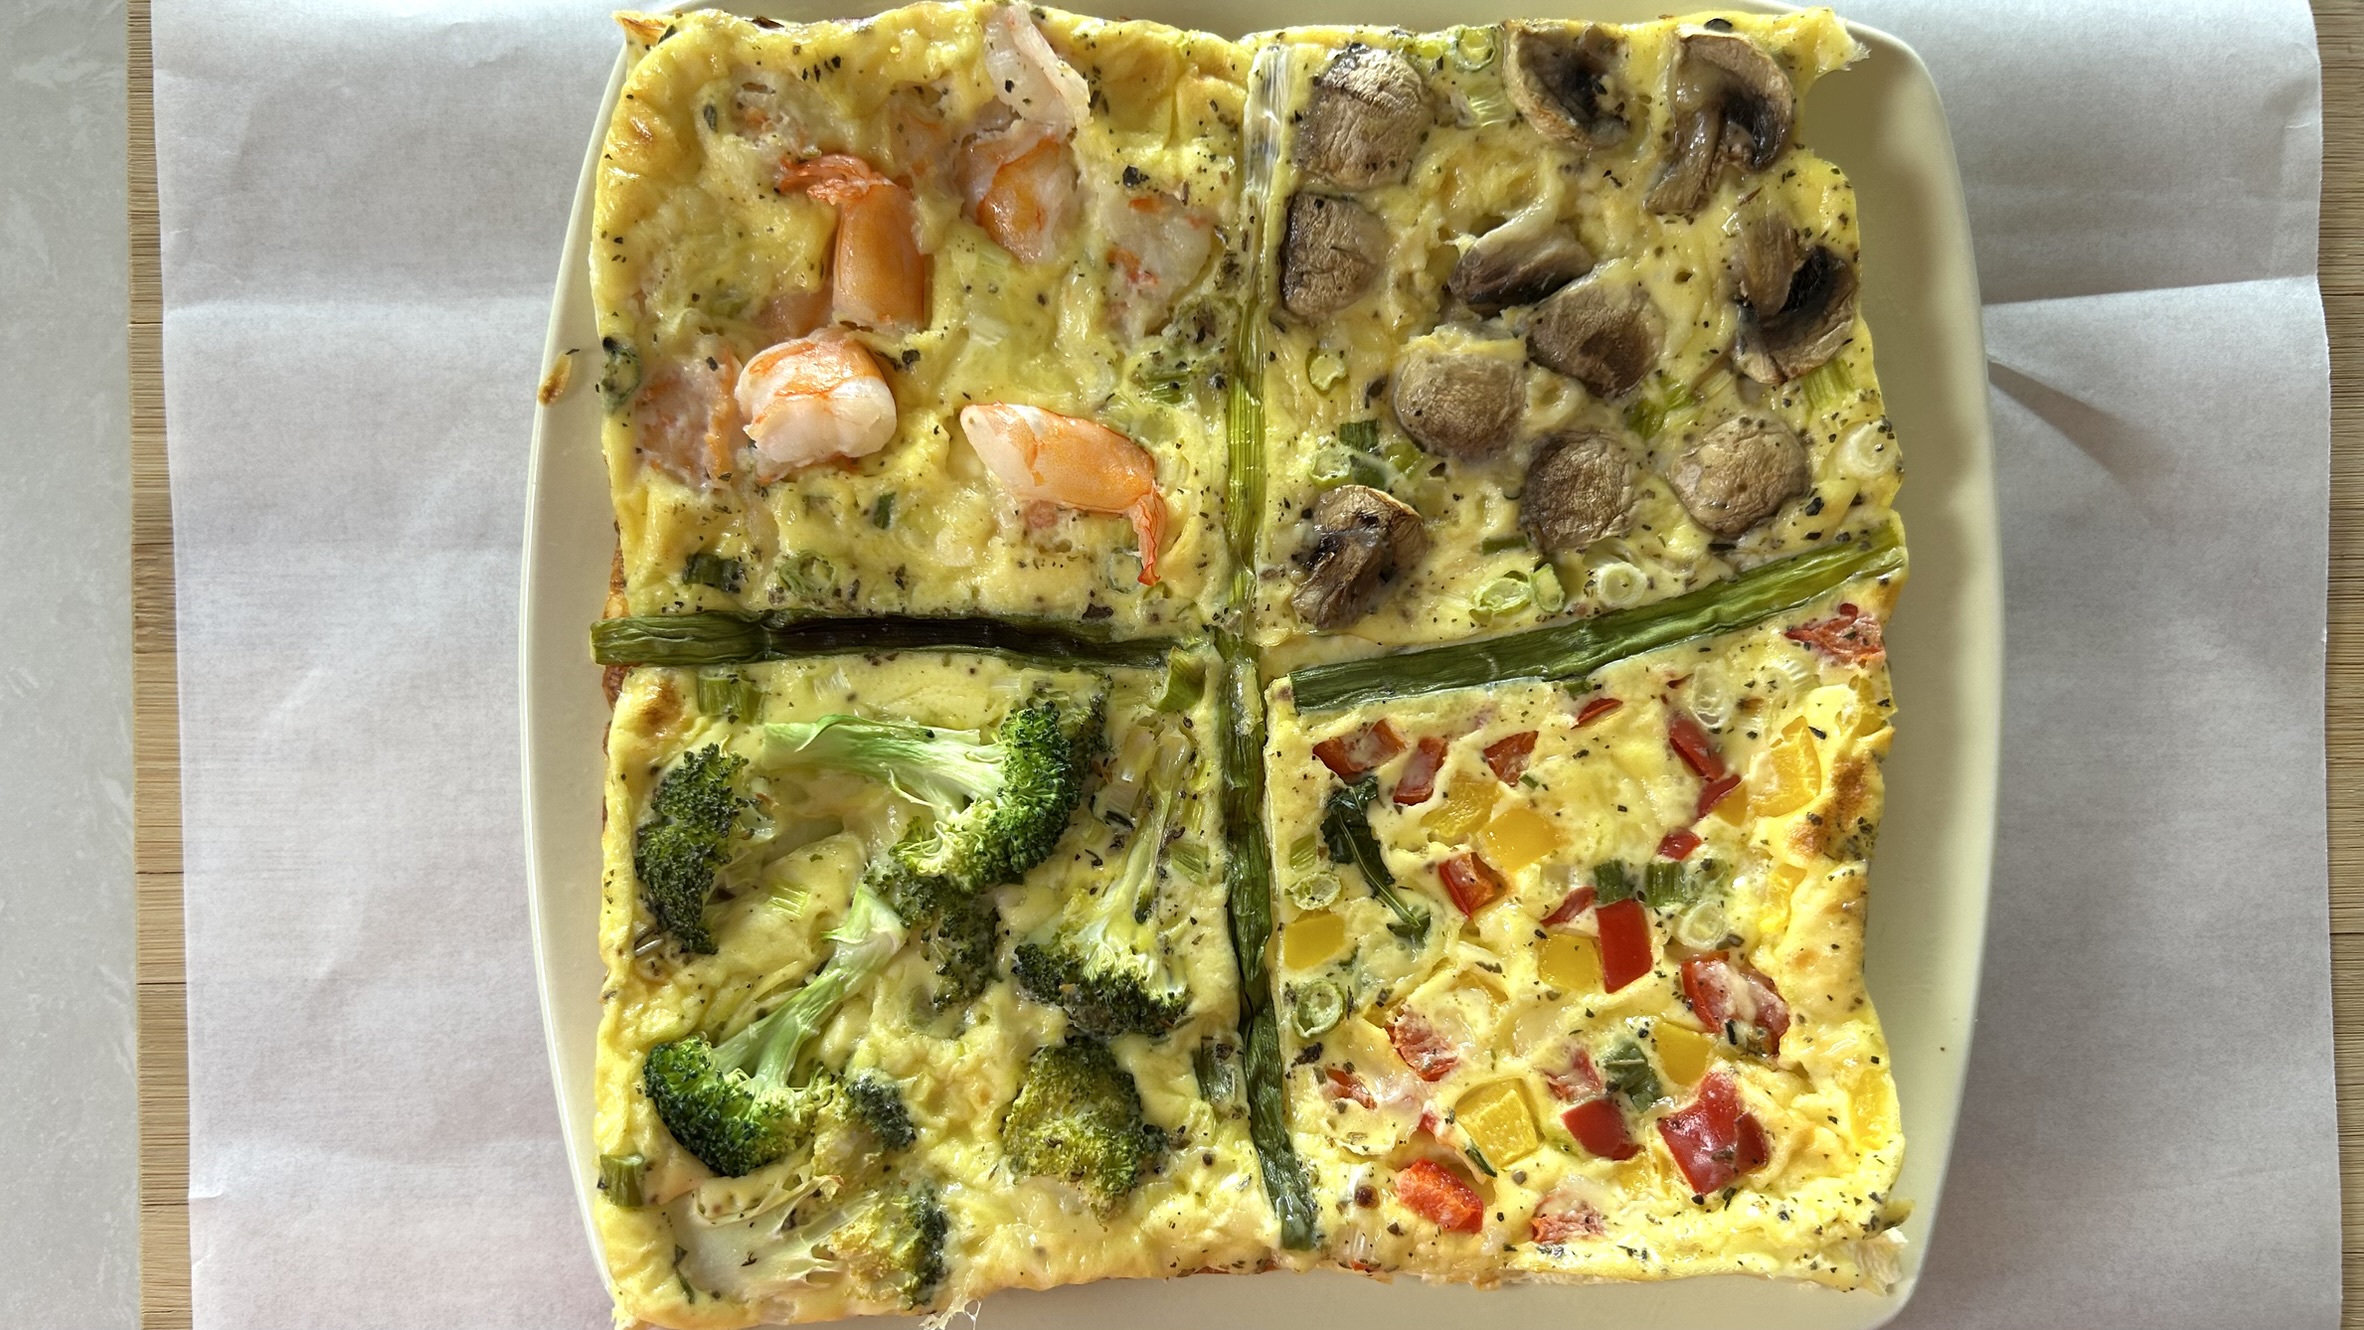
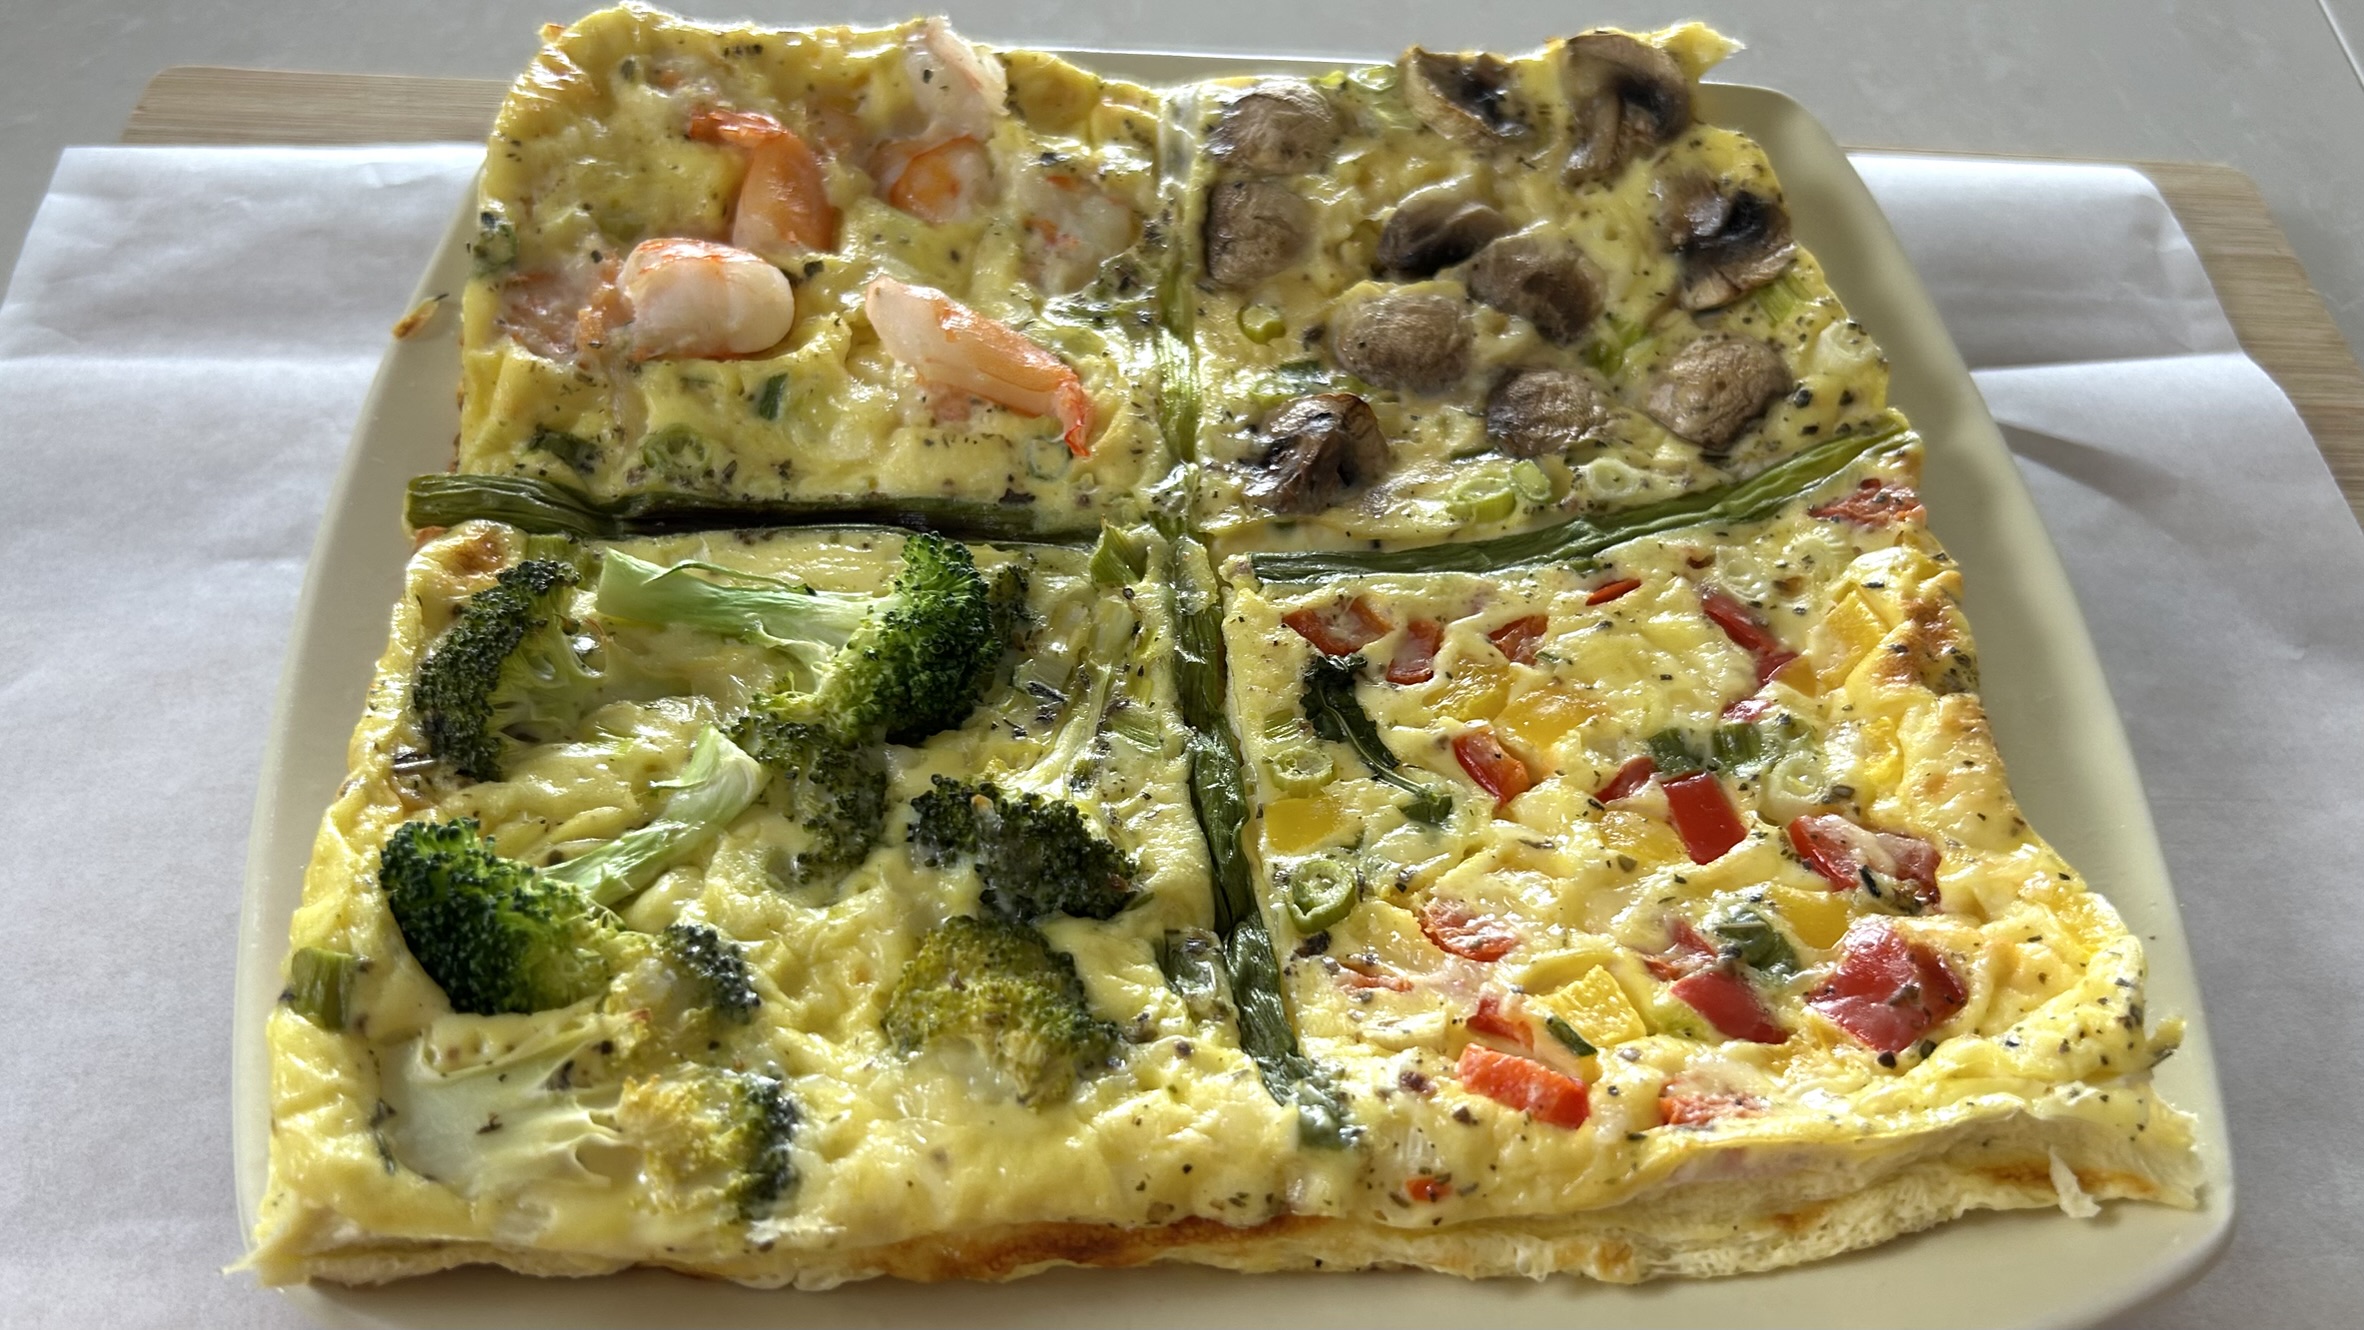
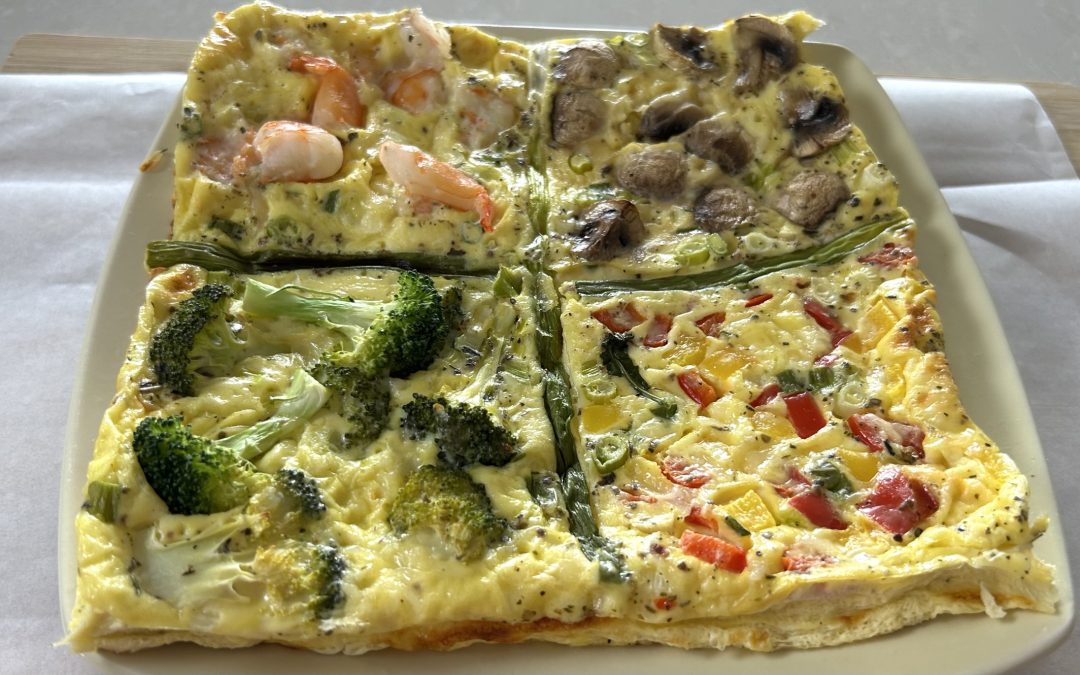
If you’re looking for a wholesome meal that’s easy to prepare, packed with protein, and guaranteed to please everyone at the table, this Four Seasons Crustless Quiche is a recipe you’ll find yourself making on repeat. Inspired by the famous Four Seasons Pizza, this colorful quiche transforms one creamy egg base into four delicious flavor combinations baked together in the same dish. Every slice is a little different, making it a fun way to satisfy different tastes without preparing multiple recipes. Whether you love colorful bell peppers, earthy mushrooms, tender broccoli, or juicy shrimp, this quiche offers something for everyone while keeping preparation incredibly simple.

Unlike a traditional quiche, this version skips the buttery crust, making it naturally gluten-free, lighter, and higher in protein while still delivering a rich, creamy texture. Greek yogurt adds extra creaminess and protein without the heaviness of cream, while cheddar cheese provides just the right amount of savory flavor. Everything comes together in one baking dish, making cleanup effortless and meal prep a breeze. Enjoy it warm for breakfast, pair it with a fresh salad for lunch, or serve it alongside roasted vegetables for a satisfying dinner. It also stores beautifully, making it an excellent make-ahead meal for busy weekdays.

One of the best things about this recipe is its versatility. The four sections can easily be customized according to the season, your family’s preferences, or whatever vegetables and proteins you already have in your refrigerator. Spinach, zucchini, cherry tomatoes, asparagus, smoked salmon, cooked chicken, feta, mozzarella, or fresh herbs all make delicious additions. It’s an excellent way to reduce food waste while creating a colorful, nutritious meal that’s as beautiful as it is delicious.

Why Eggs Deserve a Place in Your Regular Diet

Eggs are the nutritional powerhouse behind this recipe and one of nature’s most complete foods. They provide high-quality protein containing all nine essential amino acids, making them ideal for maintaining muscle mass, supporting recovery, and keeping you feeling satisfied for longer. Their impressive protein content also helps stabilize appetite, making them an excellent choice for a balanced breakfast or any meal throughout the day.

Beyond protein, eggs are naturally rich in vitamin B12, choline, selenium, vitamin D, riboflavin, and lutein. Choline plays a key role in brain development and memory, while lutein and zeaxanthin help support long-term eye health. Combined with antioxidant-rich vegetables, calcium-rich Greek yogurt, and protein-packed shrimp, this quiche becomes a balanced meal filled with vitamins, minerals, healthy fats, and antioxidants. Including eggs regularly as part of a varied, balanced diet is a simple and affordable way to support overall health while enjoying delicious, satisfying meals.

Ingredients

Egg Base

  • 6 large eggs
  • 1 cup (220 g) thick Greek yogurt
  • 2 tablespoons olive oil
  • ½ teaspoon salt
  • Freshly ground black pepper, to taste
  • ¼ teaspoon dried Italian herbs (or your favorite dried or fresh herbs)

Vegetables & Toppings

  • 2 green onions, finely chopped (reserve the long green leaves)
  • 50 g red and yellow bell peppers, finely chopped
  • 50 g mushrooms, finely chopped
  • 50 g broccoli, cut into small florets
  • 65 g cooked shrimp, diced
  • About 60 g shredded cheddar cheese

Directions

  1. Preheat your oven and prepare a 9 × 9-inch (22 × 22 cm) square baking dish by lining it with parchment paper.
  2. Wash and prepare all the vegetables. Finely chop the green onions, reserving the long green leaves, dice the bell peppers and mushrooms, cut the broccoli into small florets, and chop the cooked shrimp. Keep each topping separate.
  3. In a large mixing bowl, whisk together the eggs, Greek yogurt, olive oil, salt, black pepper, and dried herbs until smooth and fully combined.
  4. Pour the egg mixture into the prepared baking dish and spread it evenly.
  5. Arrange the reserved green onion leaves across the center of the dish to form a cross, creating four equal sections.
  6. Sprinkle most of the shredded cheddar cheese evenly over the egg mixture, followed by the chopped green onions.
  7. Fill one section with the chopped bell peppers.
  8. Fill the second section with the chopped mushrooms.
  9. Fill the third section with the broccoli florets.
  10. Fill the final section with the diced cooked shrimp.
  11. Sprinkle the remaining cheddar cheese evenly over the entire quiche.
  12. Bake until the center is fully set and the edges are lightly golden.
  13. Let the quiche cool for several minutes before slicing. Serve warm or allow it to cool completely before storing for meal prep.

Prep Time, Baking Time & Servings

  • Preparation Time: 20 minutes
  • Baking Time: 30 minutes
  • Total Time: 50 minutes
  • Servings: 4

Nutritional Information (Per Serving)

  • Calories: 291
  • Protein: 20.74 g
  • Fat: 19.97 g
  • Carbohydrates: 7.26 g
  • Fiber: 0.7 g

Storage

  • Store leftover quiche in an airtight container in the refrigerator for up to 4 days.
  • Freeze individual slices for up to 2 months.
  • Thaw overnight in the refrigerator before reheating.
  • Reheat gently in the microwave, oven, or air fryer until warmed through.

Notes & Recommendations

  • This recipe is naturally gluten-free since it contains no flour or crust.
  • Feel free to swap the vegetables according to the season or what you have on hand.
  • Great additions include spinach, zucchini, asparagus, cherry tomatoes, cooked chicken, smoked salmon, feta, mozzarella, or fresh herbs.
  • For extra protein, add more cooked shrimp or substitute with diced chicken or turkey.
  • Serve with a crisp green salad, roasted vegetables, or fresh fruit for a complete meal.
  • This quiche is perfect for breakfast, brunch, lunch, dinner, or weekly meal prep because it tastes delicious both warm and cold.
Rice Paper Almond Croissants

Rice Paper Almond Croissants

Rice Paper Almond Croissants

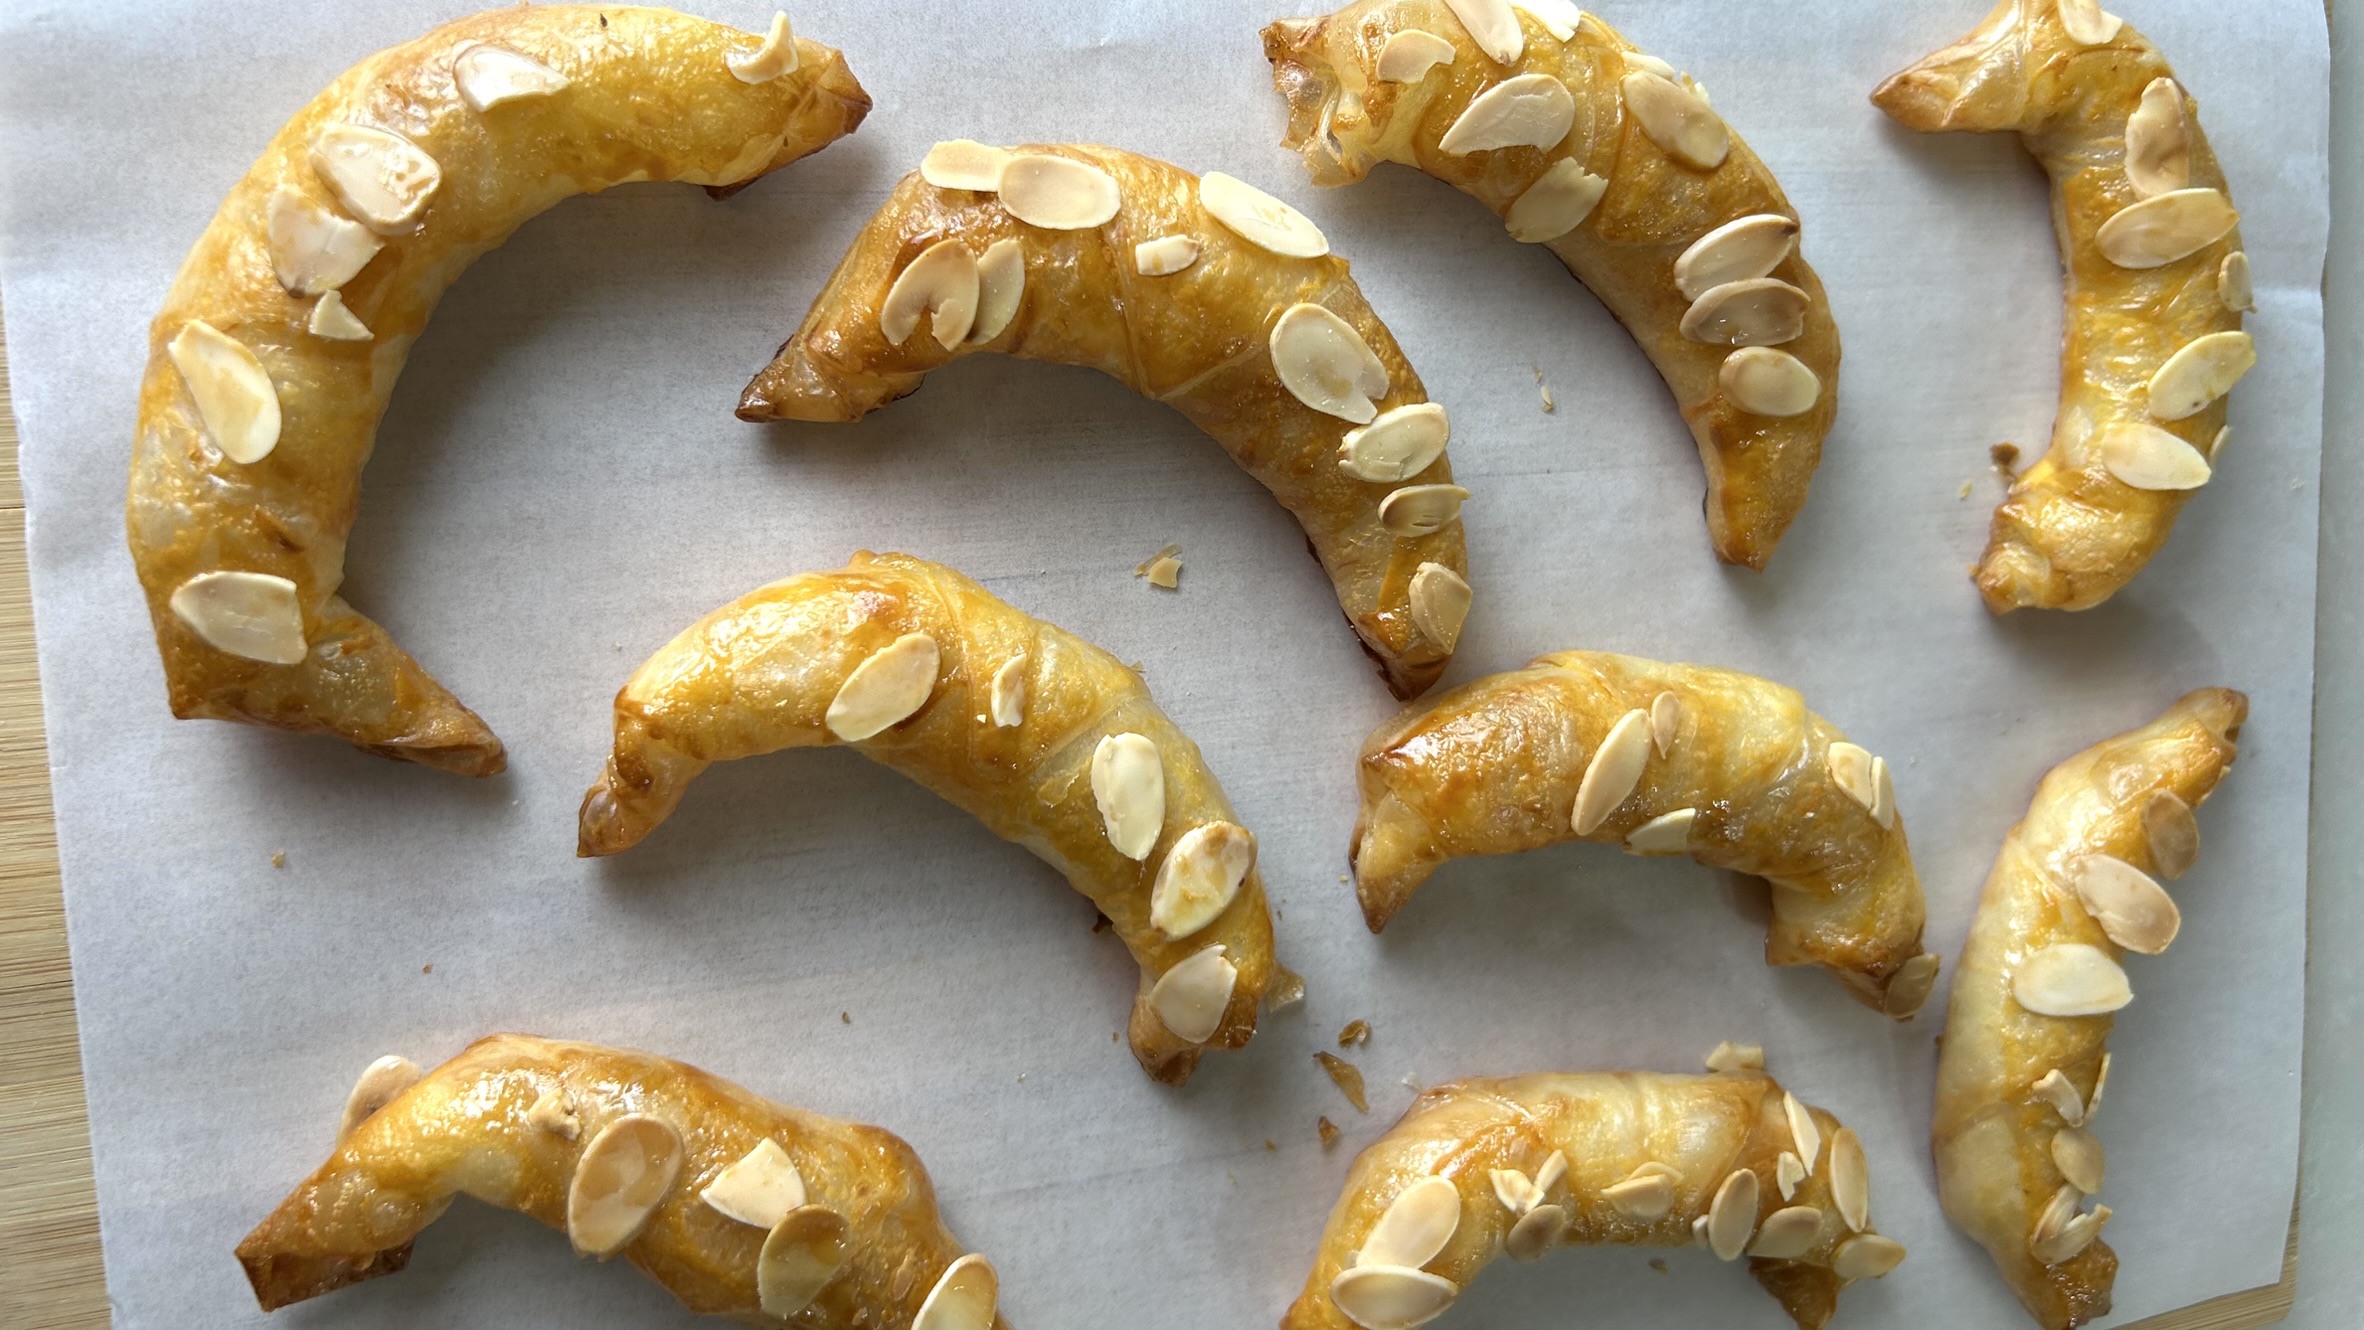
Who says you need layers of buttery puff pastry to enjoy a delicious homemade croissant? These Rice Paper Almond Croissants are proof that simple ingredients can create something truly special. Inspired by the classic French almond croissant, this lighter version swaps traditional puff pastry for rice paper, creating beautifully crisp, golden layers that shatter delicately with every bite while hiding a rich, soft almond filling inside. They look elegant, taste bakery-worthy, yet require only a fraction of the work involved in making laminated dough.

This clever recipe has become increasingly popular because it offers the satisfying experience of a croissant without the lengthy process of folding and chilling butter into pastry. Rice paper softens just enough to be shaped, then transforms in the oven into crisp, flaky-like layers that closely resemble traditional pastry while remaining naturally gluten-free and significantly lighter in calories. It’s an excellent recipe for anyone looking for healthier baking alternatives without sacrificing texture or flavor.

The contrast between the crunchy shell and the moist almond center is what makes these croissants so irresistible. Every bite combines delicate crispness with a naturally sweet, nutty filling that feels both indulgent and wholesome. They are perfect for breakfast alongside coffee, as an afternoon snack, or served as a light dessert after dinner. Better yet, they can easily be customized with different fillings such as pistachio cream, dark chocolate spread, pastry cream, lemon curd, fruit preserves, or even savory combinations, making them a versatile recipe you’ll return to again and again.

One of the greatest advantages of this recipe is its accessibility. There is no yeast, no rising time, and no complicated pastry techniques involved. Whether you’re an experienced baker or trying homemade croissants for the very first time, these rice paper croissants deliver impressive results with minimal effort. They come together quickly, bake into beautifully golden crescents, and are guaranteed to surprise anyone who discovers they’re made from rice paper instead of puff pastry.

 Almond flour, the star ingredient of this recipe, contributes much more than wonderful flavor. Naturally rich in healthy monounsaturated fats, plant-based protein, vitamin E, magnesium, manganese, and antioxidants, almonds provide lasting energy while supporting heart health, healthy skin, brain function, and muscle performance. Compared to refined wheat flour, almond flour contains fewer carbohydrates and more fiber, helping create a more satisfying filling that may support steadier blood sugar levels. Including almonds regularly in your diet is an excellent way to increase your intake of healthy fats and essential nutrients while enjoying naturally delicious foods. Combined with the lightness of rice paper, these croissants become a wonderful example of how wholesome ingredients can transform a beloved classic into a healthier homemade treat.

Ingredients

For the almond filling
  • 100 g almond flour
  • 1 tbsp oil or melted butter
  • 3–4 tbsp maple syrup (enough for the mixture to hold together)
  • ½ tsp vanilla extract
For the custard mixture
  • 1 egg
  • 2 tbsp maple syrup
  • ¾ cup (200 ml) milk
  • ¼ tsp vanilla extract
For assembling
  • 10 rice paper sheets
  • 1 egg yolk, for brushing
  • 15 g sliced almonds (optional)

Directions

  1. Preheat your oven to 350°F (180°C) and line a baking tray with parchment paper.
  2. In a medium bowl, combine the almond flour, oil (or melted butter), maple syrup, and vanilla extract.
  3. Mix until the ingredients form a soft, cohesive dough that easily holds together. Divide it into 10 equal portions and gently shape each into a small oval or log.
  4. In another bowl, whisk together the egg, maple syrup, milk, and vanilla extract until completely smooth.
  5. Pour this custard mixture into a wide, shallow dish to make dipping easier.
  6. Dip one rice paper sheet into the custard, gently turning it until it becomes flexible. Avoid soaking it for too long, as it should remain strong enough to handle without tearing.
  7. Transfer the softened rice paper onto a clean work surface and smooth out any wrinkles.
  8. Fold the upper right and upper left edges inward to create a triangular shape.
  9. Place one portion of the almond filling along the bottom edge.
  10. Fold the bottom edge over the filling, then fold both side edges inward to fully enclose it.
  11. Continue rolling tightly toward the top until completely sealed.
  12. Gently curve the ends inward to create the classic croissant shape.
  13. Transfer the croissant to the prepared baking tray.
  14. Repeat with the remaining rice paper sheets and almond filling.
  15. Brush each croissant generously with egg yolk.
  16. Sprinkle with sliced almonds if desired.
  17. Bake for 30–35 minutes, or until deeply golden, crisp, and beautifully crunchy.
  18. Allow the croissants to cool for several minutes before serving. They are at their crispiest when enjoyed fresh from the oven, although they remain delicious later with a slightly chewier texture.

Prep Time, Baking Time & Servings

  • Prep Time: 20 minutes
  • Baking Time: 30–35 minutes
  • Total Time: 50–55 minutes
  • Servings: 10 croissants

Nutritional Information

Per croissant (approximate):
  • Calories: 126
  • Protein: 3.86 g
  • Fat: 8.45 g
  • Carbohydrates: 9.82 g
  • Fiber: 1.1 g

Storage & Recommendations

  • These croissants are naturally gluten-free.
  • They are best enjoyed fresh from the oven while the exterior is at its crispiest.
  • Store leftovers in an airtight container for up to 5 days.
  • Reheat in an oven or air fryer for a few minutes to restore much of their crisp texture.
  • Avoid microwaving if you want to preserve the crunchy exterior.
  • Feel free to experiment with different fillings such as pistachio cream, dark chocolate spread, vanilla pastry cream, lemon curd, fruit preserves, peanut butter, hazelnut spread, sweetened cream cheese, coconut cream, or even savory fillings for a unique twist.
  • For extra flavor and a more bakery-style finish, sprinkle additional sliced almonds on top before baking.
  • These croissants pair wonderfully with coffee, tea, or a glass of warm milk and also make an elegant addition to brunch or dessert platters.
Turkish Dried Fig Pudding

Turkish Dried Fig Pudding

Turkish Dried Fig Pudding

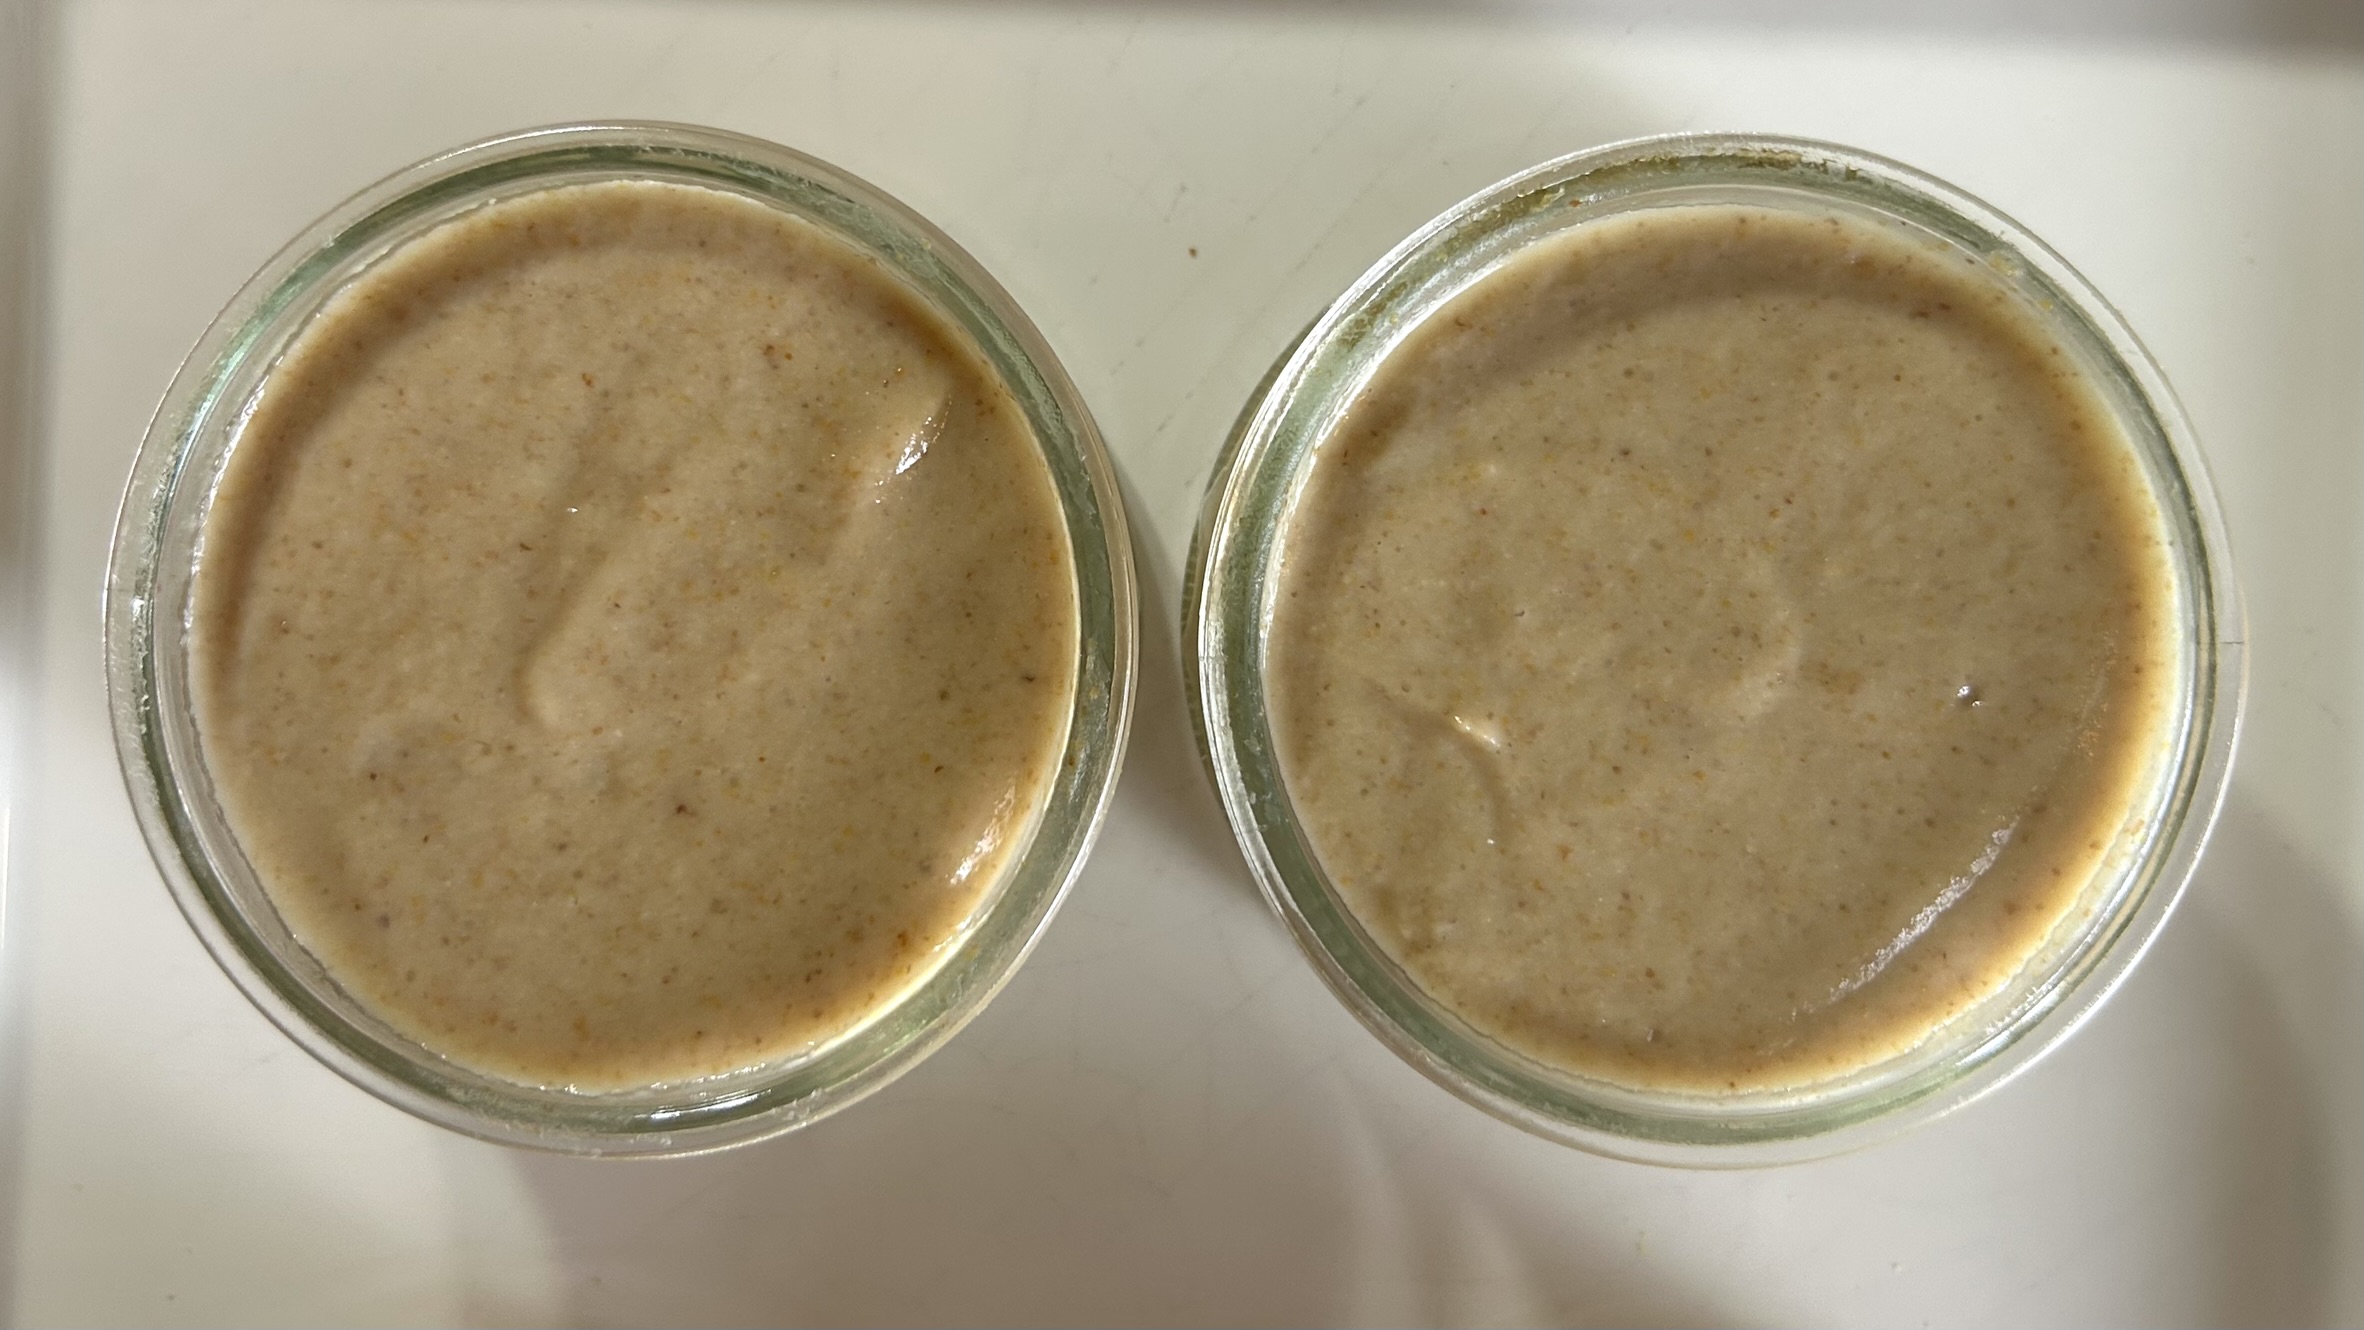
If you’re looking for an easy, naturally sweet dessert that feels incredibly indulgent while being made with just a handful of wholesome ingredients, this creamy dried fig pudding is a recipe you’ll want to make again and again. Inspired by the beloved Turkish dessert İncirli Muhallebi, this simple pudding transforms just dried figs and warm milk into a silky, rich, naturally caramel-like treat without the need for gelatin, cornstarch, refined sugar, or artificial thickeners. As the blended mixture chills, the natural fibers and pectin found in the figs work together with the proteins in the milk to create a beautifully smooth and spoonable pudding that tastes far more decadent than its ingredient list suggests.

One of the things I love most about this recipe is how effortless it is. After soaking the figs until they’re soft and tender, everything comes together in a blender in just a few minutes. The result is a naturally sweet dessert with an irresistibly creamy texture and a deep honey-caramel flavor that’s entirely thanks to the figs themselves. It’s perfect as an afternoon snack, a light dessert after dinner, or even a wholesome breakfast served with nuts and fresh fruit.

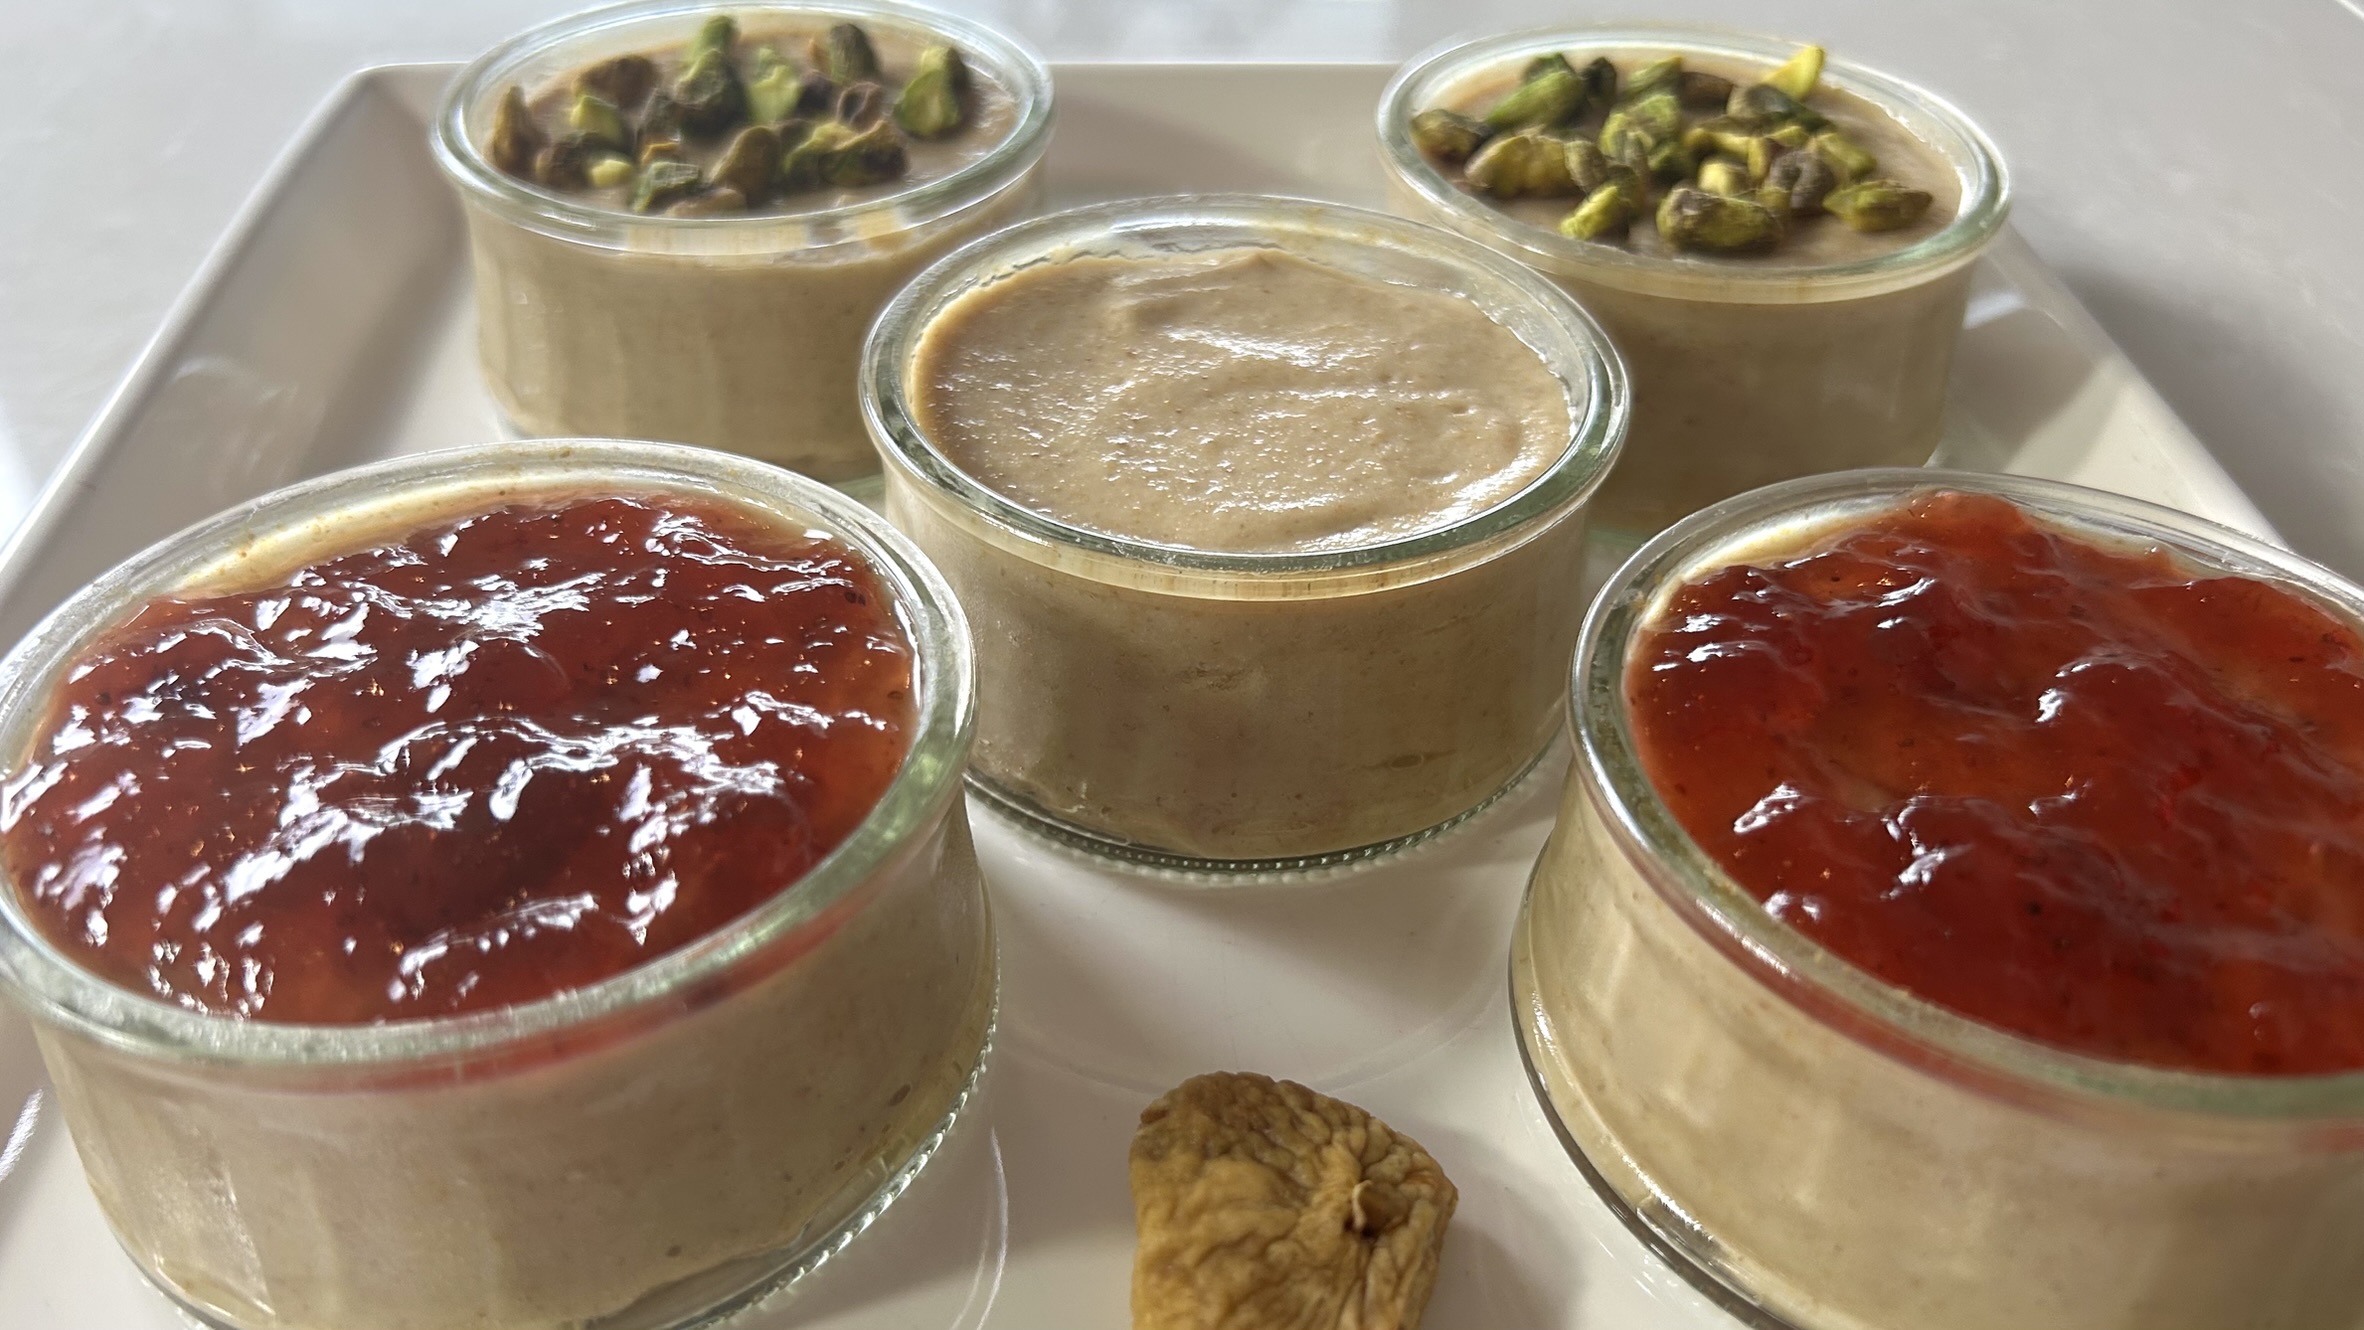
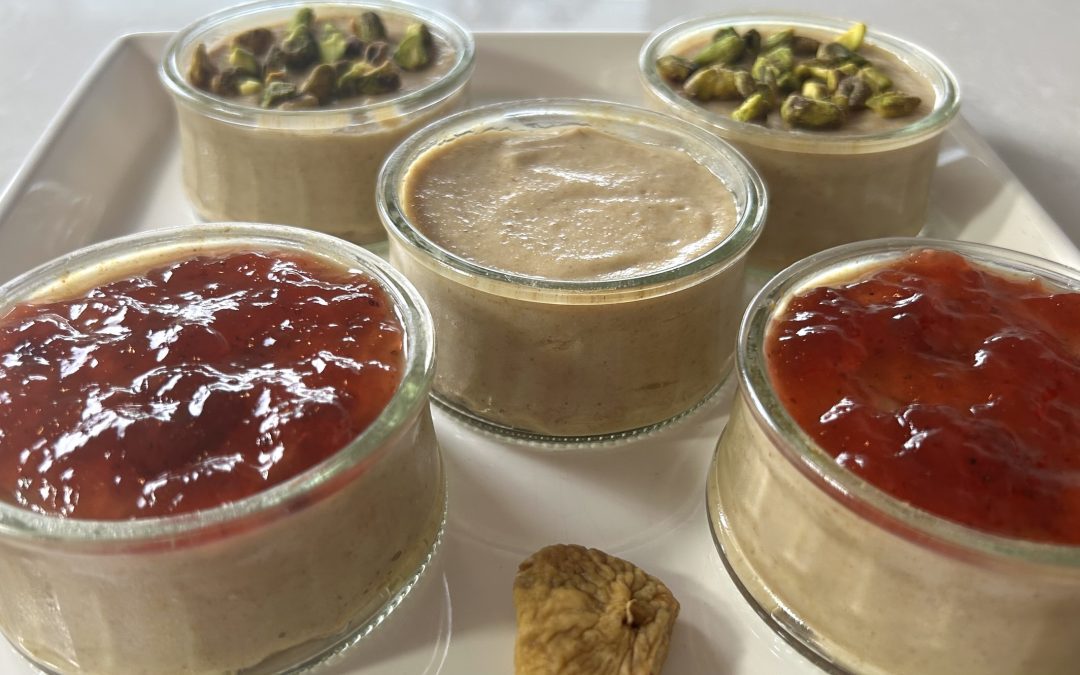
Another reason this pudding deserves a place in your regular recipe collection is its versatility. Enjoy it plain to appreciate the rich flavor of the figs, garnish it with crunchy toasted pistachios for a classic Middle Eastern touch, spread a thin layer of strawberry jam on top for a delicious fruity contrast, or personalize it with your favorite toppings. Whether you’re preparing it for your family or serving guests, this elegant dessert always looks impressive despite requiring very little effort.

Why Dried Figs Deserve a Place in Your Regular Diet

Dried figs are among nature’s most nutritious naturally sweet foods. They’re an excellent source of dietary fiber, helping support healthy digestion, promote fullness, and contribute to balanced blood sugar responses when enjoyed as part of a balanced meal. Unlike many processed desserts, figs offer sweetness together with valuable vitamins, minerals, and antioxidants rather than empty calories.

They are particularly rich in potassium, calcium, magnesium, copper, and iron—minerals that play important roles in maintaining healthy muscles, supporting normal nerve function, strengthening bones, producing energy, and helping the body transport oxygen. Dried figs also provide beneficial plant compounds called polyphenols, which help protect cells against oxidative stress and support overall health.

When combined with milk, this pudding becomes even more nutritionally balanced. Milk contributes high-quality complete protein, calcium, phosphorus, vitamin B12, and additional nutrients that help support strong bones, healthy muscles, and long-lasting satiety. Together, dried figs and milk create a naturally satisfying dessert that nourishes the body while satisfying sweet cravings in a wholesome way. Including dried figs regularly as part of a varied diet is an easy and delicious way to increase your intake of fiber, essential minerals, and protective antioxidants.

Ingredients

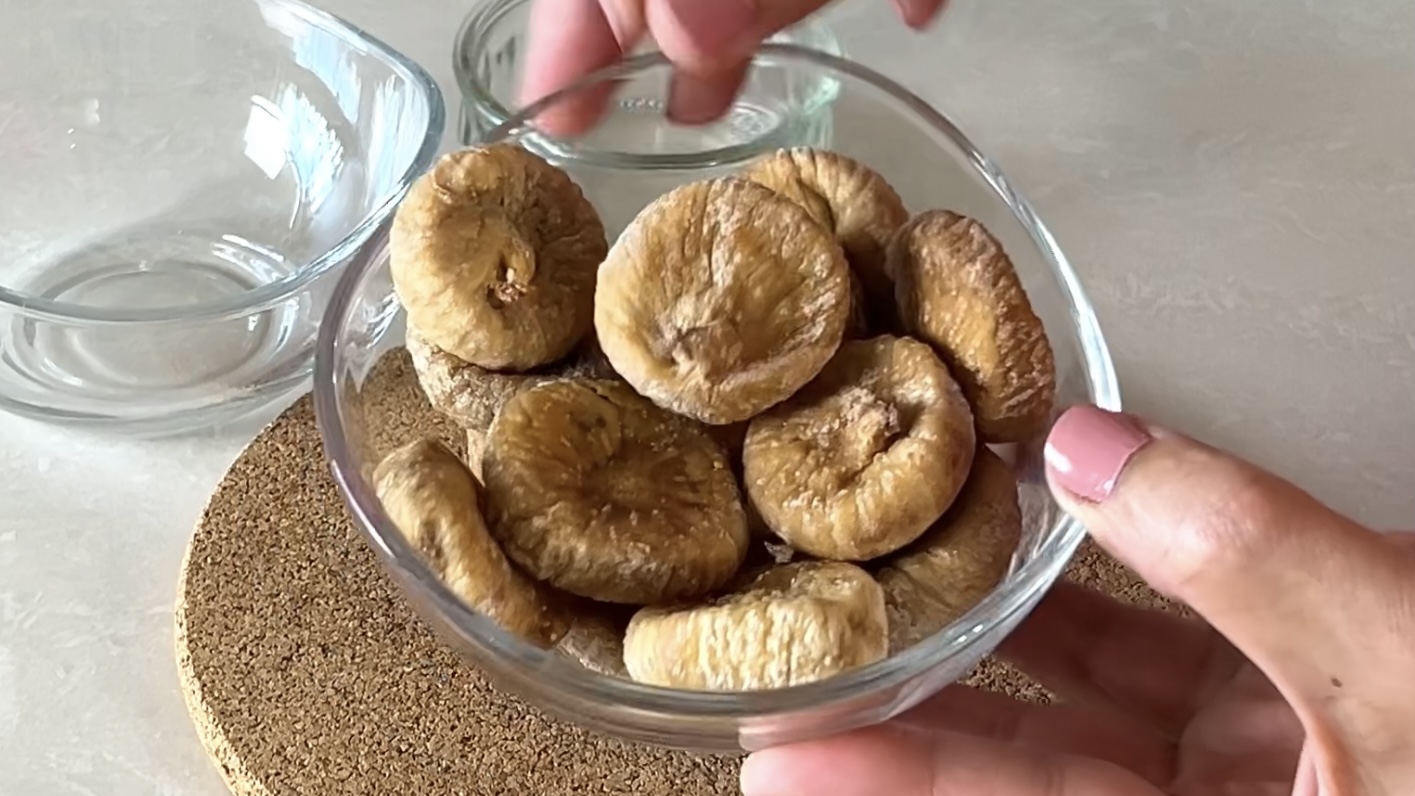
  • 180 g dried figs
  • Hot water (for soaking)
  • 400 ml milk (dairy or your favorite plant-based milk)
  • 2 tbsp toasted chopped pistachios (optional)
  • 2 tsp strawberry jam (optional)
  • Optional: your favorite toppings

Directions

  1. Place the dried figs in a bowl and cover them completely with hot water.
  2. Let them soak for 30 minutes to 1 hour, or until they become soft and plump.
  3. Drain the figs well and discard the soaking water.
  4. Cut the softened figs into large chunks and transfer them to a blender.
  5. Warm the milk over medium heat until it is lukewarm. Remove it from the heat just before it begins to simmer. Do not let it boil.
  6. Pour the warm milk over the chopped figs.
  7. Blend until the mixture becomes completely smooth, creamy, and no visible pieces of figs remain.
  8. As the mixture begins to naturally thicken, immediately divide it among small serving glasses, ramekins, or dessert bowls.
  9. Cover each serving with parchment paper to prevent the surface from drying out.
  10. Refrigerate for at least 3 hours to allow the pudding to fully set and develop its rich, silky consistency.
  11. Serve chilled as is, or garnish with toasted chopped pistachios, a thin layer of strawberry jam, or your favorite toppings.

Prep Time, Chilling Time & Servings

  • Preparation Time: 10 minutes
  • Soaking Time: 30 minutes to 1 hour
  • Chilling Time: 3 hours
  • Total Time: Approximately 3 hours 40 minutes (including soaking and chilling)
  • Servings: 5

Nutritional Information

Per Serving (Approximate)

  • Calories: 130
  • Protein: 3.93 g
  • Fat: 1.98 g
  • Carbohydrates: 26.98 g
  • Fiber: 3.5 g

Nutrition values are approximate and may vary depending on the type of milk and optional toppings used.

Storage and Recommendations

  • Store covered in the refrigerator for up to 5 days.
  • This pudding is best enjoyed thoroughly chilled.
  • Add pistachios, jam, or any crunchy toppings just before serving to preserve their texture.
  • Serve with fresh berries, chopped walnuts, almonds, or a drizzle of tahini for additional flavor and nutrition.
  • If using sweetened plant-based milk, keep in mind that the pudding will be sweeter than when made with unsweetened milk.
  • Because dried figs are naturally rich in fiber and natural sugars, this dessert is best enjoyed in moderation as part of a balanced diet.
  • For the creamiest texture, blend the mixture until completely smooth before dividing it into serving dishes.

Flaxseed Bread

Flaxseed Bread

Flaxseed Bread

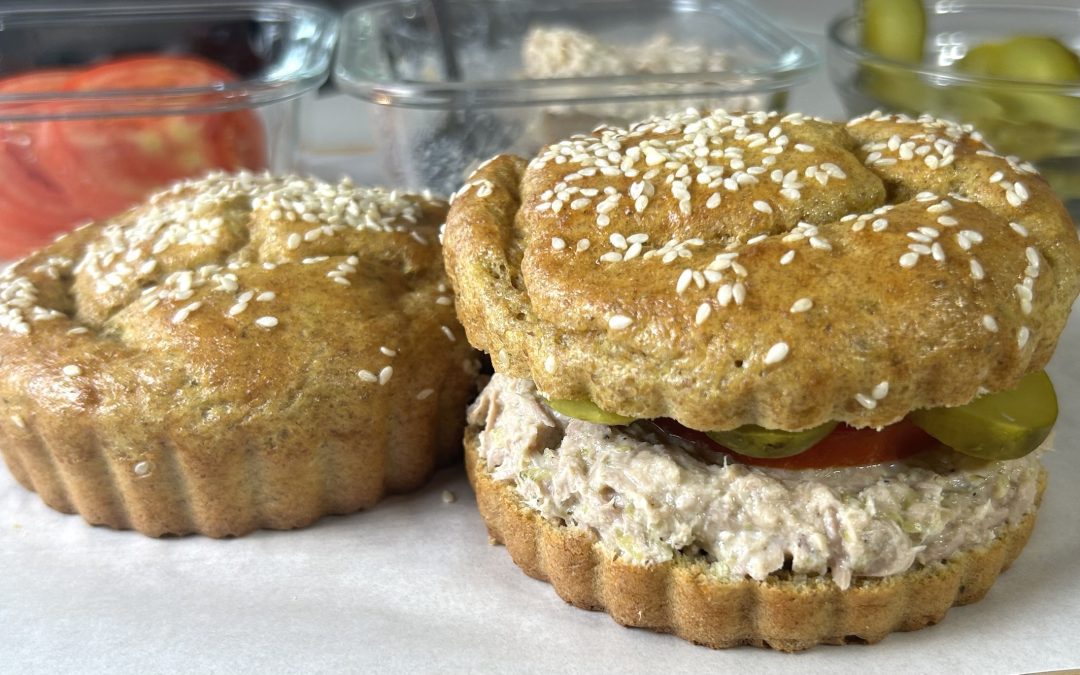
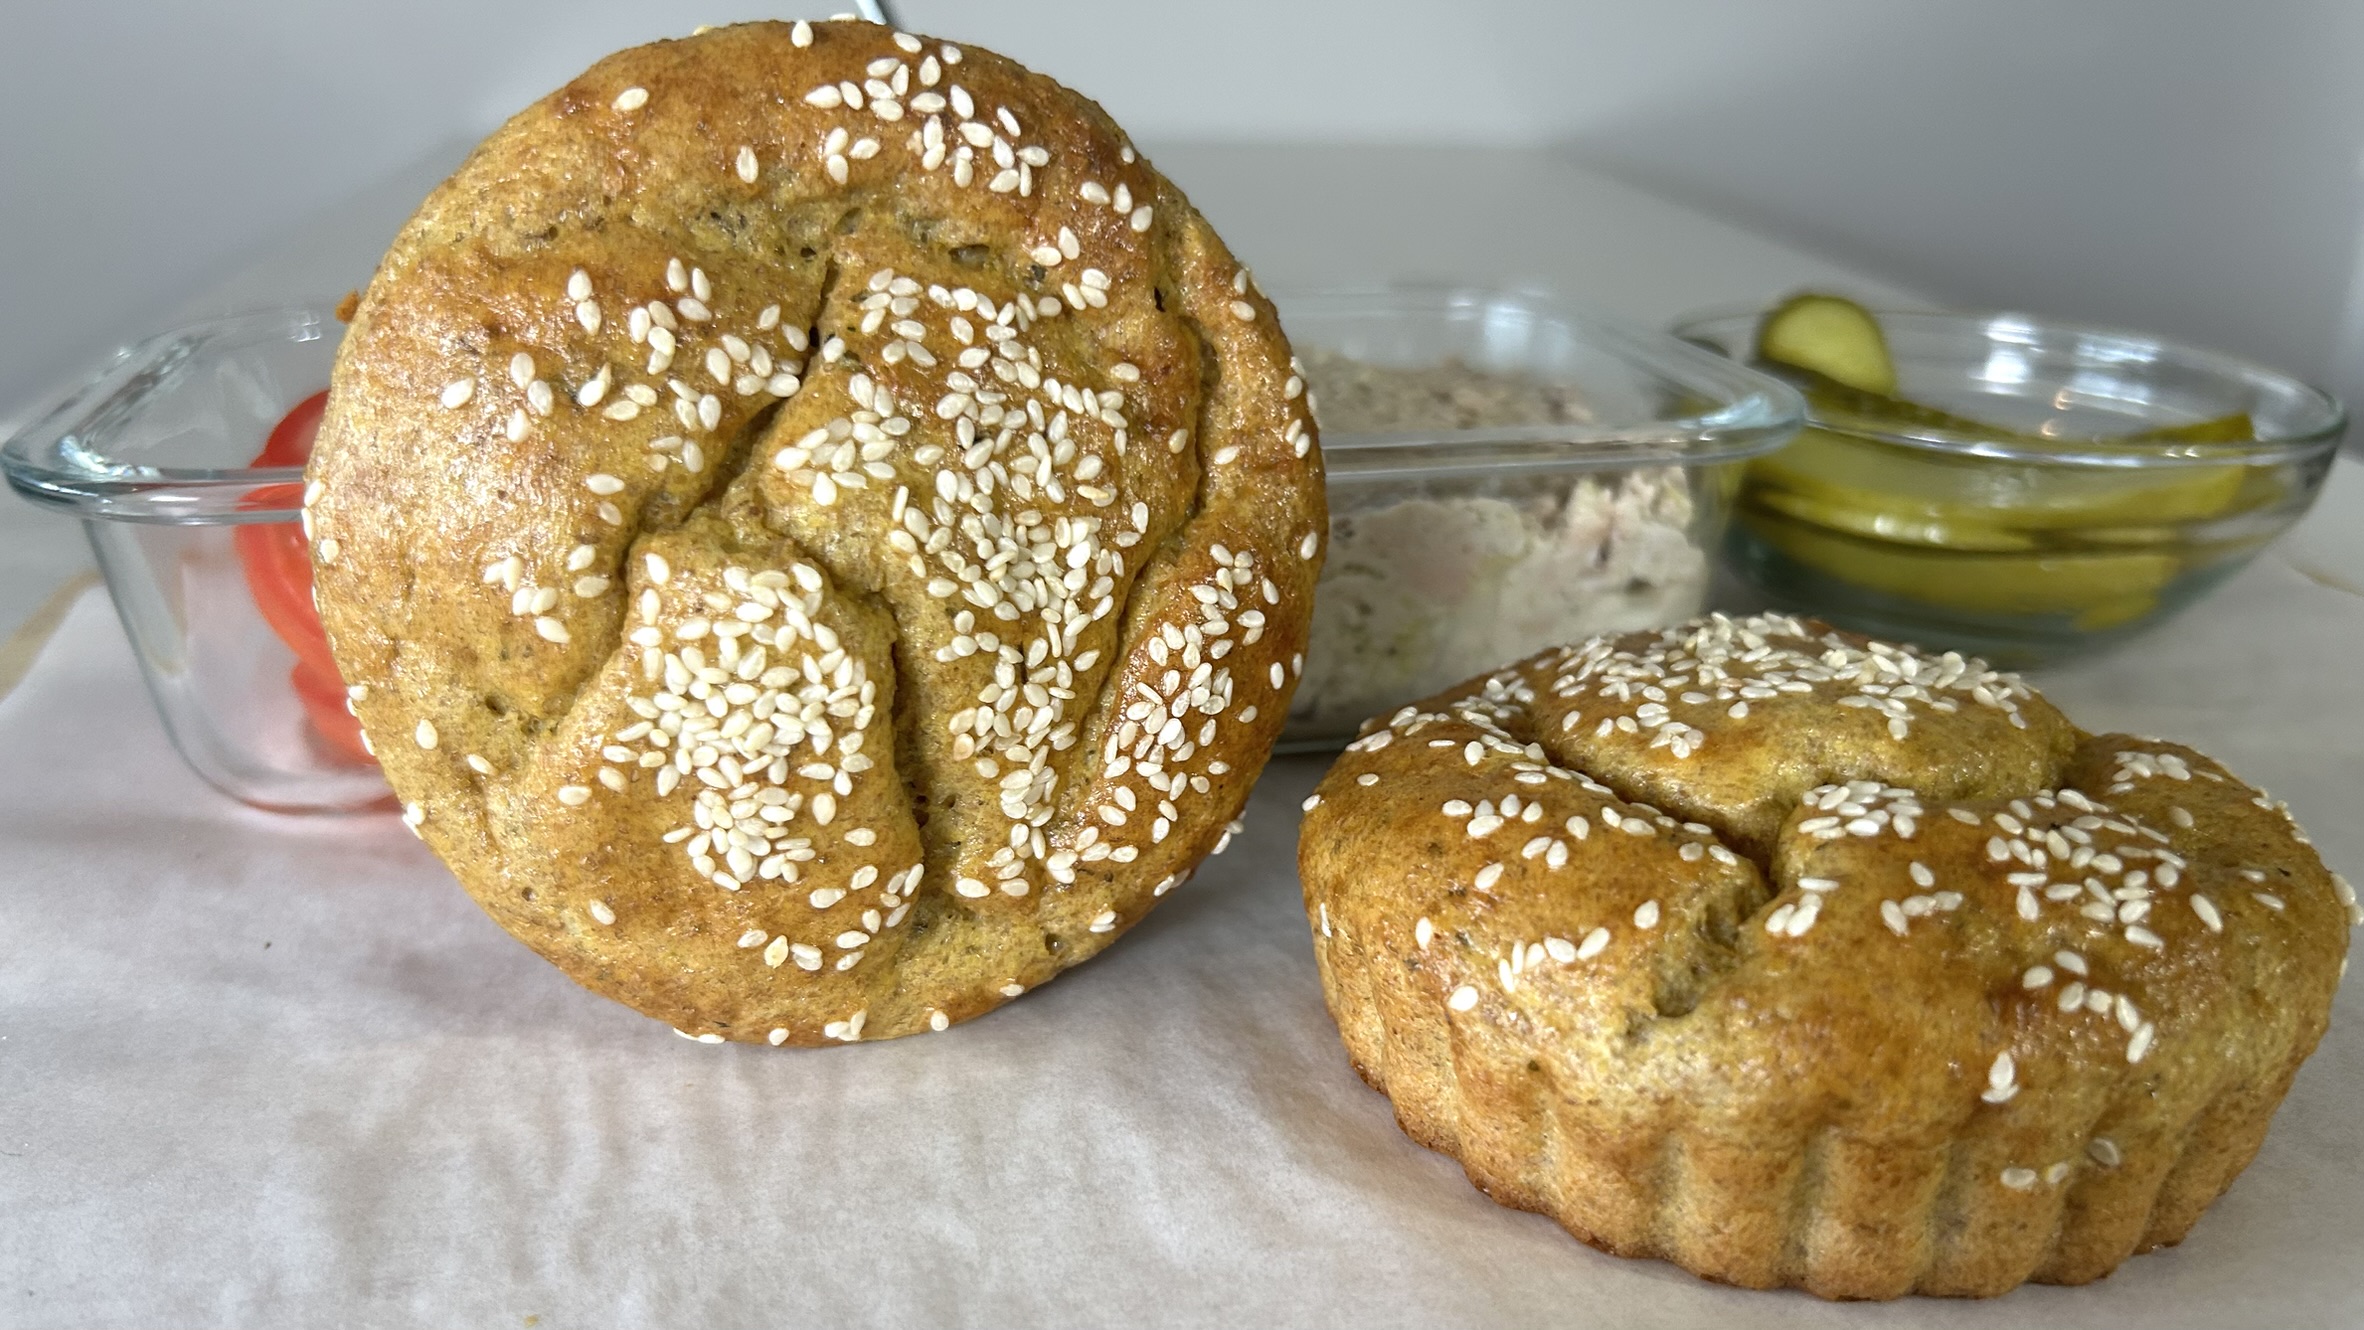
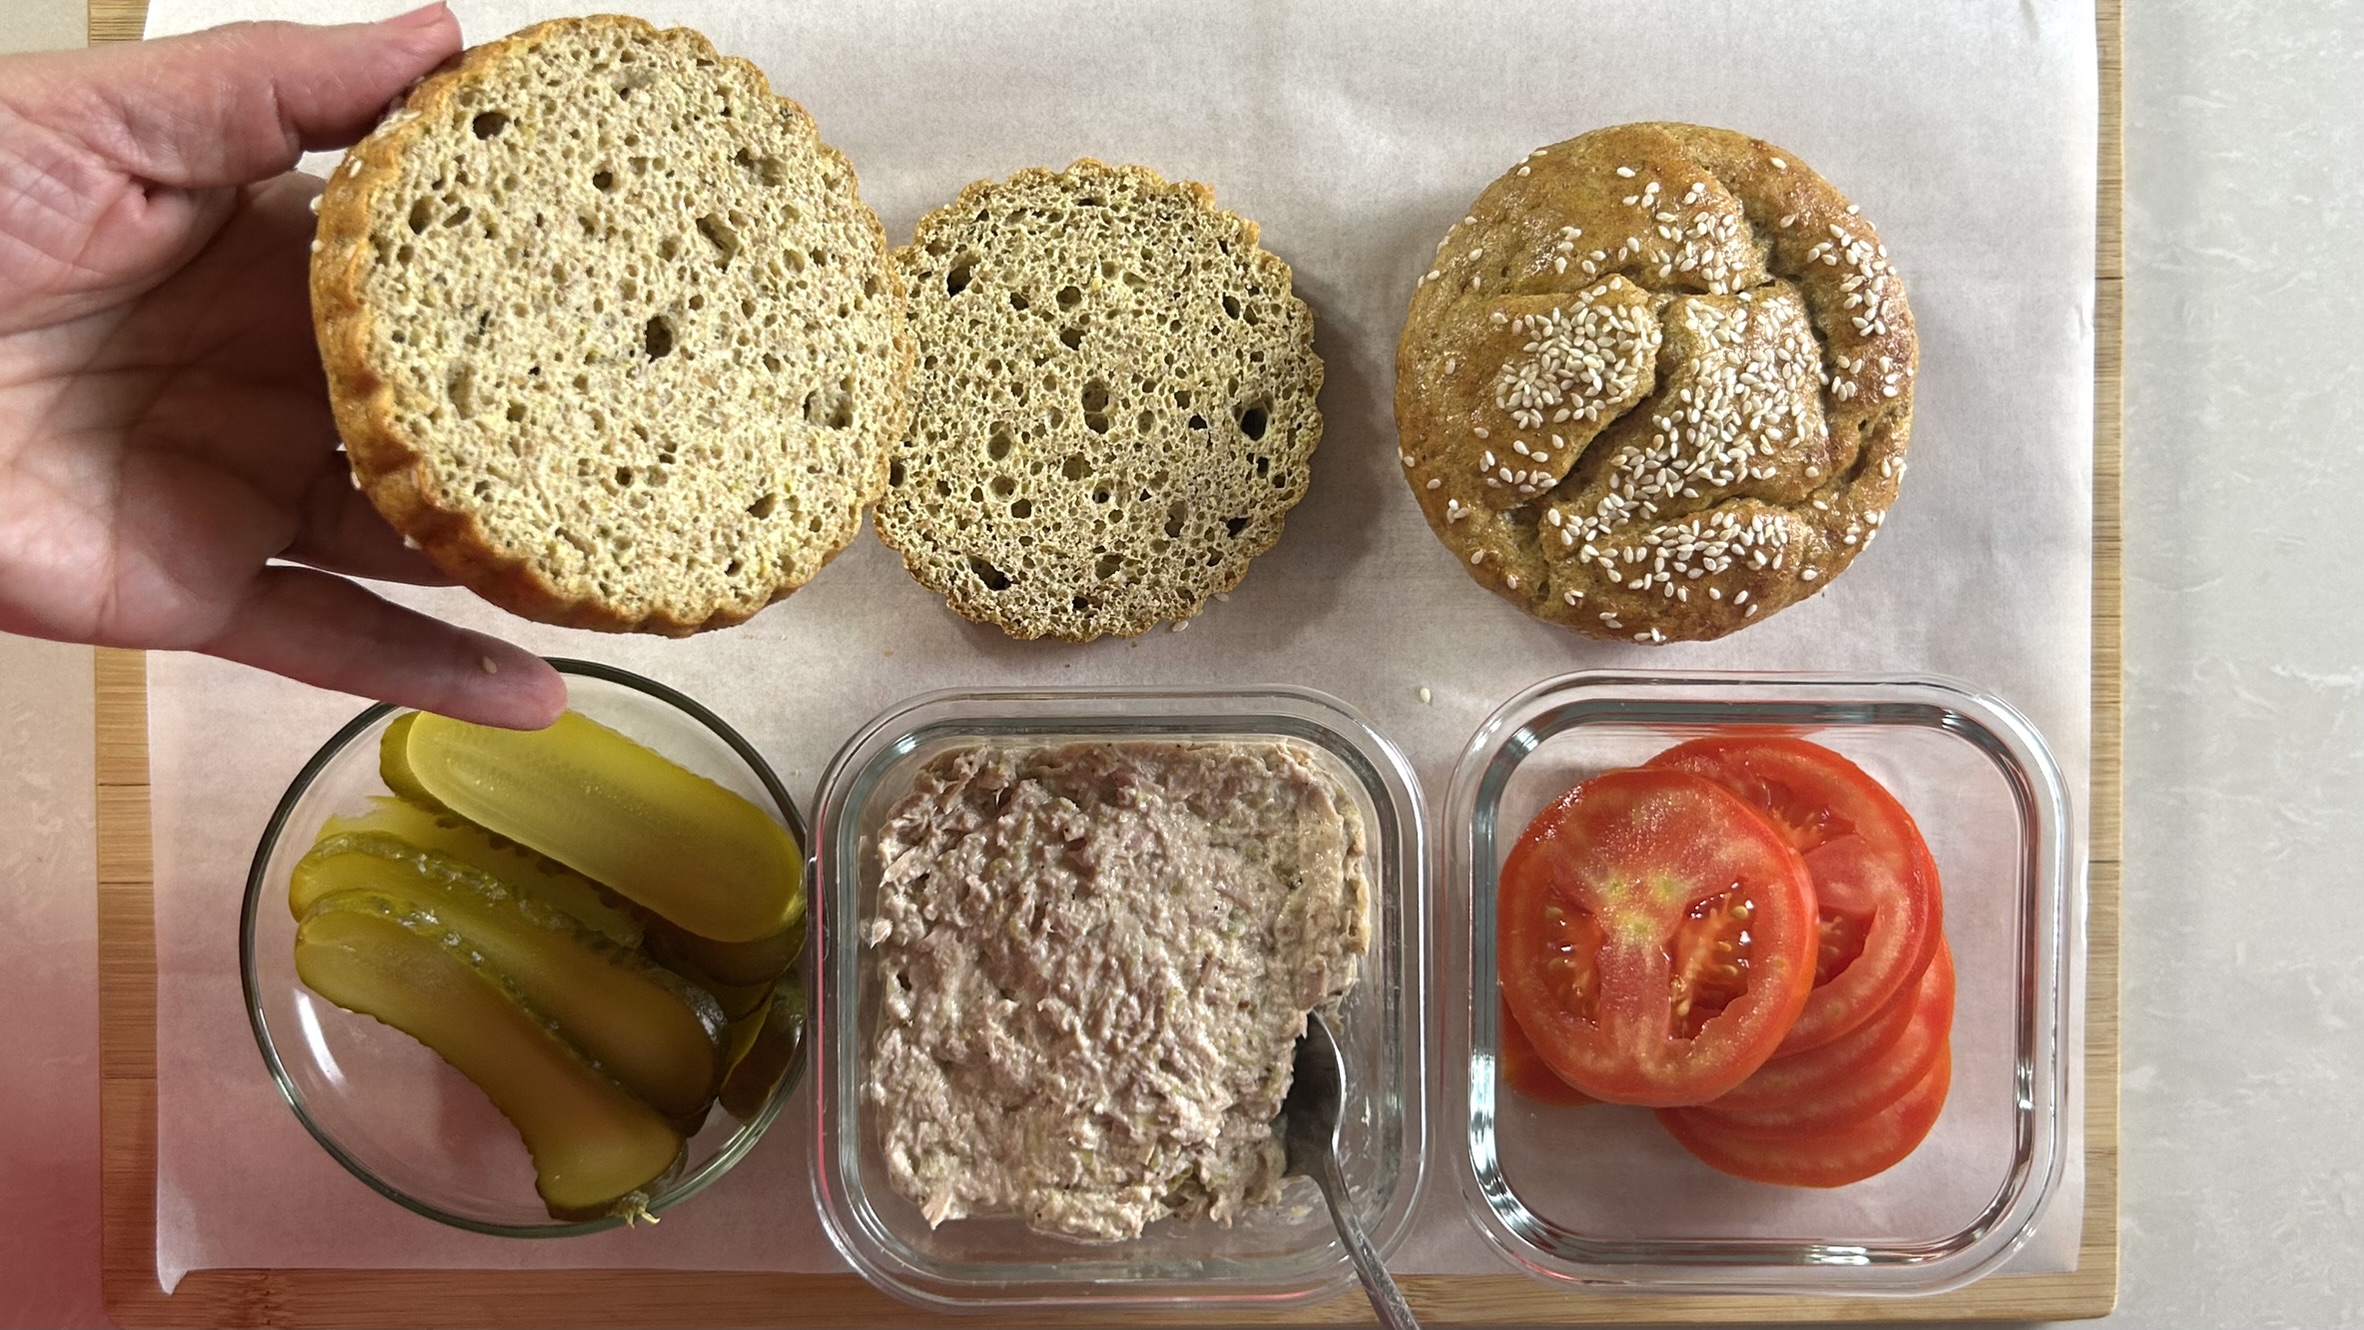
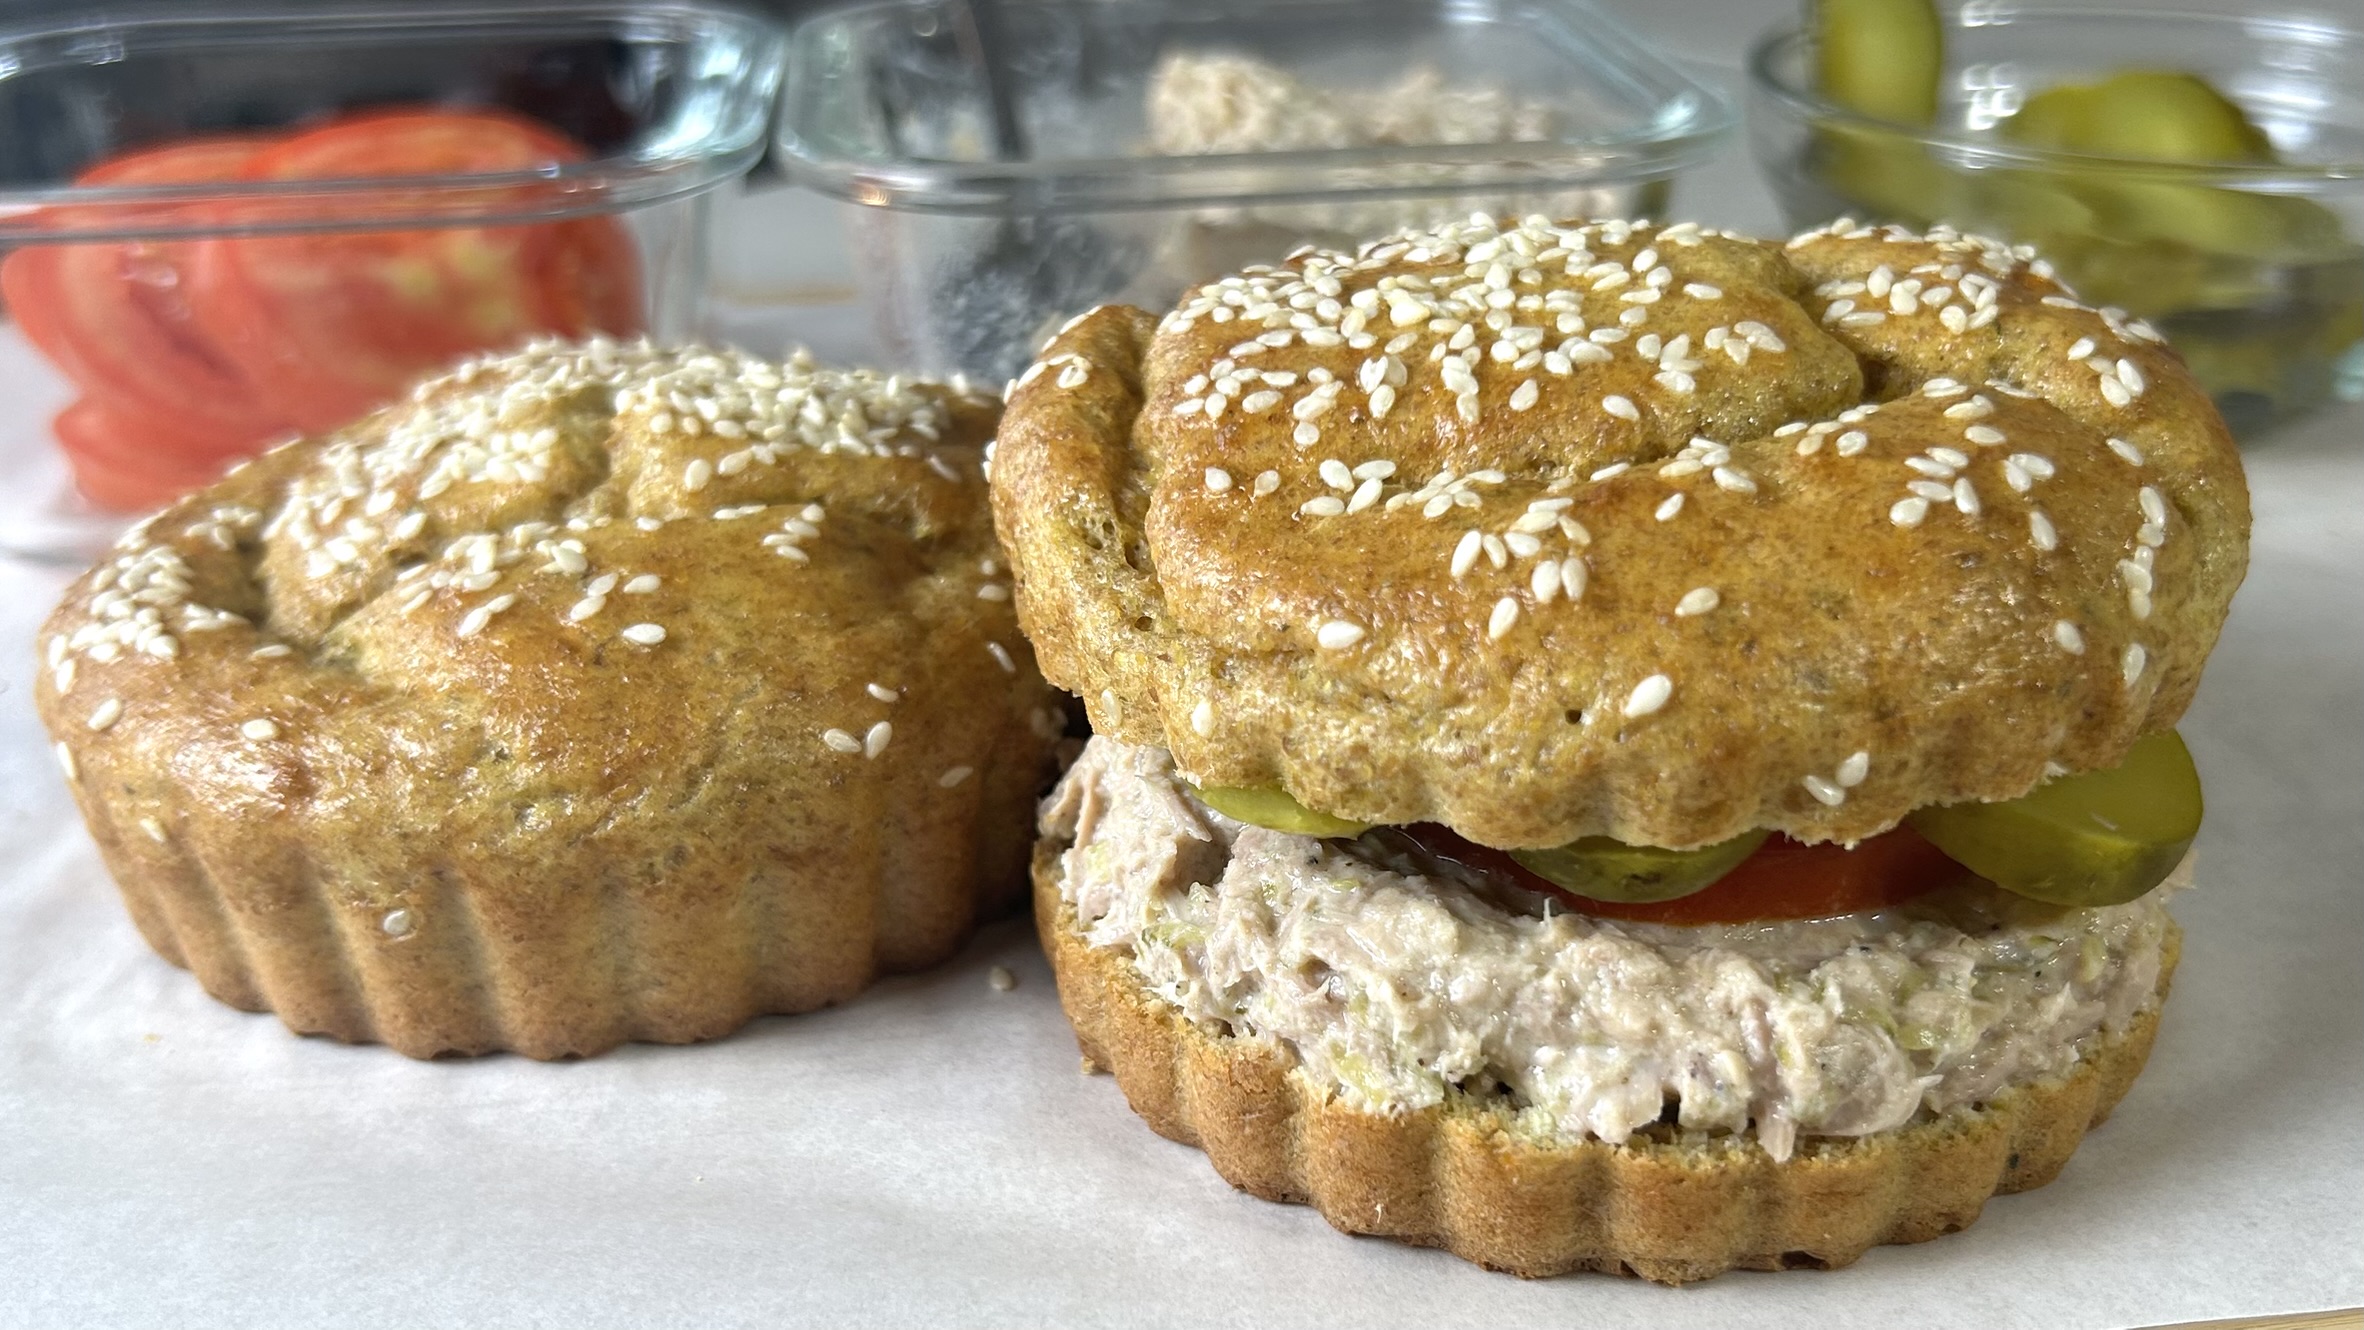
If you’re looking for a wholesome bread that’s incredibly easy to make while being naturally gluten-free, high in protein, and wonderfully satisfying, this Flaxseed Bread is about to become one of your favorite recipes. Unlike traditional breads that rely on refined wheat flour, this recipe uses freshly ground flaxseeds as its foundation, creating a soft, tender bread with a pleasantly light texture that works beautifully for sandwiches, breakfast toast, burgers, savory spreads, or simply enjoyed warm with your favorite toppings.

One of the best things about this recipe is its simplicity. With only a handful of everyday ingredients, you can prepare fresh homemade bread in under an hour without kneading, rising time, or complicated techniques. The combination of eggs and Greek yogurt helps create a moist, fluffy crumb while adding extra protein, making each serving both nourishing and filling. A touch of oregano adds subtle savory flavor, but you can easily customize the recipe with your favorite herbs and spices to suit any meal.

This bread is also an excellent option for anyone following a gluten-free lifestyle or simply trying to reduce their intake of refined carbohydrates without giving up the comfort of freshly baked bread. Thanks to its balanced combination of protein, healthy fats, and fiber, it provides lasting energy and helps keep you satisfied for longer, making it a fantastic choice for breakfast, lunch, or healthy snacks throughout the day.

The true star of this recipe is flaxseed, one of nature’s most nutrient-dense superfoods. Despite their tiny size, flaxseeds are packed with plant-based protein, dietary fiber, heart-healthy omega-3 fatty acids, vitamins, minerals, and exceptionally powerful antioxidants called lignans. Their impressive fiber content helps support healthy digestion, promotes regular bowel movements, nourishes beneficial gut bacteria, and contributes to longer-lasting fullness after meals. Research has also associated regular flaxseed consumption with improved heart health, healthier cholesterol levels, better blood sugar management, and reduced inflammation throughout the body. Because flaxseeds are among the richest natural sources of lignans, they have been extensively studied for their potential protective effects on overall health, particularly in supporting hormone balance. Including flaxseeds regularly in your diet is a simple and delicious way to increase your intake of healthy fats, fiber, and essential nutrients while supporting long-term wellness.

Ingredients

  • 4 tbsp (40 g) whole flaxseeds
  • 2 large eggs
  • 2 tbsp Greek yogurt
  • ¼ tsp salt
  • ¼ tsp dried oregano (or your favorite herbs or spices)
  • ½ tsp baking powder
  • 1 tsp sesame seeds (or any seeds of your choice)
  • Oil for greasing the ramekins

Directions

  1. Preheat your oven to 350°F (180°C).
  2. Place the flaxseeds in a coffee grinder, spice grinder, or high-speed blender and grind until they become a fine flour.
  3. In a medium mixing bowl, combine the eggs, Greek yogurt, salt, and dried oregano.
  4. Whisk thoroughly until the mixture becomes completely smooth and well combined.
  5. Add the freshly ground flaxseed flour along with the baking powder.
  6. Stir vigorously until a thick, uniform dough forms. The flaxseed flour will quickly absorb the moisture, creating a slightly sticky but easy-to-spoon batter.
  7. Lightly grease two small circular quiche ramekins (approximately 10 cm / 4 inches in diameter), or use silicone ramekins.
  8. Divide the dough evenly between the prepared ramekins.
  9. Smooth the tops using the back of a spoon.
  10. Sprinkle evenly with sesame seeds or any seeds you enjoy.
  11. Bake for 30–35 minutes, or until the tops are lightly golden and the bread feels firm when gently pressed.
  12. Allow the breads to cool for several minutes before removing them from the ramekins and serving.

Recipe Information

Yield: 2 breads

Preparation Time: 15 minutes

Baking Time: 30–35 minutes

Dietary Information: Naturally gluten-free, high in protein, low in carbohydrates, rich in dietary fiber.

Nutritional Information

Per Bread

  • Calories: 197
  • Protein: 11.11 g
  • Fat: 14.05 g
  • Carbohydrates: 8.16 g
  • Fiber: 5.7 g

Storage & Recommendations

  • Store the breads in an airtight container at room temperature for up to 5 days.
  • Freeze individually for up to 3 months. Thaw at room temperature or warm gently before serving.
  • Feel free to replace the oregano with garlic powder, Italian seasoning, rosemary, thyme, paprika, or your favorite herbs and spices.
  • Sprinkle with sunflower seeds, pumpkin seeds, poppy seeds, or everything bagel seasoning for extra flavor and texture.
  • These breads make an excellent base for sandwiches, breakfast toast, burgers, or savory snacks.
  • For an extra crispy exterior, lightly toast the bread before serving.
  • Because flaxseed flour absorbs moisture quickly, grind the flaxseeds just before preparing the recipe for the freshest flavor and best texture.