Sweet Potato Flatbread

Sweet Potato Flatbread

Sweet Potato Flatbread

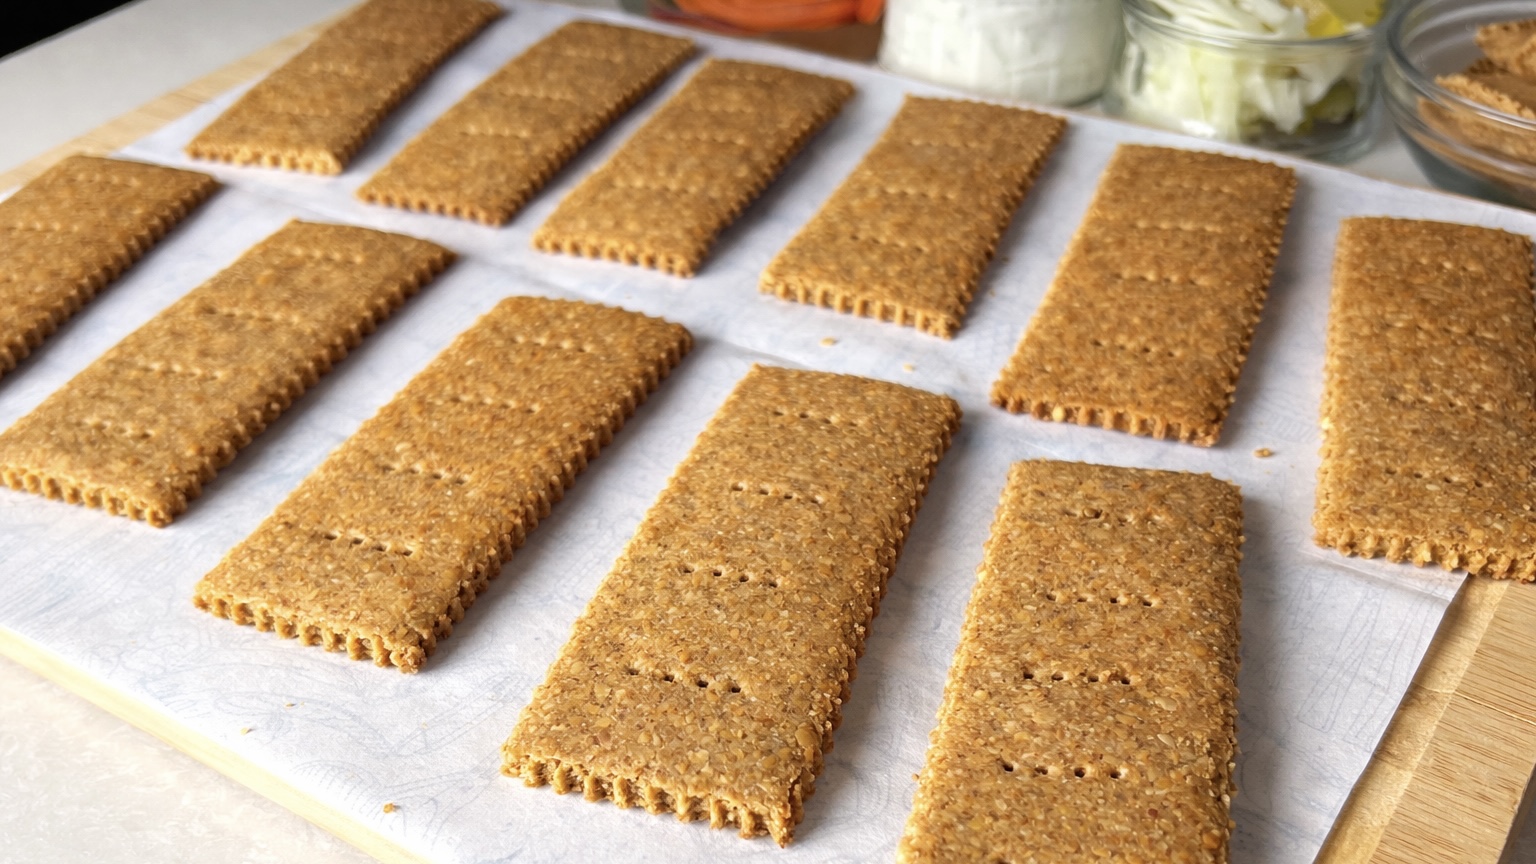
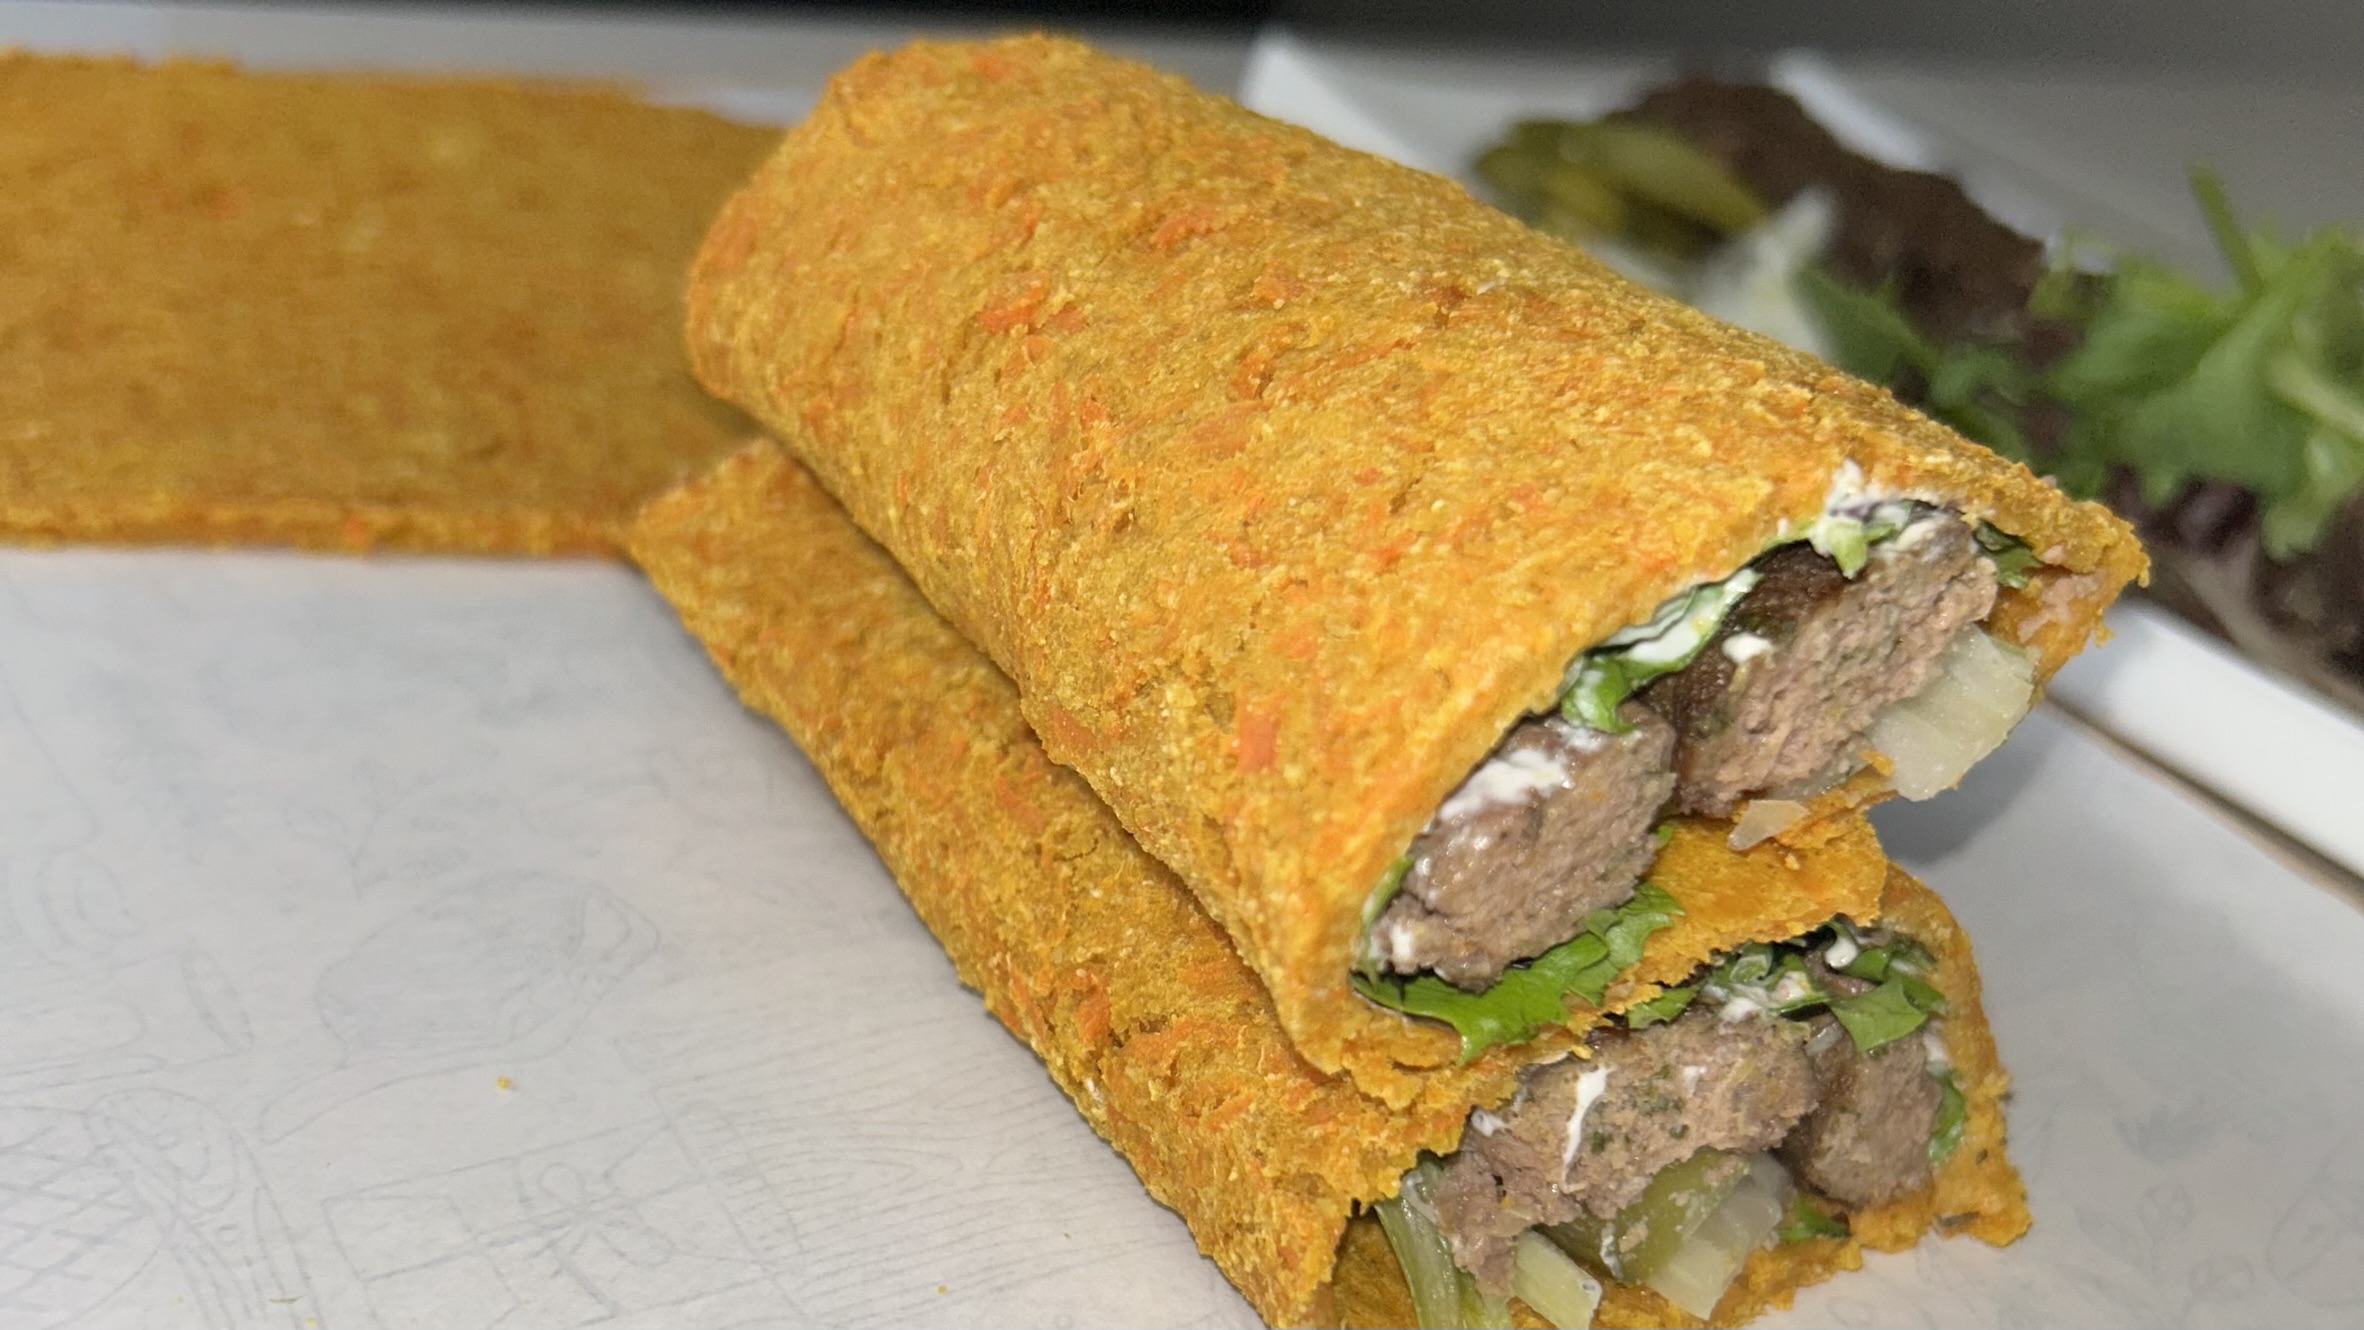
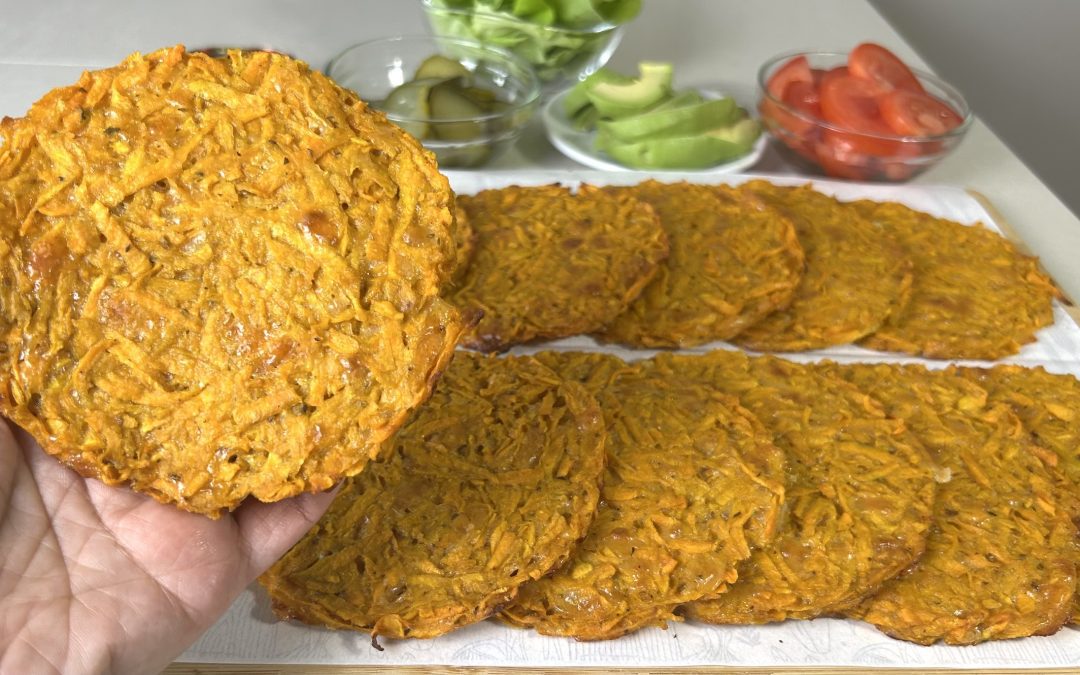
If you have been searching for a healthier alternative to traditional bread that still feels comforting, satisfying, and genuinely delicious, these Sweet Potato Flatbreads deserve a spot in your kitchen. Soft, flexible, naturally gluten-free, and packed with wholesome ingredients, these beautiful golden wraps are made mainly with shredded sweet potatoes and a few simple pantry staples. They are the kind of recipe that surprises you from the very first bite — nourishing and hearty, yet light and incredibly enjoyable to eat.

What makes these flatbreads so special is their amazing texture. They bake into soft and pliable rounds that can easily be folded, wrapped, or topped with your favorite ingredients. Unlike many store-bought gluten-free breads that can feel dry or overly processed, these homemade flatbreads feel fresh, cozy, and naturally satisfying. Their slightly sweet flavor pairs beautifully with savory fillings, making them perfect for quick lunches, healthy dinners, meal prep, or even nourishing snacks throughout the day.

One of the reasons these sweet potato flatbreads have become so viral online is because they are made with real, simple ingredients people recognize and trust. There is something incredibly comforting about transforming humble sweet potatoes into soft homemade wraps that look beautiful, taste amazing, and leave you feeling energized rather than heavy. Recipes like this remind us that healthy eating does not need to be complicated or restrictive to feel deeply satisfying.

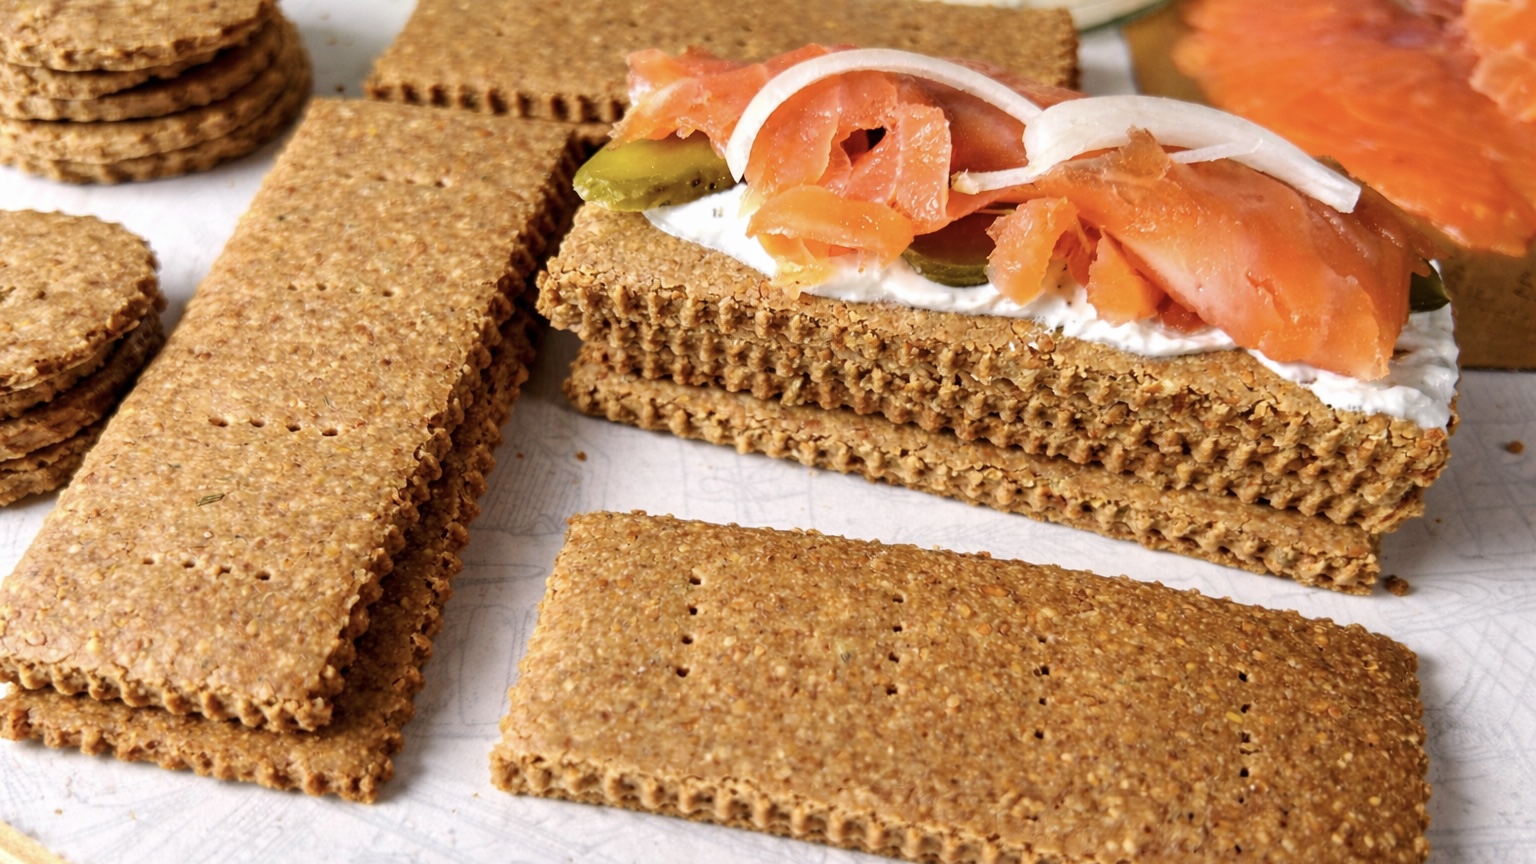
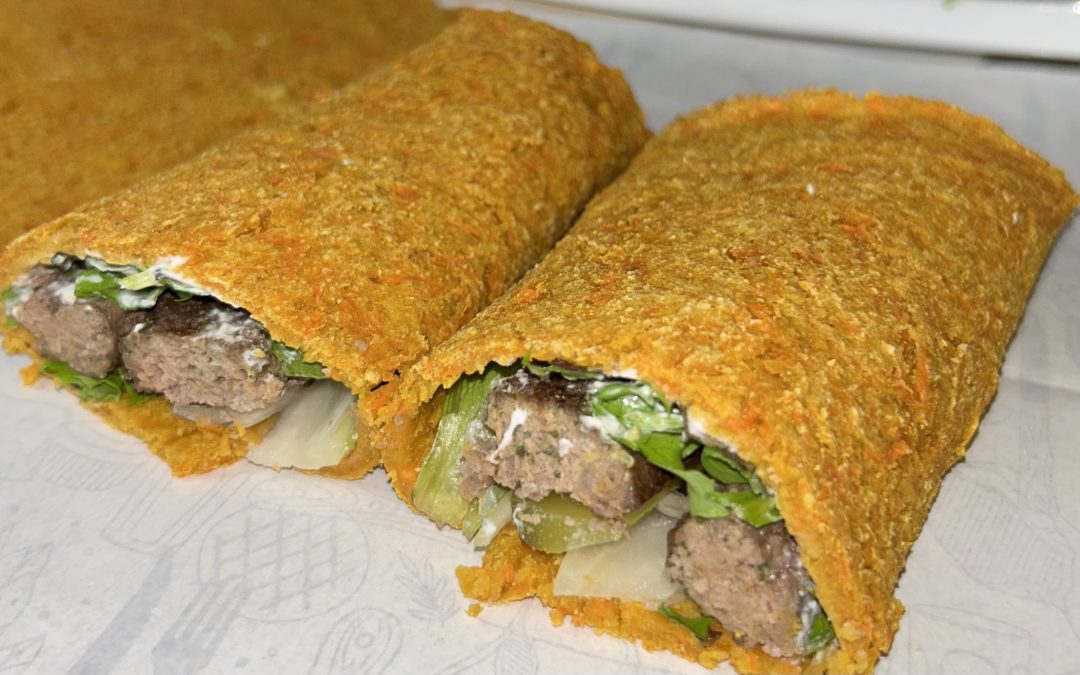
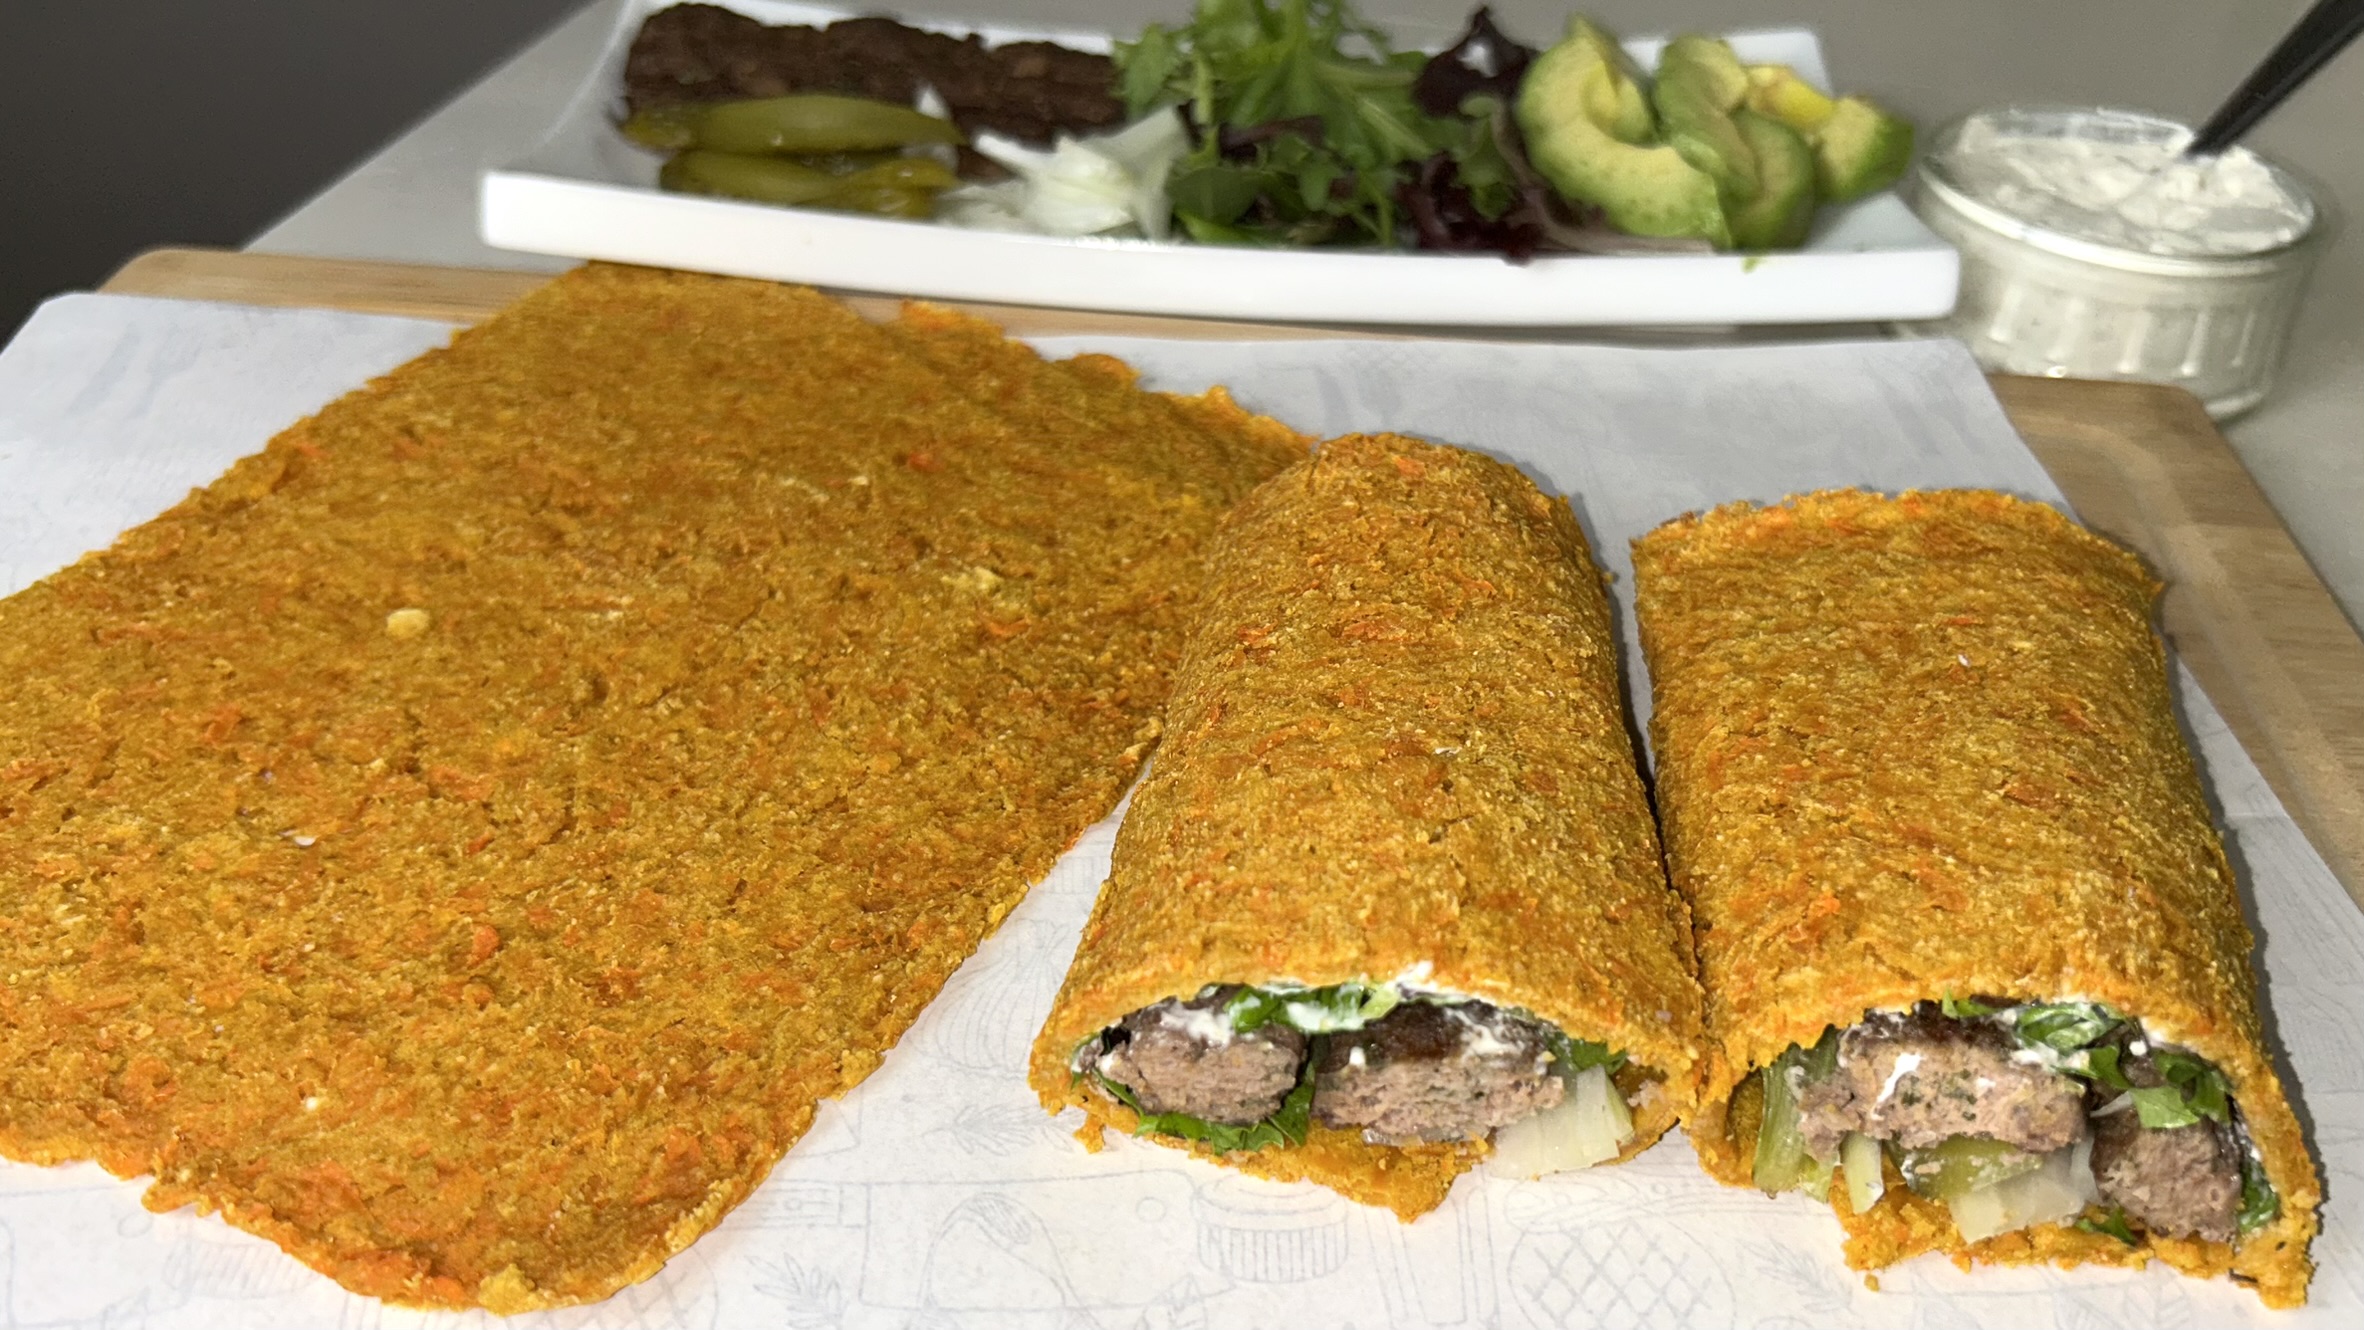
We especially loved serving these wraps with canned sardines, avocado, crisp lettuce, juicy tomato slices, and tangy pickles. The combination of creamy avocado, savory sardines, and the naturally sweet flatbread creates an incredibly delicious contrast of flavors and textures. It is the kind of meal that feels cozy and comforting while still being rich in nourishing ingredients that support overall wellness.

Sweet potatoes themselves are truly one of the most nutritious foods you can include regularly in your diet. They are naturally rich in beta-carotene, a powerful antioxidant that the body converts into vitamin A, an essential nutrient known for supporting healthy skin, strong hair, eye health, and immune function. They also provide fiber, potassium, vitamin C, and slow-digesting carbohydrates that help promote steady energy and fullness. Unlike highly refined breads that may leave you feeling hungry shortly after eating, sweet potatoes provide lasting satisfaction and nourishment.

Another wonderful benefit of sweet potatoes is their natural anti-inflammatory and antioxidant content. Combined with healthy fats from olive oil and protein from eggs and cheese, these flatbreads become a balanced and nutrient-dense meal option that can help support energy, digestion, and overall well-being. Including sweet potatoes more often in your meals is such a simple and delicious way to nourish your body while still enjoying comforting foods you truly look forward to eating.

Whether you use these flatbreads as sandwich wraps, mini pizzas, healthy lunch bases, or savory snacks, they are one of those versatile recipes you will likely find yourself making again and again. Simple, wholesome, comforting, and incredibly delicious — this is healthy comfort food at its best.

Ingredients

  • 5 medium sweet potatoes (750 g whole, about 670 g peeled and ready to shred)
  • 2 eggs
  • 1 cup (120 g) shredded mozzarella cheese (or cheese of choice)
  • 2 tbsp. olive oil
  • ¼ tsp. salt
  • 1 tsp. dried oregano (or herbs of choice)
  • ½ tsp. dried garlic (or seasoning of choice)
  • ½ tsp. dried onion (or seasoning of choice)

Optional Filling Ideas:

  • Canned sardines
  • Lettuce
  • Tomato slices
  • Avocado
  • Pickles

Directions

  1. Thoroughly wash the sweet potatoes, peel them, and shred them using the large holes of a hand grater or a food processor. You should obtain about 670 g of peeled and shredded sweet potatoes.
  2. Transfer the shredded sweet potatoes to a large mixing bowl.
  3. Add the eggs, shredded mozzarella cheese, olive oil, salt, dried oregano, dried garlic, and dried onion.
  4. Mix very well until all the ingredients are fully combined. Continue mixing until the shredded sweet potatoes soften slightly and become easier to handle.
  5. Line a large baking pan (approximately 37 x 26 cm) with parchment paper.
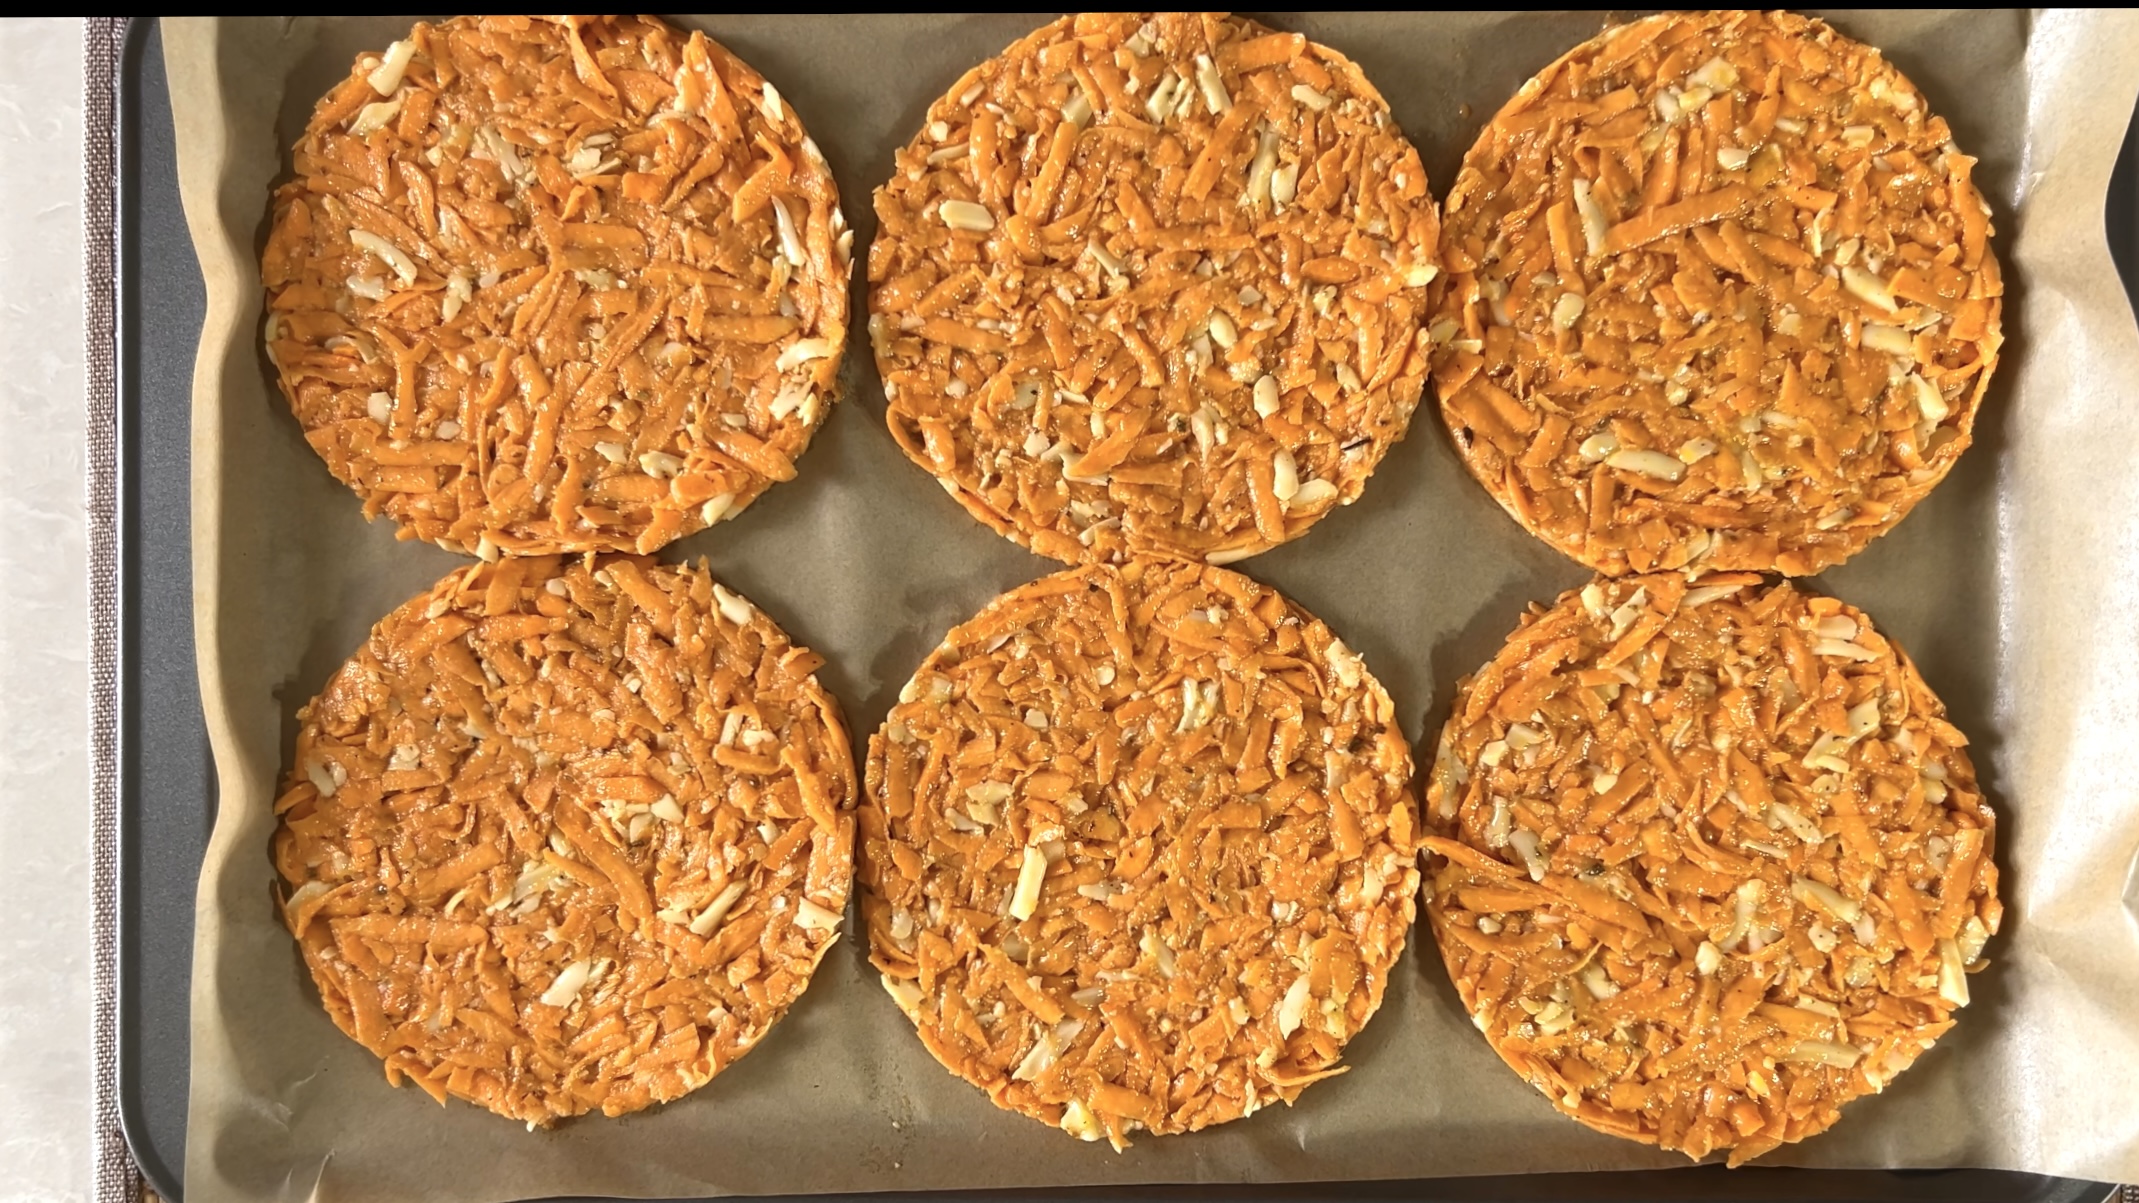
  6. Place a round cake cutter (about 12.5 cm wide) onto the prepared baking tray.
  7. Spoon about ⅓ cup of the sweet potato mixture into the cutter and gently flatten it using the back of a spoon to create a thin, even round flatbread.
  8. Carefully remove the cutter and repeat the process with the remaining mixture until all the flatbreads are formed.
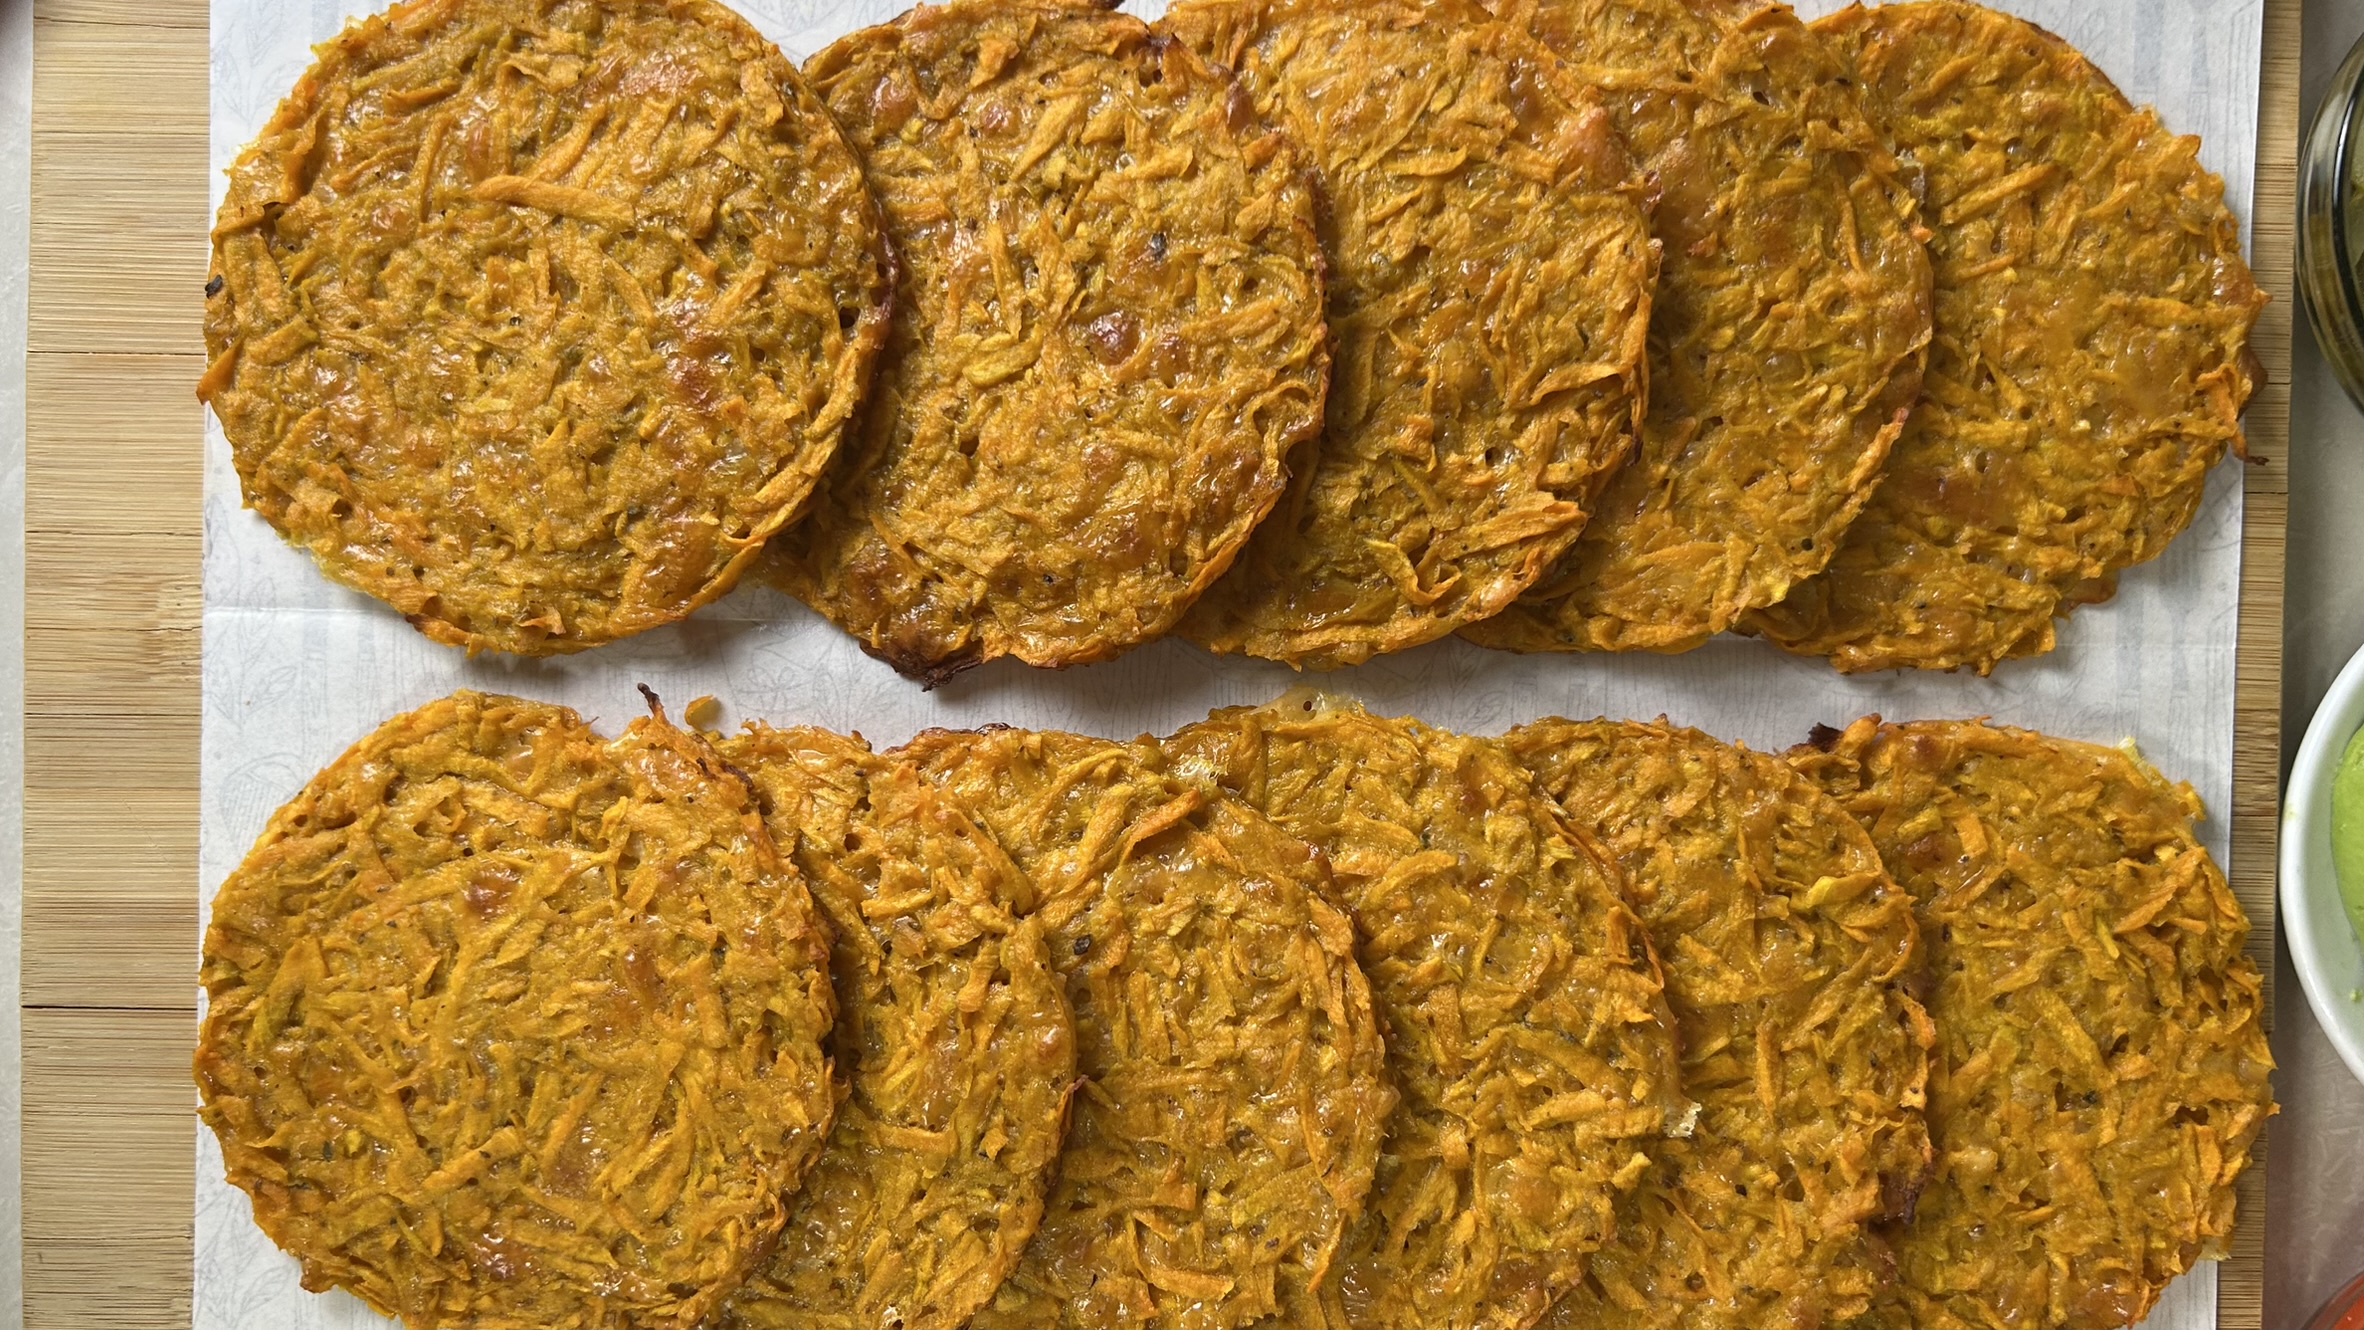
  9. Bake in a preheated oven at 350°F (180°C) for 25 to 30 minutes, or until lightly golden around the edges.
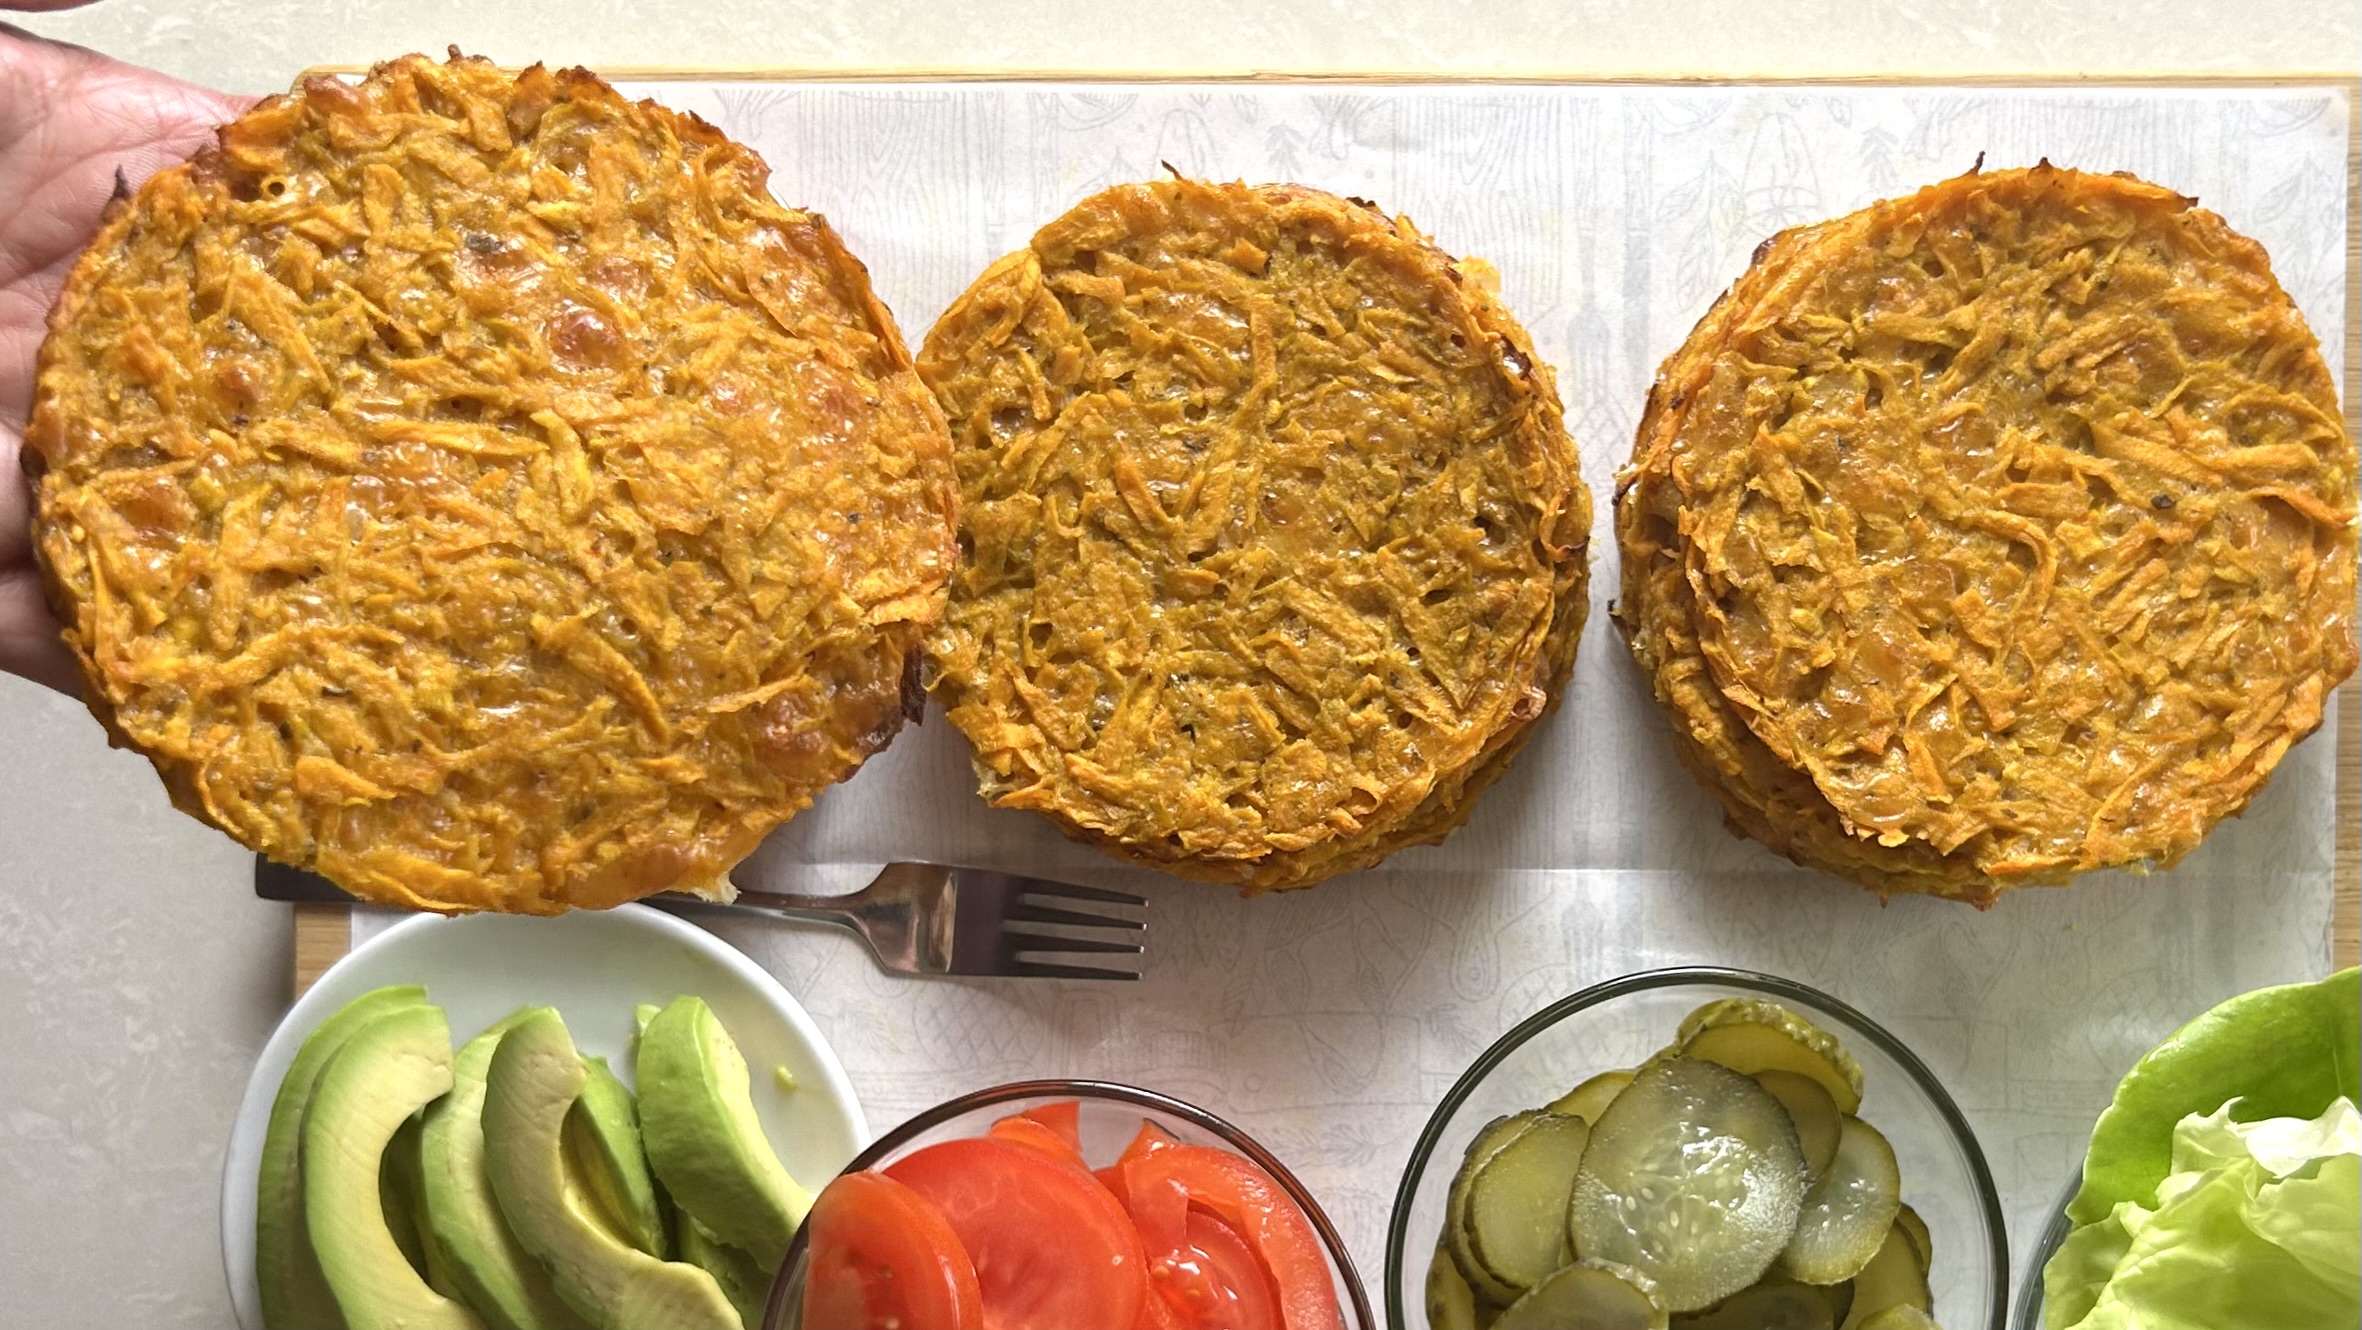
  10. Remove from the oven and allow the flatbreads to cool slightly before handling. They should come out soft, flexible, and pliable.
  11. Enjoy them warm with canned sardines, avocado, lettuce, tomato slices, pickles, or your favorite wholesome fillings.

    Prep Time, Baking Time & Servings

    • Prep Time: 20 minutes
    • Baking Time: 25–30 minutes
    • Total Time: About 50 minutes
    • Servings: 11 flatbreads

    Nutritional Information

    Per 1 flatbread:

    • Energy: 121 calories
    • Protein: 4.98 g
    • Fat: 5.82 g
    • Carbohydrates: 12.47 g
    • Fiber: 1.6 g

    Storage & Recommendations

    • Store leftovers in the refrigerator for up to 5 days.
    • Freeze for up to 3 months in an airtight container.
    • Once cooled, you need to reheat them in the oven or air fryer for the best texture and flexibility.
    • These flatbreads work beautifully as sandwich wraps, mini pizzas, or savory snacks.
    • Pairing them with sardines and avocado creates an extra filling and nutrient-dense meal rich in healthy fats and protein.
    • Feel free to customize the herbs and seasonings depending on your taste preferences.
    • For extra pliable flatbreads, avoid overbaking them. Remove them once the edges become lightly golden.
    Chickpea Brioche

    Chickpea Brioche

    Chickpea Brioche

    Who doesn’t love brioche? This classic French bread is known and adored all over the world for its soft, fluffy texture and delicate sweetness. Traditionally made with refined wheat flour, butter, eggs, and sugar, brioche has become a staple for both sweet breakfasts and savory sandwiches. Its rich yet airy crumb makes it irresistible, but classic versions often rely heavily on refined flour, which is high in gluten but relatively poor in essential nutrients. In today’s recipe, we are giving this beloved French classic a wholesome, gluten-free twist by replacing refined flour with cooked chickpeas.

    To recreate that signature soft structure, we incorporate psyllium husk, a powerful source of soluble fiber that supports gut health and acts as a natural binder in gluten-free baking. Combined with butter, eggs, and maple syrup, these homemade chickpea brioches beautifully blend indulgence with nourishment, making them perfect for breakfast, snacks, or mini-sandwiches.

    Chickpeas are the star of this recipe and for good reason—they are a nutritional powerhouse that should be a regular part of any healthy diet. Naturally gluten-free, they are packed with plant-based protein, fiber, iron, magnesium, and essential vitamins. Unlike refined wheat flour, chickpeas help support stable blood sugar levels and promote long-lasting satiety, ensuring you feel full and energized throughout the day. By choosing chickpeas as your base, you are adding valuable minerals and fiber that aid digestion and overall intestinal balance. Incorporating this versatile legume into your baking is a simple yet effective way to upgrade the nutritional profile of your favorite comfort foods without sacrificing the soft, fluffy texture you crave.

    Ingredients

    • 2 cups (325 g) cooked chickpeas (canned, drained and rinsed, or homemade)

    • 2 eggs

    • 1/3 cup maple syrup

    • 1 tbsp (10 g) instant yeast

    • A pinch of salt (optional)

    • 60 g butter, softened at room temperature

    • 6 tbsp (30 g) psyllium husk

    • 30 g dark chocolate chips (optional)

    • 1/4 cup plain yogurt (for brushing)

    • 15 g sliced almonds (optional topping)

    Instructions

    1. If you are preparing your chickpeas from dry, soak 1 cup (180 g) of dry chickpeas overnight, rinse them, and pressure cook until tender. Drain them thoroughly and let them cool slightly.
    2. Line a baking tray with parchment paper to prevent the rolls from sticking.
    3. Place the cooked chickpeas into a food processor.
    4. Add the eggs, maple syrup, instant yeast, and salt, then blend until the mixture is perfectly smooth and creamy.
    5. Add the softened butter and psyllium husk to the processor.
    6. Blend again until the ingredients form a soft, unified dough that holds together easily.
    7. Transfer the dough onto a work surface and divide it into two equal portions.
    8. Take the first portion, flatten it slightly, and add chocolate chips if you are using them. Gently knead the dough to distribute the chips, roll it into a cylinder, and divide it evenly into pieces.
    9. Shape these pieces into round balls and arrange them on the prepared baking tray.
    10. Roll the second portion of dough into a cylinder, divide it evenly, and shape the pieces into elongated rolls or your preferred shapes.
    11. Place these on the tray, cover everything with a clean kitchen towel, and let the dough rise in a warm place for about 30 minutes.
    12. Once risen, brush each brioche with a little yogurt and sprinkle sliced almonds on top if desired.
    13. Bake the rolls at 170°C (340°F) for approximately 30 minutes until they are golden brown and fully cooked. Let them cool slightly before serving.

    Nutritional Information

    Per 1 Serving:

    • Energy: 144 calories

    • Protein: 4.24 g

    • Fat: 7.21 g

    • Carbohydrates: 15.03 g

    • Fiber: 4.5 g

    Prep, Cook, and Servings

    • Prep: 30 mins

    • Cook: 30 mins

    • Servings: 12 Servings

    Notes and Recommendations

    • Ensure the chickpea mixture is blended until perfectly smooth to achieve the best airy texture in the final brioche.

    • These rolls are best enjoyed warm and pair wonderfully with nut butter, jam, or a light drizzle of honey.

    • For a savory twist, use these as buns for mini sandwiches filled with your favorite savory ingredients.

    • This recipe is naturally gluten-free.

    • If you have leftovers, slightly toast them to give the exterior a satisfying crispness while keeping the inside soft.

    Wasa-Inspired Crackers

    Wasa-Inspired Crackers

    Wasa-Inspired Crackers

    These homemade crackers are inspired by the popular Wasa crackers, a Scandinavian classic known for their crisp texture, simple ingredient list, and reputation as a healthier alternative to many refined, ultra-processed crackers. Traditionally made with whole grains and minimal additives, Wasa-style crackers are hearty, filling, and nutritionally smarter than most commercial options found in the grocery aisle. This gluten-free version builds on that idea by combining oats with a variety of nutrient-dense seeds to significantly increase fiber, plant-based protein, and essential minerals. Caraway seeds are the secret ingredient here, recreating that characteristic, nostalgic Wasa flavor, while a touch of yeast—used mainly for flavor development rather than rising, adds a deep, savory complexity. The result is a sturdy, nourishing cracker that holds up beautifully under a mountain of toppings, making it a versatile staple for your healthy pantry.

    The foundation of this recipe relies on oats, an incredible superfood that truly deserves a place in your regular diet. Oats are famously rich in beta-glucan, a type of soluble fiber that has been scientifically shown to improve heart health by lowering “bad” LDL cholesterol and supporting a healthy gut microbiome. Beyond their cardiovascular benefits, oats provide a steady release of energy thanks to their low glycemic index, which helps prevent those midday blood sugar crashes.

    They are also a fantastic source of essential minerals like manganese, phosphorus, and magnesium, which are vital for bone health and metabolic function. By incorporating oats into your snacks, you are prioritizing long-term satiety and metabolic health, ensuring your crackers do more than just satisfy a crunch—they actually fuel your body with high-quality nutrients.

    Ingredients

    • 1 1/2 cups (125 g) oats

    • 1/3 cup (50 g) pumpkin seeds

    • 1/3 cup (50 g) golden or dark flaxseeds

    • 1/3 cup (45 g) sesame seeds

    • 1/2 tbsp caraway seeds

    • 1/4 tsp salt

    • 1 tbsp instant yeast

    • 2 tbsp olive oil (optional)

    • 3/4 to 1 cup (180–240 ml) lukewarm water

    Instructions

    1. Begin by adding the oats, pumpkin seeds, flaxseeds, sesame seeds, and caraway seeds to a food processor.
    2. Blend the mixture until a soft, fine flour forms, though it is perfectly fine to have some visible texture remaining from the seeds for a more rustic feel.
    3. Add the salt, instant yeast, olive oil (if using), and the lukewarm water to the processor bowl.
    4. Blend again until the mixture comes together into a cohesive, thick dough.
    5. If the dough feels a bit too sticky to handle, stop blending and let it rest for 15 to 30 minutes to allow the oats and seeds to fully absorb the moisture.
    6. Transfer the dough onto a work surface lined with a sheet of parchment paper.
    7. Lightly flatten the dough with your hands, then cover it with a second sheet of parchment paper to prevent sticking.
    8. Roll the dough evenly until it is about 8 mm thick, or adjust the thickness according to your personal preference.
    9. Cut the rolled dough into large rectangular crackers, approximately 11 cm long and 5 cm wide, to mimic the classic Wasa shape.
    10. Transfer the parchment paper with the cut crackers onto a large baking tray (about 37 × 26 cm).
    11. Dock each cracker with a fork by poking holes across the surface; this allows moisture to escape and ensures they stay flat while baking.
    12. Bake in a preheated oven at 180°C (350°F) for 20 minutes.
    13. Reduce the oven temperature to 175°C (340°F) and continue baking for an additional 30 minutes to allow them to dry out fully without browning too much.
    14. Remove from the oven and let the crackers cool completely on the tray, as they will continue to harden and become perfectly crisp as they sit.

    Nutritional Information

    Per 1 Cracker:

    • Energy: 99 calories

    • Protein: 3.8 g

    • Fat: 6.86 g

    • Carbohydrates: 6.95 g

    • Fiber: 2.4 g

    Prep, Cook, and Servings

    • Prep: 30 mins

    • Cook: 50 mins

    • Servings: 16 Wasa Crackers

    Notes and Recommendations

    • Dietary Compatibility: This recipe is naturally Vegan and Gluten-Free if using an oat brand that certified it’s gluten free.

    • Cooling is Key: Always allow the crackers to cool completely before storing; this is what locks in that signature “snap.”

    • Storage: Keep your crackers in an airtight container at room temperature to maintain their crispness for up to two weeks.

    • Savory Toppings: These are perfect as a base for savory options like smoked salmon, avocado, hard-boiled eggs, or cream cheese.

    • Sweet Pairings: For a lighter treat, try them with nut butter or your favorite fruit spreads.

    • Texture Tip: If you prefer an extra-thin cracker, roll the dough thinner and reduce the second baking stage by 5-10 minutes, keeping a close eye on the color.

    Carrot Flatbread

    Carrot Flatbread

    Carrot Flatbread

    If you’ve been searching for a soft, flexible, and wholesome bread alternative that’s easy to make and packed with real ingredients, this carrot flatbread might just become your new favorite kitchen staple. It’s one of those simple recipes that surprises you, just a handful of everyday ingredients transforming into a beautifully pliable, naturally sweet, and nourishing wrap.

    What I love most about this carrot and oat flatbread is how effortlessly it comes together. No complicated techniques, no yeast, no kneading. Just grate, mix, spread, and bake. The result? A golden, tender flatbread that folds beautifully around your favorite fillings, perfect for wraps, tacos, sandwiches, or even as a savory base for creative toppings.

    Finely shredded fresh carrot blends seamlessly with oat flour, creating a dough that bakes into a flexible yet sturdy flatbread. The carrots distribute their natural moisture and subtle sweetness throughout, while oat flour provides structure and a satisfying texture. It’s simple, practical, and incredibly versatile.

    Now let’s talk about why carrots deserve a regular place in your diet. Carrots are rich in beta-carotene, a powerful antioxidant that your body converts into vitamin A — essential for healthy vision, immune support, and skin health. They also provide fiber, which supports digestion and promotes satiety, helping you feel full longer. Regularly incorporating carrots into meals, even in creative ways like flatbreads, is a smart and delicious way to boost your daily vegetable intake. When you combine carrots with oat flour, you also benefit from beta-glucans found in oats, a type of soluble fiber known to support heart health, steady energy levels, and balanced blood sugar. Together, they create a nutrient-dense flatbread that feels light yet deeply nourishing.

    This recipe is vegan and naturally gluten-free (as long as certified gluten-free oat flour is used), making it suitable for many dietary preferences. It’s especially helpful if you’re looking for healthy wrap alternatives or creative ways to include more vegetables in your meals.

    Let’s make it!

    Ingredients

    • 1 large carrot (275 g), finely shredded

    • 1 cup (90 g) oat flour

    • ½ tsp. salt

    • 1 tsp. baking powder (optional)

    Directions

    1. Thoroughly wash and peel the carrot to remove any dirt or residue.
    2. Finely shred the carrot using a box grater or food processor.
    3. Transfer the shredded carrot to a large bowl and sprinkle it with the salt.
    4. Let it rest briefly to allow the salt to draw out excess moisture.
    5. Add the oat flour and baking powder (if using) to the carrot mixture.
    6. Gently stir until everything is evenly combined, avoiding overmixing.
    7. Check the texture — the dough should be slightly sticky but not runny.
    8. Line a large baking tray (about 37 cm × 26 cm) with parchment paper.
    9. Spread the mixture evenly and thinly over the tray using a spatula or rectangular scraper.
    10. Bake in a preheated oven at 350°F (180°C) for 20–25 minutes, or until the surface looks set and dry.
    11. Remove from the oven and allow it to cool slightly before cutting.
    12. Slice into large portions and enjoy warm as a wrap, sandwich base, taco shell, or flatbread.

    Prep Time, Baking Time & Servings

    • Prep Time: 15 minutes

    • Baking Time: 20–25 minutes

    • Servings: 2 large flatbreads

    Nutritional Information (Per 1 Serving)

    • Energy: 230 calories

    • Protein: 8.88 g

    • Fat: 3.45 g

    • Carbohydrates: 44.17 g

    • Fiber: 8.7 g

    This flatbread is high in fiber, plant-based, and naturally gluten-free when using certified gluten-free oats.

    Storage & Recommendations

    • Best enjoyed warm, when soft and flexible.

    • Once fully cooled, it tends to dry out — avoid prolonged exposure to air.

    • Store leftovers wrapped tightly in the refrigerator for up to 5 days.

    • Reheat gently in a pan or oven to restore softness before serving.

    • Ideal for wraps, tacos, sandwiches, or as a base for savory toppings.

    Flourless Chocolate Cake

    Flourless Chocolate Cake

    Flourless Chocolate Cake

    Some of the best recipes are the ones that look simple but surprise you with just how good they actually are. This flourless chocolate cake is one of those soft, fluffy, deeply chocolatey, and deeply satisfying treats, all without using flour, refined sugar, or oil. Naturally gluten-free and made with real, whole ingredients, it is designed to be gentle on blood sugar, making it a more diabetic-friendly option when enjoyed in mindful portions. This recipe relies on two incredible main ingredients: pitted dates and peanut butter. Sweetened with dates, this cake avoids the sharp blood sugar spikes often caused by refined sugars because the fiber in dates helps slow sugar absorption. Meanwhile, the peanut butter adds healthy fats and plant-based protein that support more stable energy levels throughout your day. This gluten-free chocolate cake proves that everyday baking can be both comforting and nourishing.

    Peanut butter is the principal ingredient used in this recipe, and it is something I highly recommend making a part of your regular diet. It is a nutrient-dense powerhouse that provides a significant amount of plant-based protein and heart-healthy monounsaturated fats, which are essential for maintaining long-term satiety and supporting cardiovascular health. Beyond its macronutrients, peanut butter is rich in Vitamin E, magnesium, and antioxidants that help combat oxidative stress.

    Including it in your diet helps regulate your appetite and provides a steady, reliable source of fuel for your body and brain, making it a functional “glow-from-the-inside” food that transforms a simple dessert into a truly sustaining snack.

    Ingredients

    • 185 g pitted dates

    • Hot water, for soaking

    • 4 tbsp (24 g) cocoa powder

    • 1 cup (250 g) peanut butter

    • 4 eggs

    • 100 ml coconut milk (or milk of choice)

    • ½ tbsp baking powder

    • ½ tbsp white vinegar

    • 30 g dark chocolate chips (optional)

    • Oil, for greasing the pan

    Instructions

    1. Preheat your oven to 350°F (180°C) and lightly grease a cake pan with oil to prepare it for the batter.
    2. Place the pitted dates in a heatproof container and cover them with hot water to allow them to soften.
    3. Once the dates have softened, transfer them to a large bowl or food processor and blend until a completely smooth paste forms.
    4. Add the cocoa powder, peanut butter, and eggs directly to the date paste.
    5. Whisk or blend the mixture until it is smooth and fully combined.
    6. Add the milk gradually to the mixture to loosen the batter and create a lighter, airy consistency.
    7. Add the baking powder and white vinegar, then whisk briefly until they are evenly incorporated.
    8. Pour the batter into your prepared cake pan and gently tap it on the counter to level the surface.
    9. Sprinkle the dark chocolate chips on top if you are using them for that extra bit of indulgence.
    10. Bake for 40 minutes, or until the cake is set and a toothpick inserted into the center comes out clean.
    11. Allow the cake to cool slightly while still in the pan, then transfer it to a wire rack to cool completely.
    12. Slice and enjoy your cake as is, or finish it with your favorite toppings.

    Nutritional Information

    Per 1 Serving:

    • Energy: 144 calories

    • Protein: 4.56 g

    • Fat: 5.96 g

    • Carbohydrates: 19.26 g

    • Fiber: 2 g

    Prep, Cook, and Servings

    • Prep: 20 mins

    • Cook: 40 mins Baking

    • Servings: 12 Servings

    Notes and Recommendations

    • Dietary Profile: This cake is naturally Gluten-Free and Flourless.

    • Customization: If you choose to replace the dates with a zero-carb sweetener, this recipe can be adapted to be keto-friendly without sacrificing texture or flavor.

    • Storage: Store in an airtight container at room temperature for up to 2 days.

    • Extended Freshness: Refrigerate for up to 5 days for the best texture and freshness.

    • Freezing: You can freeze individual slices for up to 3 months for easy snacking later.

    • Serving Suggestions: Serve plain or top with jam, honey, yogurt, or a drizzle of caramel.

    • Versatility: This makes an excellent breakfast cake, midday snack, or wholesome dessert.