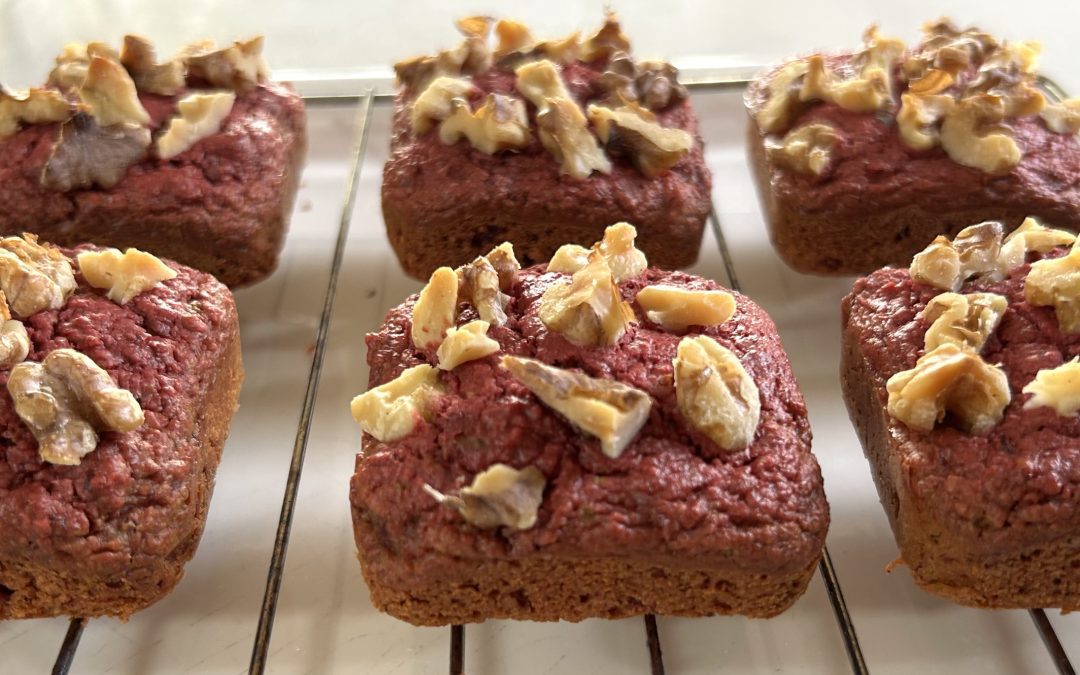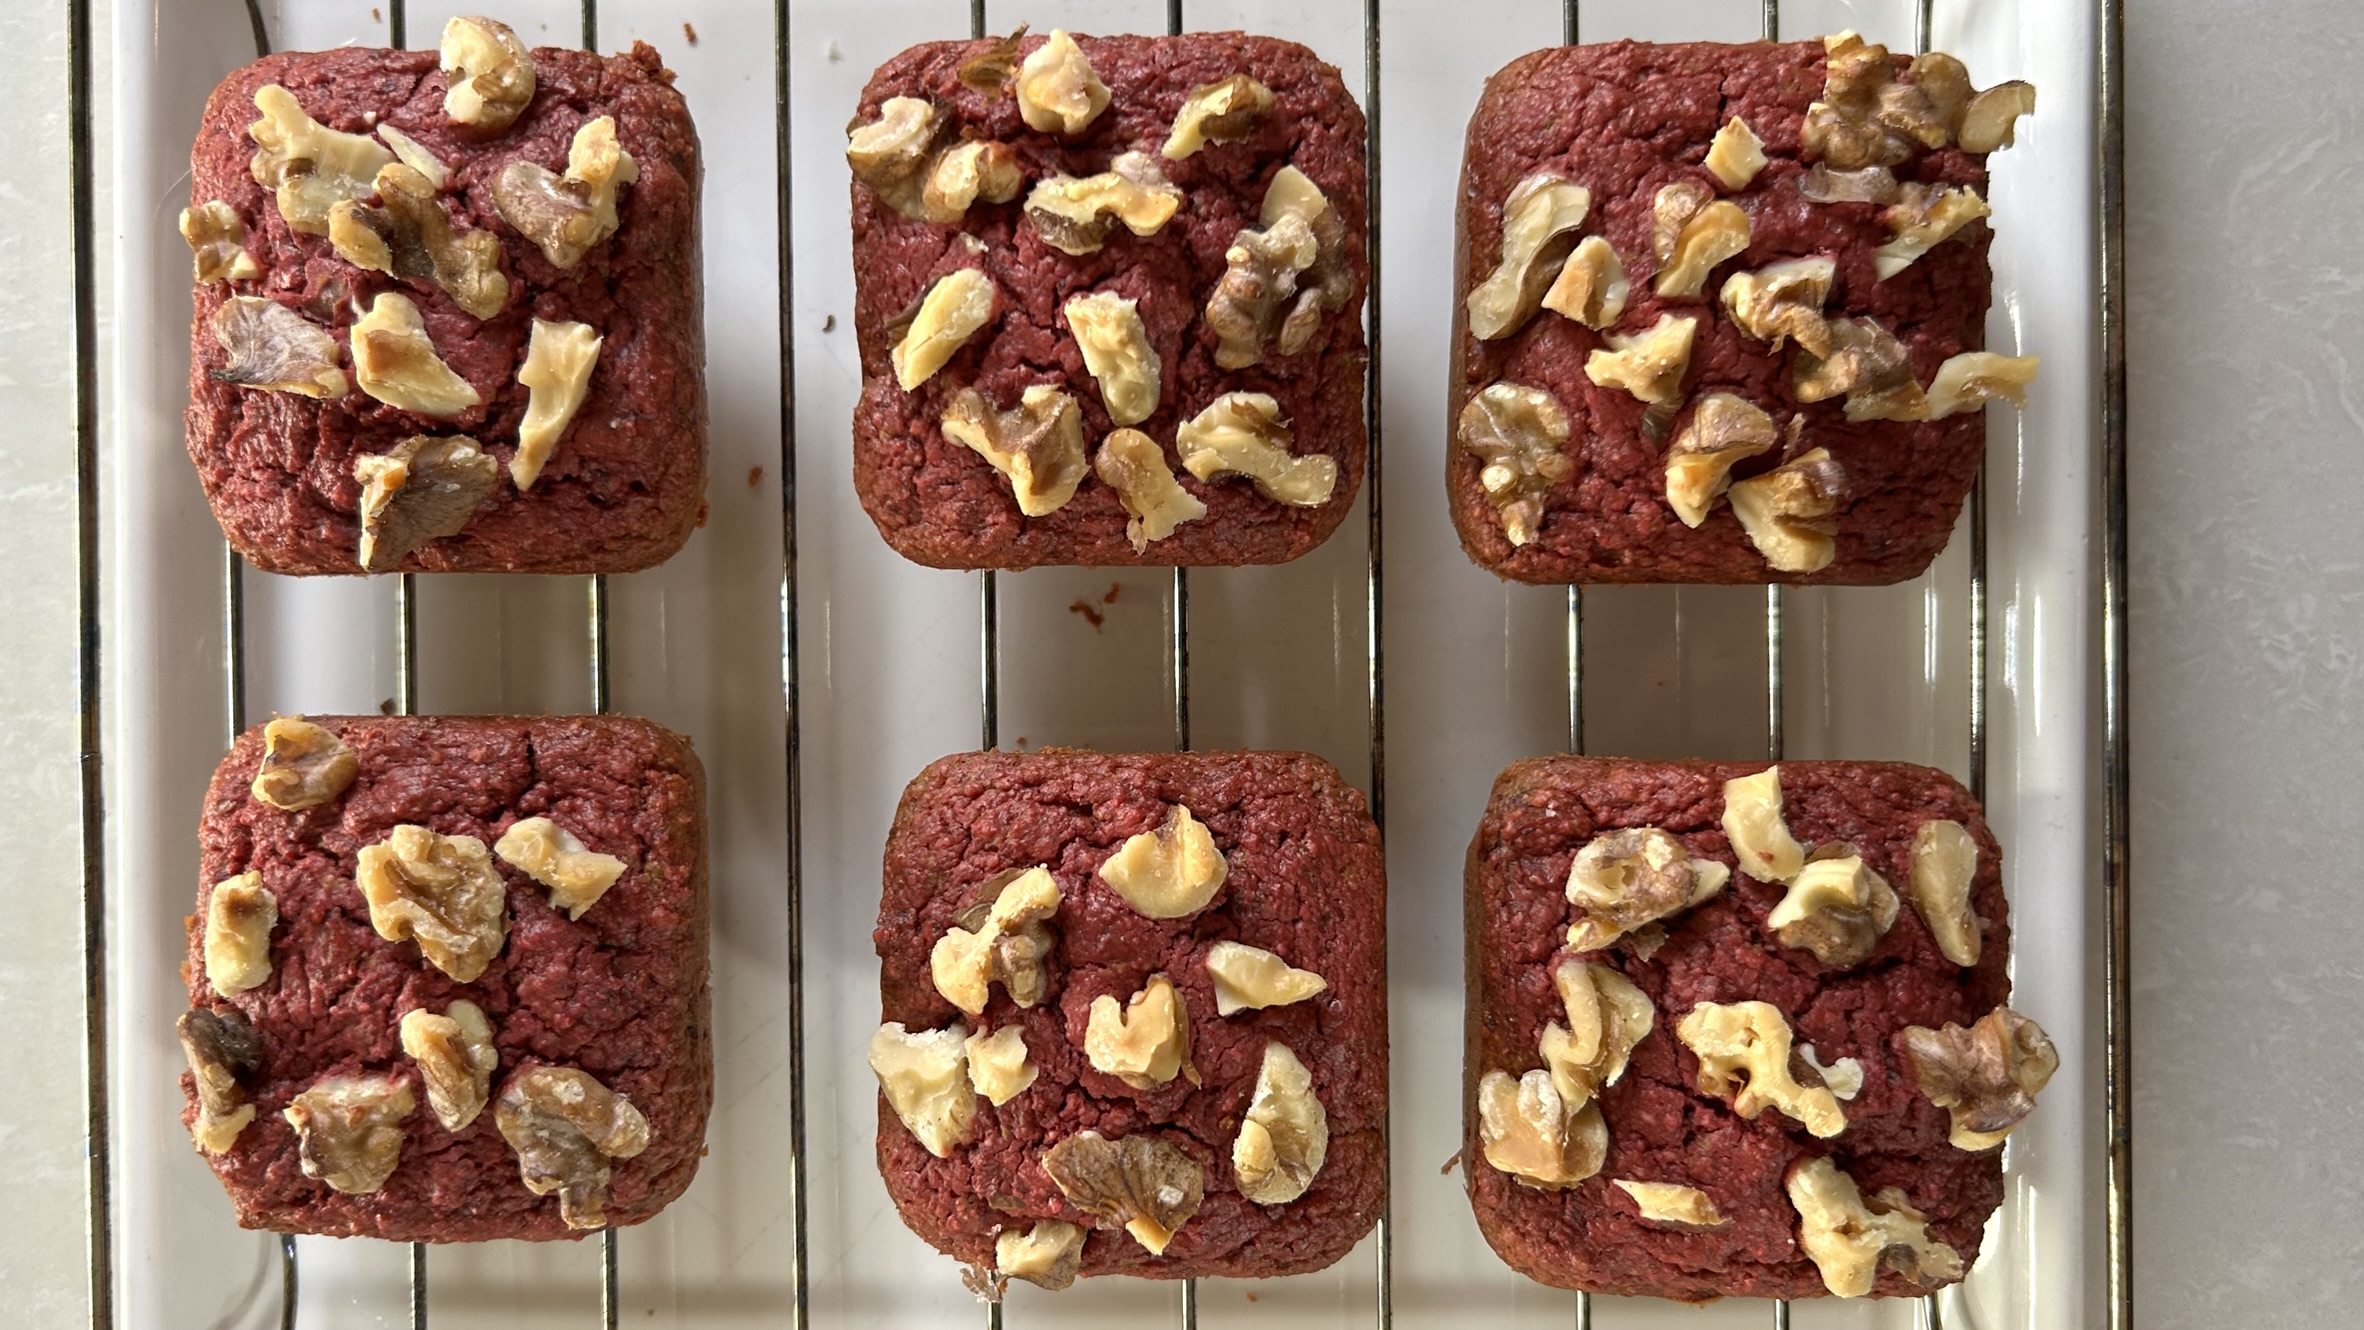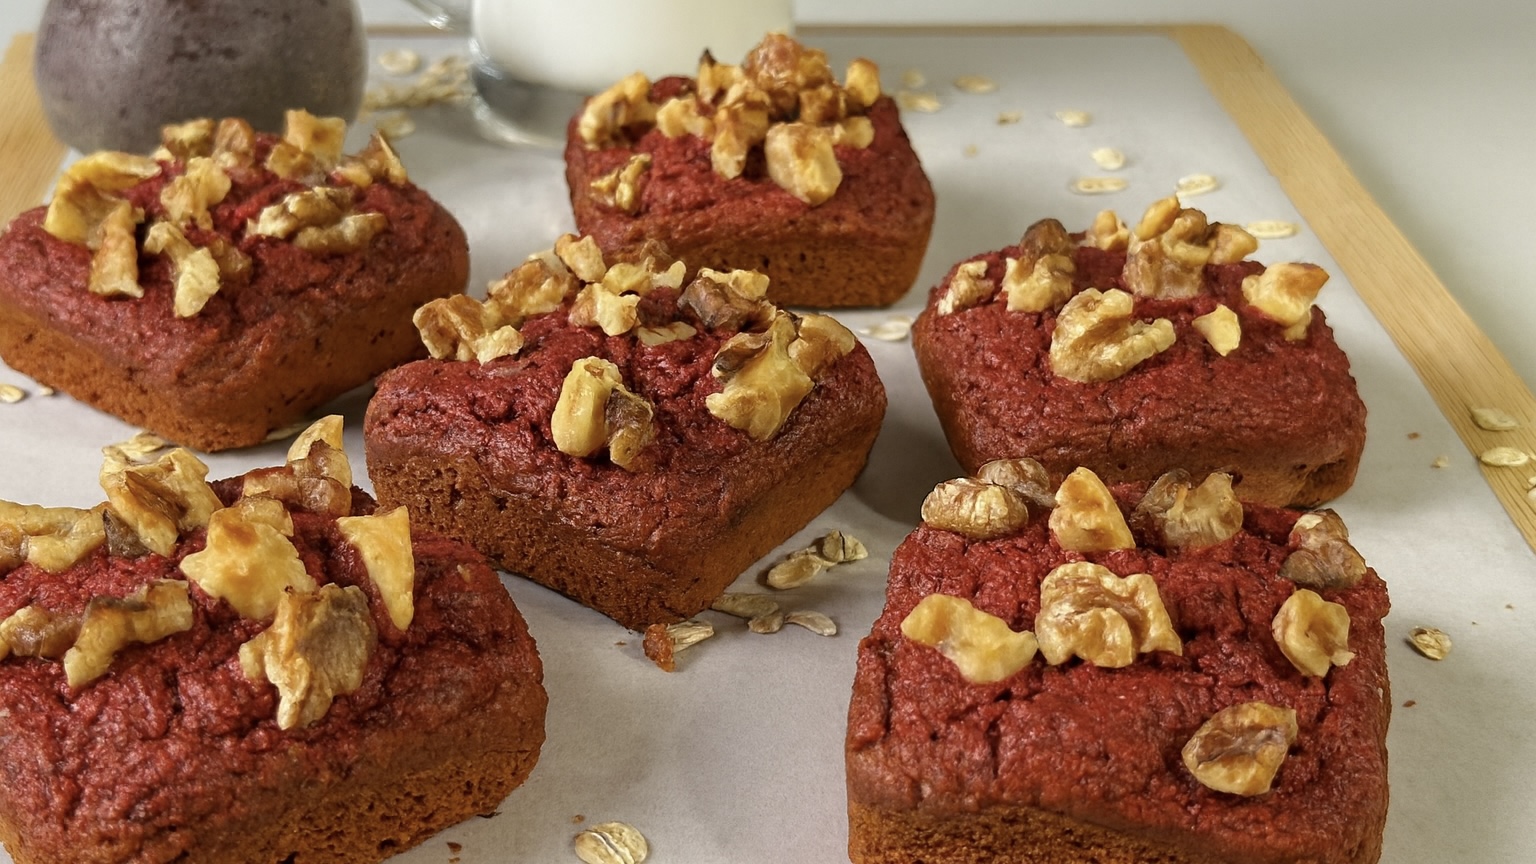
Red lentil & chia seed Breads
Red lentil & chia seed Breads
If you’ve ever found yourself craving soft, fluffy bread while following a gluten-free lifestyle, or simply looking for a more nourishing alternative to conventional bread, this red lentil and chia seed bread might quickly become a staple in your kitchen. These buns are light, tender, and surprisingly bread-like, yet made entirely from simple, whole-food ingredients, without refined flour or grains. They deliver that comforting, airy texture many of us miss, while still keeping things wholesome and deeply nourishing.
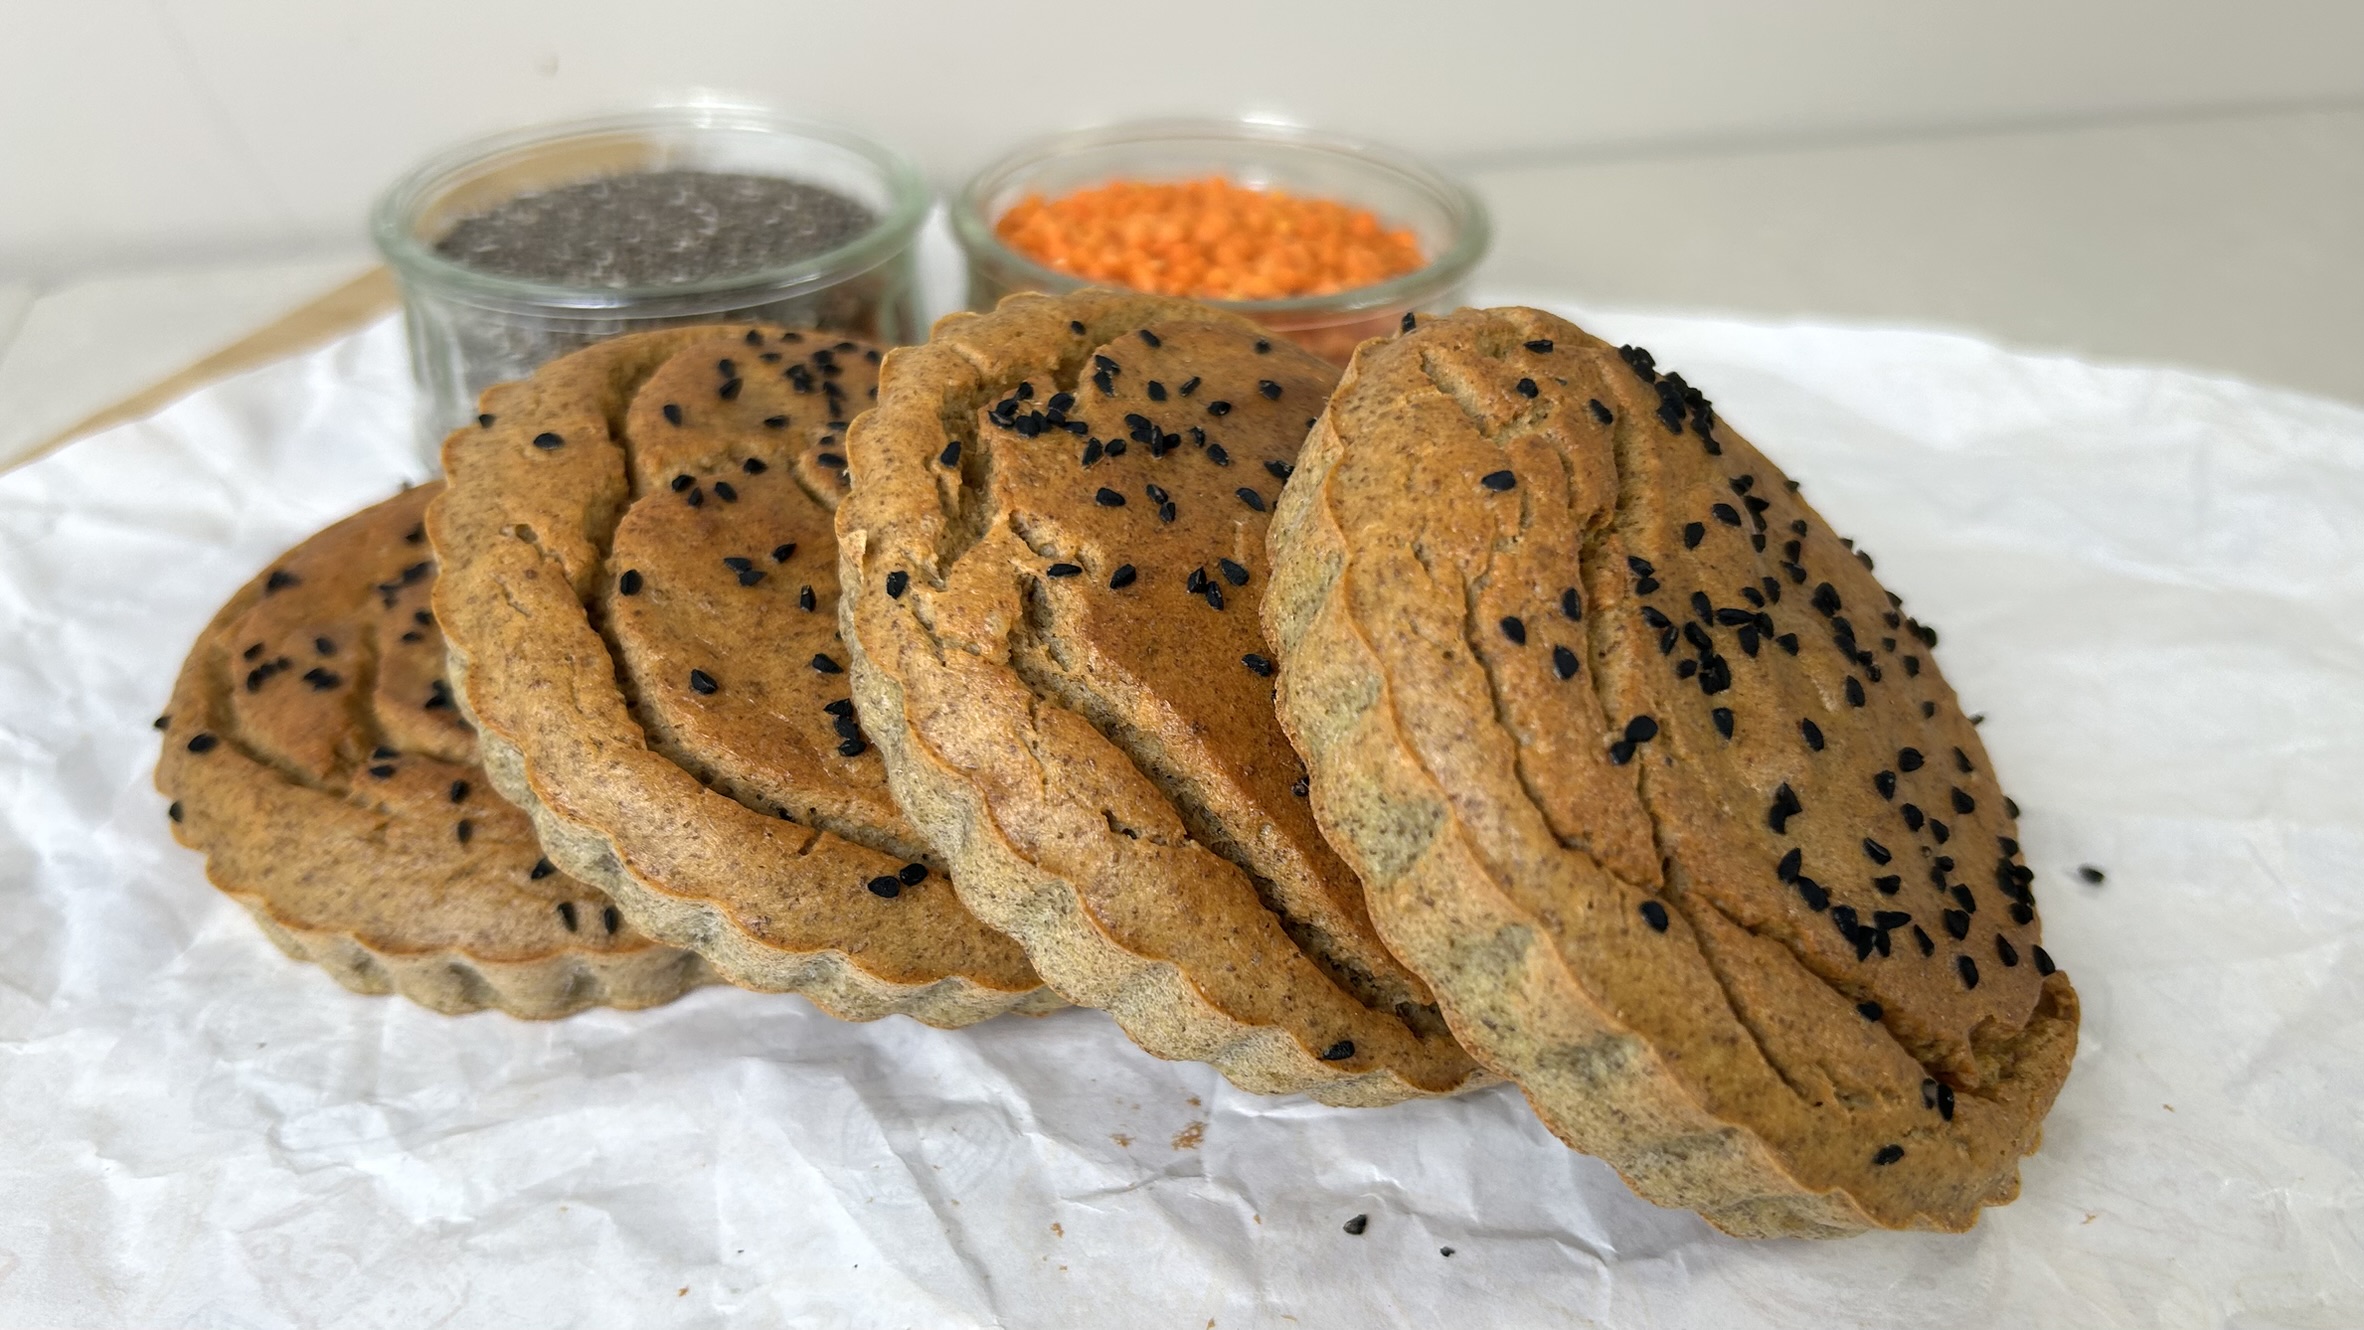
This is the kind of everyday recipe I truly love sharing. It’s practical, easy to prepare, and incredibly versatile, perfect as burger buns, sandwich bread, or served alongside soups and salads. They fit effortlessly into busy routines, work beautifully for school lunches and make-ahead meals, and freeze well for those weeks when you want something nourishing already on hand. What makes them especially satisfying is their balance: filling yet light, comforting without heaviness, and suitable for both kids and adults.
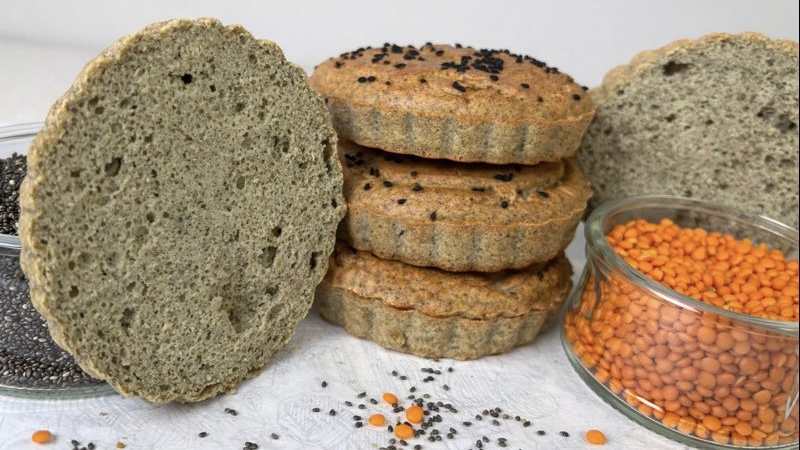
At the heart of this recipe are red lentils, a powerful whole-food ingredient that transforms beautifully when blended and baked. Naturally rich in plant-based protein, fiber, and iron, red lentils help support satiety, stable energy levels, and digestive health. Unlike refined flours, they provide slow-releasing carbohydrates that help keep blood sugar levels steady and reduce energy crashes. Their fiber content supports gut health, while their mineral profile makes them especially valuable for those looking to build nutrient-dense meals from simple ingredients. Including red lentils regularly in your diet is an easy and effective way to boost overall nutrition while still enjoying comforting foods like bread.
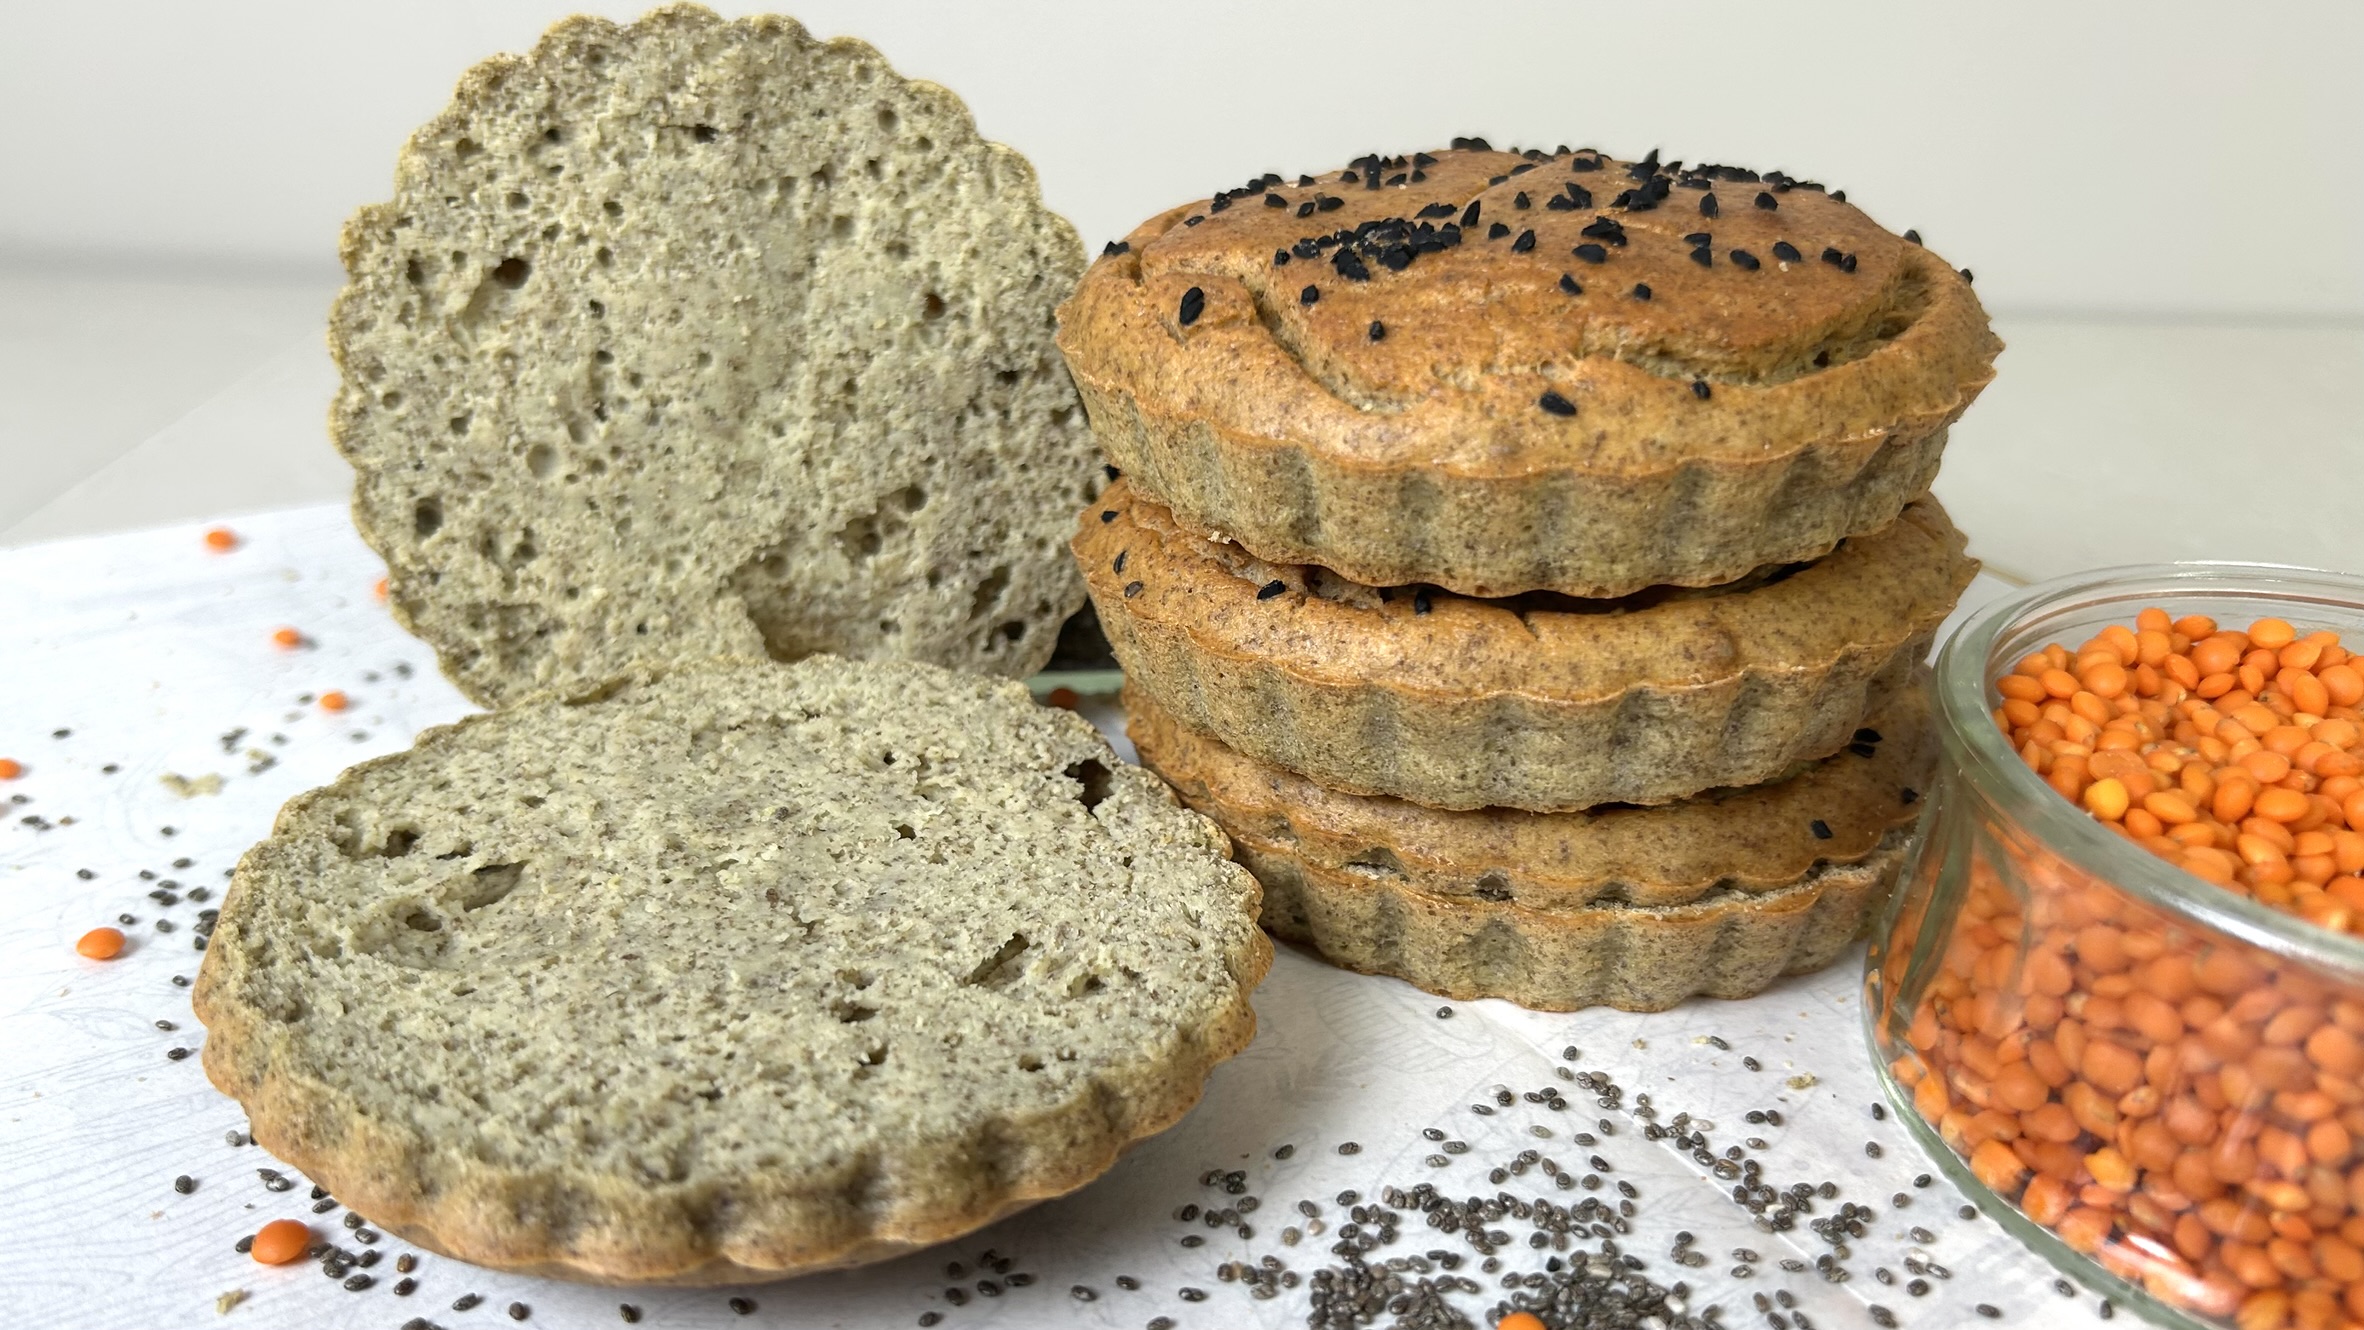
Chia seeds complement the lentils perfectly, both nutritionally and structurally. Despite their small size, chia seeds are incredibly nutrient-dense, providing omega-3 fatty acids, fiber, and essential minerals such as calcium and magnesium. When hydrated, they form a natural gel that helps bind gluten-free batters, creating moisture, softness, and a tender, bread-like crumb without the need for refined starches or gums. From a health perspective, chia seeds support digestive health, heart health, and long-lasting satiety, making them a simple ingredient with powerful benefits. Together, red lentils and chia seeds create a bread that is not only gluten-free and nourishing, but also genuinely enjoyable, proof that healthier bread alternatives don’t have to sacrifice texture or flavor.
Ingredients
-
½ cup (95 g) dried red lentils
-
3 tablespoons (30 g) chia seeds
-
3 tablespoons water
-
1 egg
-
100 g plain yogurt (Greek yogurt, sour cream, or cottage cheese)
-
2 tablespoons olive oil
-
¼ teaspoon salt
-
1 teaspoon baking powder
-
1 teaspoon nigella seeds or seeds of choice, for topping
Directions
- Soak the red lentils in water for several hours or overnight until fully softened.
- Drain and rinse the lentils thoroughly, then strain well to remove excess moisture.
- Place the chia seeds in a small bowl, add water, stir, and allow them to gel until softened.
- Transfer the soaked and drained lentils to a blender.
- Add the egg, yogurt, olive oil, salt, and the prepared chia mixture.
- Blend until the mixture becomes completely smooth and uniform.
- Add the baking powder and blend briefly, just until evenly incorporated.
- Pour the batter into a mixing bowl.
- Lightly grease bun molds or ramekins with oil.
- Divide the mixture evenly among the molds.
- Gently tap the tray to level and smooth the tops.
- Sprinkle seeds or spices over the surface for extra flavor and texture.
- Bake until the buns are lightly golden, fluffy, and cooked through.
- Allow them to cool slightly before removing from the molds and serving.
Prep Time, Baking & Servings
-
Soaking time: Overnight
-
Prep time: 20 minutes
-
Baking time: 30–35 minutes
-
Baking temperature: 350°F (180°C)
-
Servings: 4
Nutritional Information (Per Serving)
-
Energy: 215 calories
-
Protein: 9.36 g
-
Fat: 11.58 g
-
Carbohydrates: 19.99 g
-
Fiber: 5.2 g
This recipe is naturally gluten-free and suitable for vegetarian diets.
Storage & Recommendations
-
Store the buns in an airtight container in the refrigerator for up to 5 days.
-
For longer storage, freeze them for up to 3 months.
-
Reheat gently in the oven or toaster for the best texture.
-
Use as burger buns, sandwich bread, or serve alongside soups and salads.