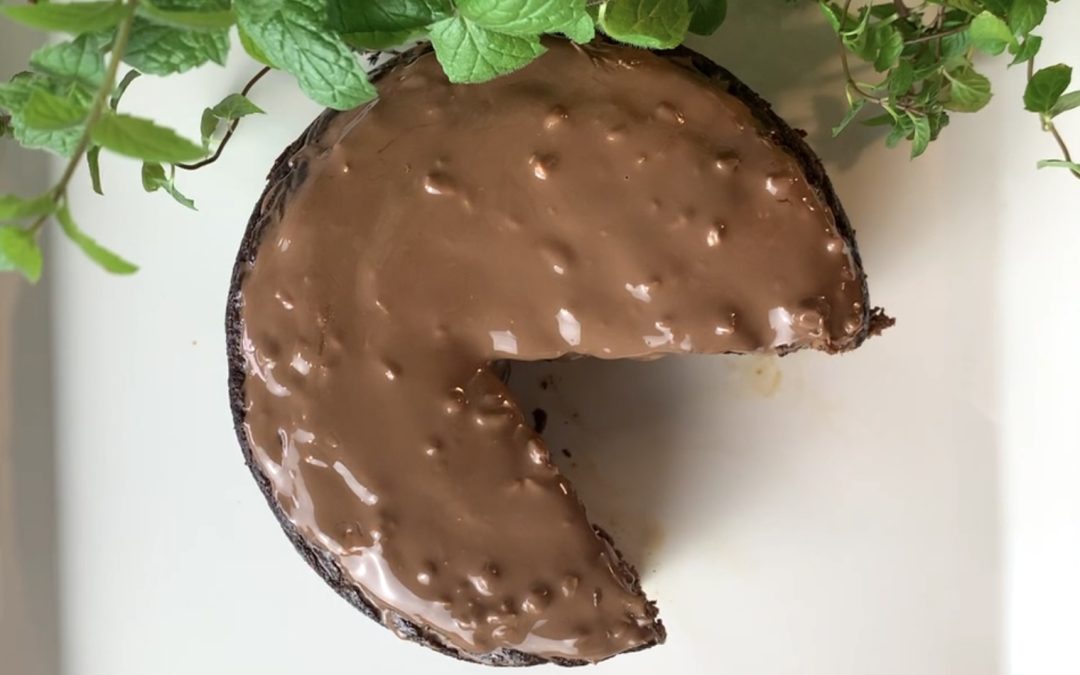
Crunchy Oat Biscuits
Crunchy Oat Biscuits

Why settle for store-bought oat biscuits when you can easily whip up your own incredibly tasty, nutritious, and crunchy version in just a few minutes? These homemade oat biscuits require only a handful of ingredients, and the results are nothing short of delightful. Whether you’re craving a quick snack or looking to impress guests with a homemade treat, these biscuits are your go-to solution.
The key ingredient in this recipe is oats, a versatile and nutritious whole grain that’s packed with health benefits. Oats are an excellent source of soluble fiber, which helps reduce cholesterol levels, manage blood sugar, and keep you feeling full longer. They are also rich in antioxidants and provide a good amount of protein, making them an ideal choice for anyone looking to maintain a balanced diet. Incorporating oats into your regular meals can support heart health, aid digestion, and contribute to overall well-being.
With the addition of peanut butter, maple syrup, and a hint of vanilla, these oat biscuits strike the perfect balance between health and flavor. Enjoy them with your favorite hot beverage, and you’ll never look at store-bought biscuits the same way again!
Ingredients
For the Cookies:
- 1 cup (80 g) old-fashioned rolled oats
- 1/3 cup (90 g) peanut butter
- 1/3 cup maple syrup (or honey or any liquid sweetener of your choice)
- 1 tsp. vanilla extract (or any preferred flavoring ingredient, such as cinnamon)
- Pinch of salt
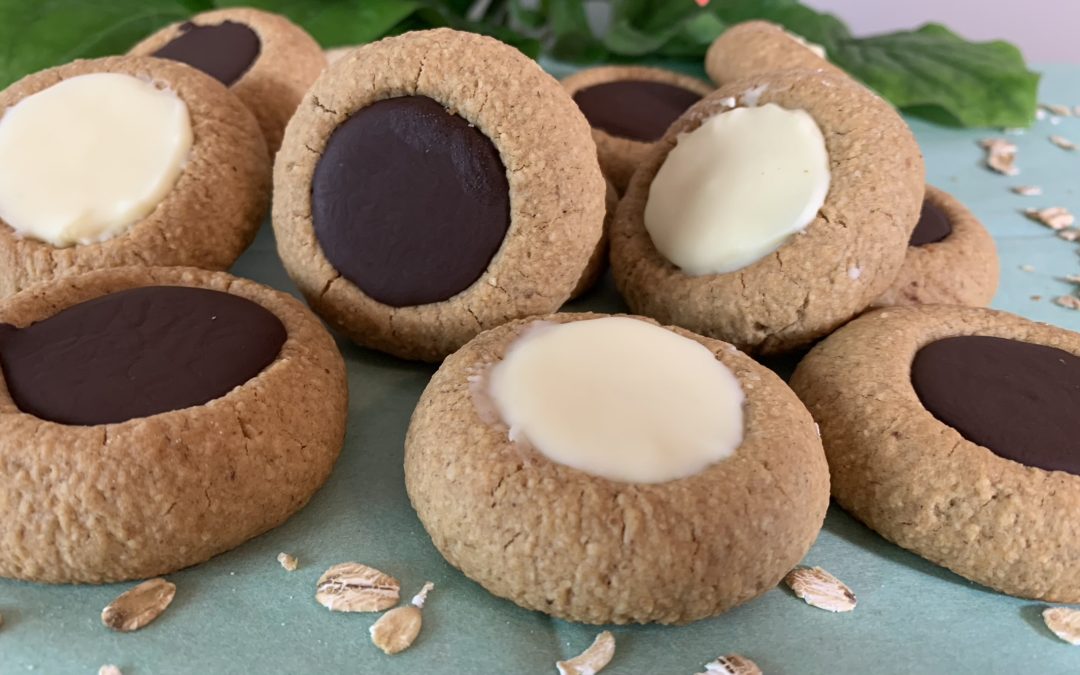
For the Garnish (optional):
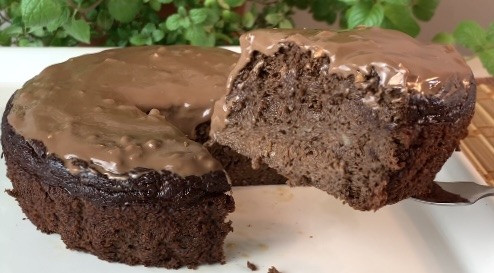
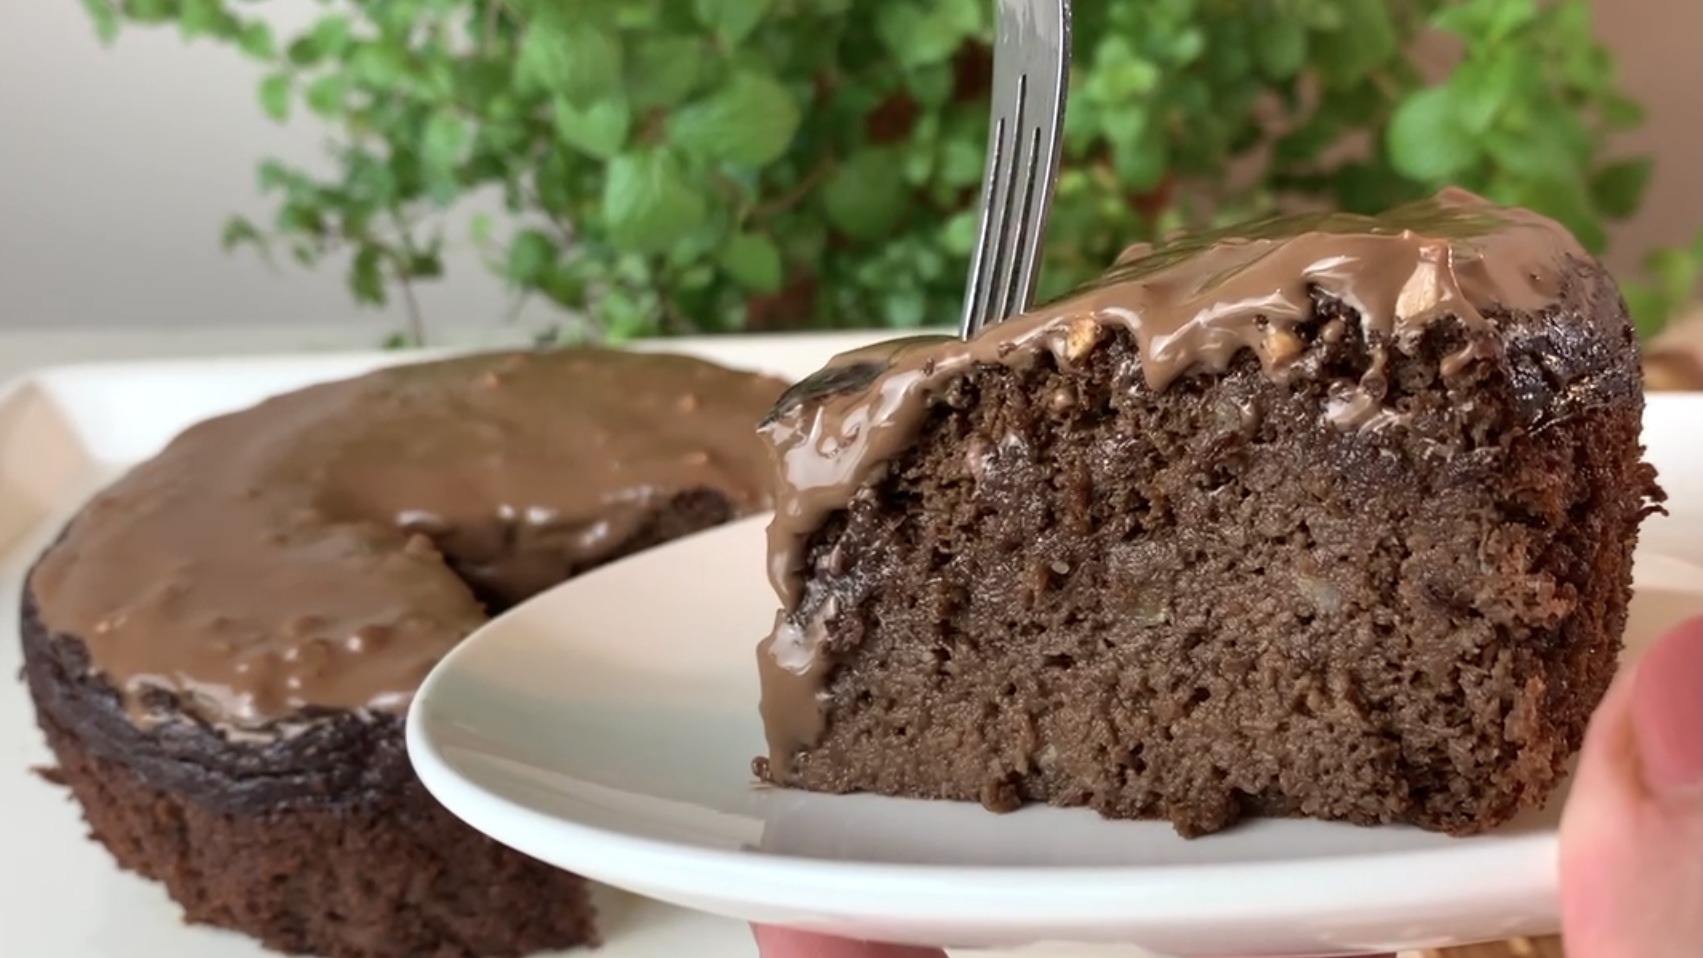
- 30 g dark chocolate
- 30 g white chocolate
Directions
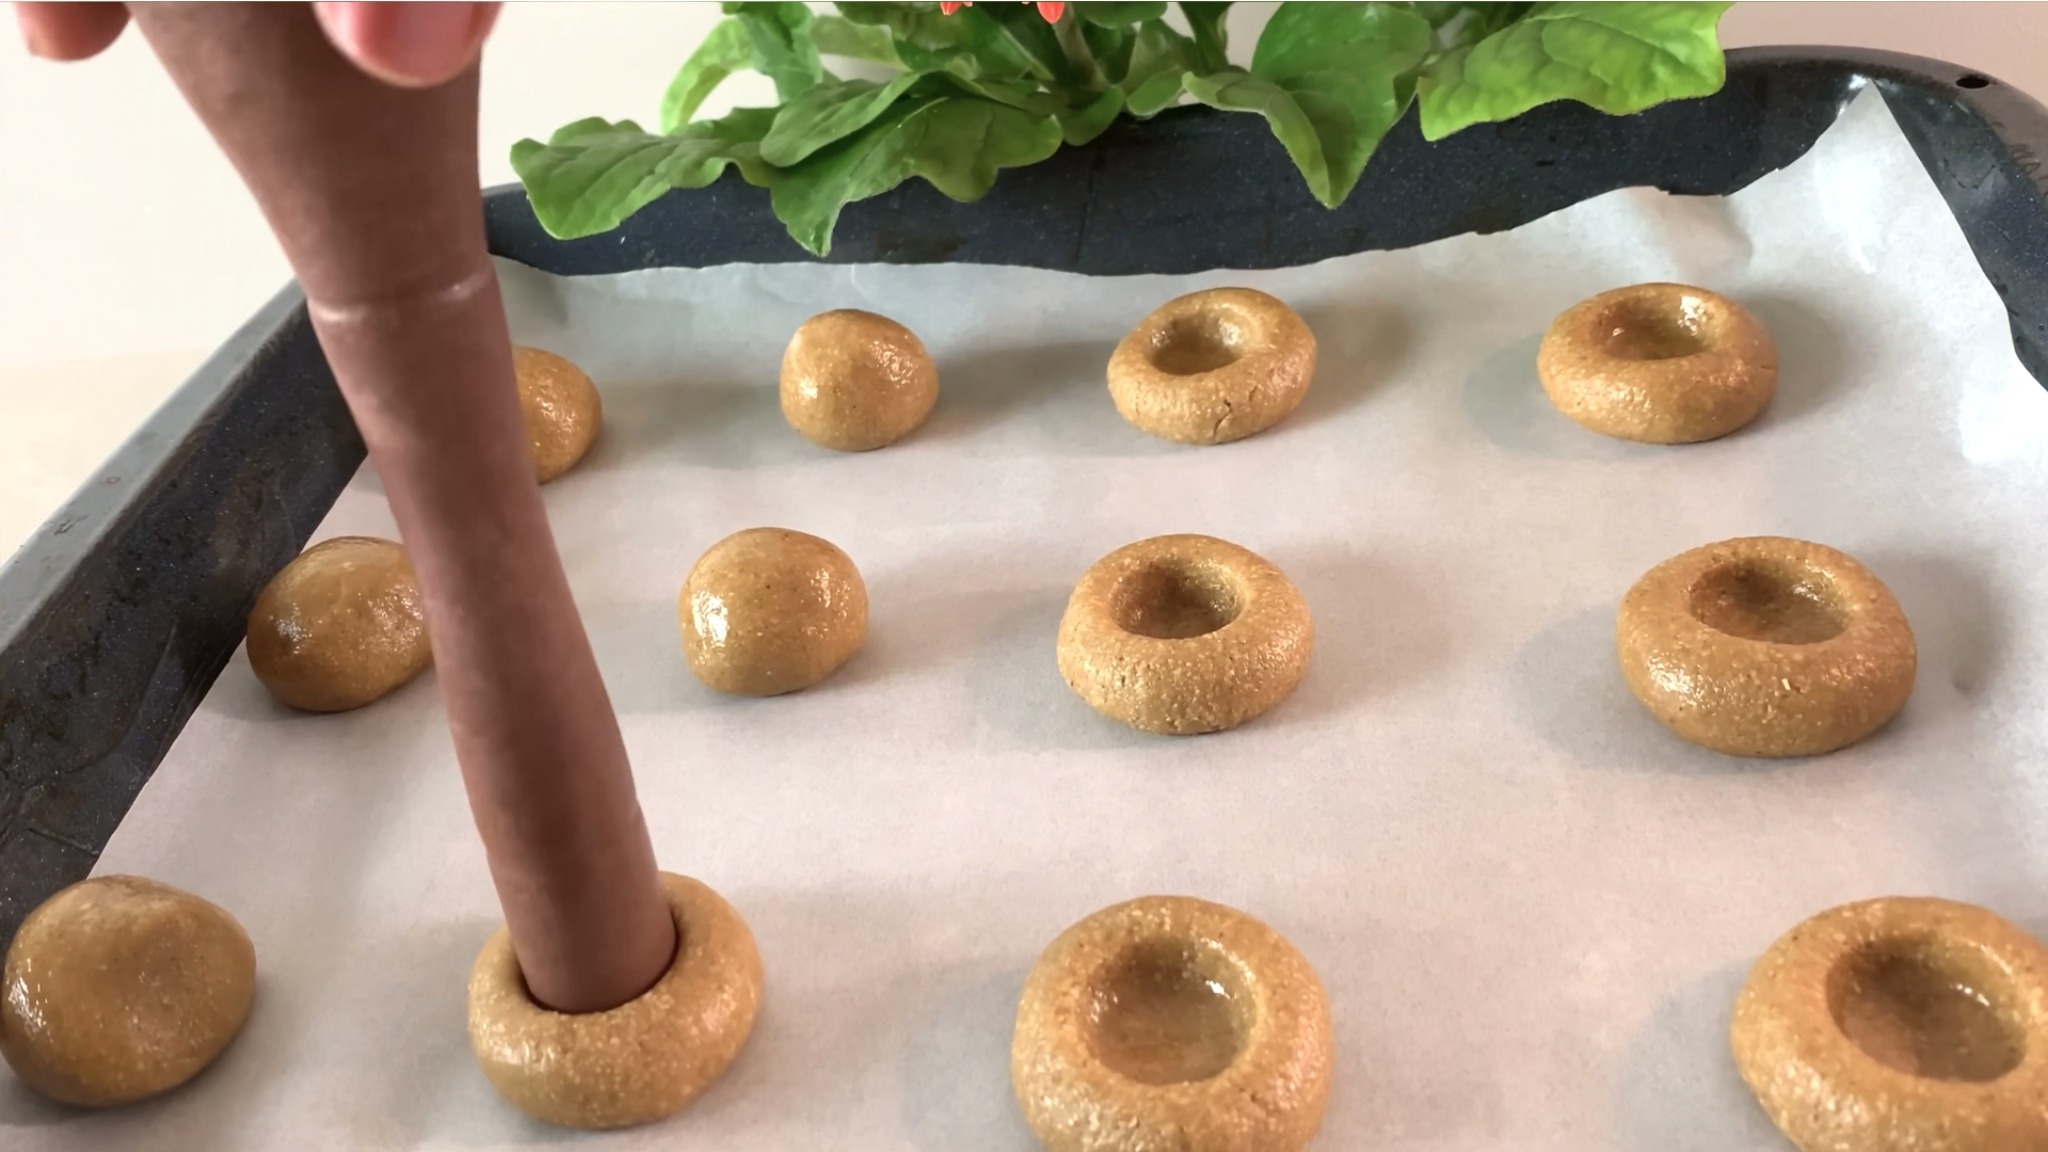
- In a mixing bowl, combine old-fashioned rolled oats, peanut butter, maple syrup (or honey), vanilla extract, and a pinch of salt.
- Stir well to combine and achieve a dough-like consistency that is easy to work with.
- Using your hands, shape the dough into tablespoon-sized balls and place them on a baking tray lined with parchment paper.
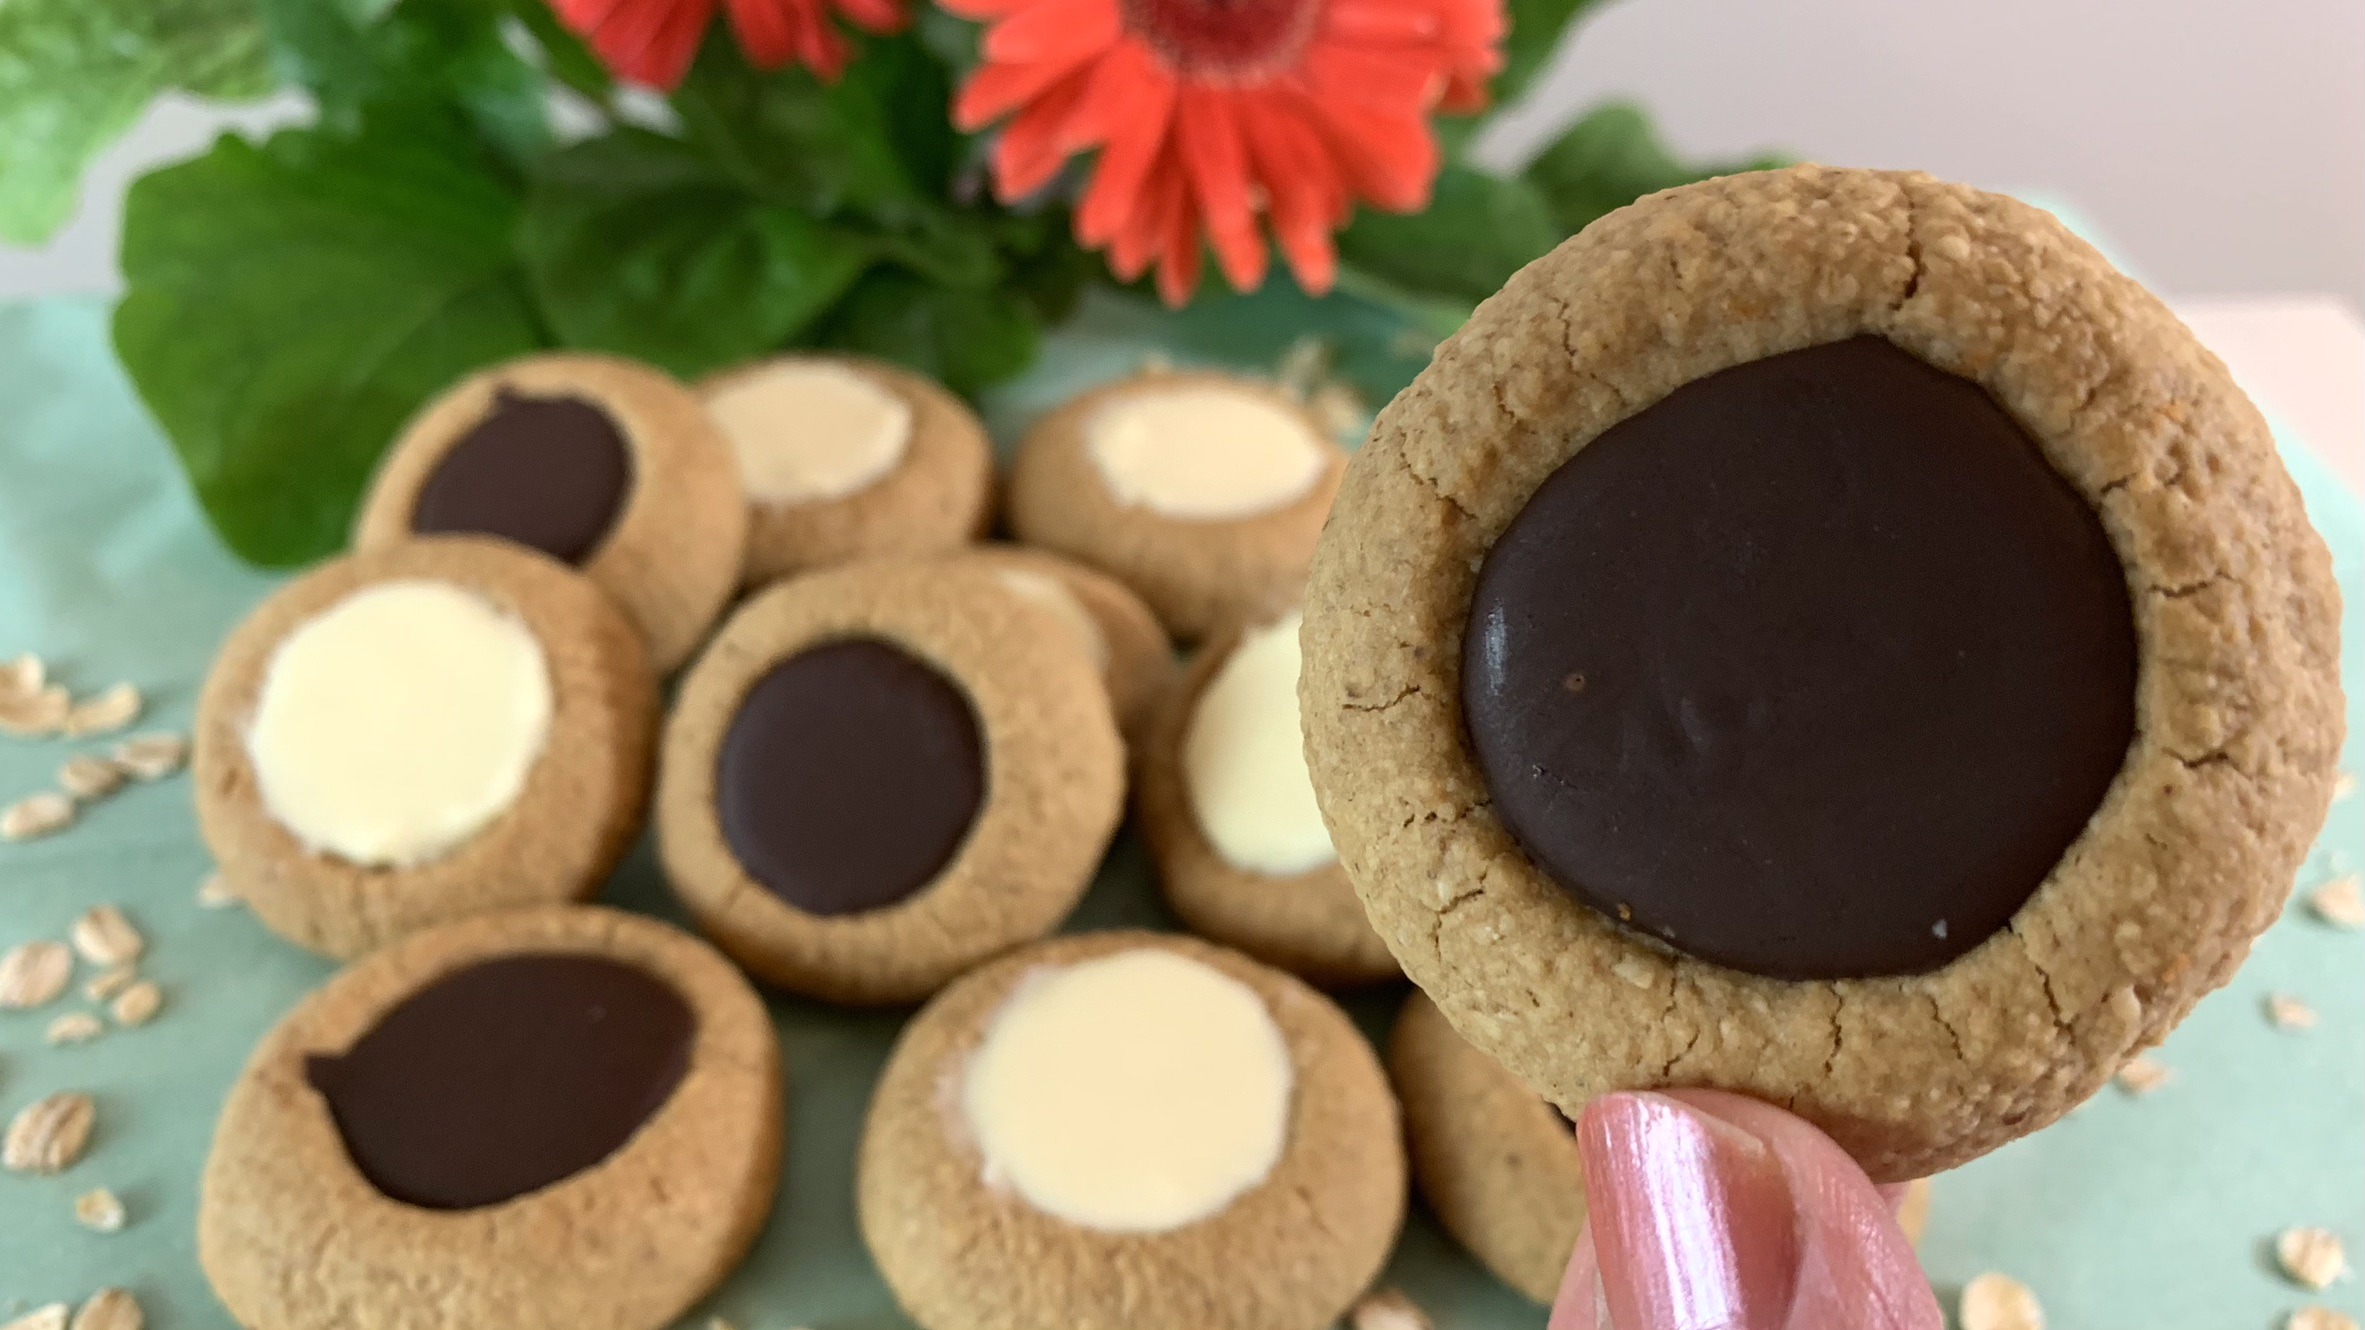
- Press the back of a measuring teaspoon into each ball to create a circular hole in the center.
- Bake the biscuits in a preheated oven at 350°F (175°C) for approximately 20 minutes or until golden brown.
- Once baked, allow the biscuits to cool completely on the baking tray.
- Melt the dark and/or white chocolate separately and fill the circular holes.
- Refrigerate for about an hour to allow the chocolate to set and achieve a smooth finish.
- Serve your rich and crunchy oat biscuits with a cup of hot milk or coffee.
Prep Time and Servings
- Makes: 12 Biscuits
- Prep Time: 30 minutes
- Baking Time: 20 minutes
- Chill Time: 1 hour
Nutritional Information (Per 1 Biscuit)
- Energy: 123 calories
- Protein: 3.14 g
- Fat: 6.19 g
- Carbohydrates: 14.57 g
- Fiber: 1.4 g
Storage and Recommendations
- Store your oat biscuits in an airtight container at room temperature for up to one week.
- These treats are vegan and gluten-free.
- Customize your oat biscuits by adding chopped nuts, dried fruits, or spices to the dough.