Gluten-Free Biscotti

Gluten-Free Biscotti

Gluten-Free Biscotti
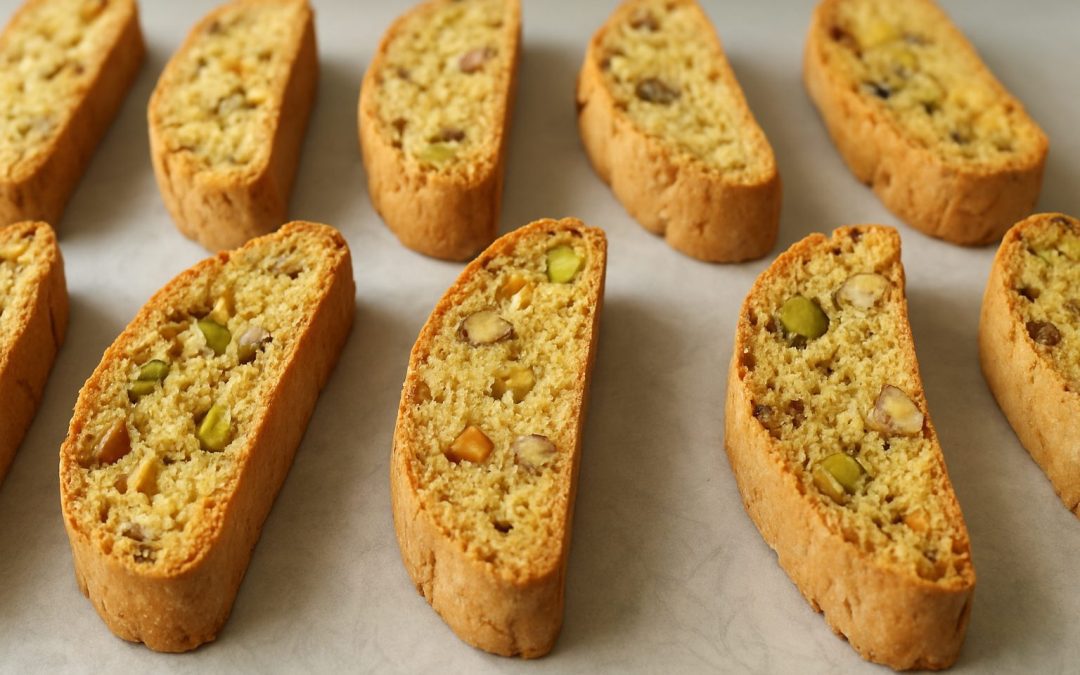
Biscotti, also known as Cantucci, are one of Italy’s most beloved and popular cookies, originating from the historic Tuscan city of Prato. These oblong, dry, and crunchy treats are traditionally baked twice, a process captured by the name “bis-cotti”, to achieve their legendary shelf life and signature snap.
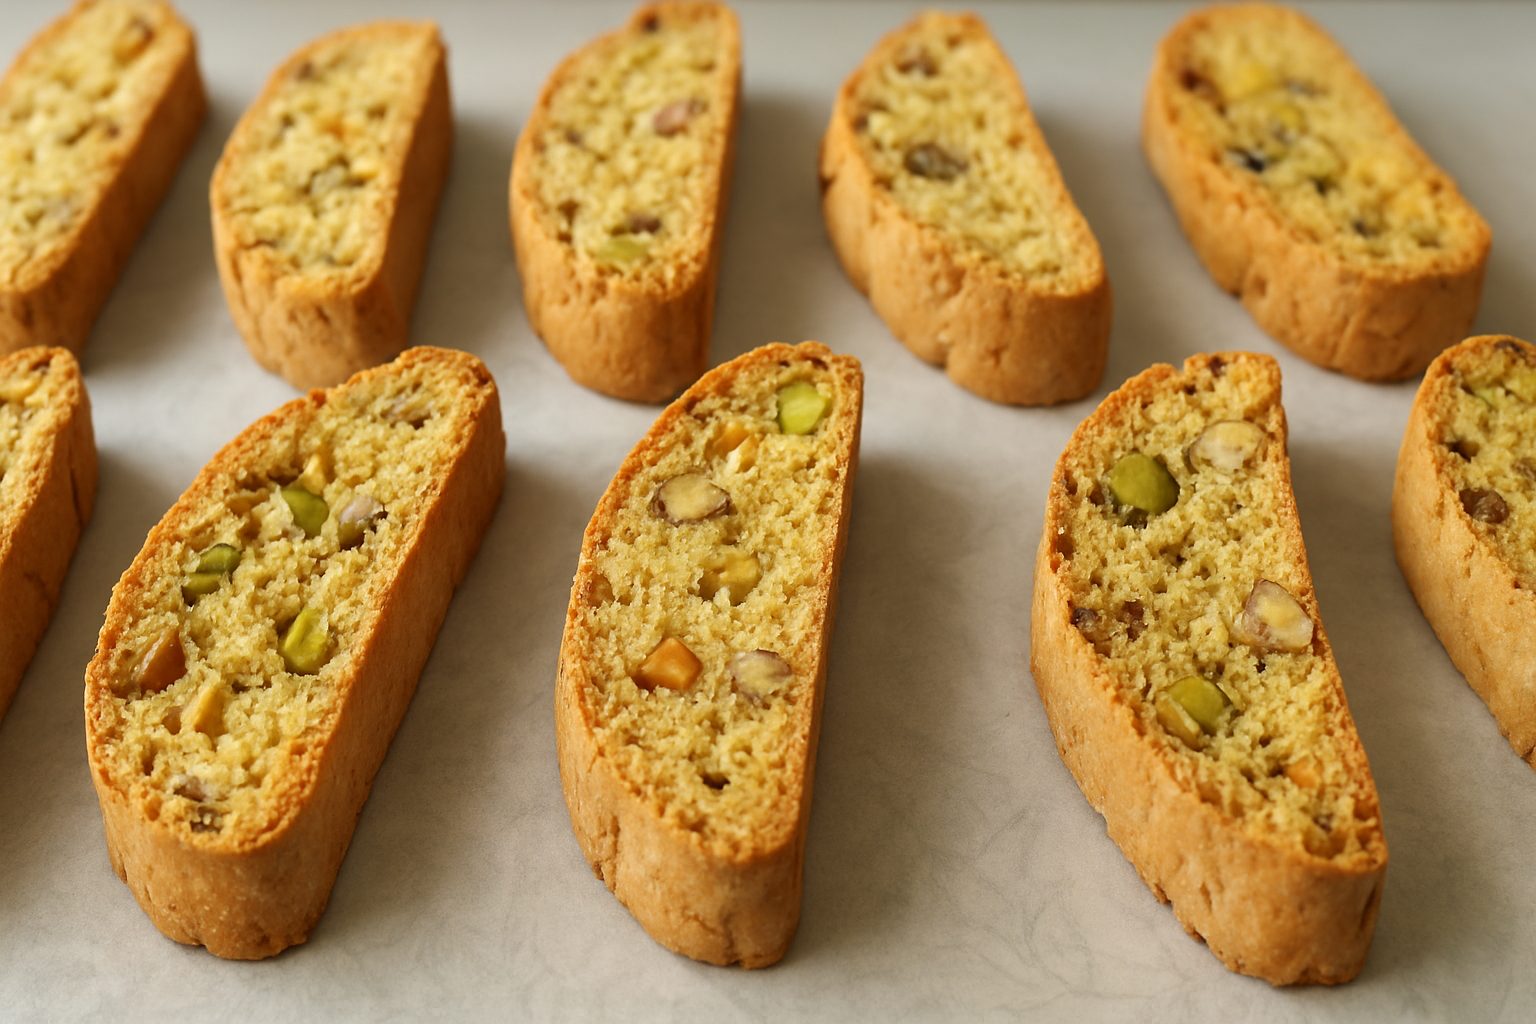
While the traditional recipe relies heavily on wheat flour, this modern version re-imagines the classic using a nutrient-dense blend of almond and rice flour. This change makes the treat safely gluten-free without sacrificing any of the satisfying crunch that makes biscotti so iconic. It is the perfect, worry-free way to enjoy a piece of Italian culture, whether you are dipping it into a morning coffee or sharing it as a thoughtful, homemade gift.
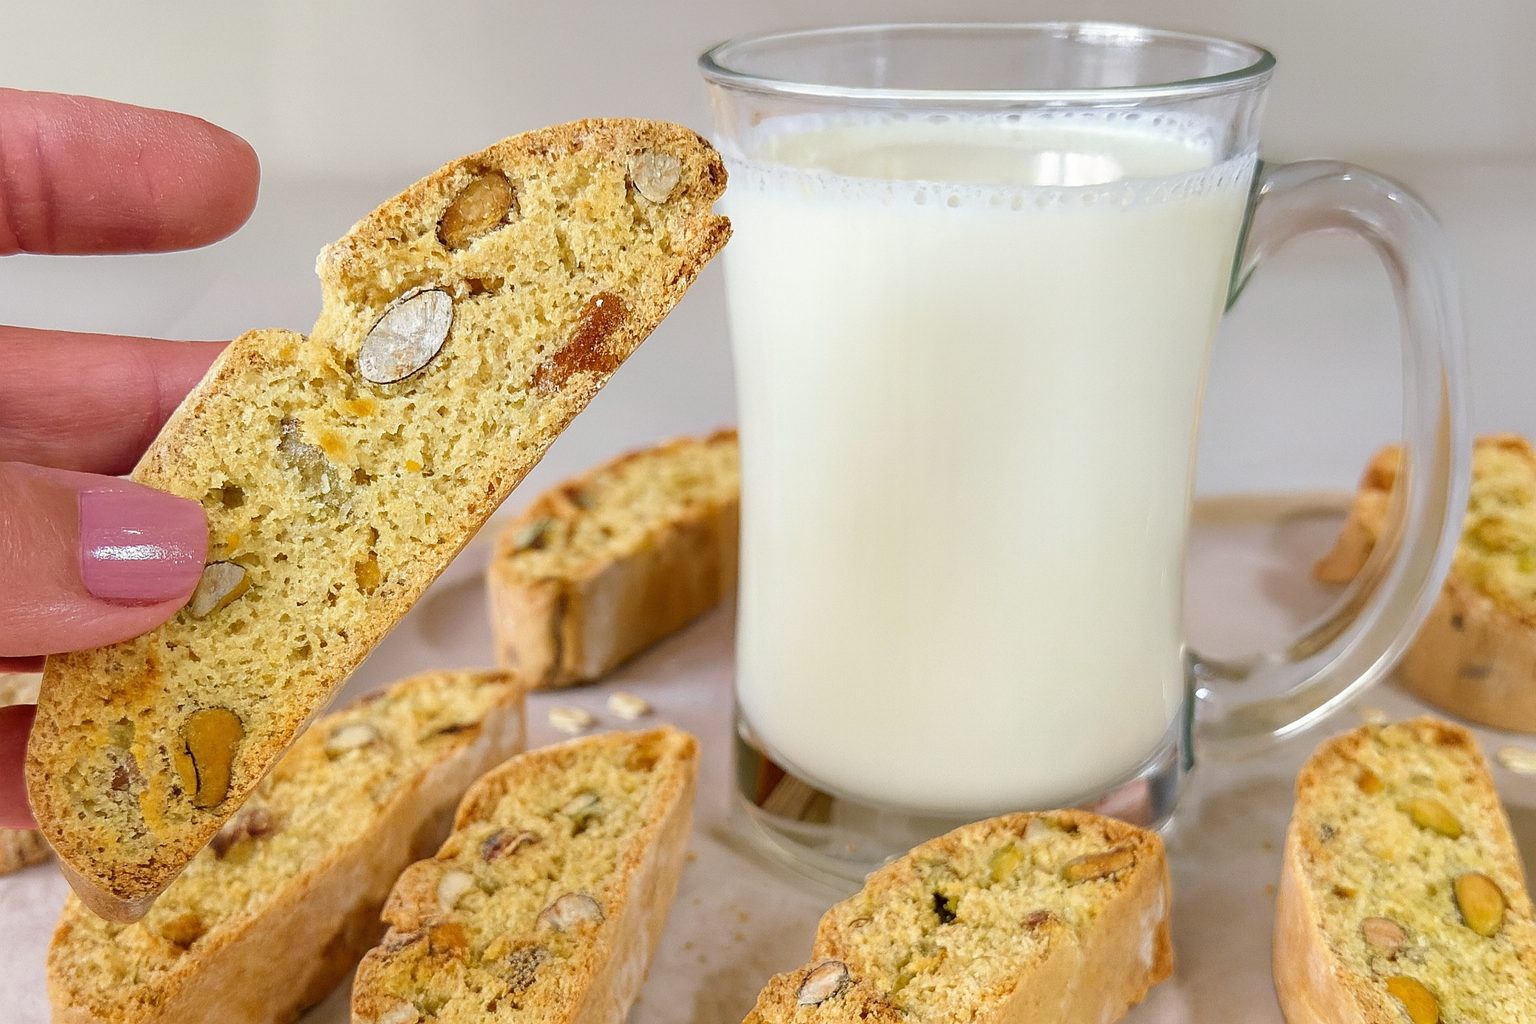
The heart of this recipe lies in the almond flour, which is far more than just a gluten-free substitute; it is a nutritional powerhouse that should be a staple in your regular diet. Made from finely ground blanched almonds, this flour adds a rich, delicate flavor and a moist crumb that contrasts beautifully with the double-baked exterior. Almonds are naturally packed with Vitamin E, a potent antioxidant that supports skin health and cell protection, and Magnesium, which plays a vital role in blood sugar control and bone health. Furthermore, almond flour is loaded with healthy monounsaturated fats, plant-based protein, and dietary fiber. Choosing almond flour over refined wheat flour provides sustained energy levels and promotes digestive health, making these biscotti a much more satisfying and functional snack than your average cookie.

Ingredients

  • 1 ¼ cups (120 g) almond flour

  • 1 ½ cups (130 g) rice flour

  • ½ cup (70 g) raw almonds, chopped

  • ¼ cup (25 g) roasted pistachios

  • ¼ cup (35 g) raisins

  • 1 tsp baking powder

  • 1 pinch (optional) salt

  • 2 large eggs

  • ⅓ cup maple syrup

  • 1 tsp vanilla extract

Instructions

  1. Roughly chop the raw almonds into large, visible chunks to ensure a rustic texture in the finished cookie.
  2. In a large mixing bowl, combine the almond flour, rice flour, chopped almonds, roasted pistachios, raisins, baking powder, and an optional pinch of salt. Stir the mixture thoroughly until all the dry ingredients are evenly distributed.
  3. In a separate bowl, crack the eggs and add the maple syrup and vanilla extract. Whisk these wet ingredients together until they are well blended and smooth.
  4. Add the dry mixture to the wet mixture, stirring gently. Stop as soon as a lightly sticky dough forms, being careful to avoid overmixing.
  5. Cover the dough with plastic wrap and let it chill in the refrigerator for approximately 30 minutes. This resting period is essential as it improves the dough’s texture and makes it much easier to shape.
  6. Prepare your workspace by sprinkling it with a little rice flour and place the chilled dough over a sheet of parchment paper.
  7. Sprinkle more rice flour over the top of the dough and use your hands to shape it into a long, uniform rectangular log, roughly 25 cm long, 8 cm wide, and 1.5 to 2 cm high.
  8. Transfer the parchment paper with the log onto a large baking tray and place it into an oven preheated to 175°C (350°F). Bake for 30 minutes.
  9. Remove the baked log from the oven and let it cool completely for at least one hour. Patience is key here; a cool log ensures a clean cut without crumbling.
  10. Transfer the cooled log to a cutting board and, using a sharp serrated knife, carefully slice it into equal pieces roughly 1.5 cm thick.
  11. Lay the sliced biscotti pieces back onto the large baking tray and return them to the oven for a second bake of 10 to 12 minutes at 175°C.
  12. Remove them promptly and let them cool on the tray. They will continue to crisp up as they reach room temperature.

Nutritional Information per 1 Serving:

  • Energy: 173 calories

  • Protein: 5.13 g

  • Fat: 9.06 g

  • Carbohydrates: 19.6 g

  • Fiber: 2.4 g

Prep, Cook, and Servings

  • Servings: 13 pieces

  • Prep Time: 20 minutes

  • Fridge Time: 30 minutes

  • Baking Time: 30 + 10-12 minutes

  • Dietary Status: Gluten-Free

Notes and Recommendations

  • Storage: Store cooled biscotti in an airtight container at room temperature for up to 2-3 weeks.

  • Texture: The dry, double-baked nature of the cookie helps them maintain their crunch for a long time, making them excellent for dipping in liquids.

  • Slicing Tip: The key to perfect, un-cracked slices is ensuring the log is completely cool before cutting.

  • Tool Tip: Using a sharp serrated knife (like a bread knife) helps significantly when cutting through the whole nuts inside the log.
Beet & Oat Mini Cakes

Beet & Oat Mini Cakes

Beet & Oat Mini Cakes

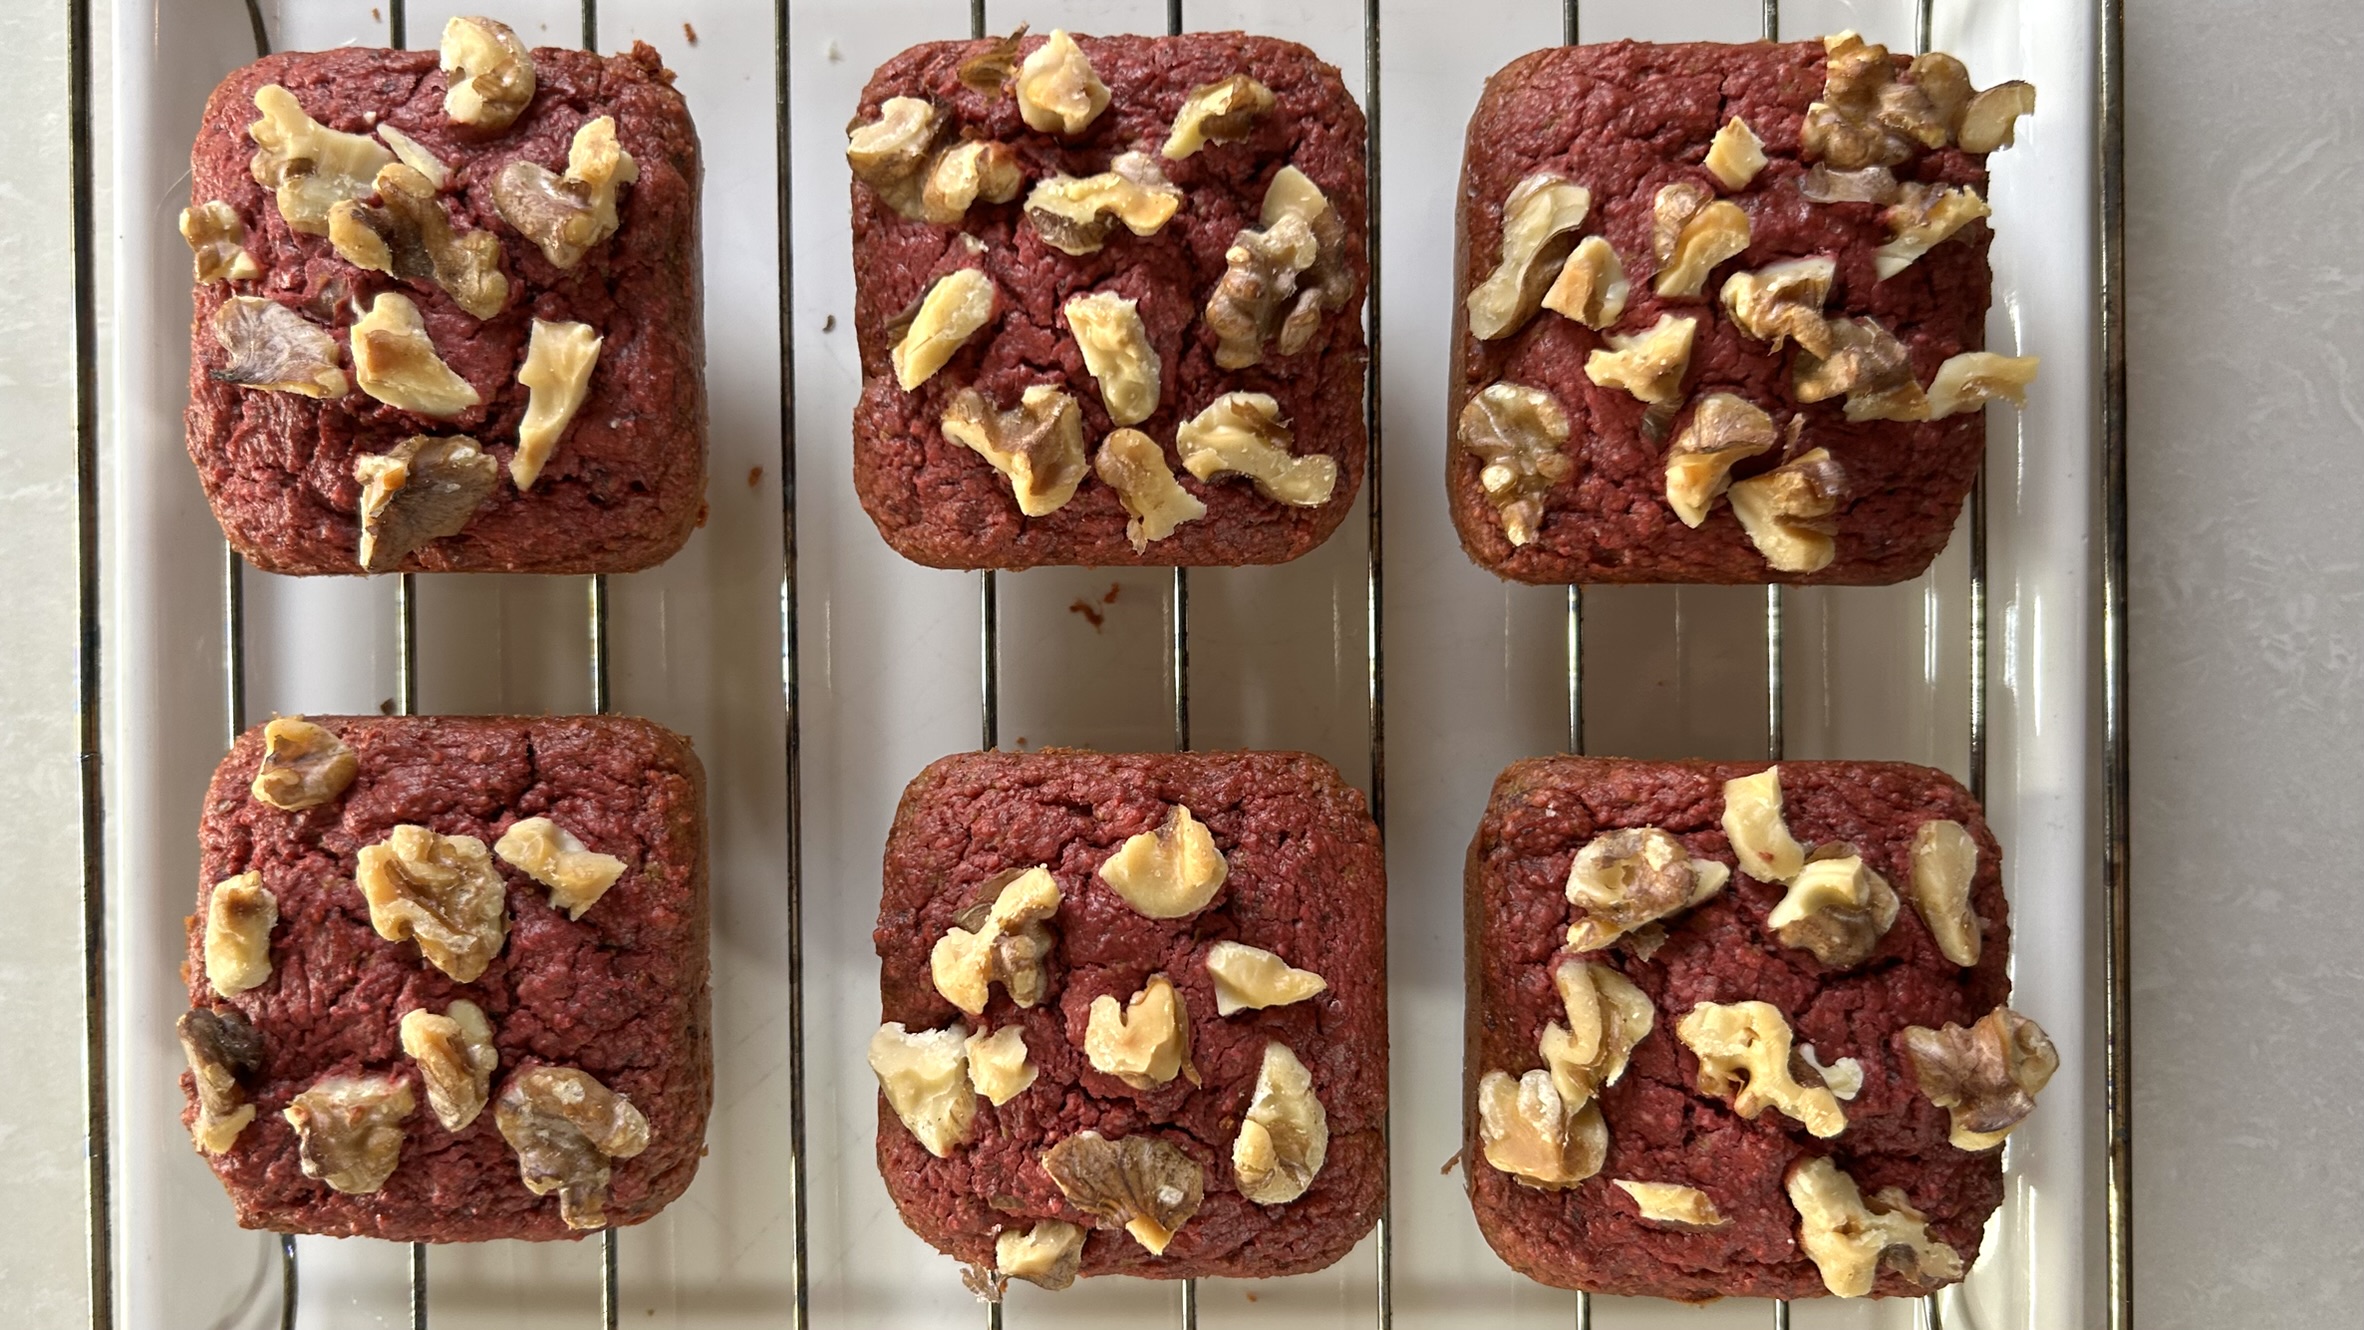
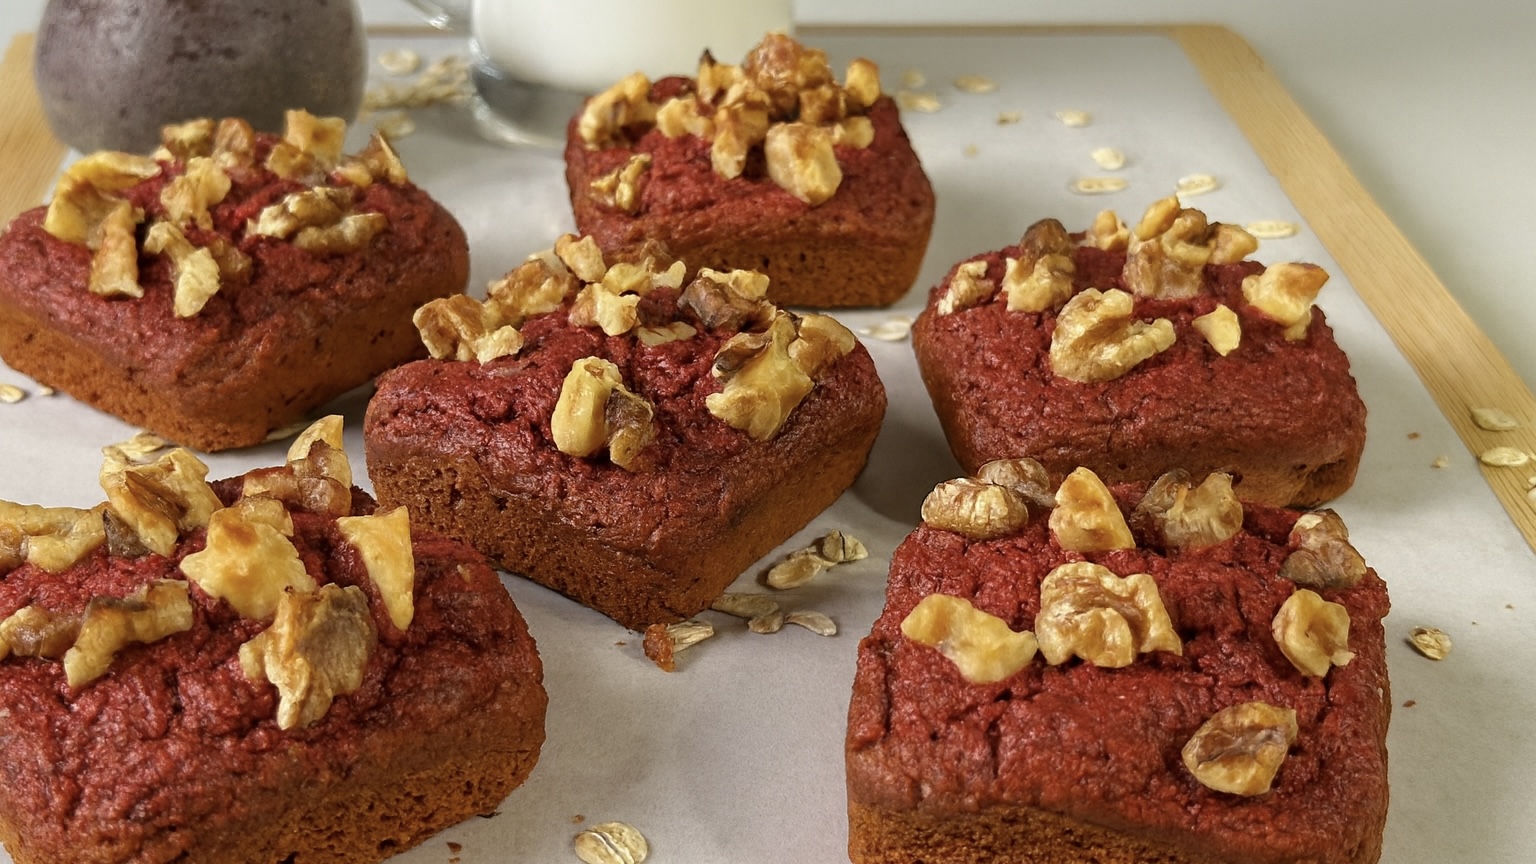
If you’ve been following my kitchen adventures for a while, you already know that I love sneaking whole foods, especially veggies, into my sweet treats. There’s something so satisfying about creating desserts that feel indulgent yet still nourish your body with real ingredients. And today, I’m sharing one of my favorite wholesome creations: Beet & Oat Mini Cakes.

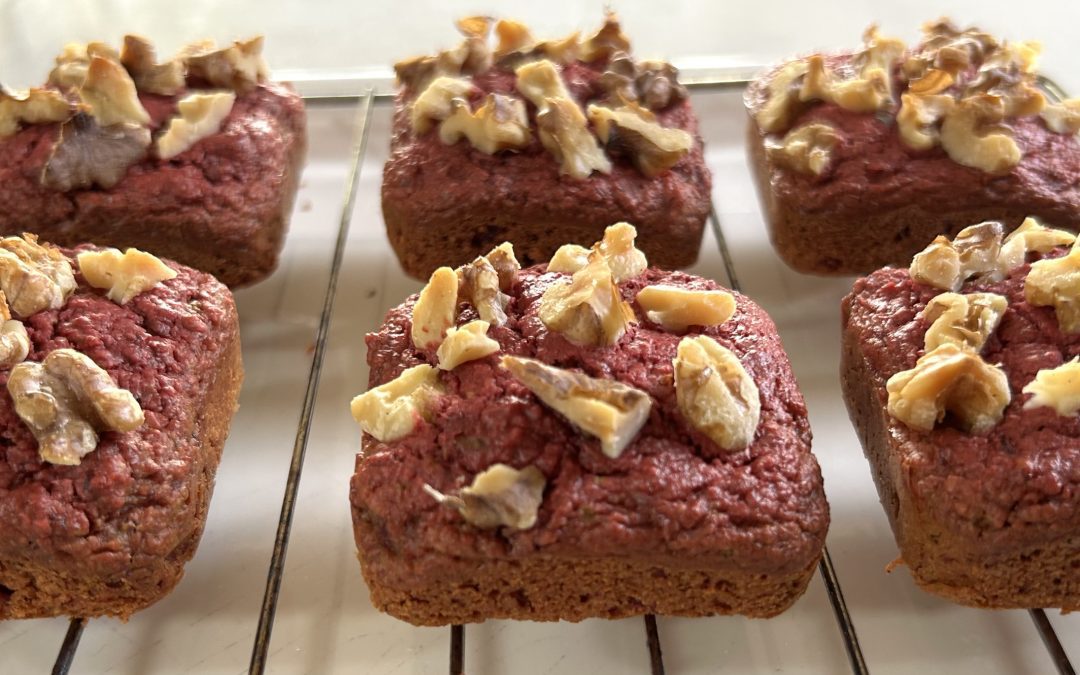
These little cakes look vibrant and playful, and the best part? They’re naturally gluten-free, dairy-free, vegan, and made with nothing but simple pantry staples. The beets give them the most stunning color and a gentle sweetness that pairs beautifully with creamy peanut butter, cozy pumpkin pie spice, and the rustic flavor of oats. They’re soft, moist, perfectly tender, and incredibly easy to make, even on a busy day.

Let’s talk about the magic ingredient behind these mini cakes: beets.
Beets are one of the most nutrient-dense vegetables you can bake with. They’re rich in antioxidants, folate, potassium, nitrates, and fiber, all of which support healthy blood flow, energy production, digestion, and overall wellness. Their natural sugars caramelize beautifully during baking, giving these mini cakes a lovely softness without needing refined ingredients. Beets also offer natural anti-inflammatory benefits and help support stamina, making them an ingredient truly worth including in your regular diet.

Paired with oat flour, another nutritional powerhouse known for its beta-glucan fiber, slow-release carbohydrates, and essential minerals like magnesium and iron, these mini cakes become a nourishing treat that satisfies the body as much as it satisfies the craving for something sweet.

These Beet & Oat Mini Cakes are the perfect example of how real, whole foods can transform simple ingredients into something comforting, beautiful, and incredibly delicious.

Ingredients

  • 1 medium beet, cleaned, peeled, and shredded (about 90 g)

  • ⅓ cup (80 g) peanut butter

  • ¼ cup maple syrup or sweetener of choice

  • ¼ cup non-dairy milk

  • 1 cup (80 g) oat flour

  • 1 tsp baking powder

  • ¼ tsp pumpkin pie spice

  • 30 g walnuts or any nut/seed/chocolate chips for topping (optional)

Directions

  1. Preheat your oven to 350°F (180°C). Prepare a mini cake tray by lining it with paper liners or lightly greasing each cavity.
  2. Clean, peel, and finely shred the beet.
  3. In a mixing bowl, stir together the peanut butter and maple syrup until smooth and blended.
  4. Pour the non-dairy milk into the mixture and mix until the liquid is fully incorporated.
  5. Add the shredded beet to the bowl and gently fold to distribute it evenly throughout the batter.
  6. Add the oat flour, baking powder, and pumpkin pie spice. Mix until just combined, avoid over-mixing to keep the cakes soft and tender.
  7. Divide the batter evenly among the mini cake cups.
  8. Add walnuts or any nuts/seeds/chocolate chips on top if you want extra crunch and richness.
  9. Bake for 25 minutes, or until a toothpick inserted into the center comes out clean.
  10. Let the mini cakes cool slightly before transferring them to a cooling rack.
  11. Enjoy warm or completely cooled, delicious either way!

Servings, Prep Time & Baking Info

  • Servings: 6 mini cakes

  • Prep time: 20 minutes

  • Baking time: 25 minutes

  • Total time: ~45 minutes

Nutritional Information (Per Serving)

  • Energy: 212 calories

  • Protein: 6.53 g

  • Fat: 11.47 g

  • Carbohydrates: 23.4 g

  • Fiber: 2.8 g

Storage

  • Store at room temperature in an airtight container for 1–2 days.

  • Refrigerate for up to 1 week for maximum freshness.

  • Freeze for up to 3 months; thaw at room temperature.

Recommendations

  • Swap walnuts for pecans, almonds, pumpkin seeds, sunflower seeds, or chocolate chips depending on your preference.

  • For sweeter cakes, add an extra tablespoon of maple syrup.

  • For a breakfast version, pair with yogurt or a drizzle of nut butter.

Red Lentil Meat Pie

Red Lentil Meat Pie

Red Lentil Meat Pie

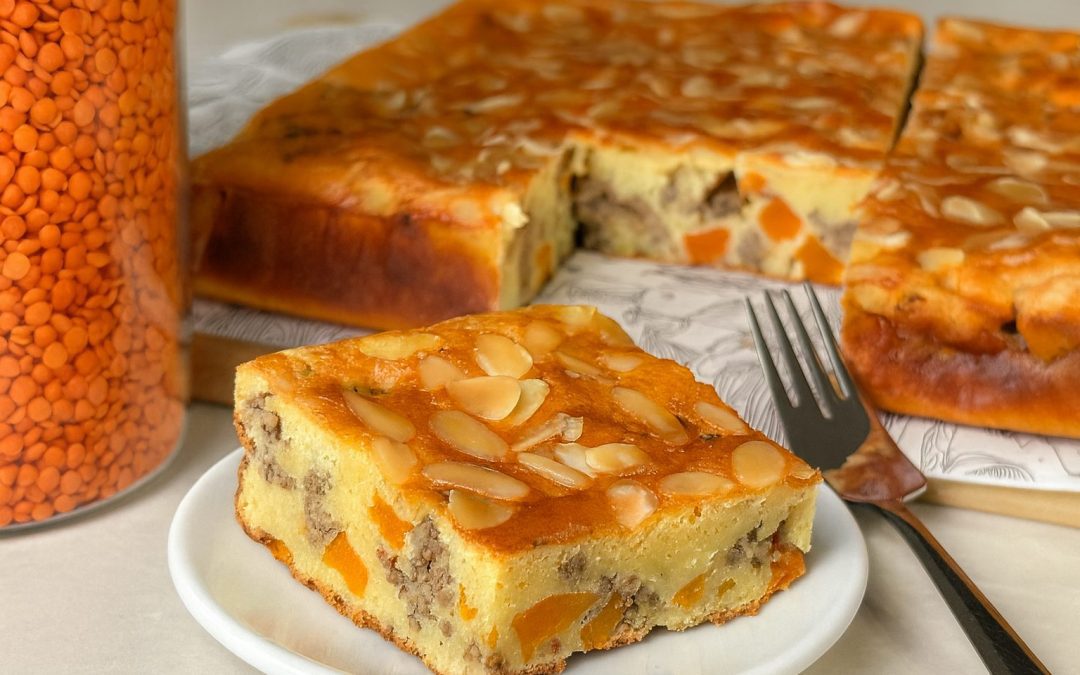
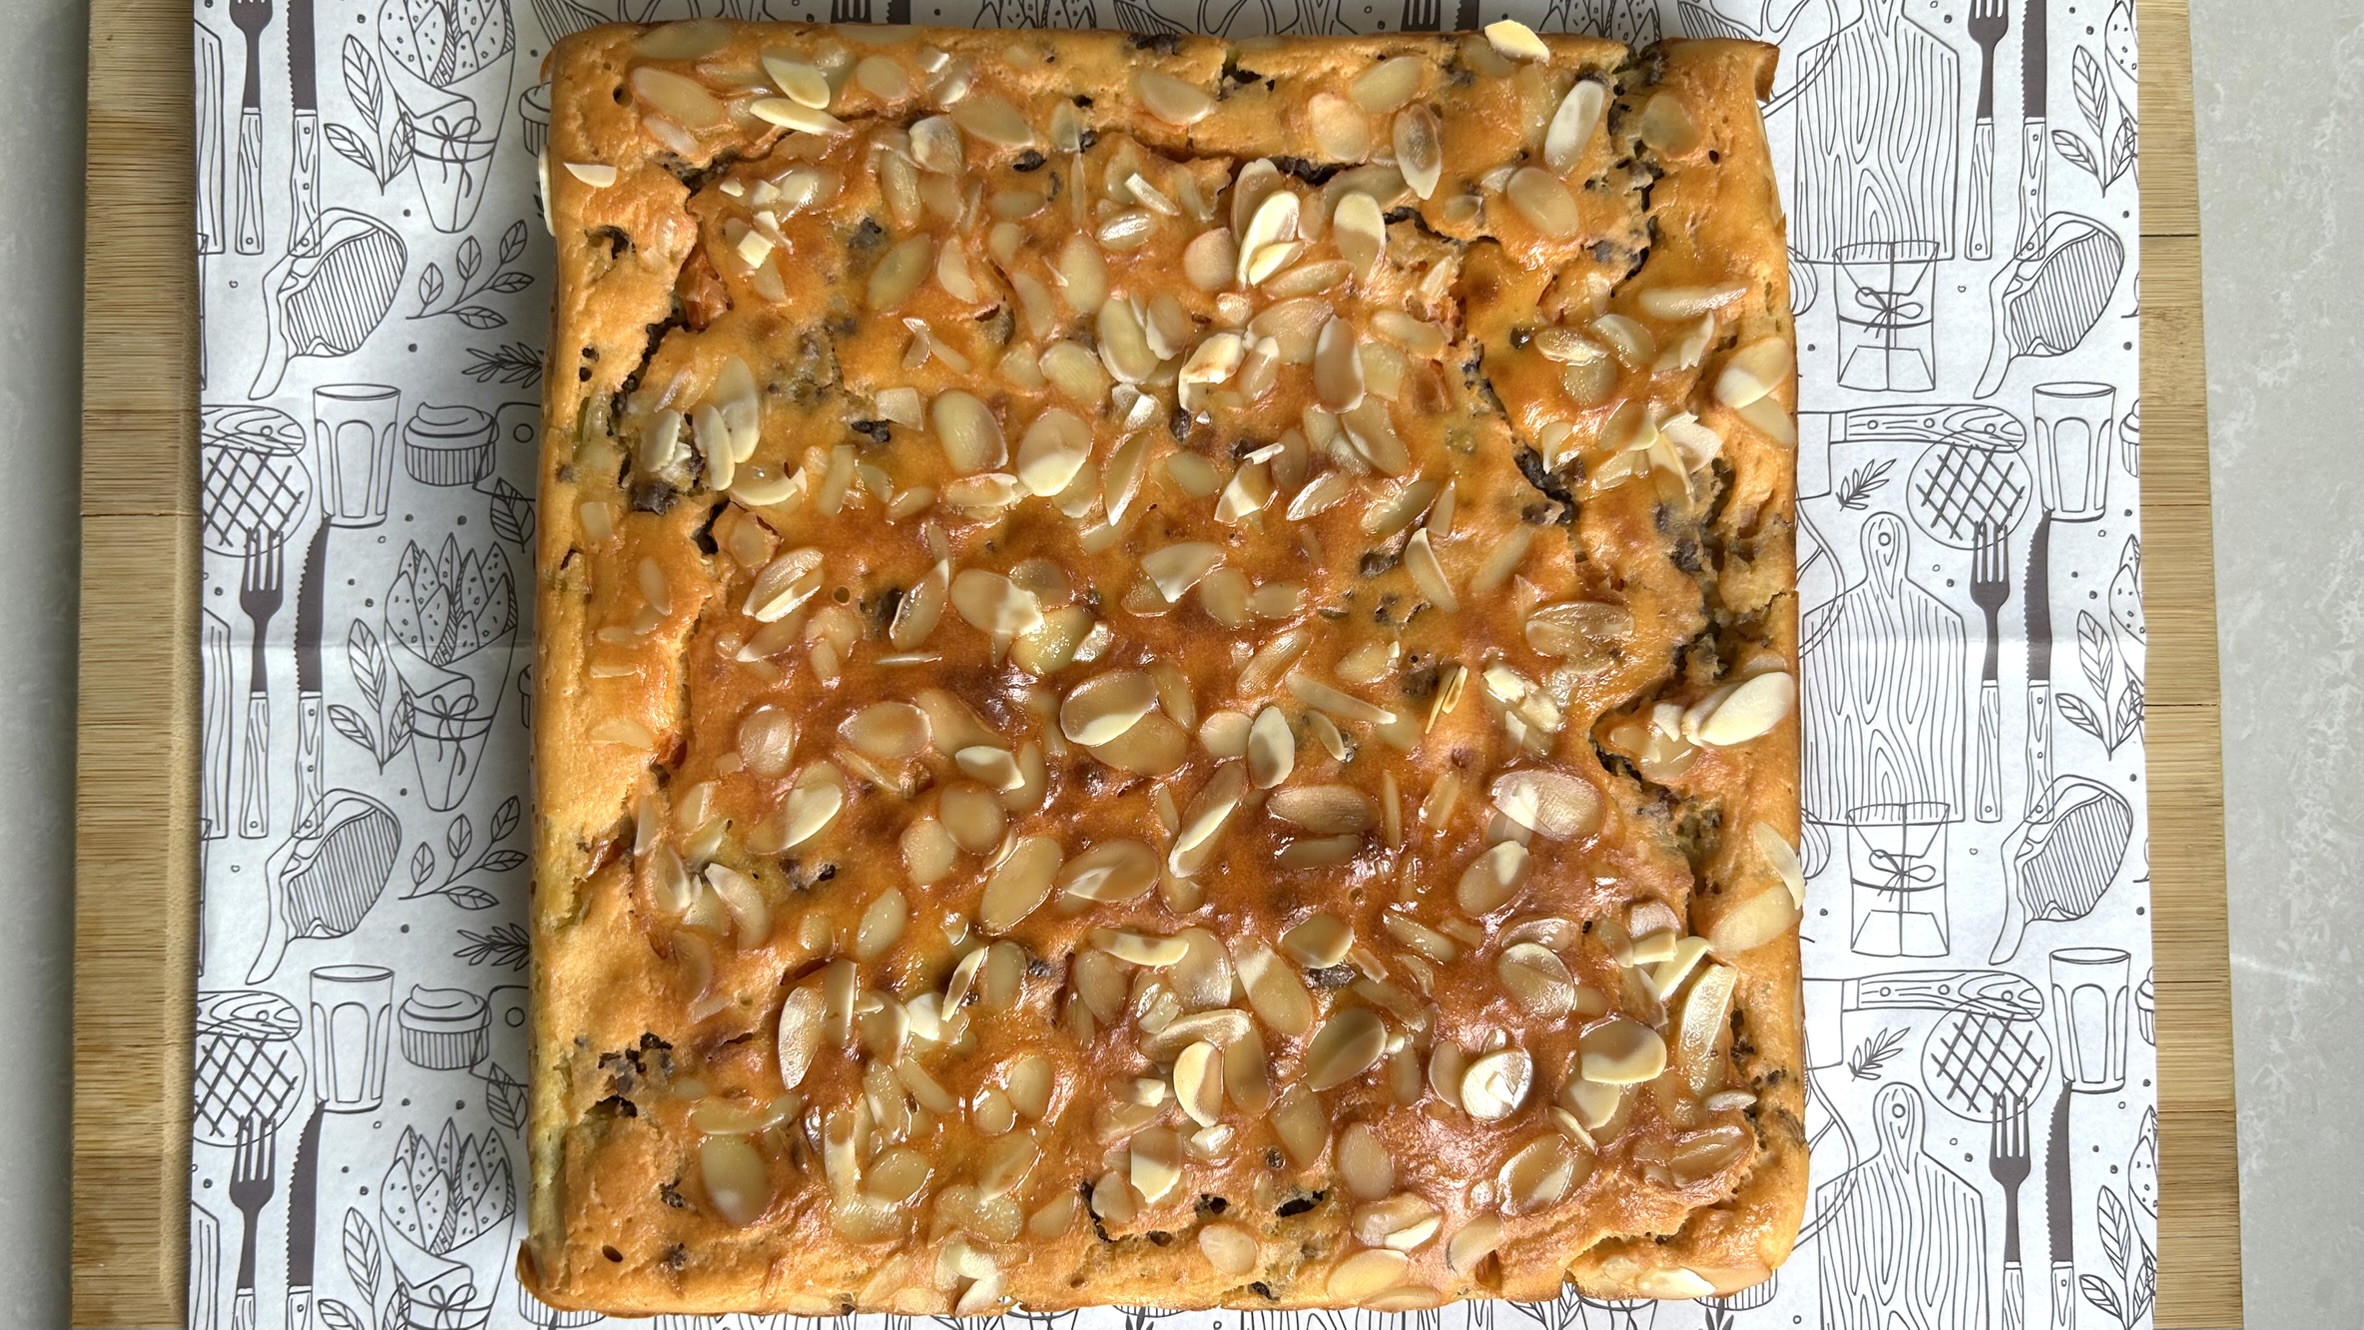
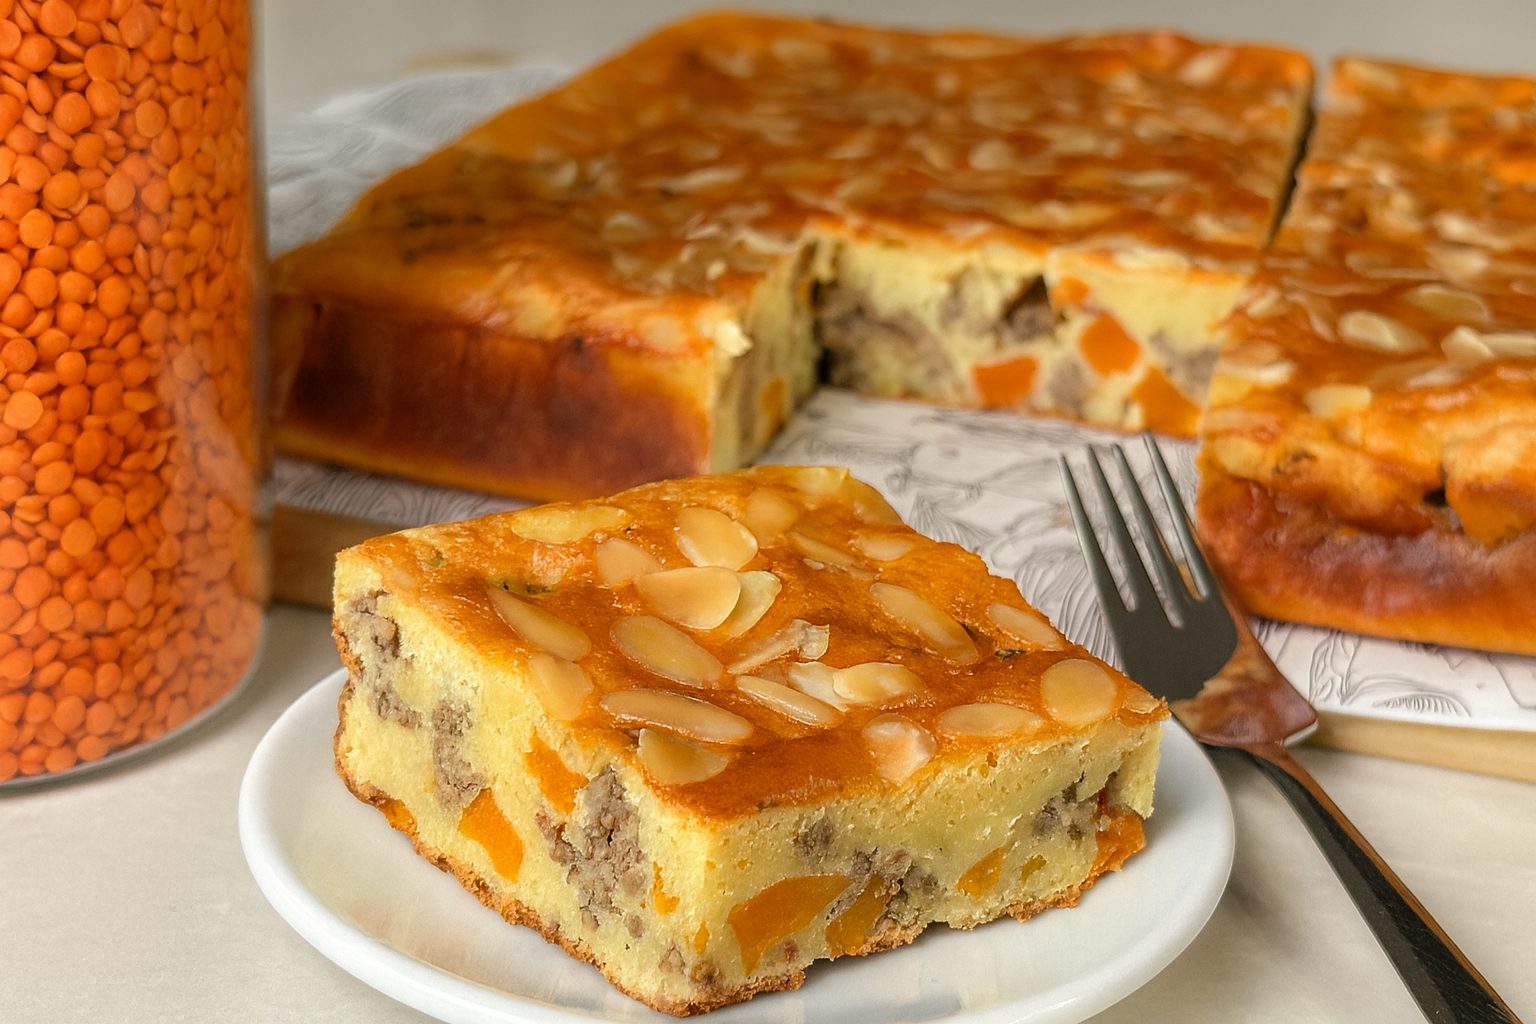
Today, I’m sharing a comforting savory recipe that has quickly become one of my favorite wholesome dinner ideas, my Red Lentil Meat Pie. If you’ve ever wished to enjoy a classic meat pie without the heaviness of refined flour crusts, butter-packed bases, or the guilty feeling that sometimes follows indulgent meals, this twist on the traditional recipe will completely change the way you look at savory pies. It’s inspired by classic homemade meat pies but reimagined with a nutritious and modern makeover that fits beautifully into a balanced, health-conscious lifestyle.

Instead of using pastry dough, this recipe uses a batter made from red lentils, eggs, cottage cheese, and a touch of olive oil. When baked, it forms a golden and tender crust with deep, earthy flavor that pairs wonderfully with the meat and vegetable filling. Inside, sautéed ground beef, carrots, onions, garlic, and spices come together to create a hearty and satisfying center that feels comforting yet surprisingly light. Because everything finishes cooking in the oven, it also means less hassle, perfect for busy weeknights, family dinners, holiday tables, or even meal prep.

Why Red Lentils Should Be in Your Regular Diet

Red lentils are the star of this dish, and for good reason. They’re naturally rich in plant-based protein, making them a fantastic ingredient for anyone looking to boost protein intake without relying solely on meat. They are also excellent sources of fiber, which supports digestion, gut health, and long-lasting satiety. Red lentils provide essential B vitamins, along with minerals such as iron, magnesium, zinc, and potassium, nutrients that help support energy production, muscle function, immunity, and long-term metabolic health.

Unlike refined flour, red lentils have a low glycemic index, meaning they help maintain steadier blood sugar levels and support balanced energy throughout the day. Adding red lentils to your weekly meals is also incredibly budget-friendly and versatile, they blend well in soups, pies, patties, salads, and even baked goods. Choosing lentils more often is an easy, nourishing way to increase protein, minerals, and overall nutrient density in your diet, while keeping meals delicious and satisfying.

This Red Lentil Meat Pie combines flavor, nutrition, and convenience in every bite and is one of those comforting recipes you’ll want to make again and again.

Ingredients

  • 1 cup (190 g) dry red lentils

  • 1 cup or 200 g cottage cheese

  • 2 eggs

  • 5 tbsp olive oil (for crust and sautéing)

  • 400 g ground beef

  • 110 g onion

  • 140 g carrots

  • 3 garlic cloves (10 g)

  • ½ tsp salt (for the meat)

  • ½ tsp salt (for the crust)

  • Black pepper, to taste

  • ¼ tsp nutmeg powder

  • ½ tbsp baking powder

  • 20 g sliced almonds (optional, for topping)

Directions

  1. Place the red lentils in a bowl, cover with water, and soak for at least 4 hours or overnight in the refrigerator.
  2. Drain and rinse the soaked lentils well, then set aside to strain while you prepare the filling.
  3. Heat olive oil in a skillet over medium-high heat and add the ground beef.
  4. Break the meat apart and cook until most of the moisture evaporates.
  5. Add the diced onions, carrots, garlic, nutmeg, salt, and black pepper. Stir well.
  6. Cover the pan and allow the mixture to simmer briefly so the flavors blend without fully cooking the vegetables.
  7. Remove from heat and let the filling cool slightly.
  8. In a blender, add the strained lentils along with the cottage cheese, eggs, olive oil, salt for the crust, and baking powder.
  9. Blend until smooth and uniform.
  10. Line a square baking pan with parchment paper.
  11. Pour half of the lentil batter into the pan and gently shake to spread it evenly.
  12. Spoon the meat mixture evenly over the bottom layer and distribute using a fork.
  13. Pour the remaining lentil batter on top and shake again to level.
  14. Sprinkle sliced almonds on top if using.
  15. Bake in a preheated oven at 185°C (365°F) for about 45 minutes, or until golden and set.
  16. Lift the pie out using the parchment paper and allow it to cool slightly before slicing and serving.

Prep and Baking Information

  • Servings: 9

  • Prep Time: 30 minutes (plus soaking time)

  • Baking Time: 45 minutes

  • Cooking Method: Oven

Nutritional Information (Per Serving)

  • Calories: 282

  • Protein: 18.56 g

  • Fat: 15.57 g

  • Carbohydrates: 17.59 g

  • Fiber: 3.2 g

Storage & Recommendations

  • Store leftovers in the refrigerator for up to 5 days.

  • Reheat in the oven or air fryer for best texture.

  • Can be frozen in slices for up to 3 months and reheated directly from frozen.

  • Add variety by incorporating peas, bell peppers, spinach, mushrooms, thyme, oregano, or other vegetables and herbs.

  • You can substitute turkey or chicken instead of beef for a lighter version.

Pumpkin Custard Cake

Pumpkin Custard Cake

Pumpkin Custard Cake

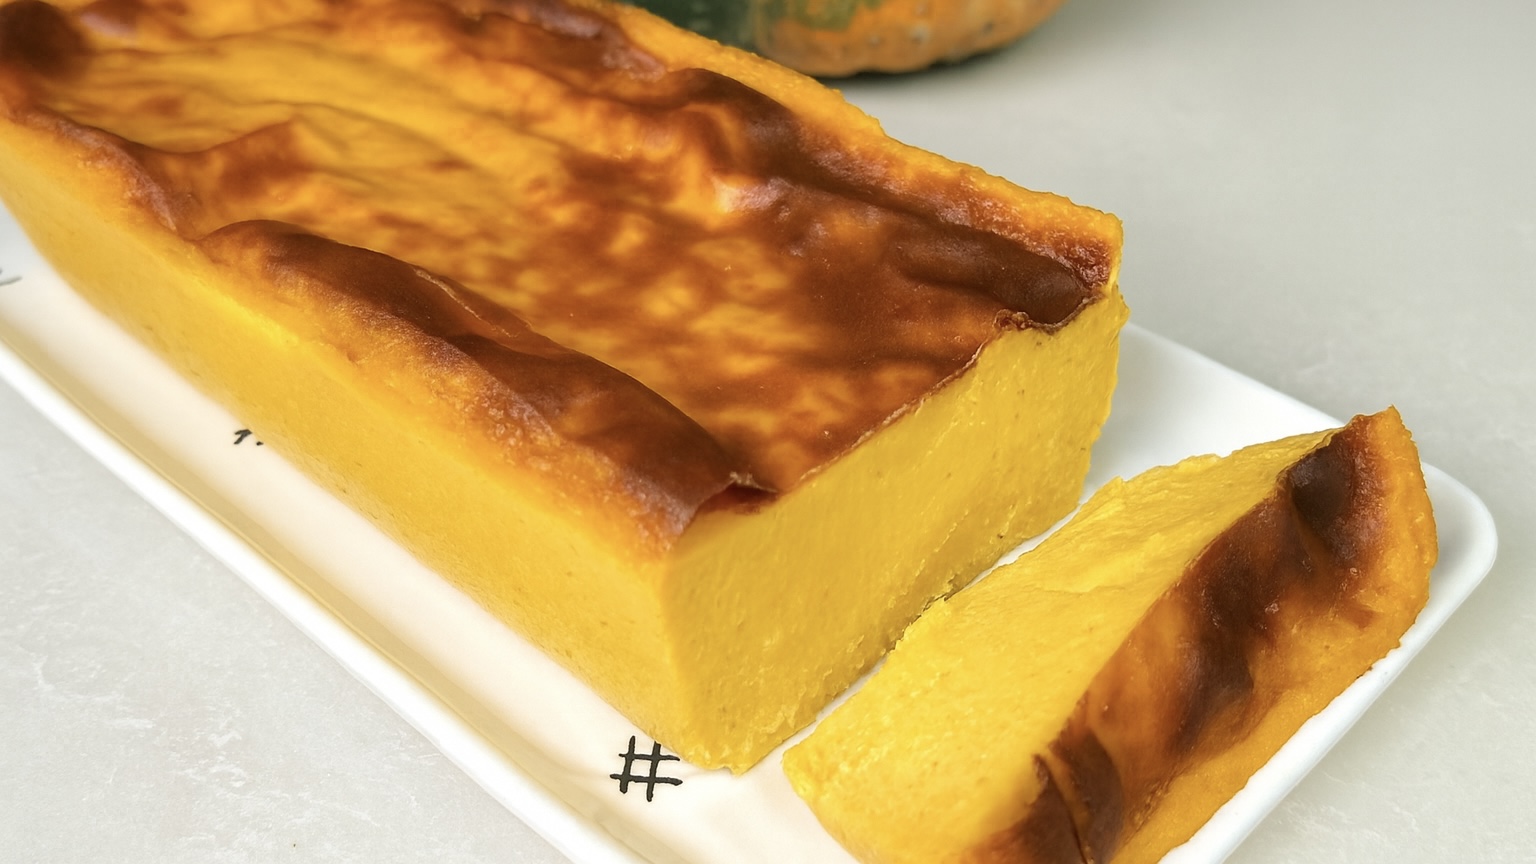
If there is one French dessert that has stood the test of time, it’s the iconic Flan Parisien. Smooth, creamy, and comforting with every bite, this classic custard cake is a cherished staple of French patisserie. Traditionally baked in a buttery crust with simple pantry ingredients, it’s known for being reliable, accessible, and surprisingly elegant. Today, I’m recreating this nostalgic classic, but with my personal seasonal twist that makes it lighter, naturally gluten-free, and even more nutritious.

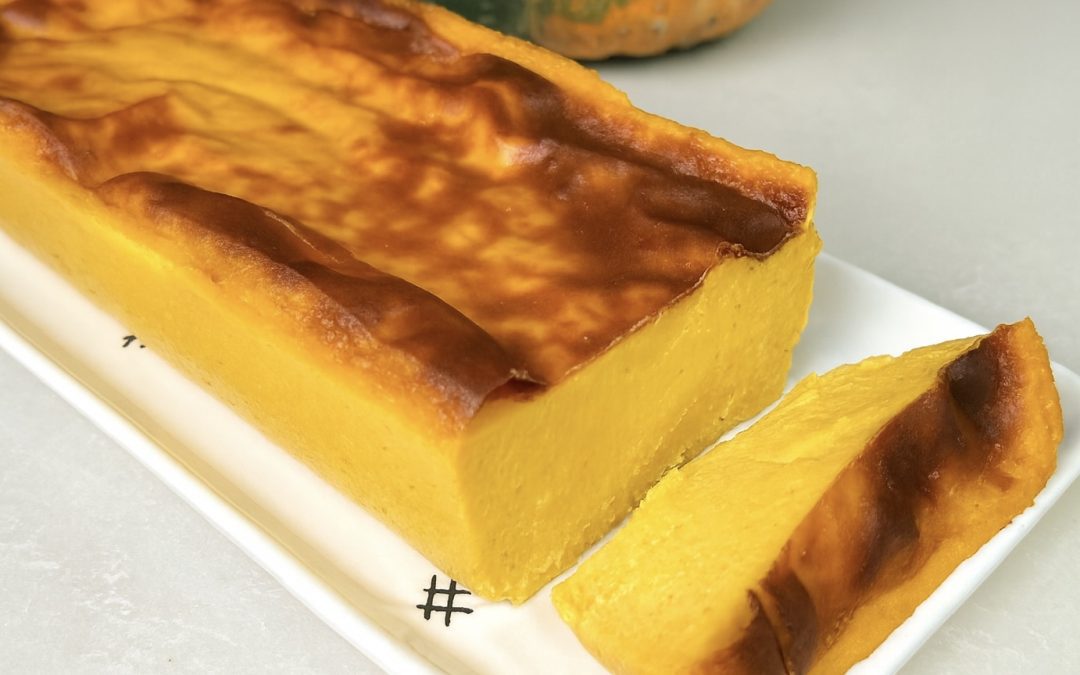
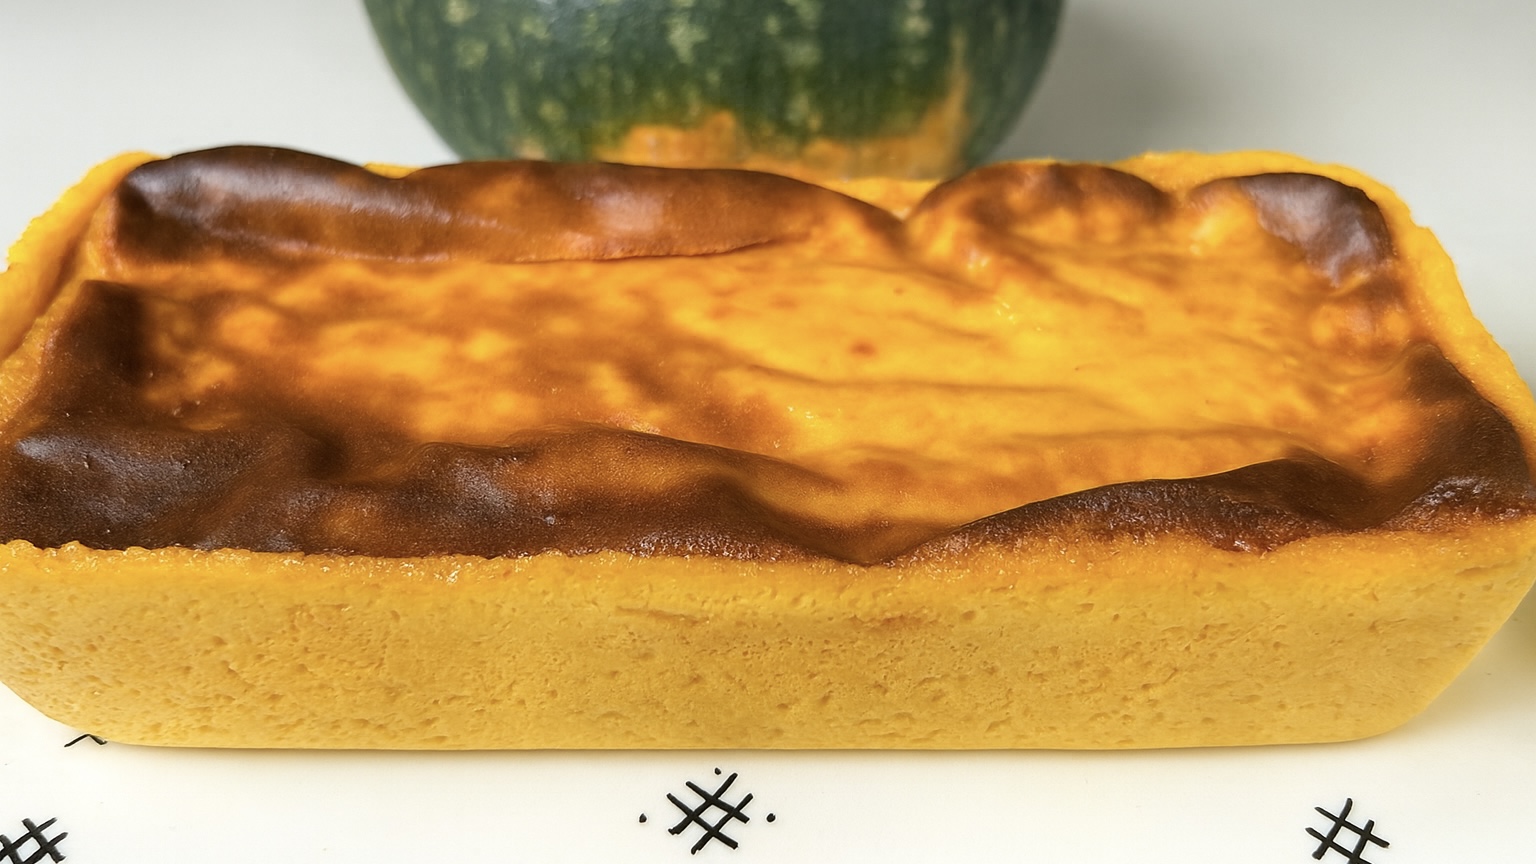
In this version, we skip the traditional crust altogether to create a custard that is softer, lighter, and faster to prepare, perfect for busy home cooks and newer bakers who want an impressive dessert without the fuss. And instead of sticking to the traditional vanilla custard alone, we invite one of autumn’s most beloved ingredients to the party: pumpkin puree. It adds a gorgeous natural color, a lightly sweet earthy flavor, and turns the custard into a beautifully golden loaf that is both simple and stunning.

With its creamy interior, elegant browned top, and warm fall flavors, this Pumpkin Custard Cake is a wonderful addition to Thanksgiving menus, Sunday brunches, or cozy family evenings. It’s one of those desserts that looks impressive, but is honestly so simple that anyone can make it. Just mix, pour, bake, and chill.

Why Pumpkin Should Be Part of Your Regular Diet

Pumpkin is more than a seasonal ingredient, it’s a powerhouse of nutrition that deserves a regular place in your kitchen. Naturally rich in vitamin A, beta-carotene, and antioxidants, pumpkin helps support vision, immune function, and healthy skin. It’s also high in fiber, which supports digestion and helps keep you fuller longer, making it a great ingredient for people looking to improve satiety and balance blood sugar naturally.

Unlike many richer dessert bases, pumpkin is low in fat yet flavorful, which means you get delicious taste with added nutritional benefits. Adding pumpkin to recipes like this one allows you to enjoy indulgent treats while still nourishing your body, proof that comfort food and healthy eating can absolutely coexist.

Ingredients

  • 4 eggs, room temperature

  • 1/3 cup maple syrup

  • 45 g cornstarch

  • 2 cups (470 ml) whole milk, room temperature

  • 30 g butter, room temperature

  • 1 tsp vanilla extract

  • 1 cup pumpkin puree (220 g)

Servings: 8–10 slices
Prep Time: 20 minutes
Baking Time: 40 minutes
Dietary Info: Gluten-free when made as written

Directions

  1. Add the eggs, maple syrup, and cornstarch to a saucepan.
  2. Whisk vigorously until the mixture is completely smooth and lump-free.
  3. Gradually pour in the room-temperature milk while whisking continuously.
  4. Place the saucepan over medium-high heat.
  5. Cook while whisking constantly until the mixture begins to thicken and lightly simmer.
  6. Continue whisking until the custard becomes thick, smooth, and creamy.
  7. Lower the heat and add the room-temperature butter, whisking until fully melted and incorporated.
  8. Add the pumpkin puree and vanilla extract, whisking again until smooth and uniform.
  9. If the mixture looks slightly lumpy, remove from heat and use an electric whisk for 1–2 minutes to smooth it out.
  10. Pour the custard into a silicone cake mold or greased baking pan, smoothing the top.
  11. Bake at 365°F (185°C) for about 40 minutes, or until the surface is golden brown.
  12. Allow the cake to cool slightly, then refrigerate for at least 3 hours to set.
  13. Unmold, slice, and enjoy chilled.

Nutritional Information (per slice)

  • Calories: 162

  • Protein: 5.31 g

  • Fat: 7.43 g

  • Carbohydrates: 18.37 g

  • Fiber: 0.4 g

Storage

  • Store covered in the refrigerator for up to 5 days

  • Keep tightly covered to prevent the surface from drying

  • Best served after several hours of refrigeration

  • Can be enjoyed plain or topped with:

    • caramel

    • maple drizzle

    • whipped cream

    • chopped nuts

DIY Almond Butter

DIY Almond Butter

DIY Almond Butter

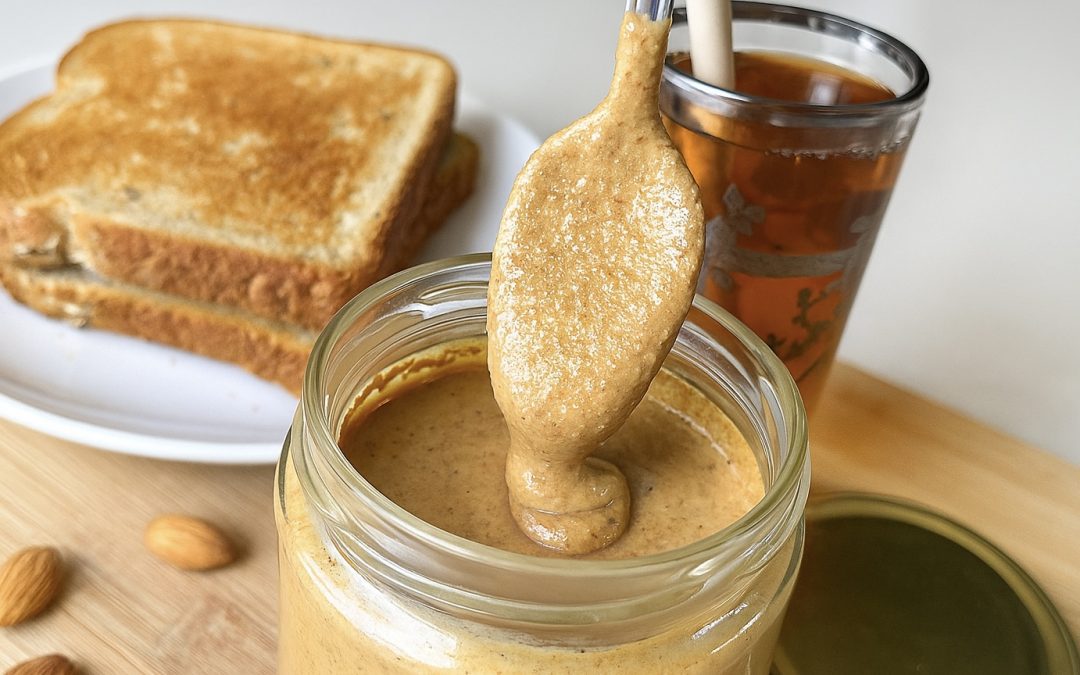
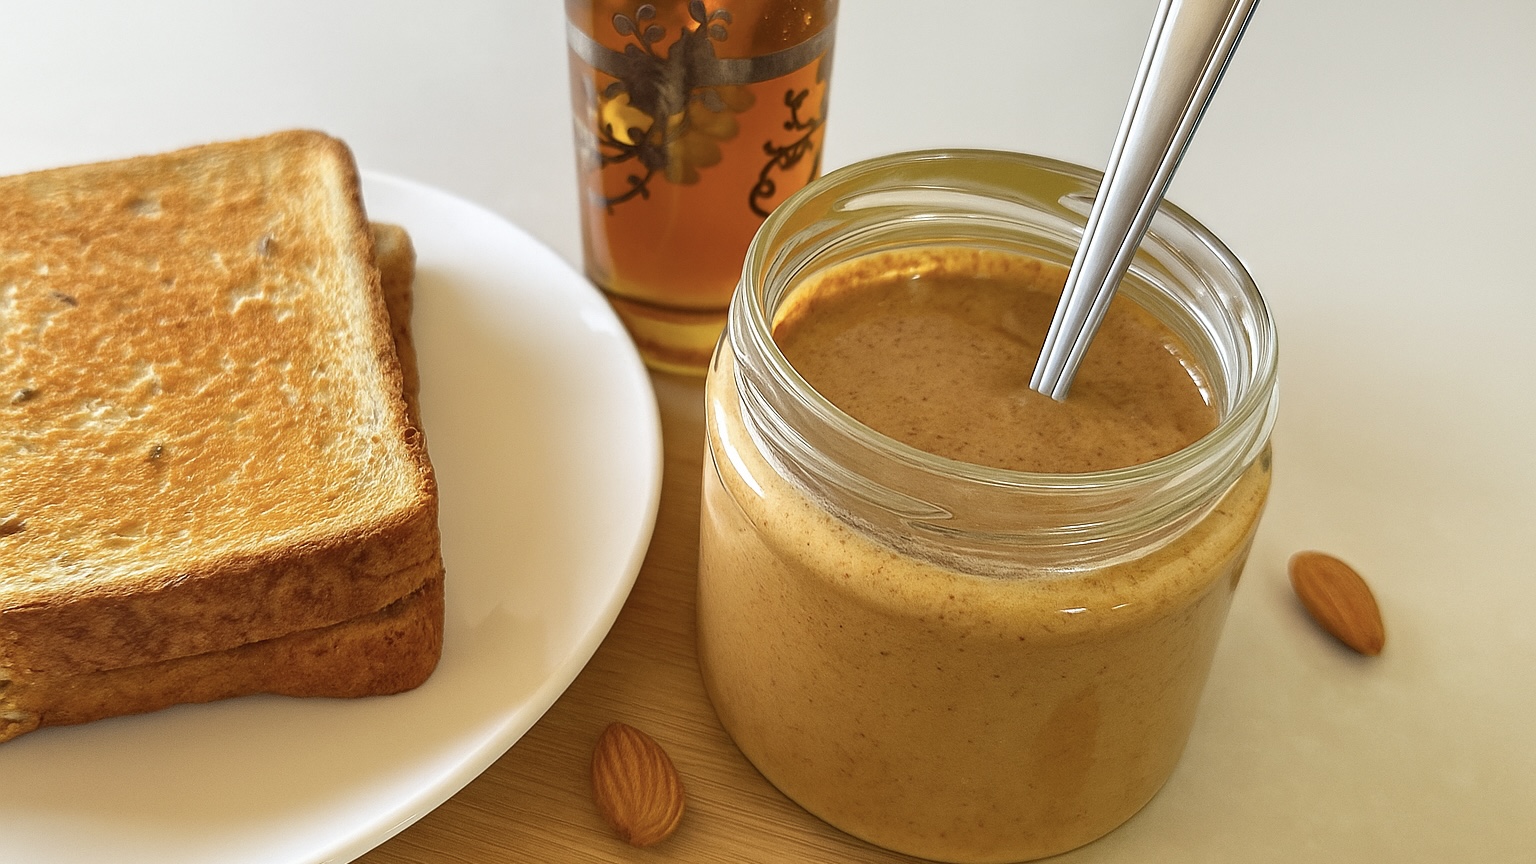
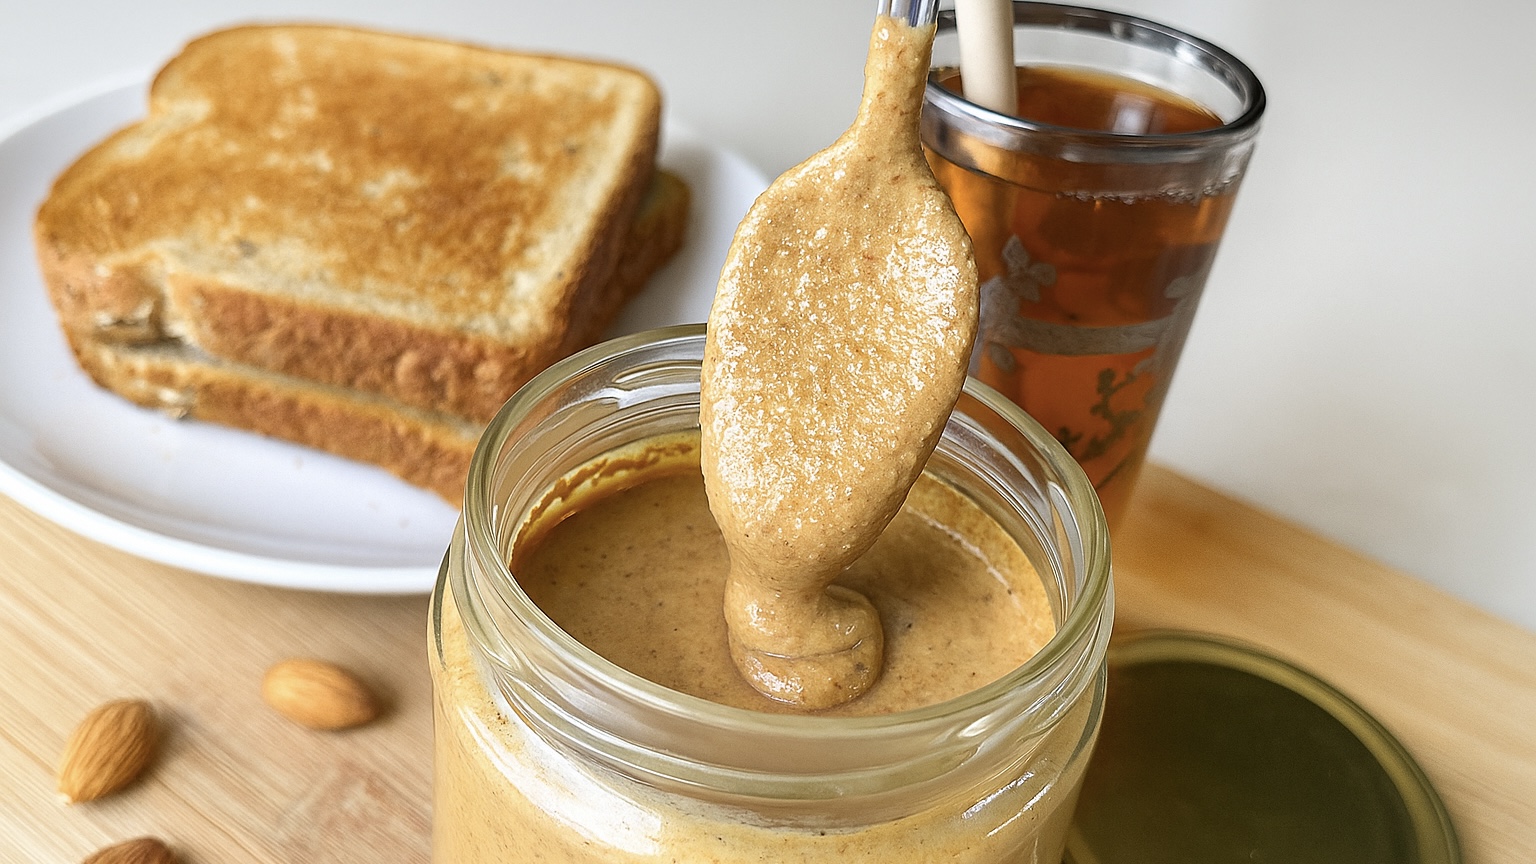
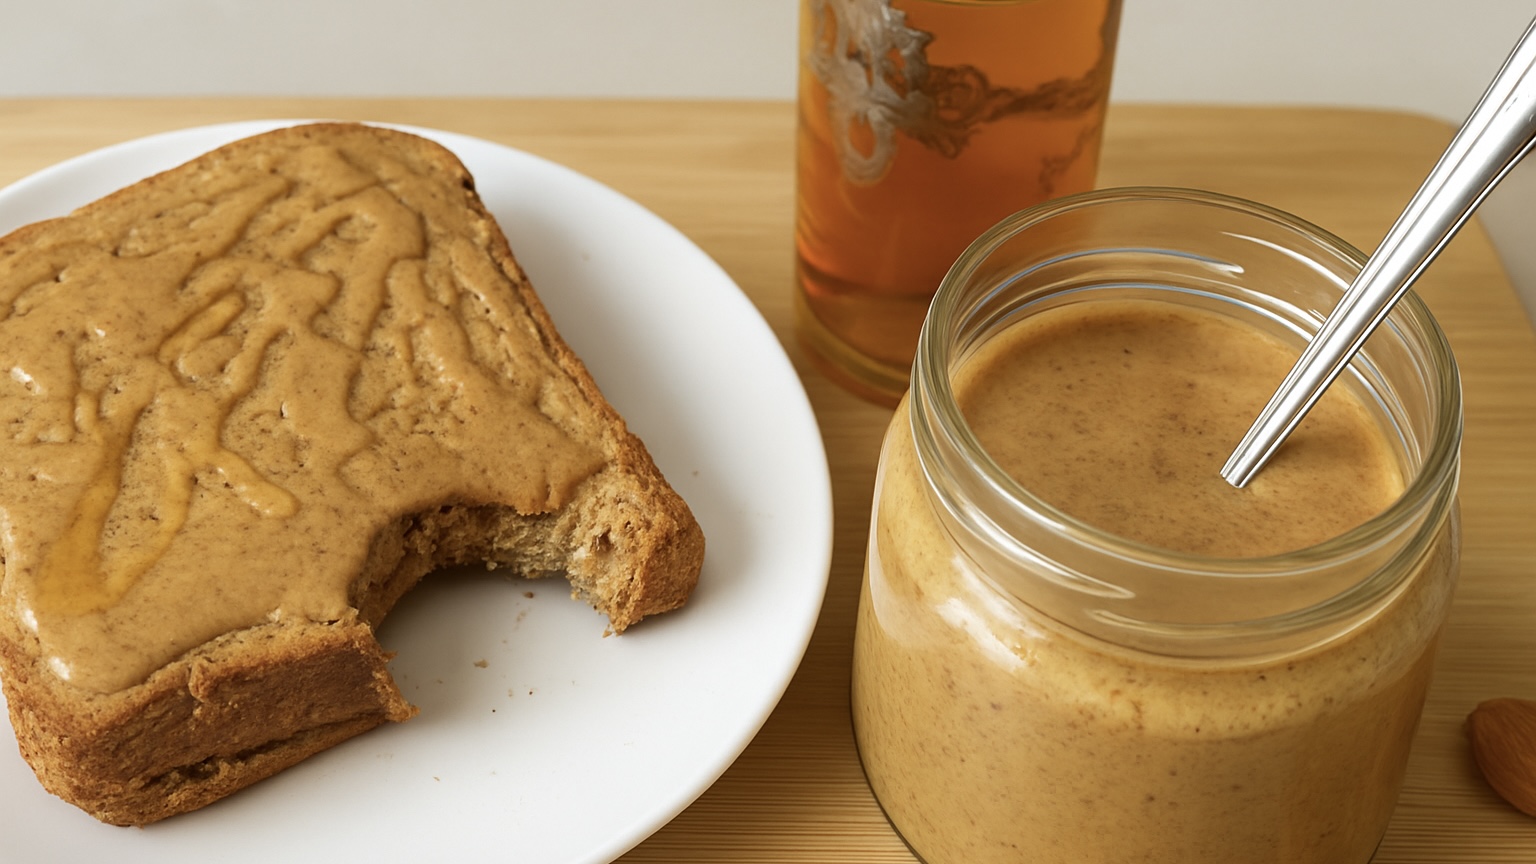
There’s something deeply satisfying about making your own almond butter from scratch, not only does it taste far better than most store-bought versions, but it’s also nutritionally superior and much more affordable. By soaking, skinning, roasting, and blending almonds the right way, you’re not just making a delicious spread, you’re unlocking the almonds’ full potential in terms of digestibility, nutrient availability, and absorption. Let’s go through the process step-by-step and see why each one really matters.

When you soak almonds (or any nuts), you’re doing your body a big favor. Almonds naturally contain compounds called phytic acid and enzyme inhibitors, which can interfere with the absorption of key minerals like iron, zinc, calcium, and magnesium. Soaking them in warm water for 12 to 24 hours helps neutralize these anti-nutrients, making the almonds much easier to digest and their nutrients more bioavailable. Rinsing them afterward washes away the released phytic acid and any remaining enzyme inhibitors, leaving the nuts lighter, softer, and much more nourishing.

Removing the skin from almonds takes this one step further. The thin brown layer contains tannins and other phenolic compounds that can also slightly reduce nutrient absorption. Studies have shown that blanching or soaking almonds can decrease these compounds, making the nutrients (especially vitamin E and minerals) more accessible. However, the skin also contains beneficial antioxidants and fiber, which is why we’re keeping half of the almonds with their skin, a balance between nutrition and texture.

Once you roast and blend them, you’ll end up with a smooth, rich, and creamy almond butter that’s truly “alive”, packed with nutrients your body can easily use.

Ingredients

  • 2 cups (about 300 g) raw almonds

  • 1 pinch sea salt (optional, added before blending)

Yield
Approximately 270 g (about 1 ¼ cups) almond butter, or 16–17 tablespoons

Directions 

  1. Place almonds in a bowl and cover with warm water. Let them soak for 12 to 24 hours. This process neutralizes phytic acid and enzyme inhibitors, improving digestibility and nutrient absorption.
  2. Drain and rinse thoroughly under running water to remove any remaining anti-nutrients.
  3. Drain well. Remove the skin from half the almonds by gently pinching each one — the skin should slip off easily. If not, soak them briefly in hot water for 2–3 minutes, then drain and try again.
  4. Spread both peeled and unpeeled almonds in a single layer on a parchment-lined baking tray.
  5. Pat dry using paper towels to speed up roasting.
  6. Roast in a preheated oven at 340°F (170°C) for 50–60 minutes, stirring once or twice until they turn light golden and crisp.
  7. Let cool slightly, then transfer to a high-powered food processor. Add the pinch of salt if using.
  8. Process for about 2 minutes, then scrape down the sides. Continue blending for up to 12 minutes total, until the almonds go from coarse meal to fine flour, then to paste, and finally to a smooth, creamy butter.
  9. Stop blending when you reach your preferred texture — thick and rustic or silky smooth.
  10. Transfer to a glass jar with a tight lid and enjoy!

Prep and Cook Time
Soaking: 12–24 hours
Prep: 30 minutes
Blending: up to 12 minutes
Baking: 60 minutes

Makes: About 16–17 tablespoons


Nutritional Information (per tablespoon)
Energy: 98 calories
Protein: 9 g
Fat: 3.4 g
Carbohydrates: 3 g
Fiber: 1.8 g

Storage and Notes

  • Store at room temperature for up to 2 weeks.

  • Refrigerate for up to 1 month.

  • Soaking reduces anti-nutrients like phytic acid, improving mineral absorption (iron, zinc, magnesium).

  • Keeping half of the almonds with skin retains antioxidants and fiber for extra health benefits.

  • A pinch of salt enhances almond flavor and balances natural sweetness.

Dietary Information: This recipe is gluten-free, dairy-free, and suitable for vegan and paleo diets.