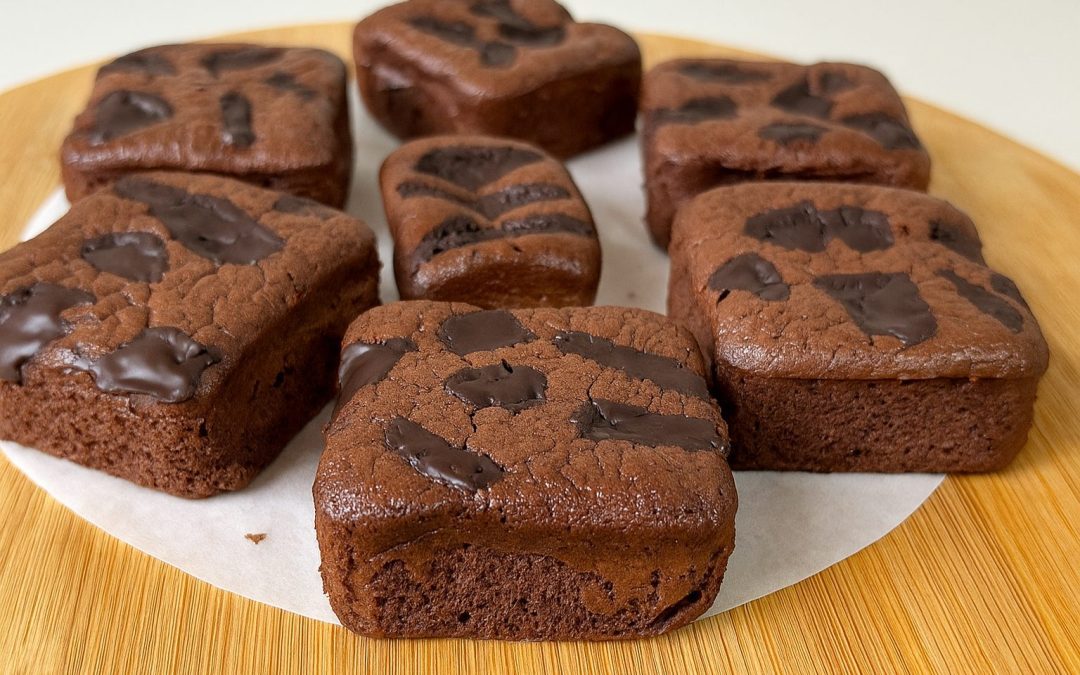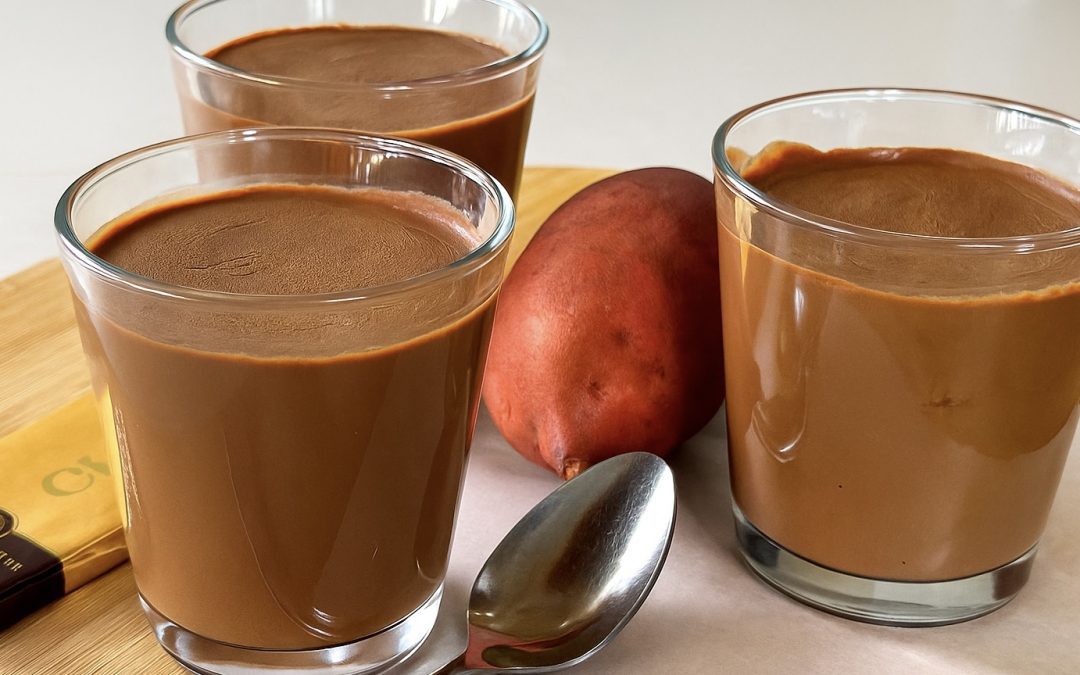
2-Ingredient Healthy Chocolate Mousse
2-Ingredient Healthy Chocolate Mousse
There’s something about chocolate mousse that feels like pure magic, isn’t it? That silky, melt-in-your-mouth texture, the way each spoonful seems to melt away into bliss… it’s the kind of dessert we usually associate with indulgence, decadence, and a little bit of guilt. But what if I told you that you could enjoy all of that creamy, dreamy luxury with just two simple ingredients, and in a way that’s actually nourishing for your body? This 2-Ingredient Healthy Chocolate Mousse makes that possible. It’s one of those recipes that’s so easy, so clever, and so satisfying, you’ll find yourself making it on repeat.
The secret lies in the sweet potato. Now, don’t be fooled, sweet potatoes aren’t just for savory dishes or holiday casseroles. When cooked and blended, they turn unbelievably smooth and creamy, making them the perfect base for a mousse. They bring natural sweetness, fiber, and loads of nutrients to the table. Rich in vitamin A (thanks to their vibrant orange beta-carotene content), vitamin C, potassium, and manganese, sweet potatoes are a powerhouse for your immune system, skin health, and overall energy. The fiber in them also helps keep digestion happy and leaves you feeling full and satisfied, something you rarely get from traditional desserts. Including sweet potatoes regularly in your meals isn’t just a comfort-food choice, it’s a smart way to nourish your body with vitamins, antioxidants, and steady, slow-release energy.
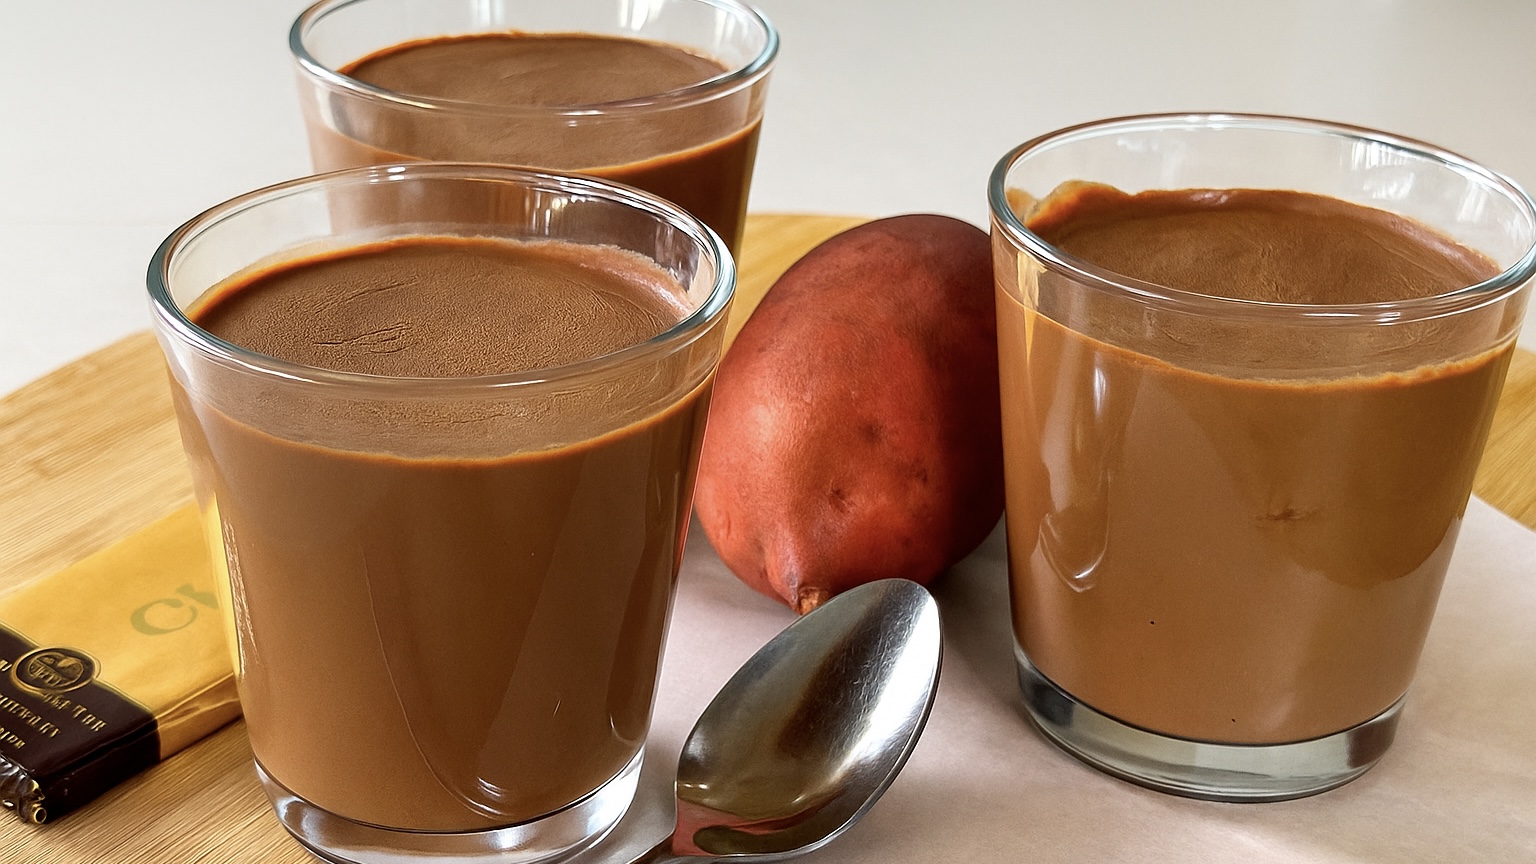
And then, of course, there’s the star we all know and love, dark chocolate. Unlike milk chocolate, high-quality dark chocolate (especially 70% cacao or higher) is packed with antioxidants called flavonoids, which have been linked to heart health, improved circulation, and even better brain function. It also contains magnesium, iron, and copper, minerals your body needs to keep energy levels steady and support your nervous system. What makes dark chocolate even more special is the way it lifts your moodm, it helps trigger the release of “feel-good” chemicals in the brain, giving you a natural little happiness boost with every bite. That’s why pairing dark chocolate with sweet potatoes is such a winning combination: you’re not only satisfying your sweet tooth, but also giving your body a dessert that supports your health. 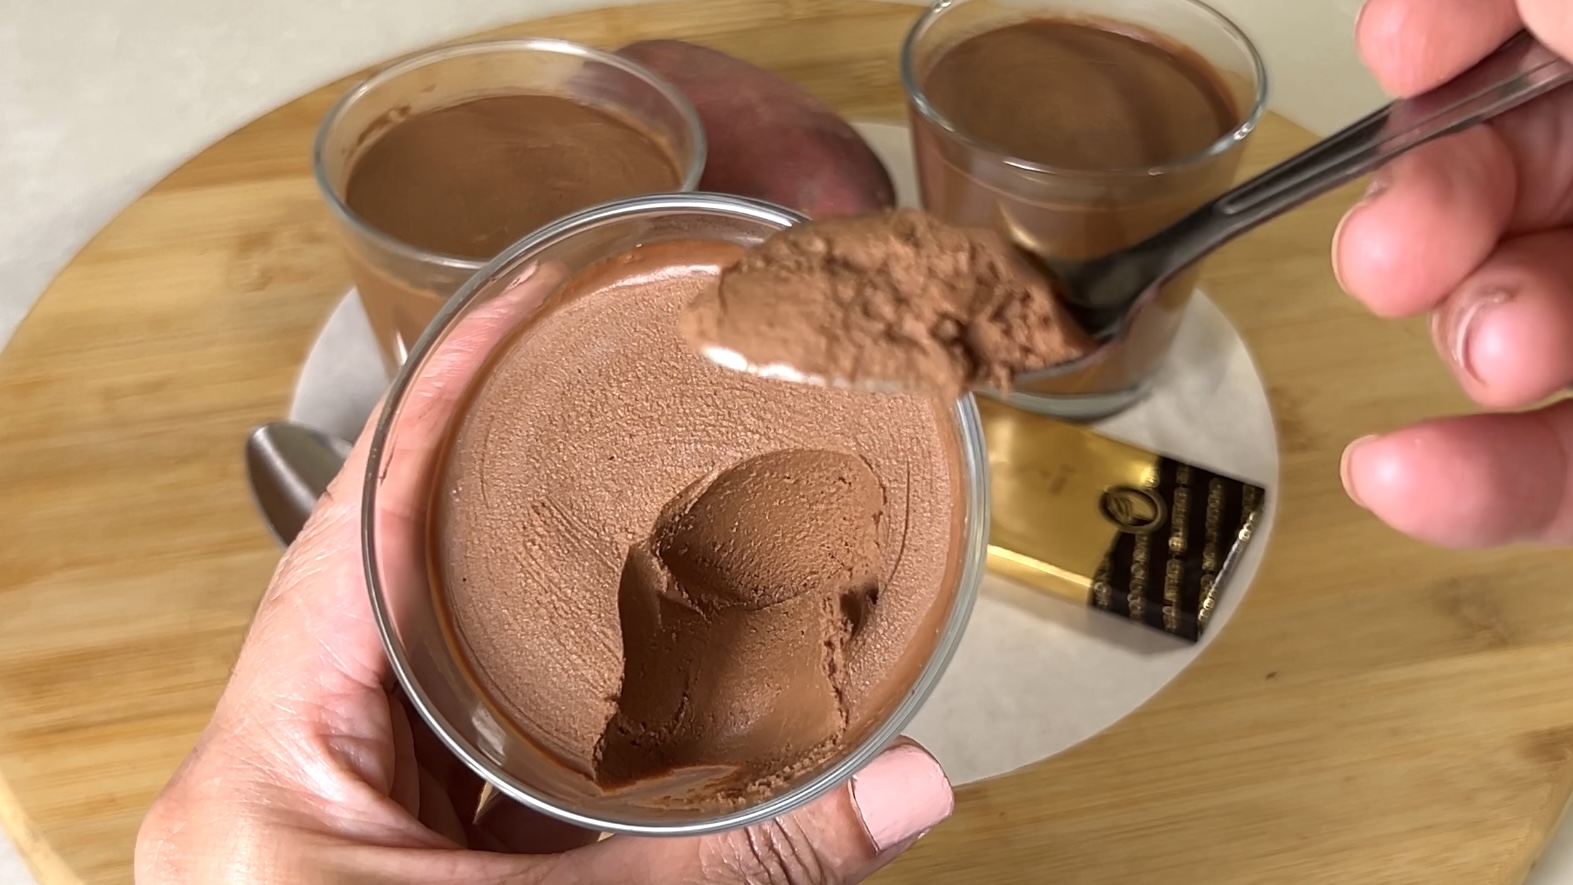
So the next time you’re craving something sweet, rich, and chocolatey, skip the store-bought mousse or heavy cream-based recipes and give this a try. With only two wholesome ingredients, you’ll be amazed at how indulgent, smooth, and chocolatey it tastes. It’s proof that dessert can be both delicious and nourishing, and once you try it, I promise you’ll never look at chocolate mousse the same way again.
Ingredients
-
2 medium-sized raw sweet potatoes (300 g raw or ≈ 250 g steamed)
-
120 g dark chocolate (70% or higher cacao recommended)
-
About ½ cup hot steaming water (reserved from steaming the sweet potatoes)
Directions
- Chop the dark chocolate into small chunks and place them in a mixing bowl.
- Clean, peel, and cut the sweet potatoes into large chunks.
- Steam the sweet potatoes for 15 to 20 minutes over medium heat until fork-tender.
- Reserve about half a cup of the hot steaming water.
- Pour the hot steaming water over the chocolate chunks and add the steamed sweet potatoes.
- Let the mixture rest for 3 to 5 minutes so the chocolate starts to melt.
- Blend everything together with a hand blender or food processor until smooth and creamy.
- Spoon the mousse into ramekins or serving glasses.
- Cover each container with plastic wrap.
- Chill in the refrigerator for at least 1 hour before serving.
- Serve cold, optionally garnished with cocoa powder, shaved chocolate, berries, or nuts.
Prep, Cooking & Servings
-
Prep time: 15 minutes
-
Steaming: 20 minutes
-
Chill time: 1 hour in the fridge
-
Servings: 3
Nutritional Information (per serving)
-
Energy: 316 calories
-
Protein: 5.14 g
-
Fat: 17.14 g
-
Carbohydrates: 35.83 g
-
Fiber: 6.6 g
This recipe is vegan and gluten-free.
Storage and Recommendations
-
Refrigerate covered for up to 5 days.
-
For the best flavor and health benefits, use high-quality dark chocolate with at least 70% cacao.
-
Garnish with berries, nuts, or cocoa powder before serving for added flavor and a beautiful presentation.