Rice Paper Spinach Rolls
Rice Paper Spinach Rolls
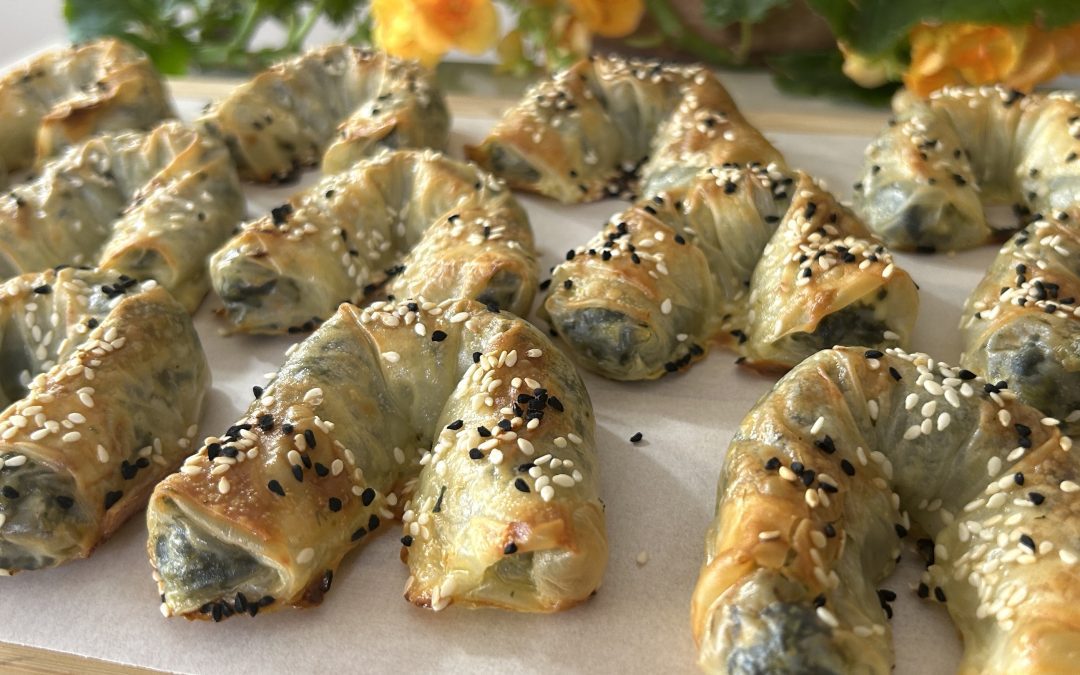
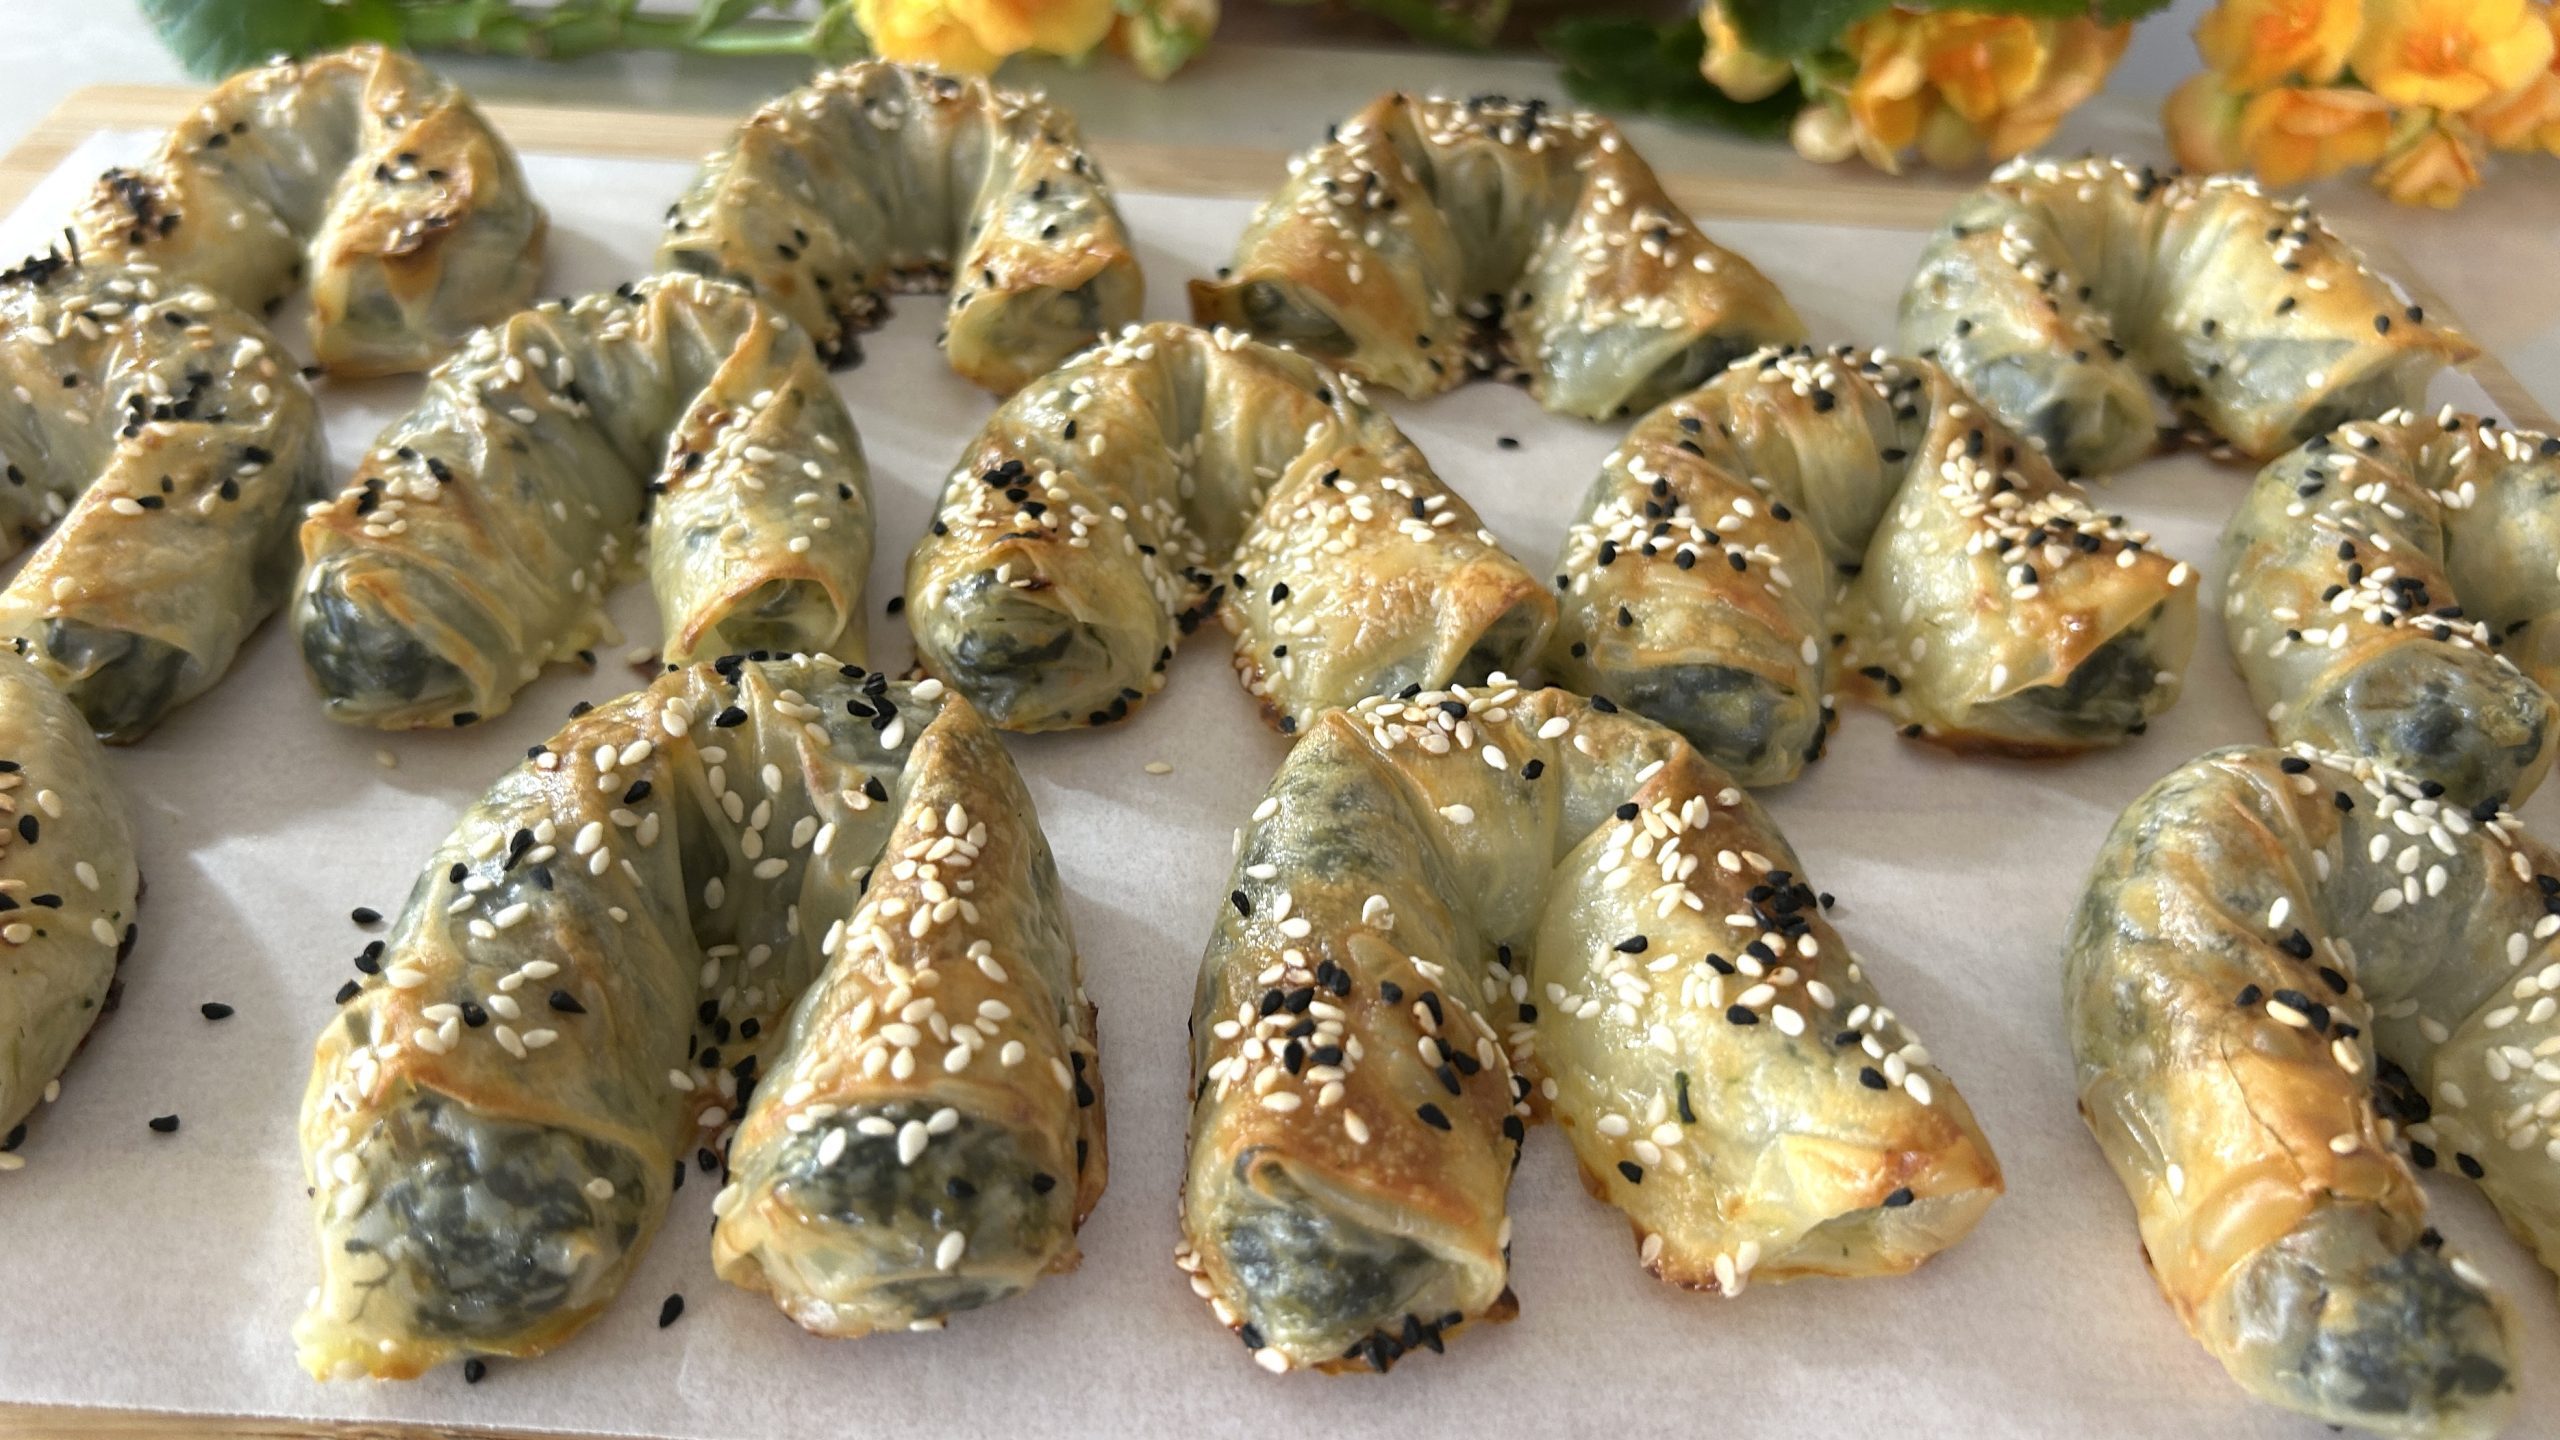
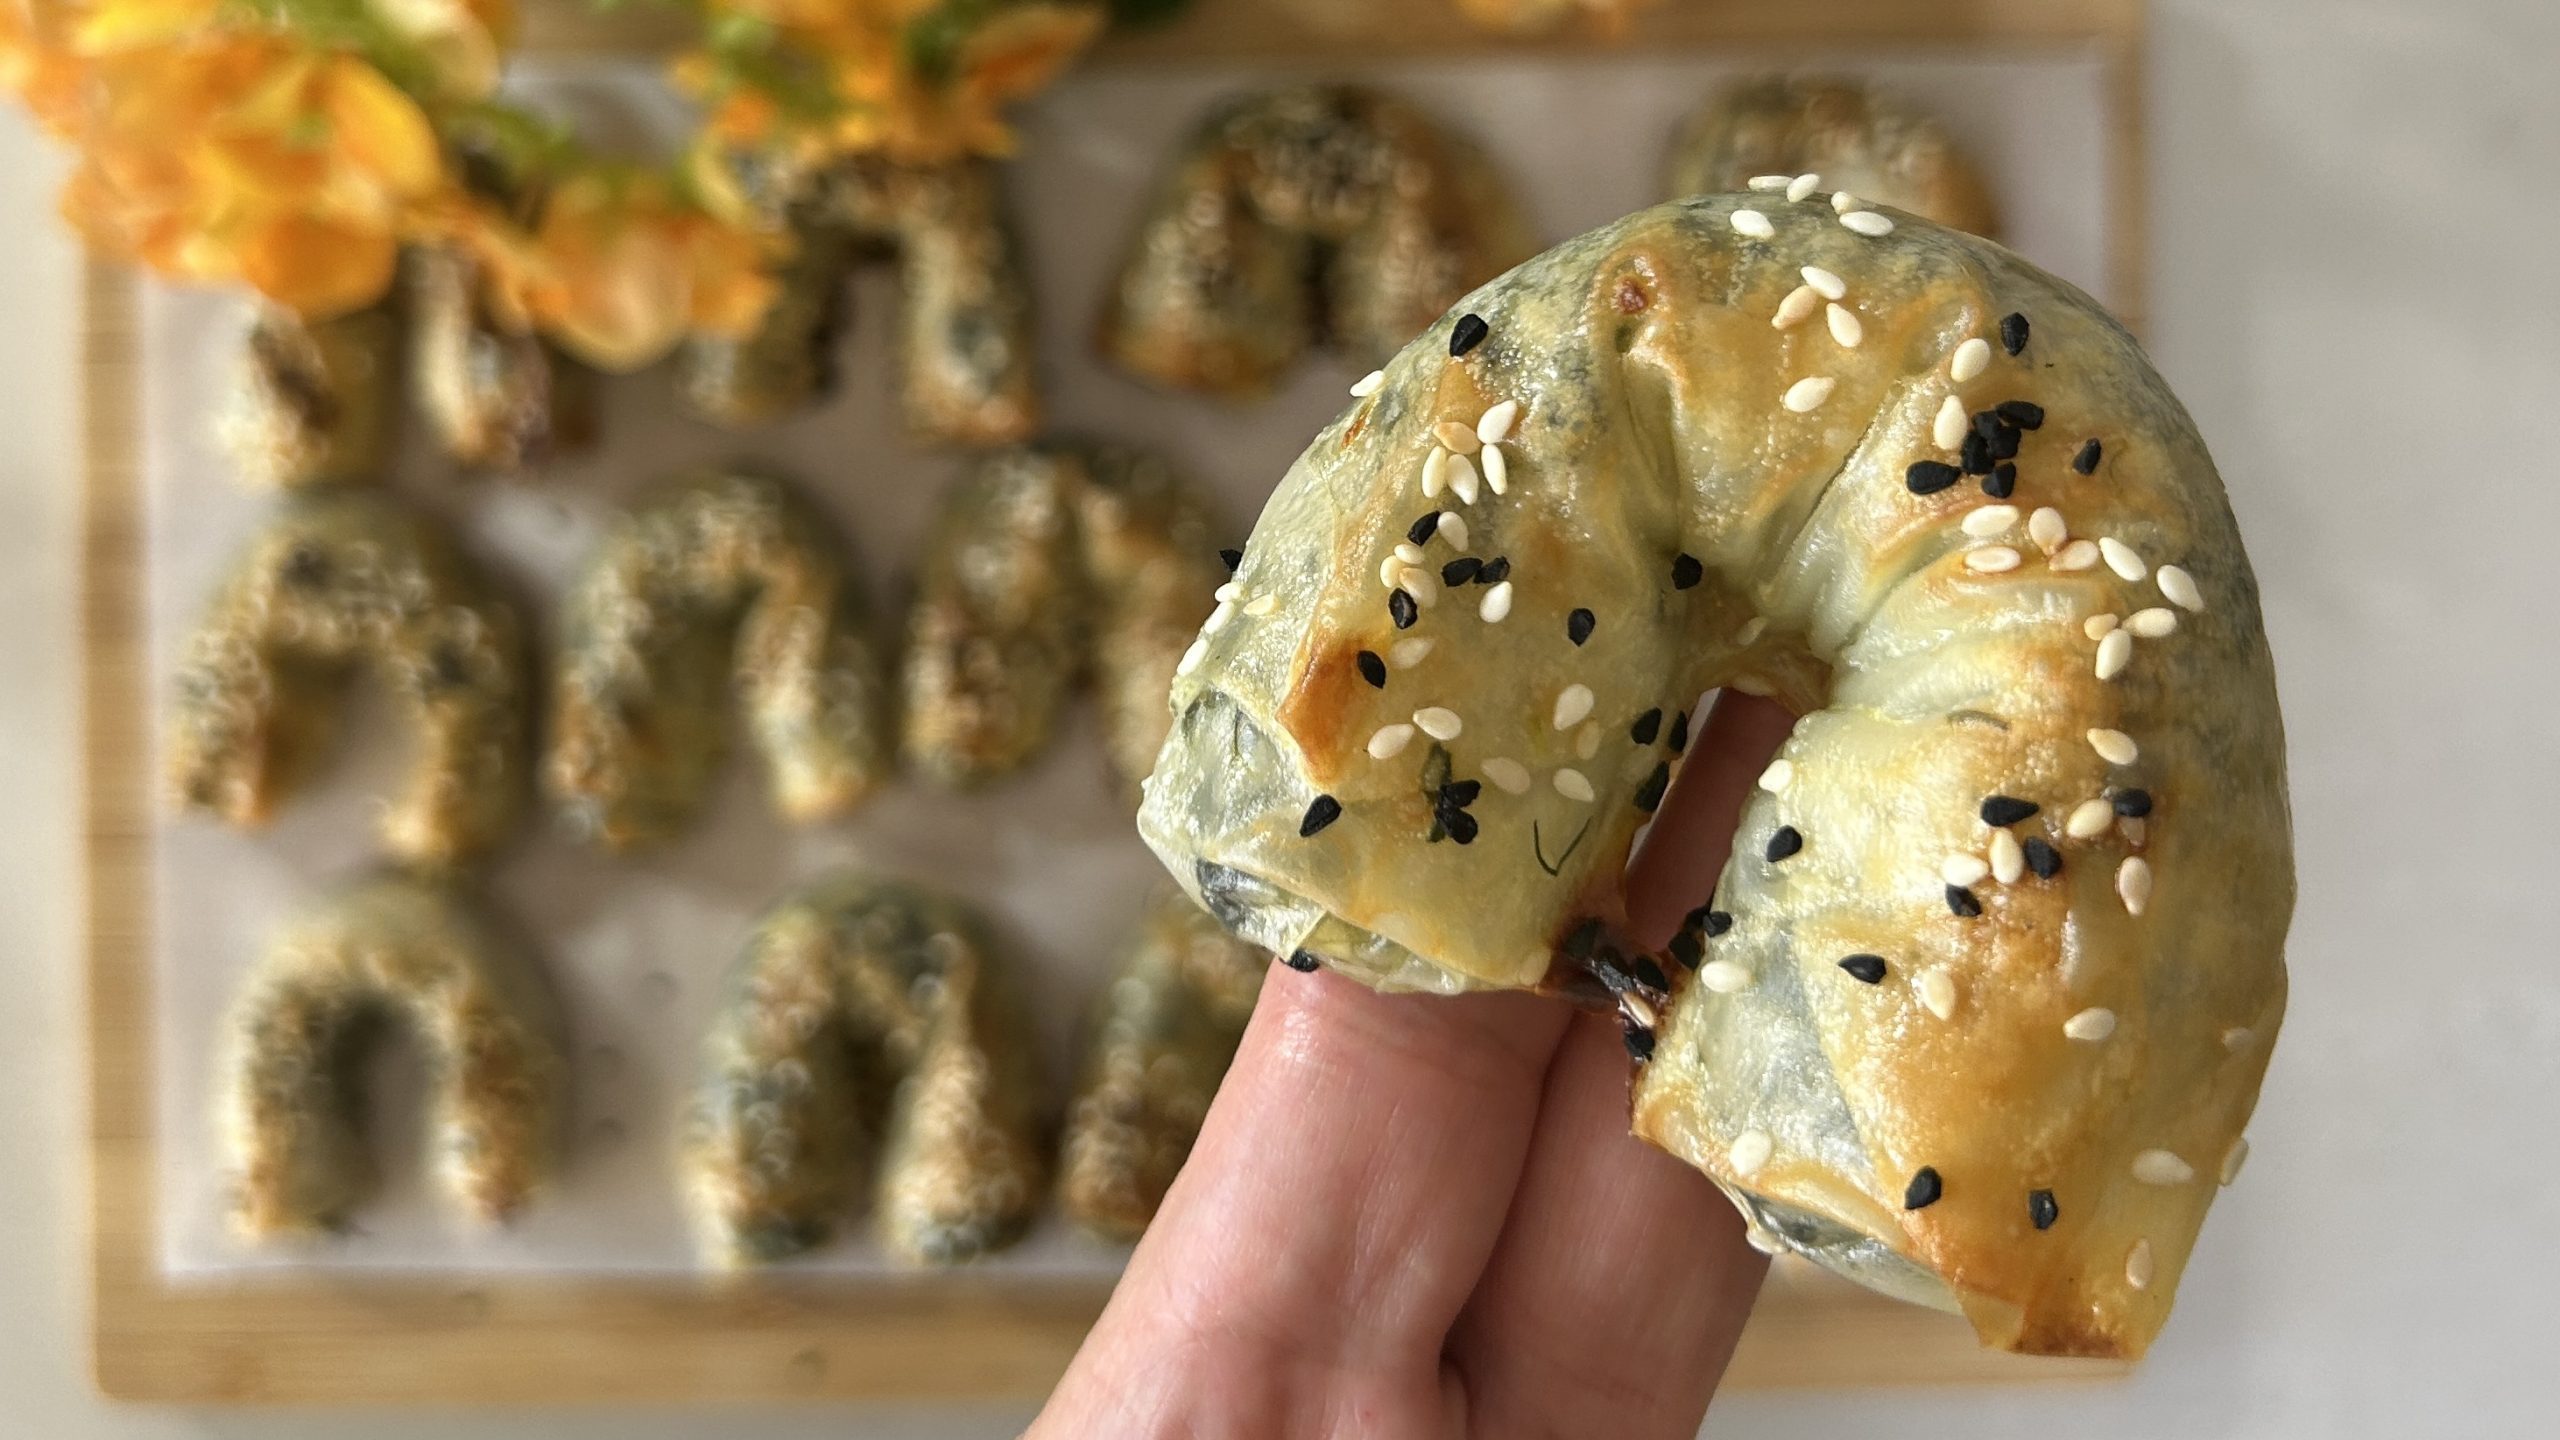
I have to admit, rice paper has completely changed the game when it comes to light, crispy, and satisfying snacks. While traditionally used for Vietnamese spring rolls, it has now become a fantastic alternative to puff pastry or phyllo dough in various recipes. That’s exactly what inspired me to swap out the phyllo in my favorite Greek spanakopita (or burek) for these delicious rice paper spinach rolls! The result? A beautifully golden, crispy exterior that wraps a rich, savory spinach and feta filling, bursting with Mediterranean flavors. If you’ve ever wanted a lighter, gluten-free version of spanakopita without sacrificing any of the taste, this is the perfect recipe for you!
What makes this recipe even more exciting is the nutritional punch it packs. The star ingredient, spinach, is a powerhouse of vitamins and minerals. Rich in iron, calcium, magnesium, and vitamin K, spinach supports bone health, muscle function, and energy production. It’s also loaded with antioxidants that help fight inflammation and support overall well-being. Paired with the probiotics and calcium from feta cheese, this dish isn’t just delicious, it’s also a nourishing, balanced choice for any time of the day. Adding spinach to your regular diet can help boost your iron levels, making it a great choice for those looking to prevent or manage iron deficiency. Plus, it’s an easy way to sneak in more greens without compromising on flavor.
So if you’re looking for a crispy, savory, and nutrient-packed bite, these rice paper spinach rolls are a must-try!
Ingredients:
- 300 g frozen spinach, thawed and squeezed dry
- 55 g onion, finely chopped
- 35 g fresh dill, chopped
- 100 g feta cheese, crumbled
- 2 tbsp. olive oil
- ¼ tsp. salt
- Black pepper, to taste
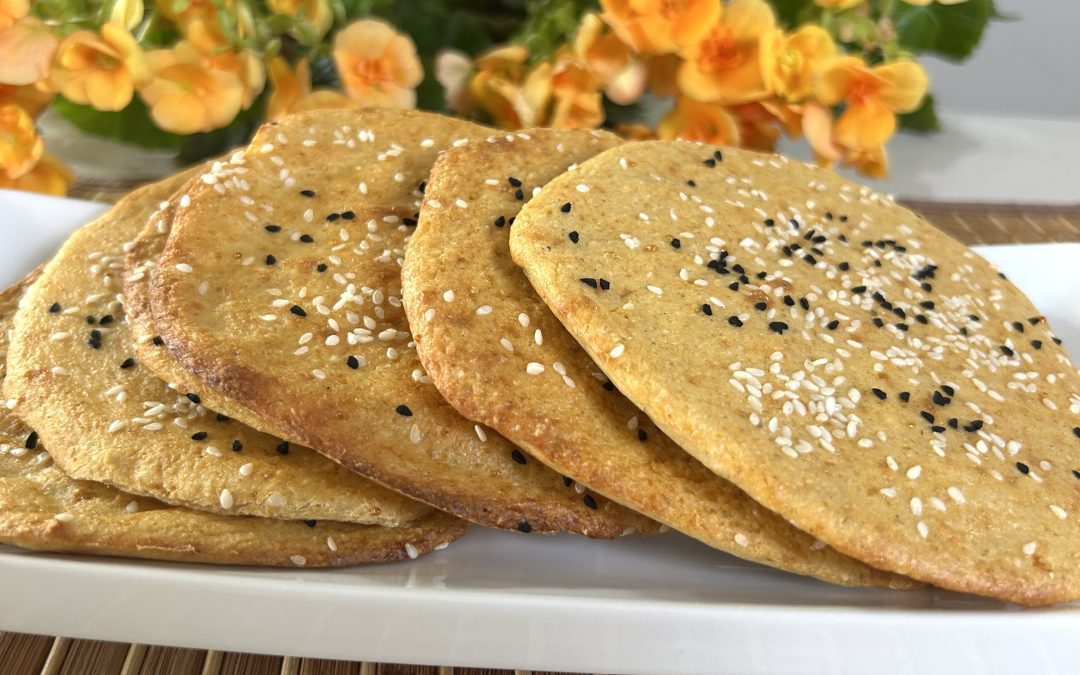
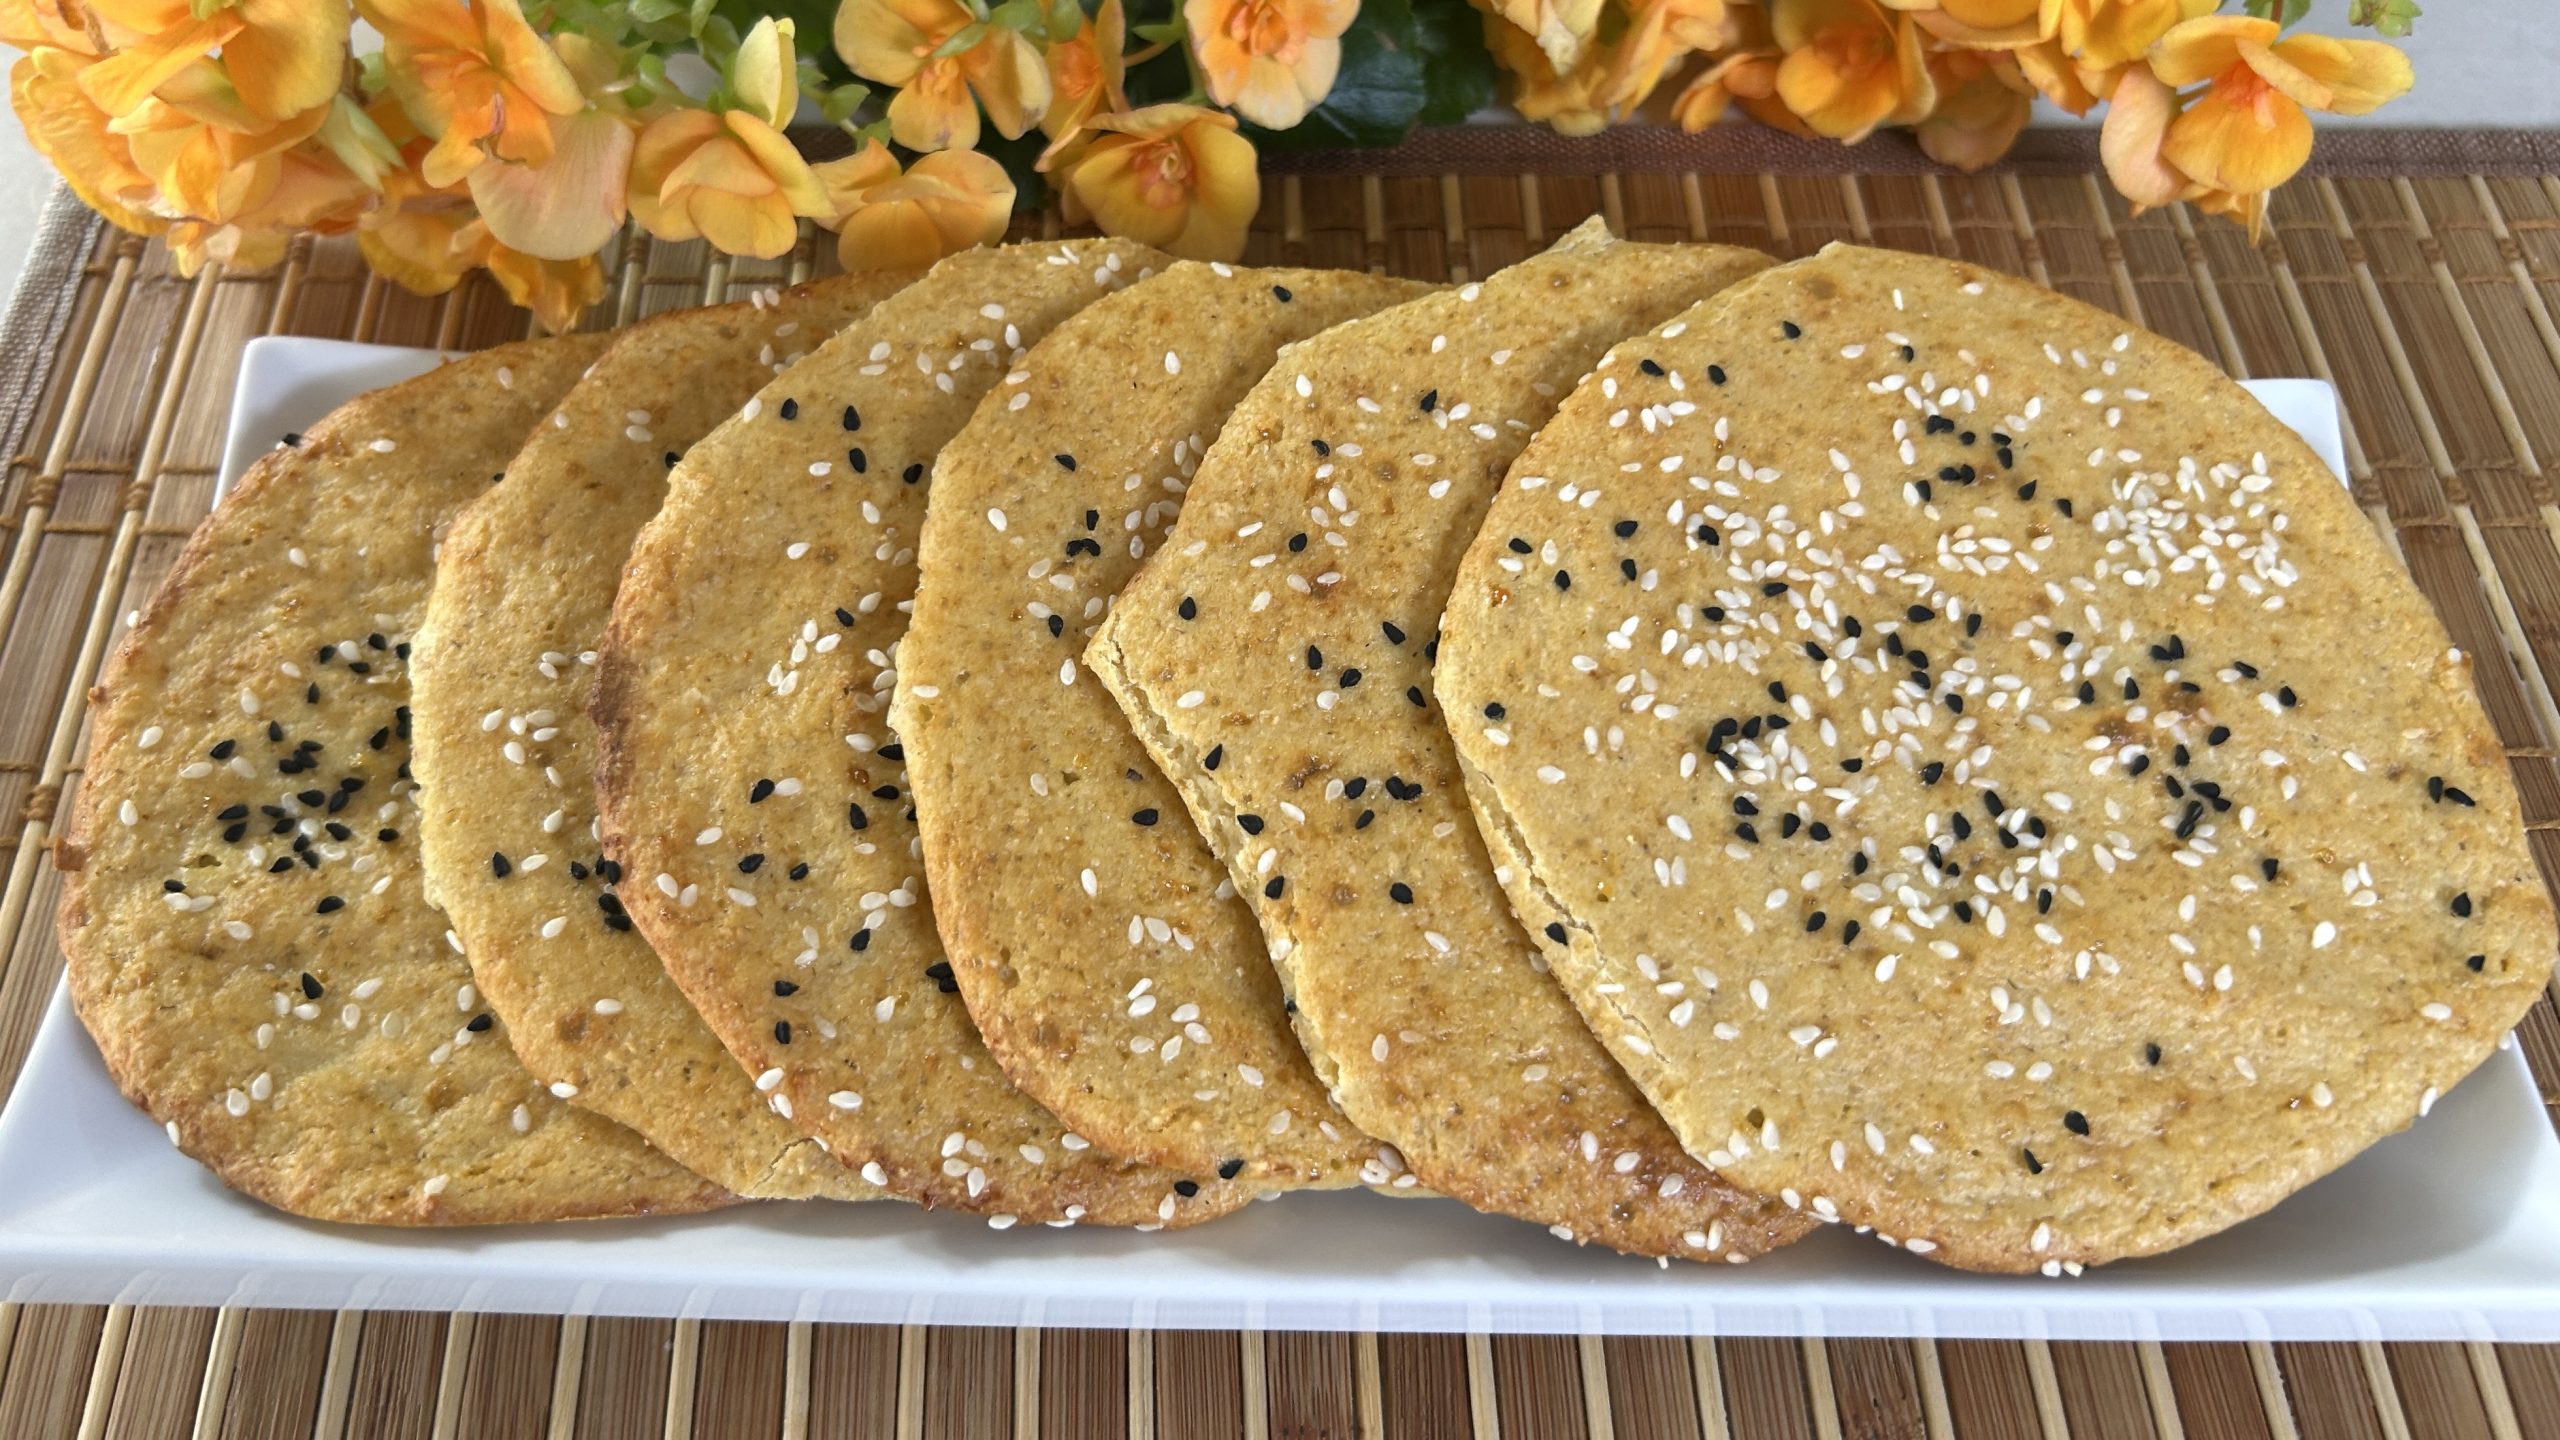
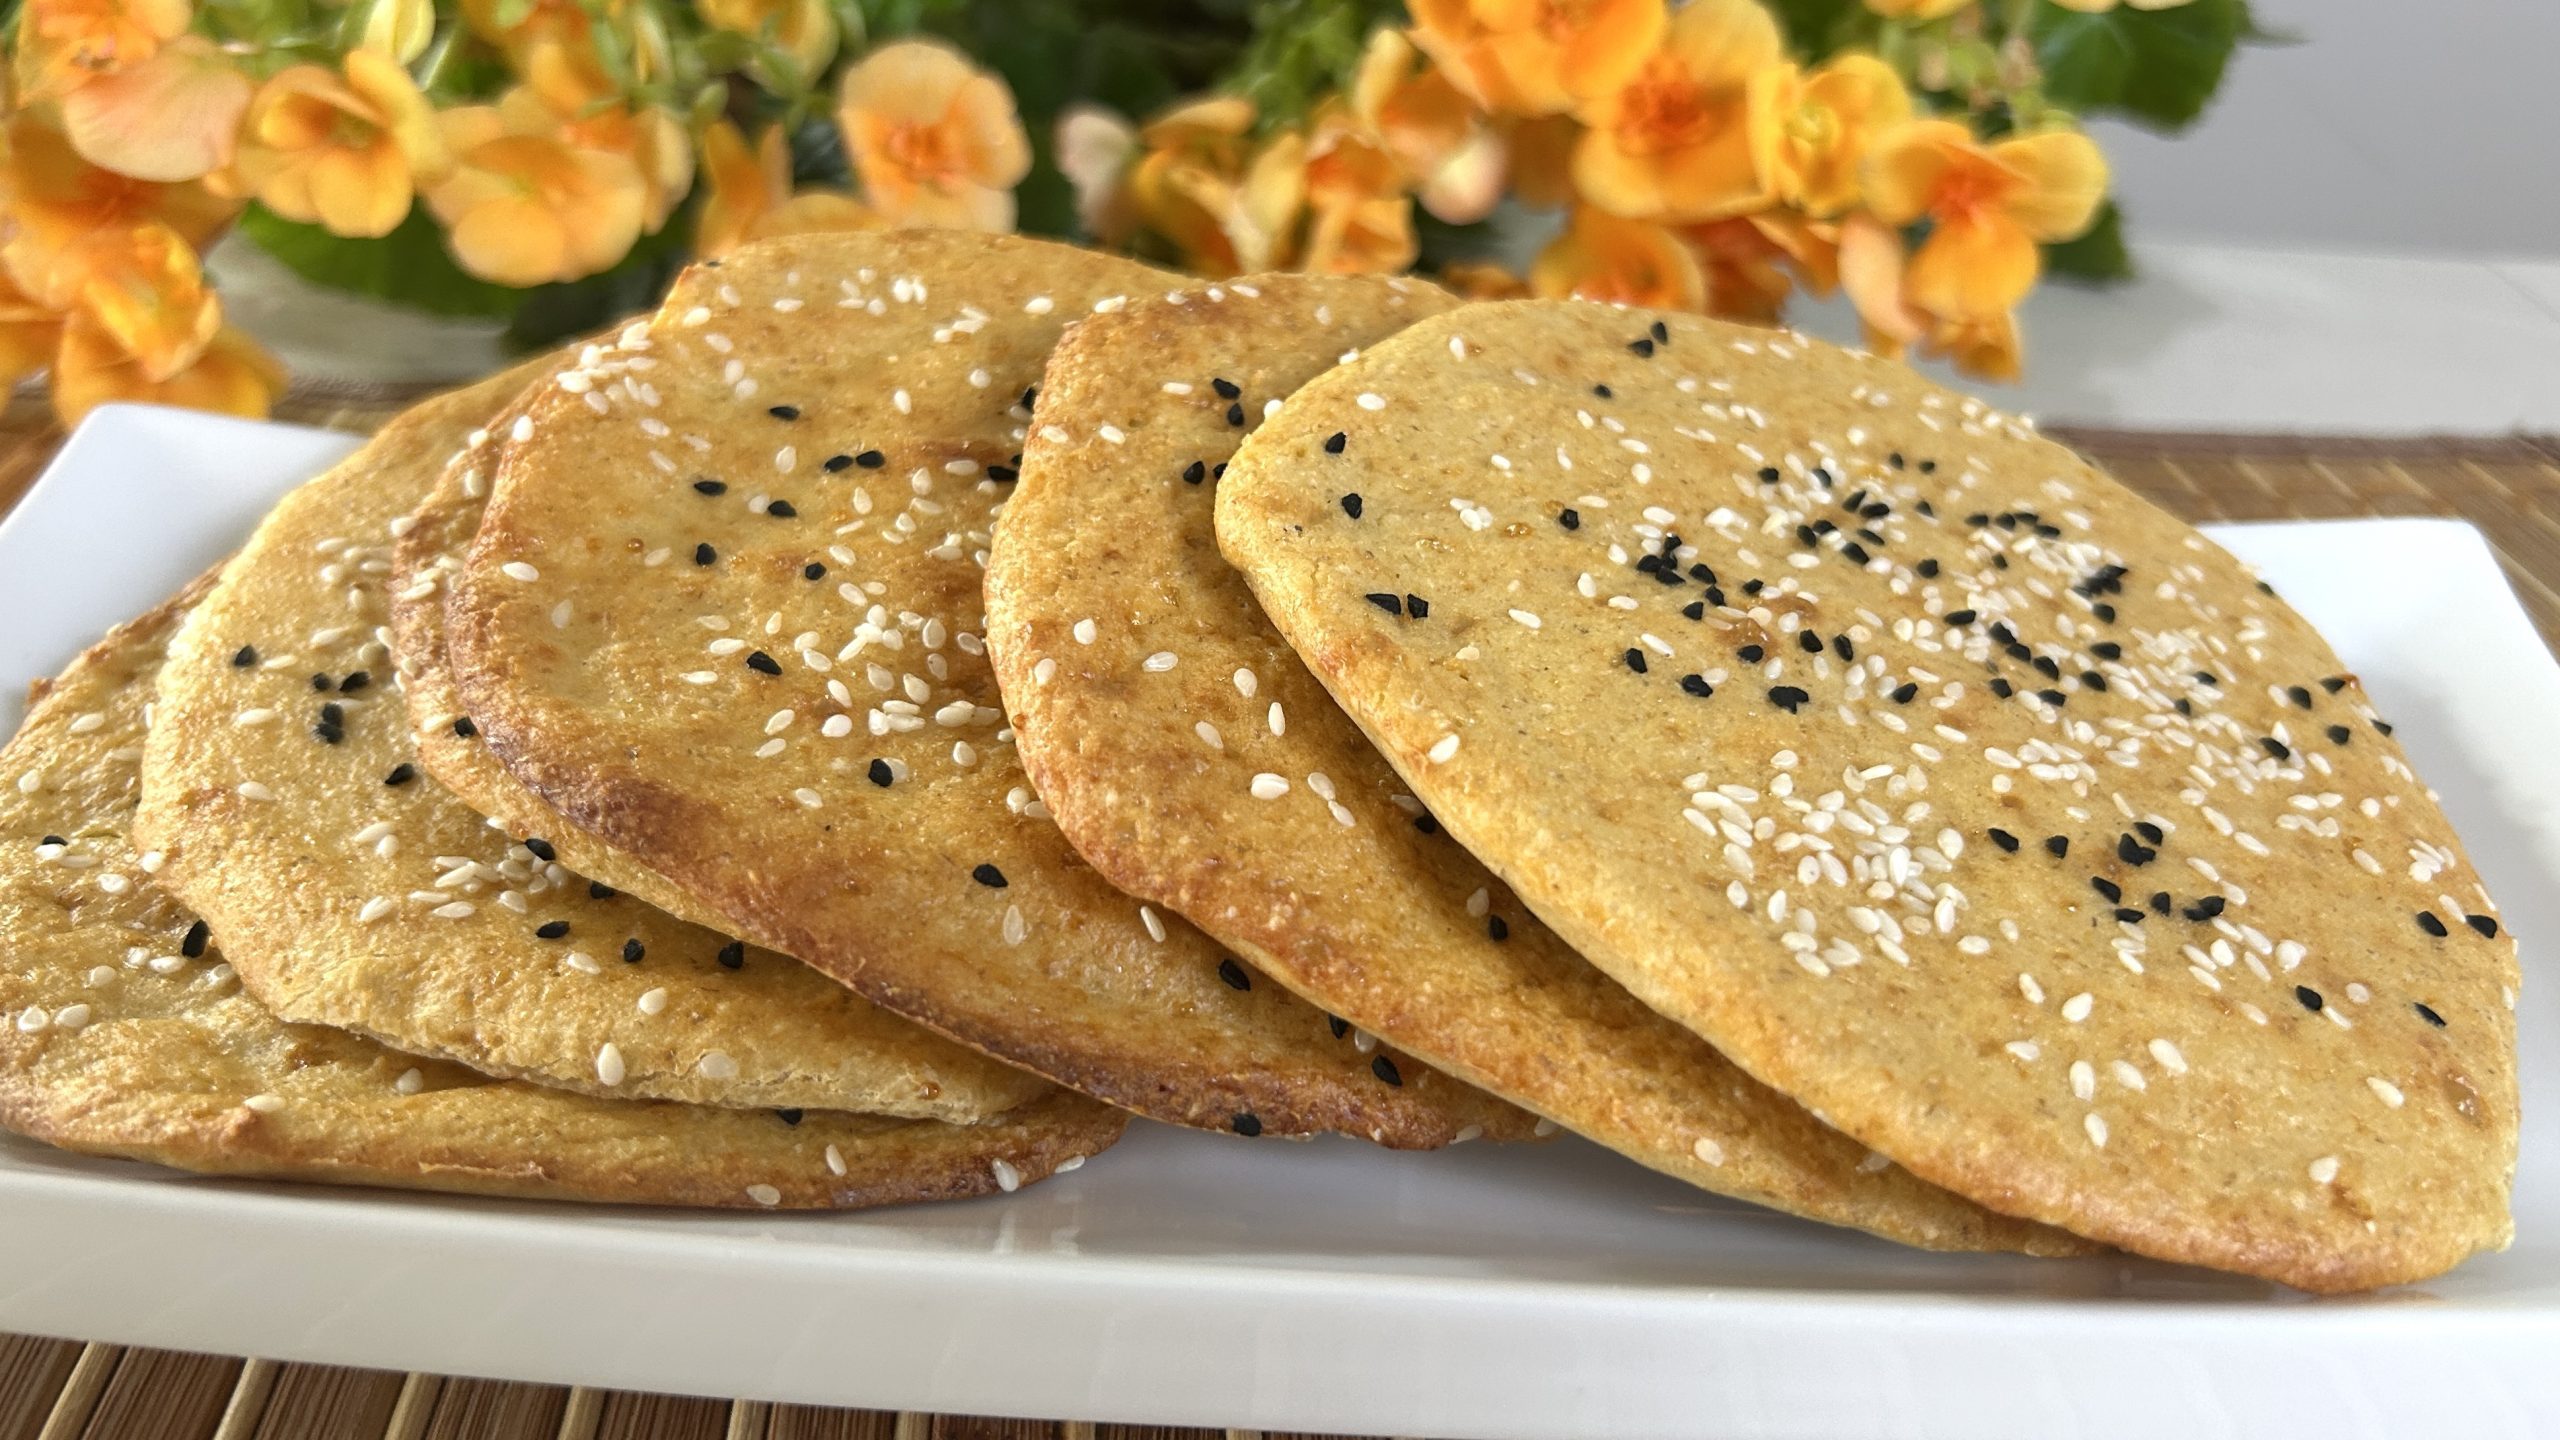
- 14 rice paper wrappers
- 1 egg
- 2 tbsp. sour cream or plain yogurt
- 200 ml milk
- 1 tbsp. olive oil
- 1 tbsp. sesame seeds (or your seed of choice)
- 1 tbsp. nigella seeds (or your seed of choice)
Directions:
- Thaw the frozen spinach, squeeze out excess water, and mix with chopped onion, dill, crumbled feta, olive oil, salt, and black pepper in a bowl. Set aside.
- Whisk together the egg, sour cream (or yogurt), milk, and olive oil in a bowl. Pour into a large, shallow plate for dipping.
- Dip one rice paper into the mixture, flipping it back and forth until flexible but still firm enough to handle.
- Lay the softened rice paper on a board, place 2 tablespoons of filling near the bottom edge, fold in the sides, and roll tightly into a cigar shape.
- Curve the roll into a C shape and place it on a parchment-lined baking tray.
- Continue until all the rice papers and filling are used.
- Generously coat each roll with the egg and milk mixture for a golden finish.
- Sprinkle sesame and nigella seeds on top for extra crunch and flavor.
- Preheat the oven to 350°F (175°C) and bake for 35 minutes or until golden brown and crispy.
- Let them cool slightly before enjoying—crispy fresh out of the oven but softer and chewier over time!
Prep Time: 30 minutes
Baking Time: 35 minutes
Servings: 14
Nutritional Information (Per Serving):
- Energy: 101 calories
- Protein: 3.52 g
- Fat: 6.24 g
- Carbohydrates: 8.16 g
- Fiber: 1 g
Storage & Notes:
- Store in an airtight container in the refrigerator for up to 5 days. Reheat in the oven at 350°F (175°C) to restore crispiness.
- For longer storage, freeze the spinach rolls for up to 3 months. Reheat before serving.
- Serve with Greek yogurt or a light garlic dip for extra creaminess.
- This recipe is gluten-free and packed with iron-rich spinach for a nutritious snack!