Protein-Rich Breakfast Wrap
Protein-Rich Breakfast Wrap
If you’re ready to add a powerful punch of nutrients to your daily routine, this Protein-Rich Wrap is the perfect choice. Not only does it deliver a satisfying crunch and flavor, but it’s also a wonderful way to start your day with balanced energy. Whether you need a quick breakfast that fuels you for the morning ahead or a light lunch that keeps you going, this wrap does it all. High in protein and healthy fats, this cottage cheese-based wrap stabilizes your blood sugar, preventing those midday crashes while keeping you feeling full and satisfied for hours.
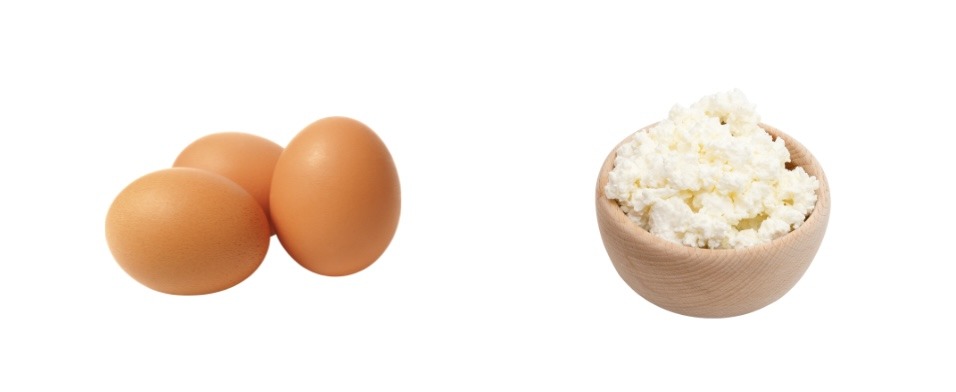
What makes this wrap particularly special is its star ingredient, cottage cheese. Cottage cheese is not only delicious but also packed with high-quality protein, essential for muscle repair and growth. It’s rich in B vitamins, which help convert food into energy, and provides important minerals like calcium and phosphorus for strong bones. Including cottage cheese in your diet regularly can support a healthy metabolism and help maintain a healthy weight. Plus, its versatility allows you to enjoy it in both sweet and savory dishes!
This recipe is perfect for a high-protein meal to keep you energized throughout the day without the sugar highs and lows that many other breakfast or lunch options bring.
Why this wrap is great for you?
Cottage cheese, along with eggs, forms the protein-rich base of this recipe. Both ingredients are excellent sources of high-quality protein, essential for muscle repair and overall health. Cottage cheese also provides B vitamins and minerals that support bone health, while the zucchini adds fiber and important vitamins like A and C. Together, these ingredients create a nutrient-dense wrap that keeps your blood sugar stable, helping to prevent energy crashes.
Ingredients
For the flatbread/wraps:
- ⅓ cup (80 g) cottage cheese
- 2 eggs
- ⅛ tsp salt (optional)
- Black pepper to taste
- 100 g zucchini (or other veggies of choice)
- 1 tbsp olive oil (divided)
For the topping (feel free to add your preferred toppings):
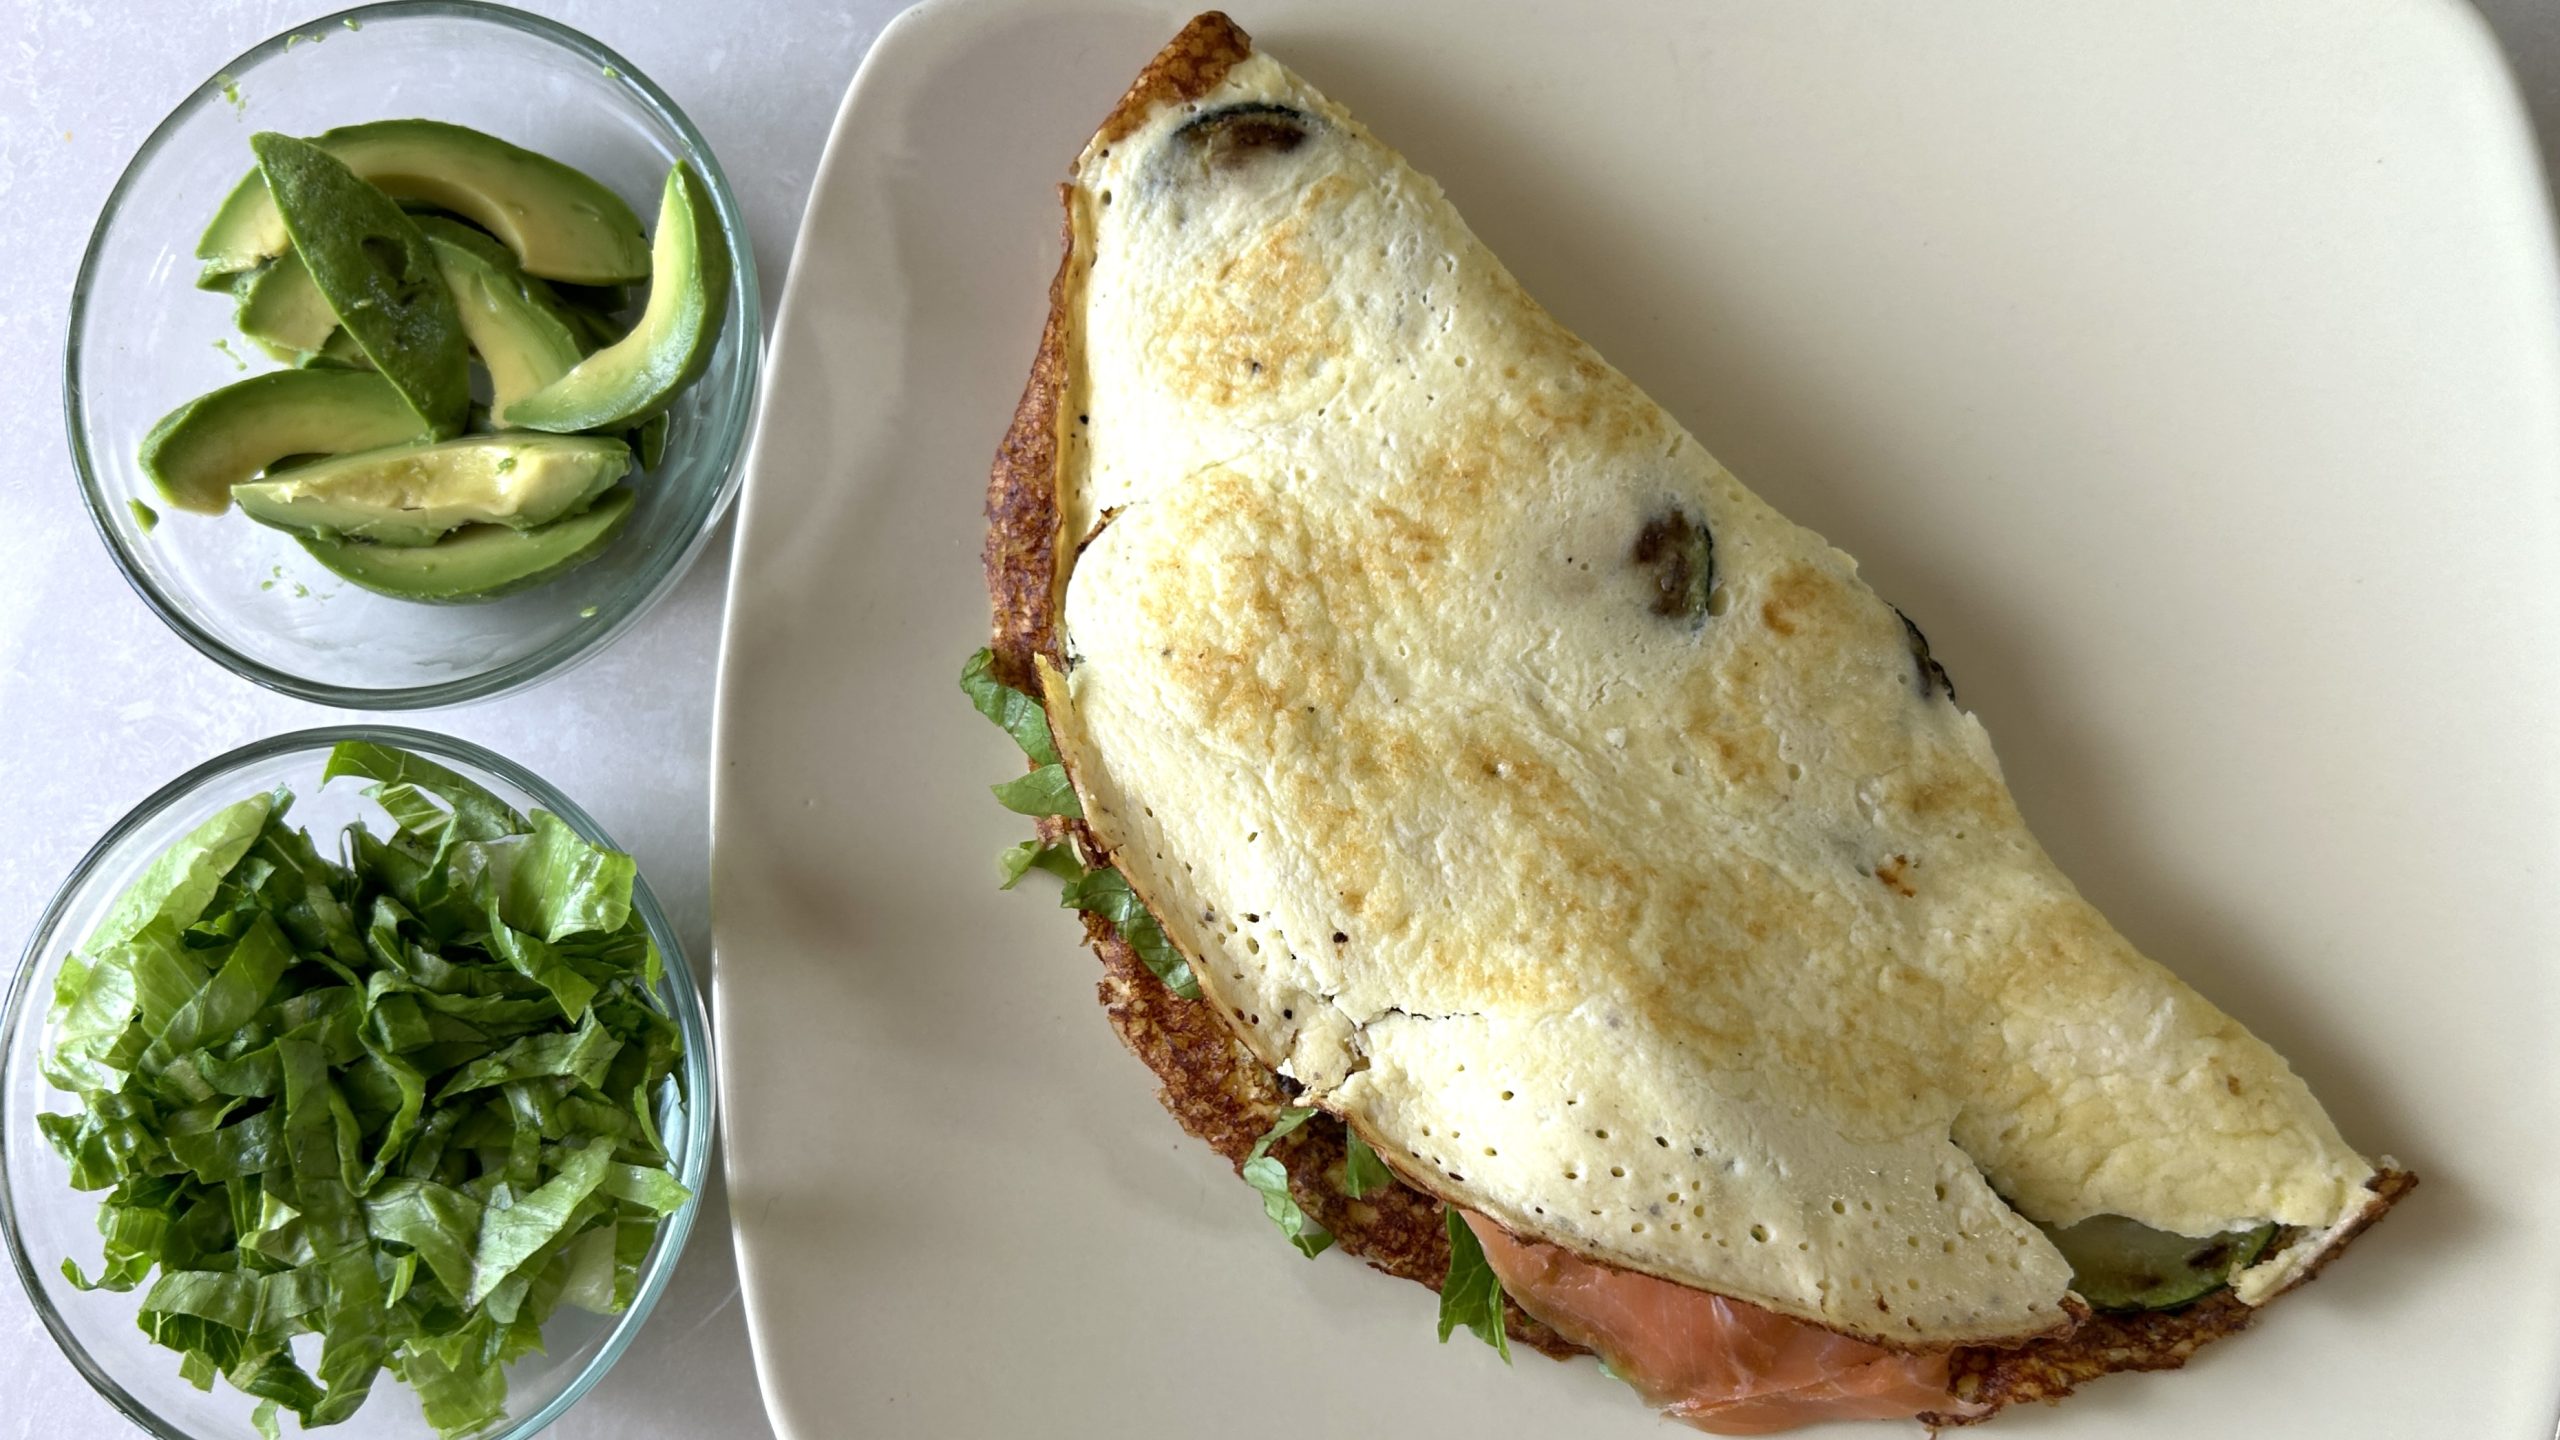
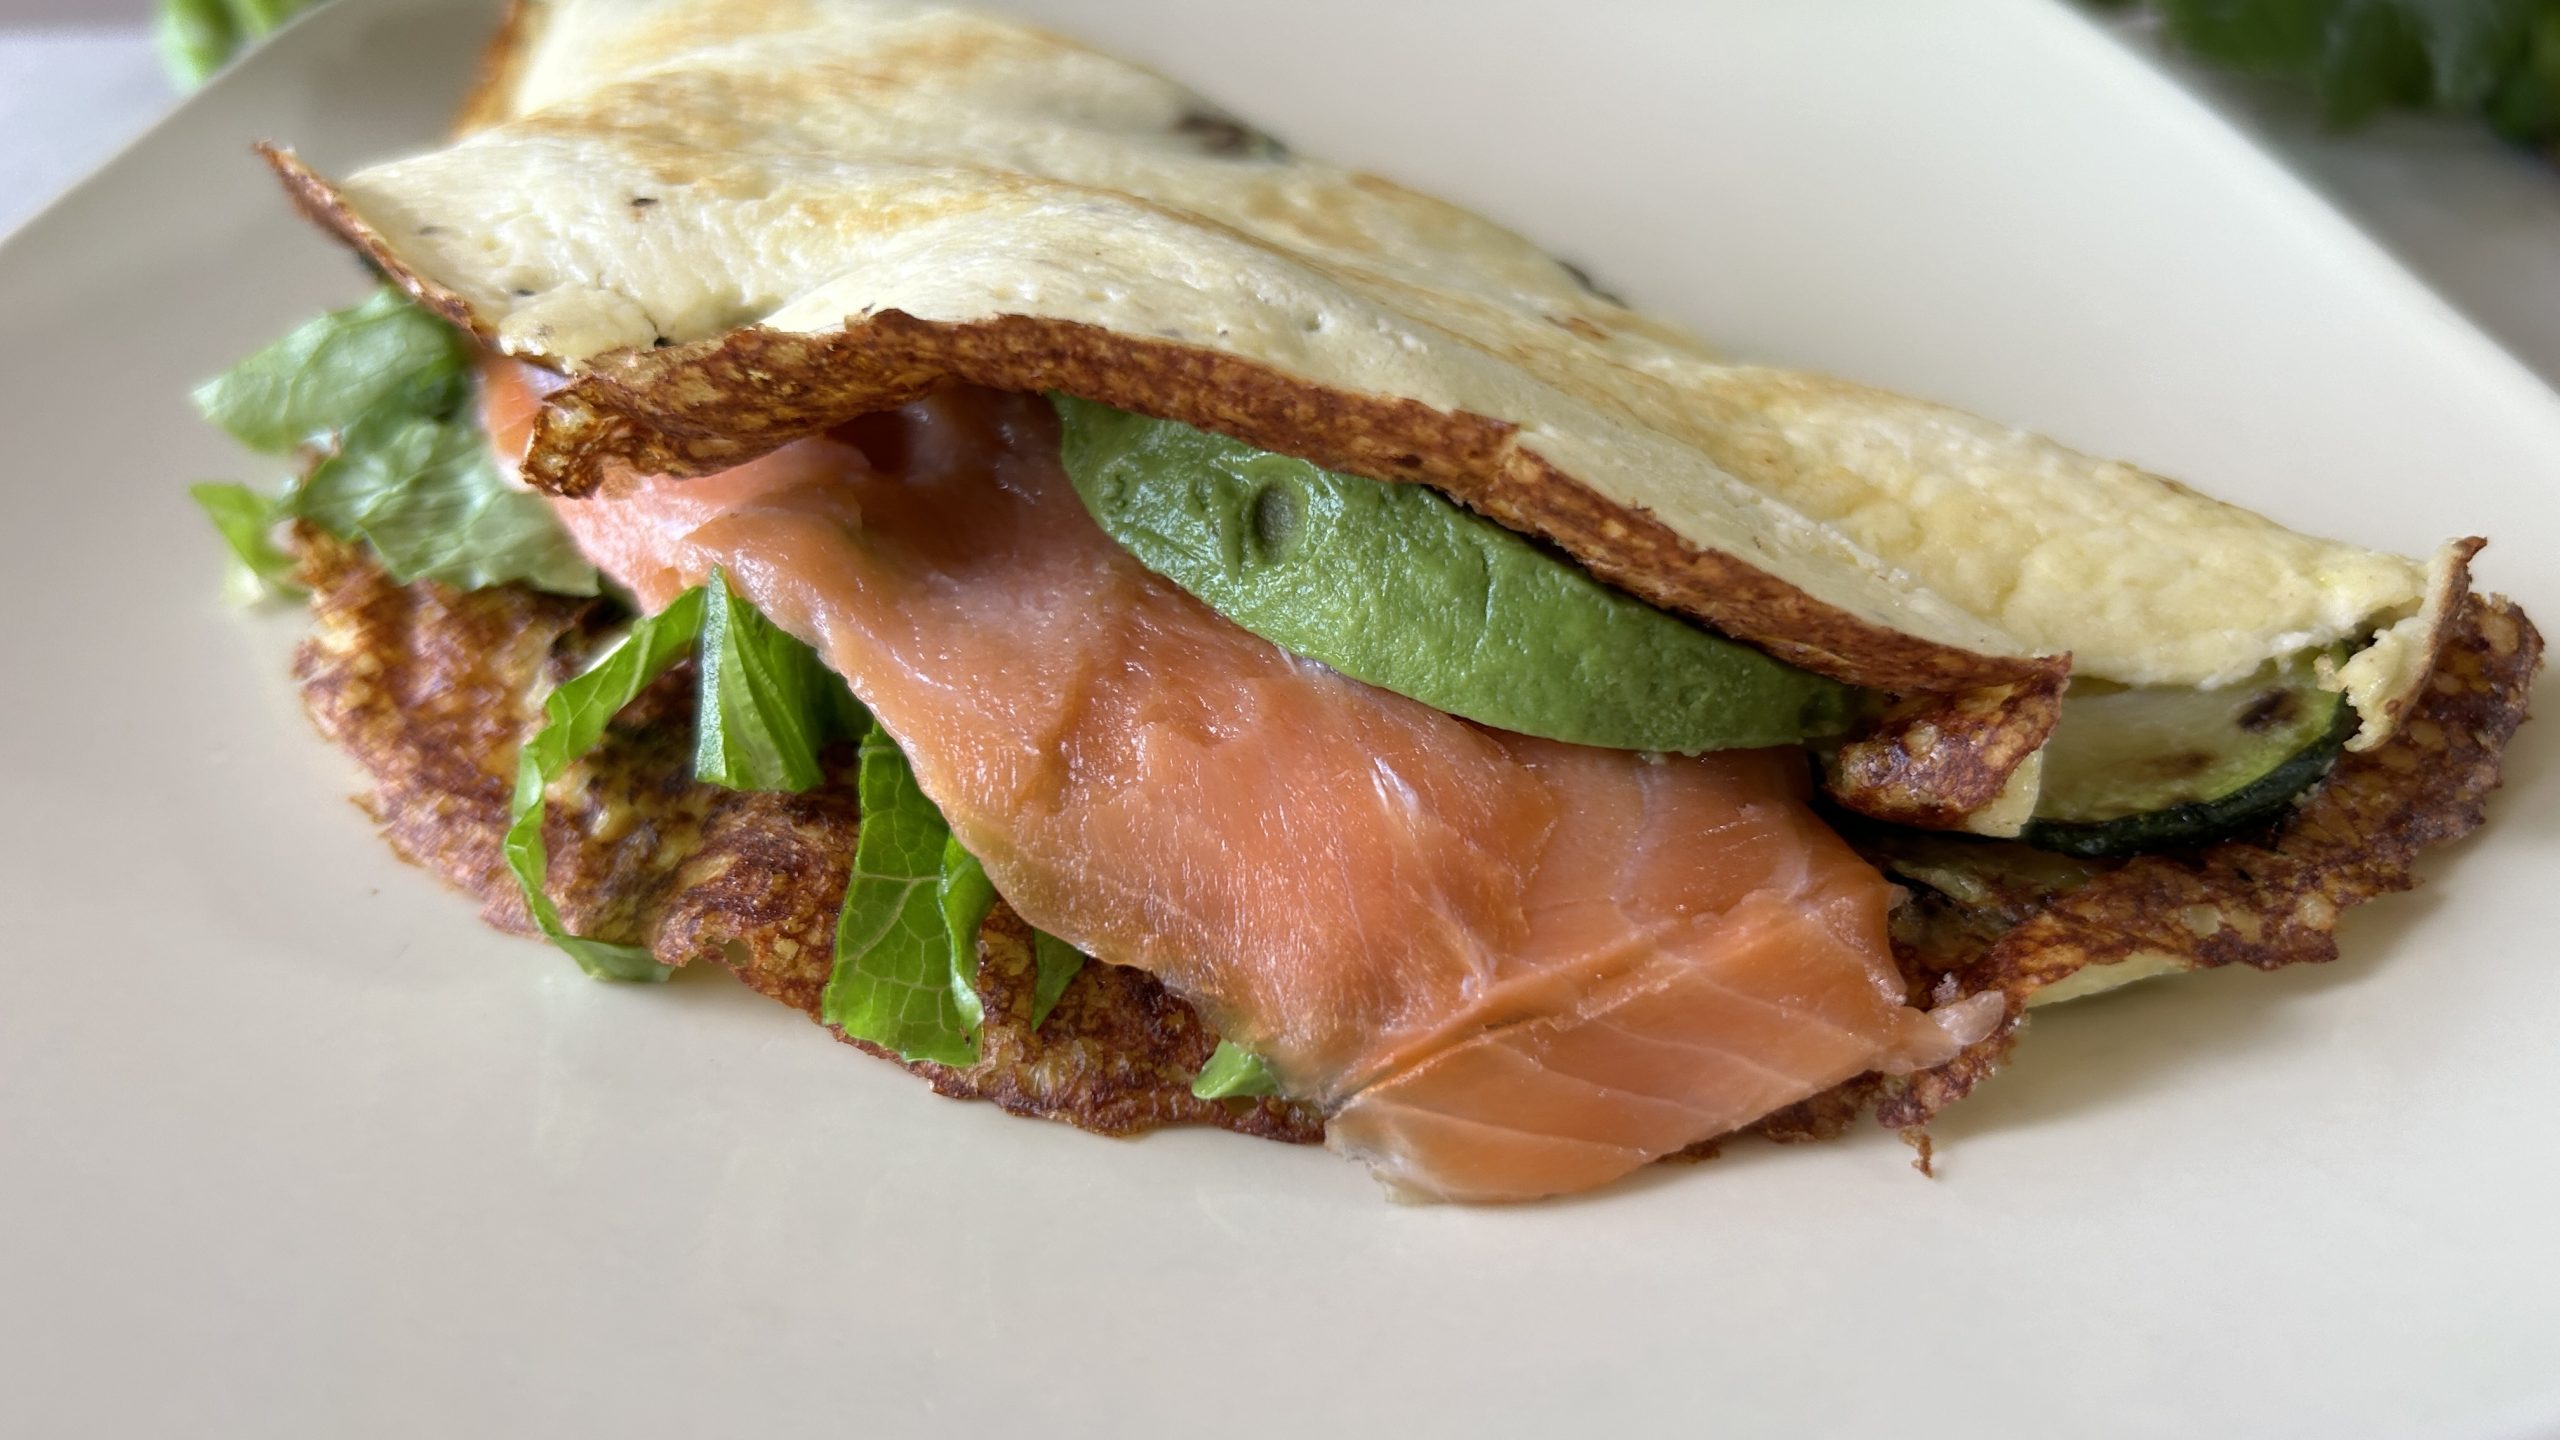
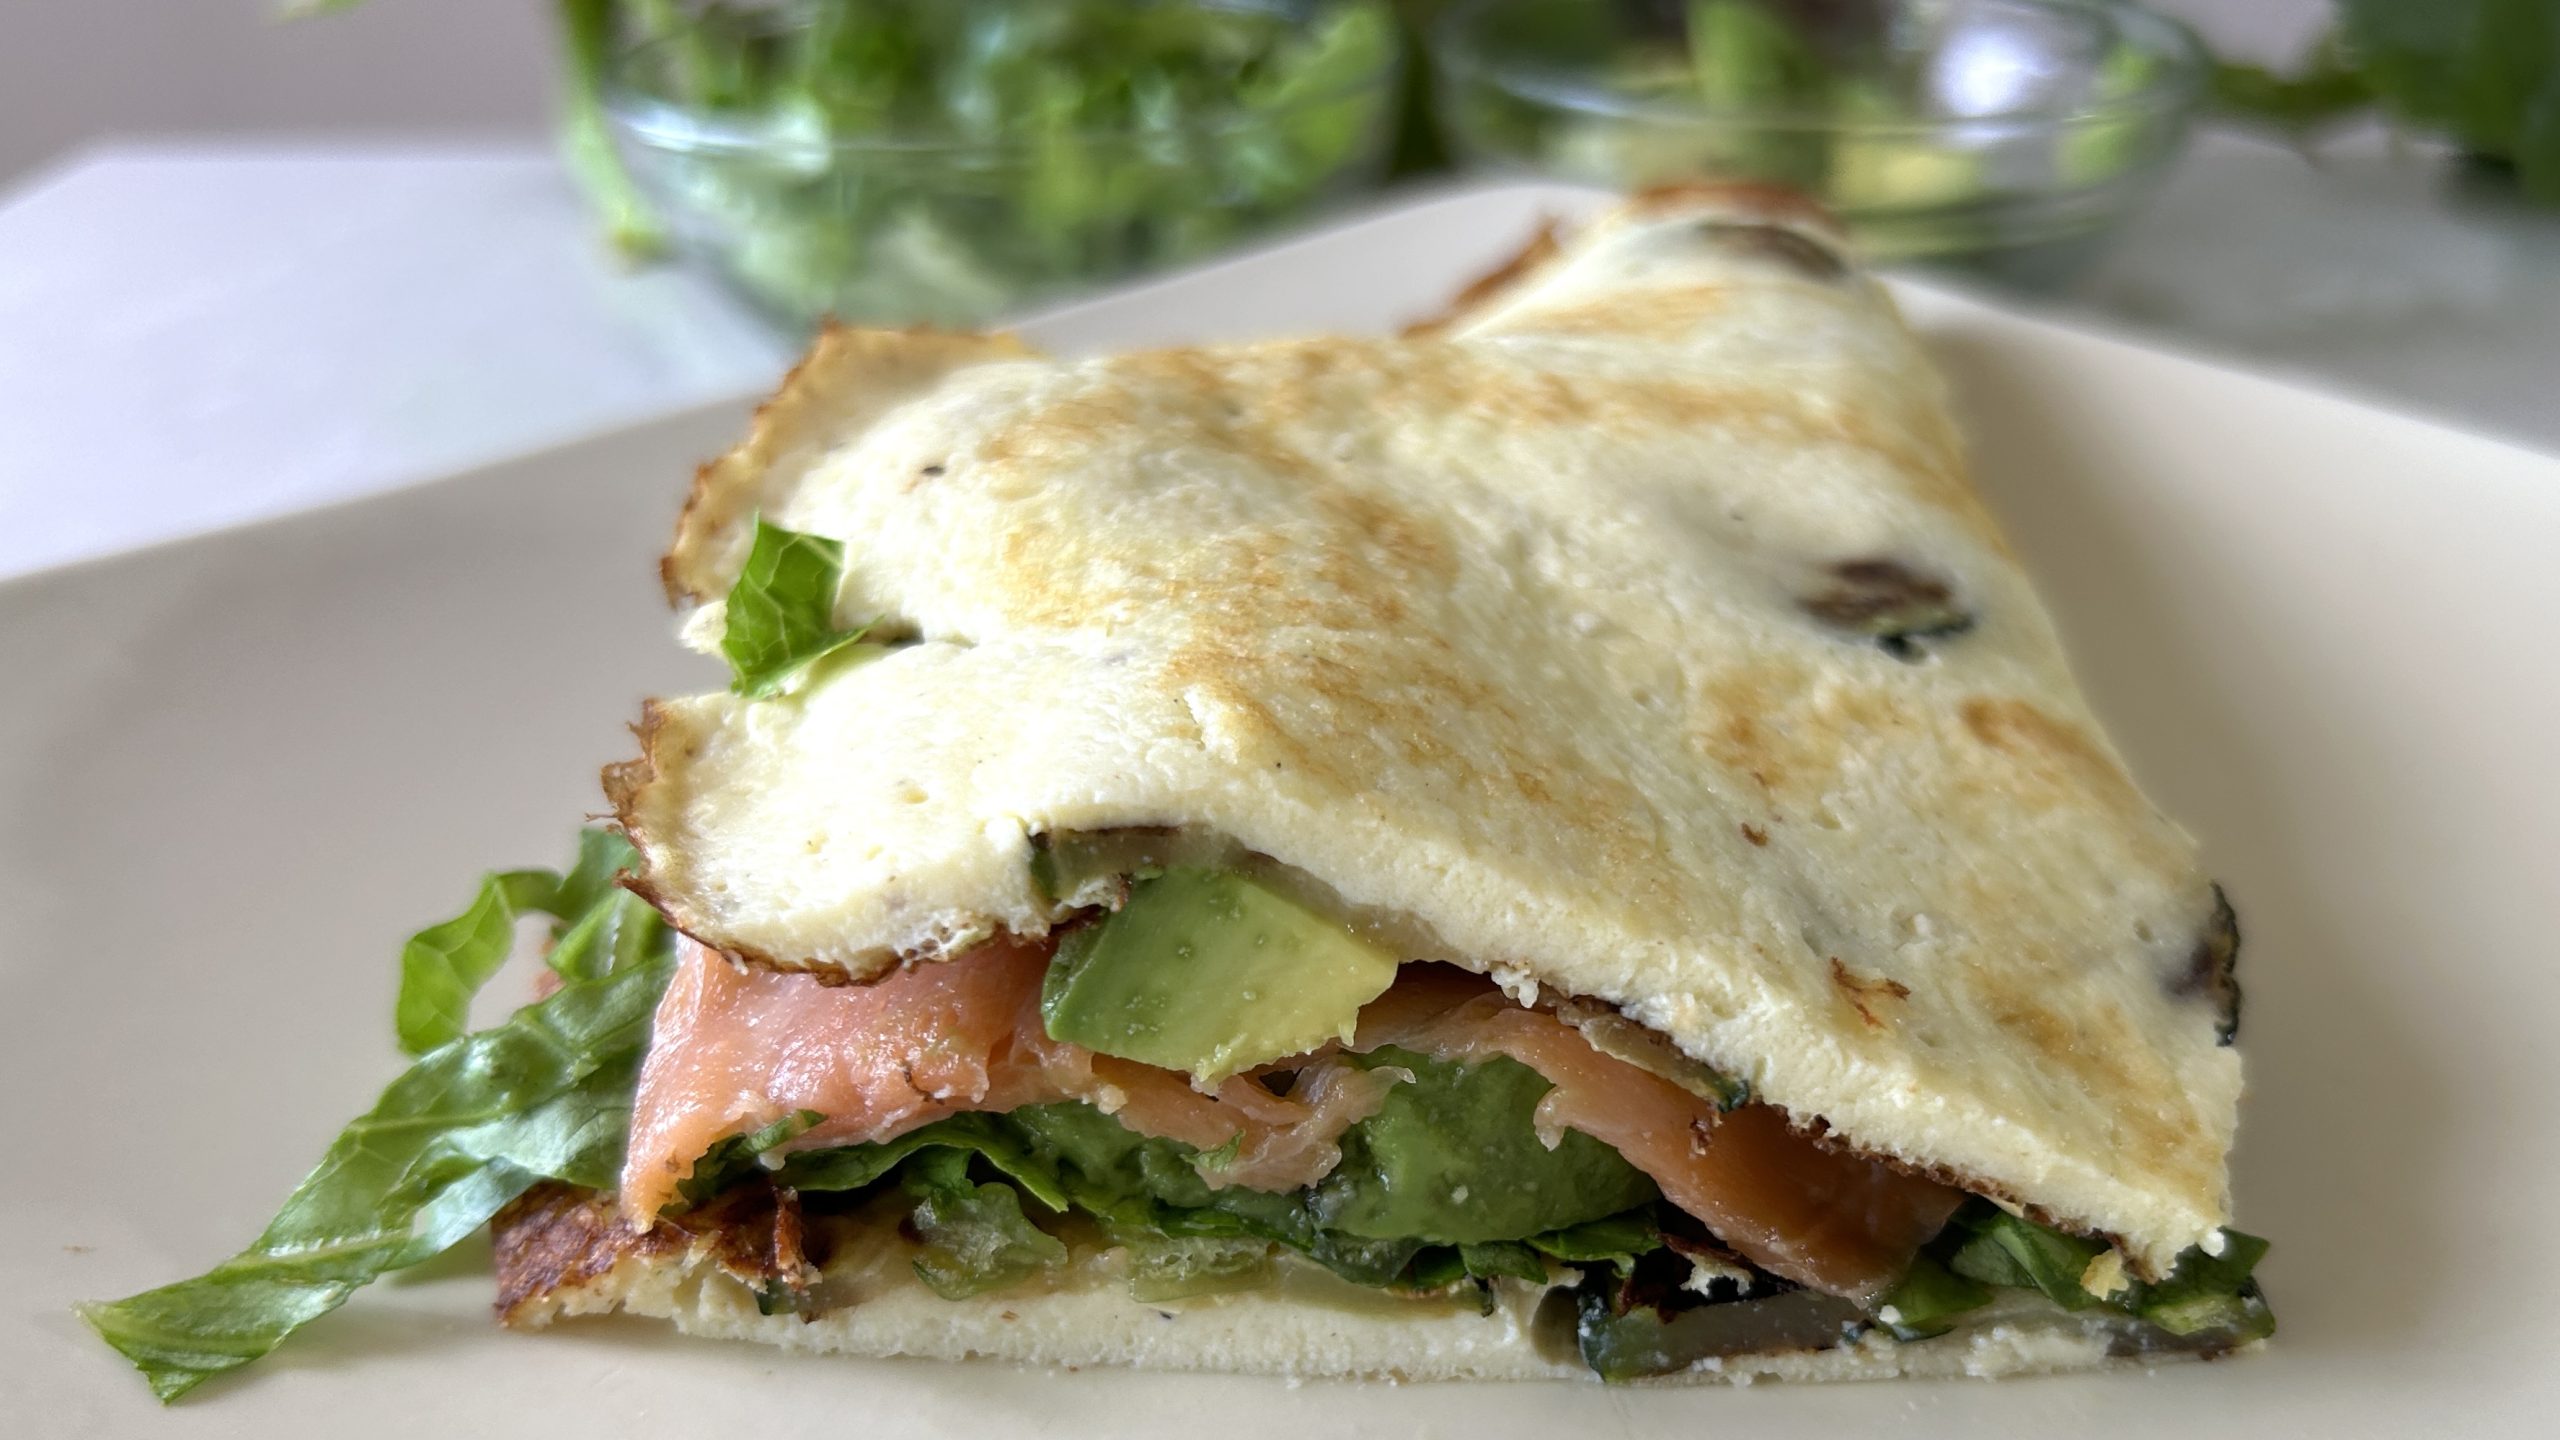
- 20 g lettuce
- 25 g avocado
- 30 g smoked salmon
Directions
- Slice the zucchini and cook it in a pan with half of the olive oil for 2-3 minutes.
- Flip the zucchini, brush with the remaining oil, and cook for another minute.
- In a mixing bowl, blend the cottage cheese, eggs, salt, and black pepper. Use a hand blender to make it smooth.
- Pour the mixture over the zucchini, cover the pan, and cook over low-medium heat for 3-4 minutes or until the top side is set.
- Flip the flatbread or wrap and cook the other side uncovered for 1-2 minutes.
- Layer the lettuce, avocado, and smoked salmon on one side of the wrap.
- Fold the other half over the filling to create the wrap.
- Serve immediately and enjoy!
Prep Time & Cooking Information
- Prep time: 15 minutes
- Pan cooking time: 15 minutes
- Servings: 1 wrap
Nutritional Information (per serving)
- Energy: 449 calories
- Protein: 31.63 g
- Fat: 32.79 g
- Carbohydrates: 7.49 g
- Fiber: 2.7 g
Storage & Recommendations
- Best enjoyed fresh, but leftovers can be stored in an airtight container in the fridge for up to 24 hours.
- For variety, feel free to add your favorite fillings such as spinach, tomatoes, or feta for a twist.


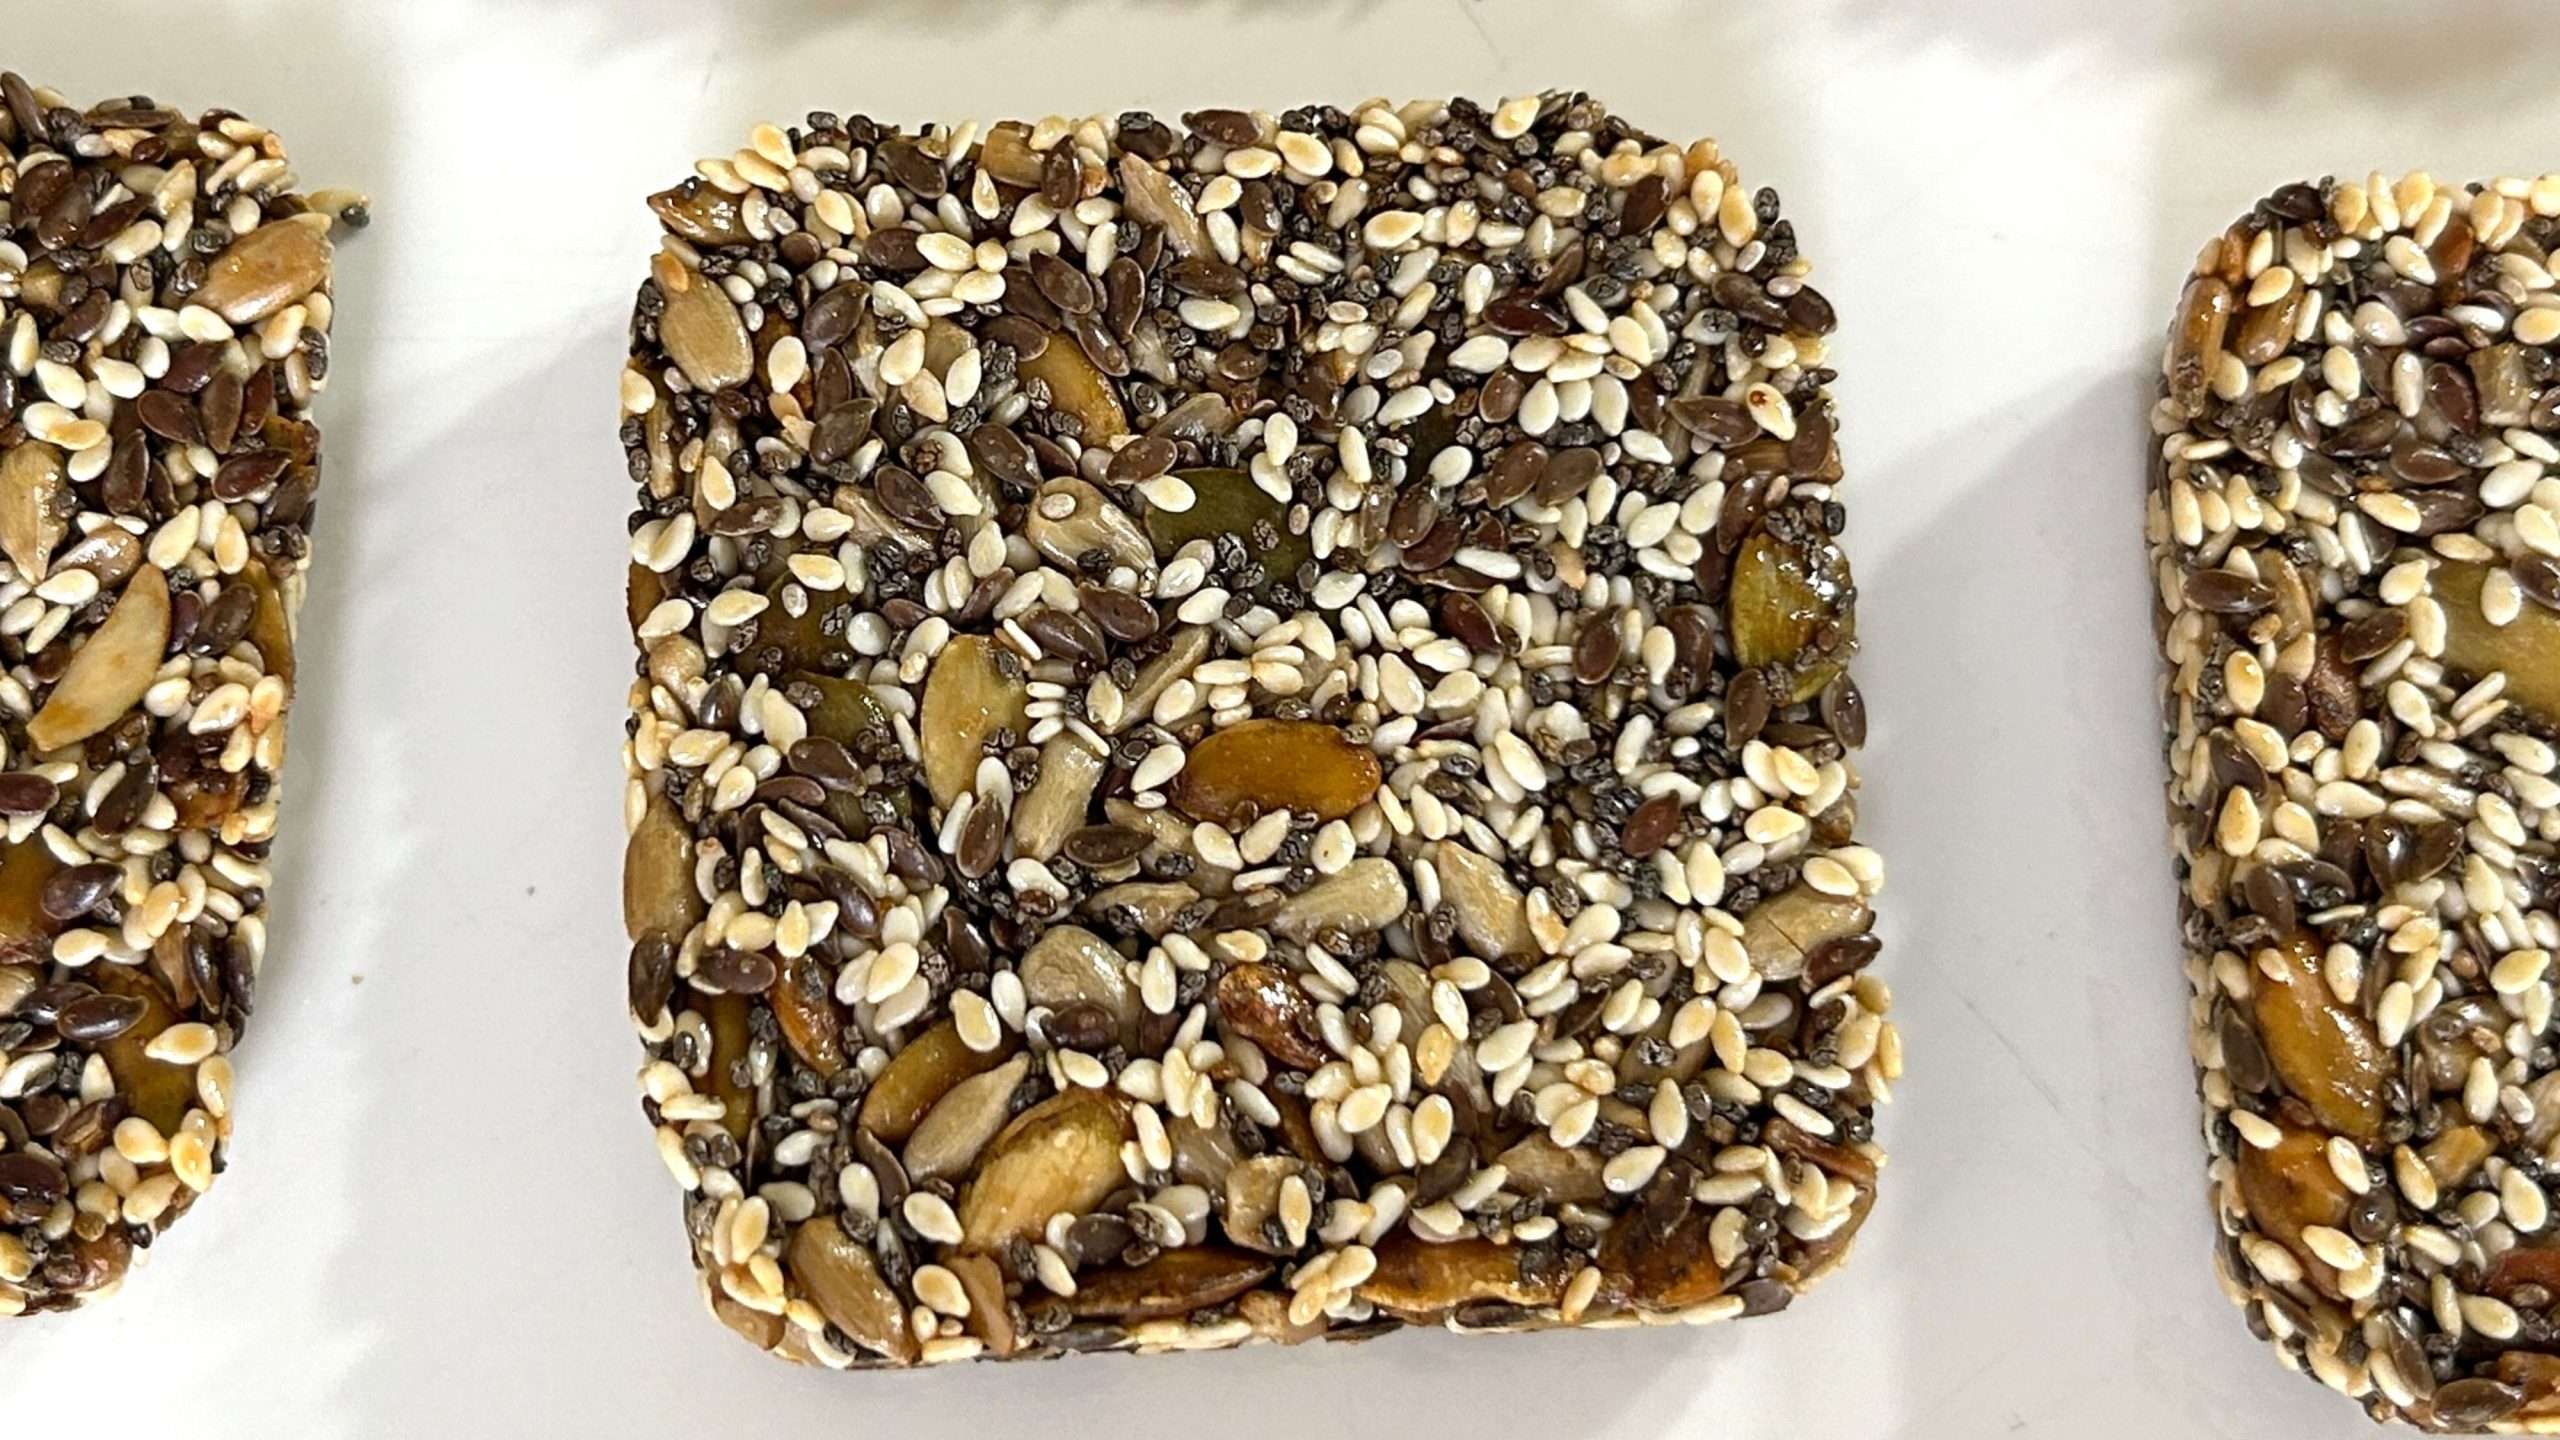
 Let’s take a closer look at the benefits of each seed in this recipe: