Burnt Basque Cheesecake

Burnt Basque Cheesecake

Burnt Basque Cheesecake

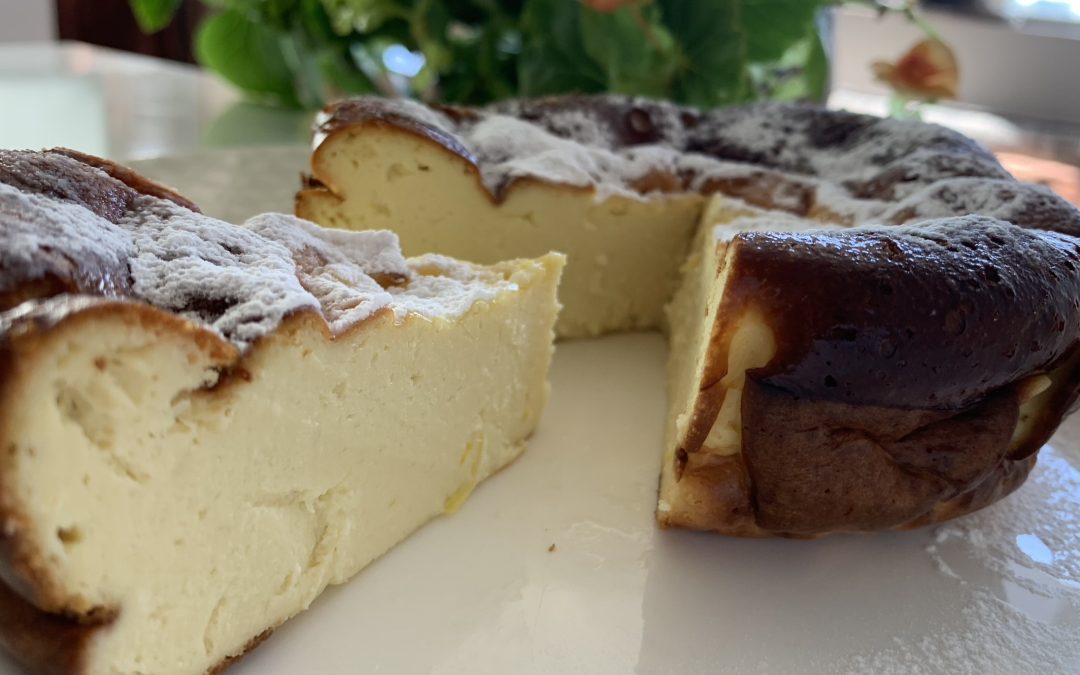
Indulge in the creamy, melt-in-your-mouth goodness of this lighter version of the popular burnt Basque cheesecake. This culinary masterpiece is surprisingly easy to make and delivers a taste that’s out of this world. Whether you’re serving it at a dinner party or enjoying a slice on a cozy afternoon, this cheesecake is sure to impress.

Not only is this dessert a delight for your taste buds, but it’s also a great source of protein and calcium, thanks to the cream cheese and eggs. These ingredients play a crucial role in bone health and muscle maintenance, making this cheesecake a somewhat nutritious treat when enjoyed in moderation.

The use of maple syrup as a sweetener adds a touch of natural sweetness without the refined sugars, offering a slightly healthier alternative to traditional desserts.

Ingredients

  • 300 g cream cheese
  • 3 eggs
  • ¼ cup maple syrup (or any other sweetener of your choice)
  • 2 tbsp. or 15 g cornstarch
  • Zest of one lemon

Directions

  1. Preheat your oven to 365°F (185°C) and line a baking pan with parchment paper.
  2. In a mixing bowl, combine the cream cheese kept at room temperature and eggs. Use a hand mixer to whisk vigorously until the mixture is smooth and creamy.
  3. Add maple syrup, cornstarch, and the zest of a lemon to the cream cheese mixture. Mix again until all ingredients are fully combined.
  4. Pour the creamy batter into the prepared baking pan. Bake the cheesecake in the preheated oven for 40 to 50 minutes, depending on your preferred texture.
  5. Keep an eye on it; you want the top to turn golden brown, almost burned, and the edges to set.
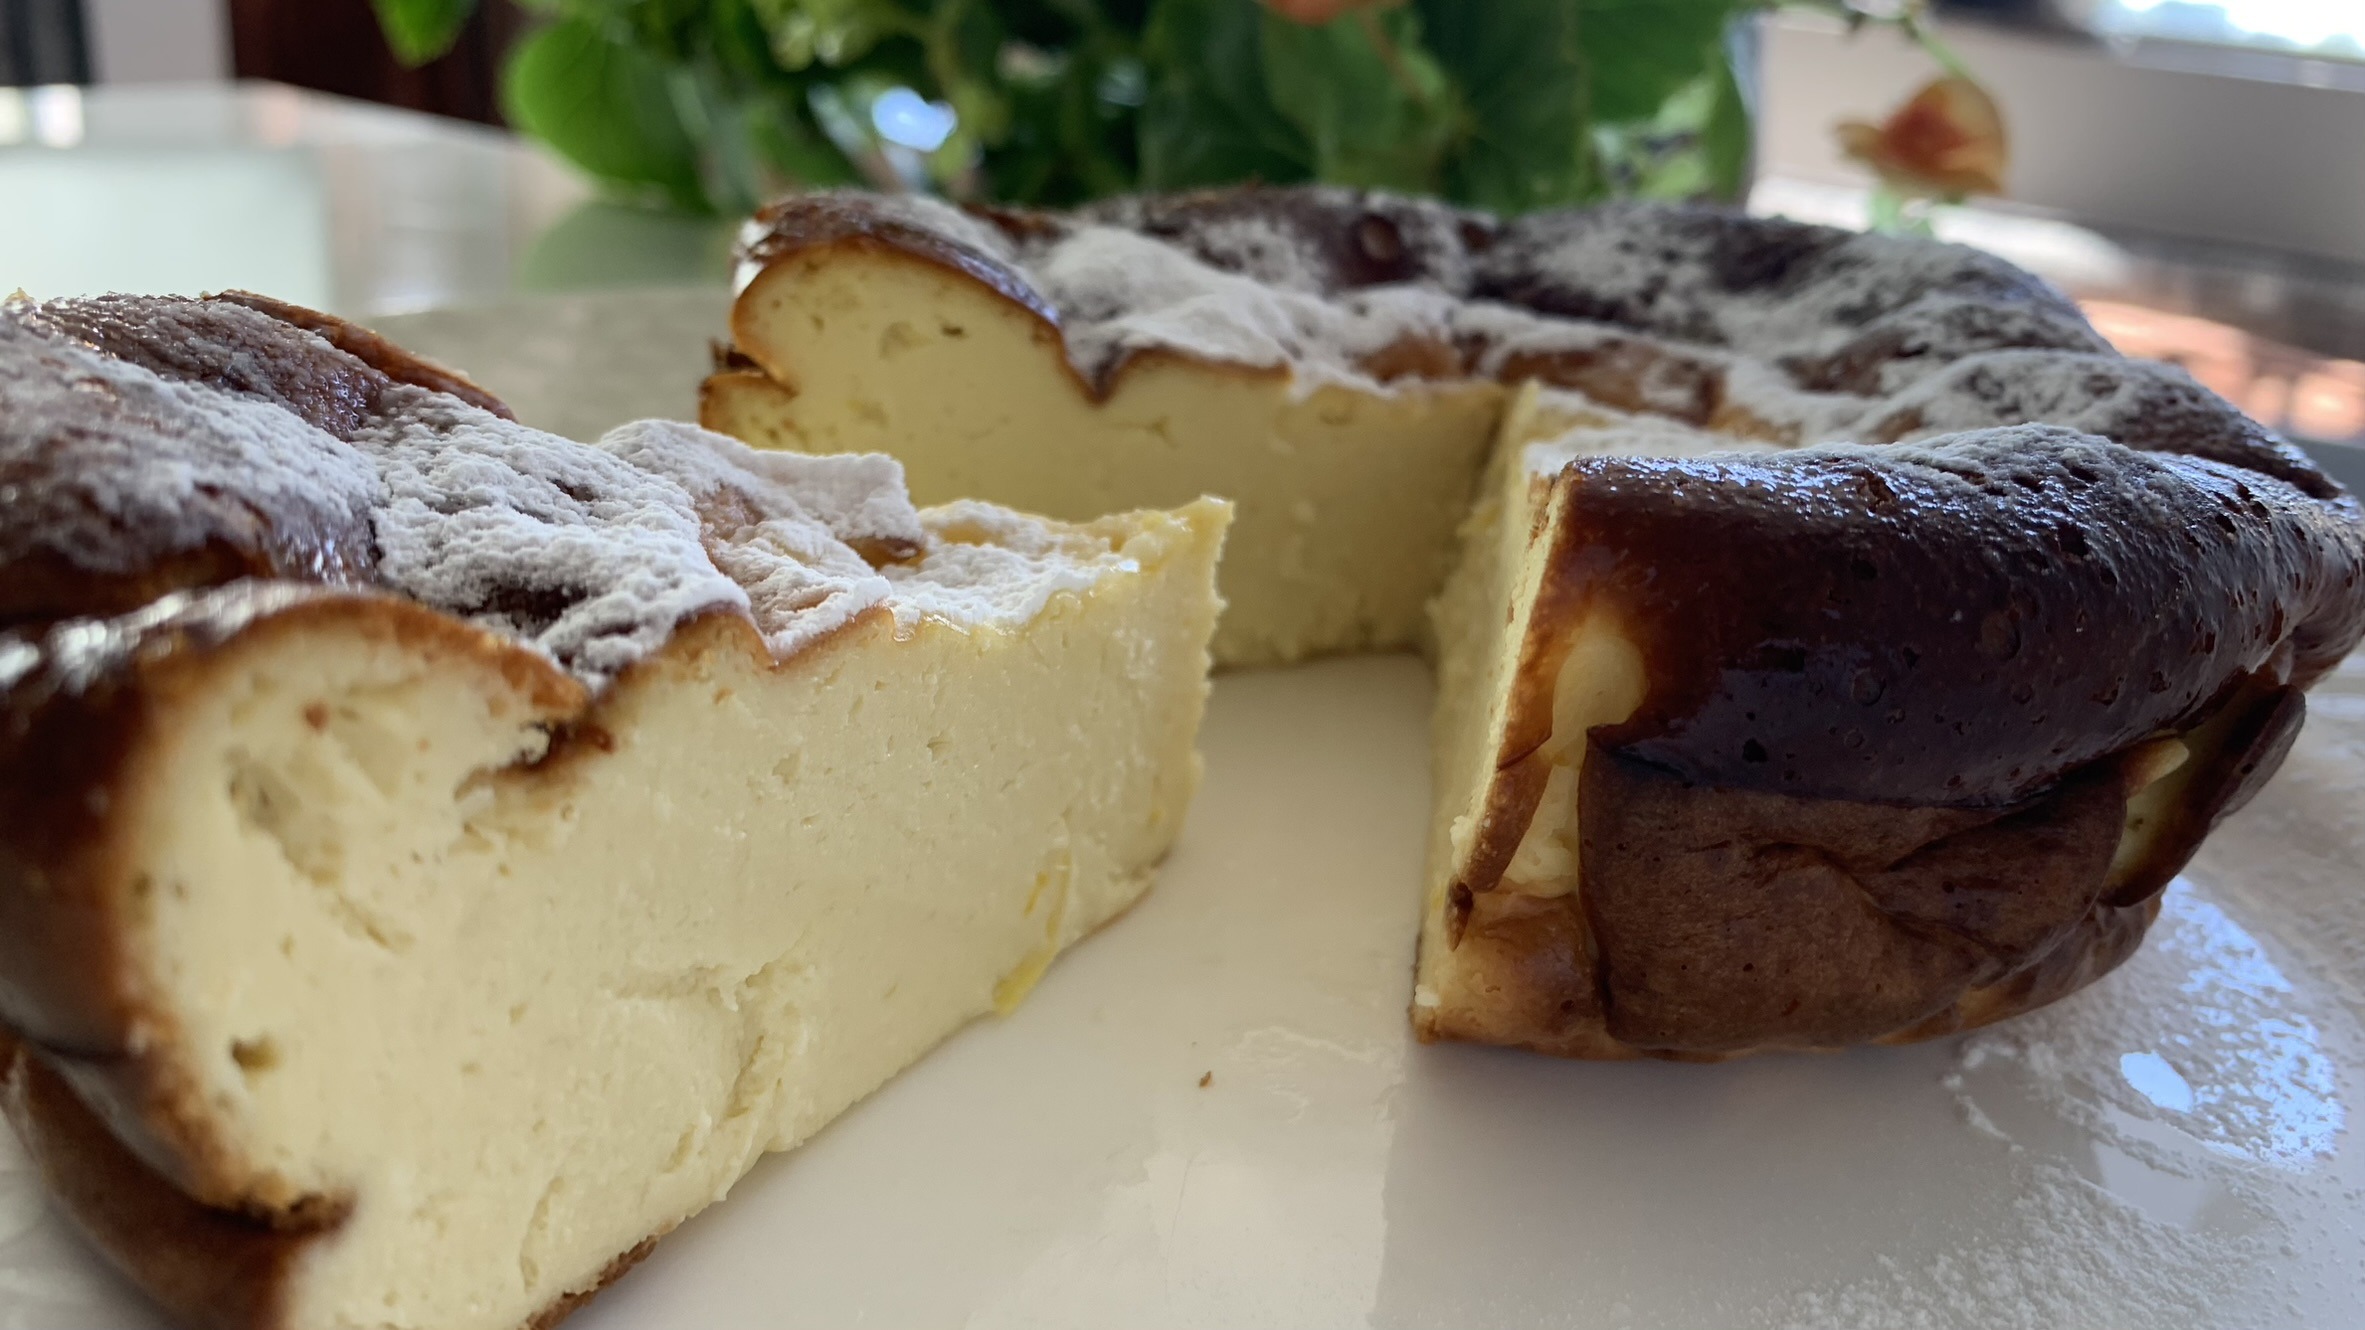
  6. Once done, remove the cheesecake from the oven and let it cool. It will deflate substantially, which is perfectly normal.
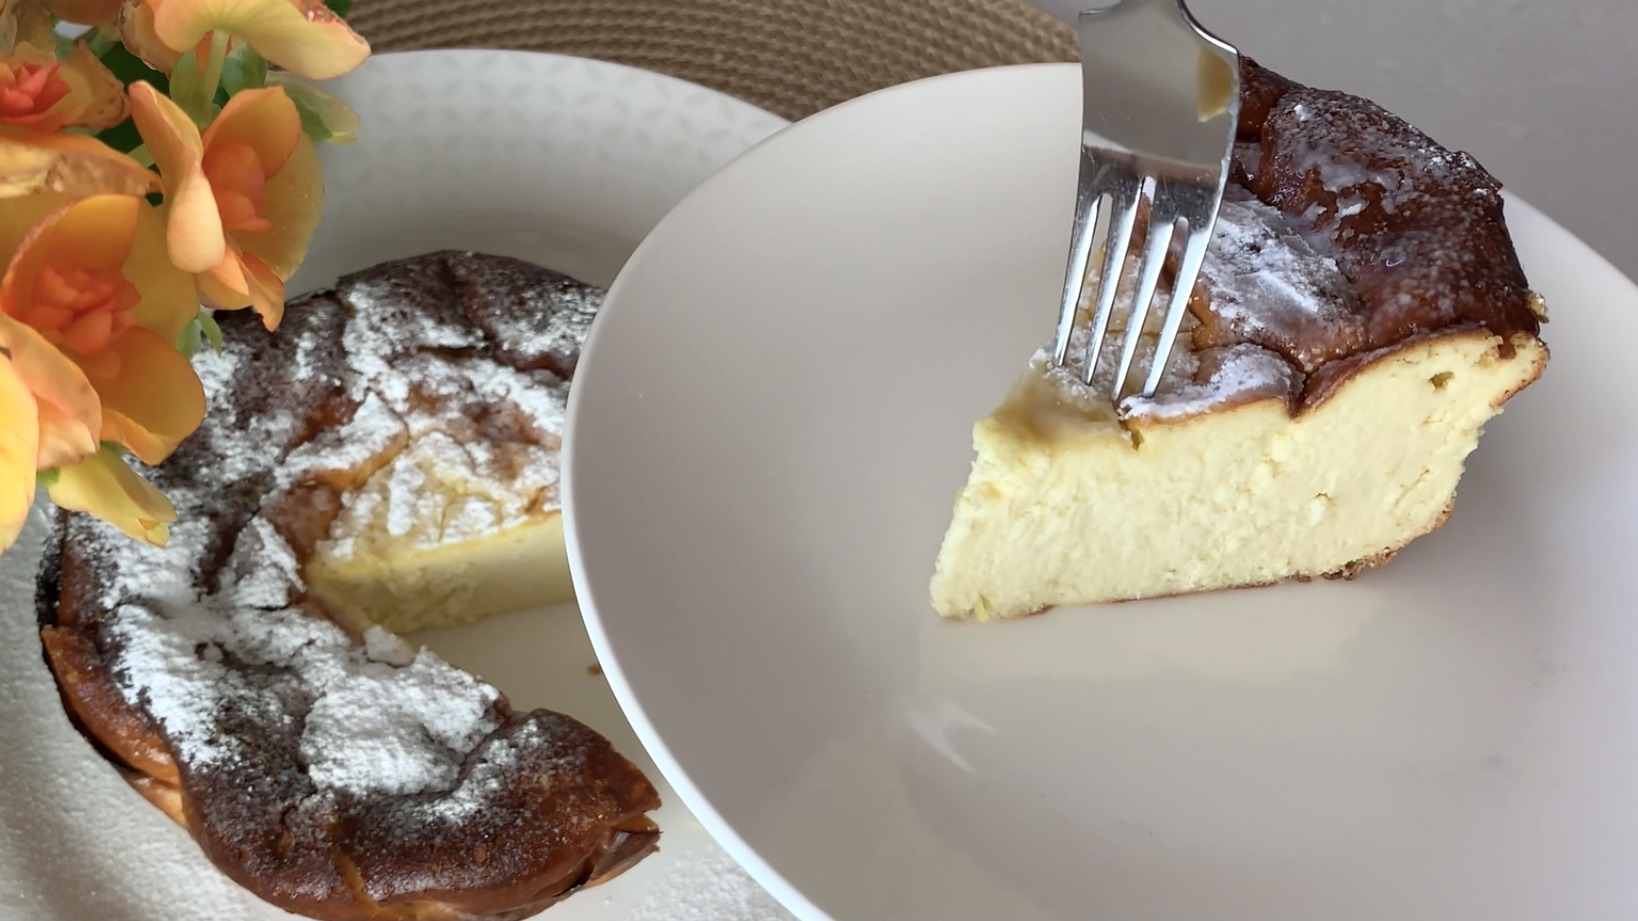
  7. If desired, sprinkle powdered sugar over the top for a nice finish.
  8. Carefully cut into slices, serve, and savor the creamy, tangy, and sweet flavors of your homemade Cheesecake Basque.

Prep Time

  • 20 minutes

Baking Time

  • 45 minutes

Servings

  • 4 servings

Nutritional Information (Per 1 Serving)

  • Energy: 340 calories
  • Protein: 10.05 g
  • Fat: 25.03 g
  • Carbohydrates: 19.52 g
  • Fiber: 0 g

Storage and Recommendations

Store your leftover Basque cheesecake in an airtight container in the refrigerator for up to 3 days. Garnish with fresh berries or any other healthy garnishes of your preference for an added burst of flavor and color.

Carrot Walnut Salad

Carrot Walnut Salad

Carrot Walnut Salad

If you’re looking for a salad that’s both nutritious and bursting with flavor, you’ve come to the right place. This Carrot & Walnut Salad combines the natural sweetness of carrots with the crunch of walnuts and the tangy burst of citrus from freshly squeezed orange juice. Not only is this salad a joy to eat, but it’s also packed with nutrients that are fantastic for your health.

Carrots, the star of this dish, are a powerhouse of beta-carotene, which your body converts into vitamin A, essential for maintaining good vision, a strong immune system, and glowing skin. Walnuts, on the other hand, are loaded with heart-healthy fats, protein, and antioxidants that can help reduce inflammation and promote brain health. When you bring these ingredients together, you have a salad that’s not just delicious but also a great way to support your overall well-being. Add this salad to your regular diet for a tasty boost of essential nutrients!

This recipe makes a deliciously fresh and crunchy salad that’s perfect as a side dish or a light main course. Enjoy the vibrant flavors and the health benefits with every bite!

Ingredients

  • 400 g raw and shredded carrots
  • ⅓ cup or 50 g dried raisins
  • 60 g sliced green onion
  • 1 orange (we’ll use the juice to hydrate the raisins and add to the vinaigrette)
  • ⅓ cup or 35 g raw walnuts
  • 2 tbsp. olive oil
  • 2 tbsp. apple cider vinegar
  • 3 tbsp. orange juice
  • ½ tsp. salt
  • Black pepper to taste

Directions

  1. Start by juicing an orange. Take the juice and add it to the raisins to hydrate them. Let sit while you start shredding the carrots using a hand grater or food processor and chopping the green onion. Chop the walnuts into large chunks and set aside.
  2. In a large mixing bowl, add shredded carrots, chopped onion, and the drained raisins (from the orange juice). Stir well to combine all the ingredients.
  3. Prepare the vinaigrette by adding olive oil, apple cider vinegar, the orange juice from the raisins, salt, and black pepper to a jar. Mix well to combine.
  4. Pour the vinaigrette on top of the salad mixture and mix well to combine all the ingredients.
  5. Place the salad into a serving plate, garnish with walnut chunks, and enjoy fresh.

Prep Time

  • 30 minutes

Nutrition (Per 1 Serving)

  • Energy: 302 calories
  • Protein: 4.16 g
  • Fat: 12.83 g
  • Carbohydrates: 25.61 g
  • Fiber: 4.8 g

Storage and Notes

  • It’s best to enjoy your carrot salad while still fresh. If you have leftovers, store them in an airtight container in the fridge for up to 2 days.
  • Customize the salad by adding other ingredients like dried cranberries or seeds for added flavor and texture!


Corn Soup

Corn Soup

Corn Soup

Capture the essence of summer with this delightful and creamy corn soup! This recipe offers a healthy twist on the classic corn cream soup, using wholesome ingredients and no cream or butter. It’s the perfect blend of simplicity and taste, making it a hit with both kids and adults alike.

Corn, the star ingredient of this recipe, is not only delicious but also packed with nutrients. Rich in fiber, vitamins, and minerals, corn supports digestive health and provides a good source of energy. It’s particularly high in Vitamin B6, which plays a crucial role in energy metabolism, and folate, which is essential for cell function and tissue growth. Additionally, corn is loaded with antioxidants, particularly lutein and zeaxanthin, which are beneficial for eye health. Incorporating corn into your diet can help keep your meals nutritious while satisfying your taste buds.

Now, let’s dive into this comforting and flavorful corn soup!

Ingredients:

  • 2 cups (275 g) fresh or frozen corn
  • 200 g diced potato
  • 120 g sliced leeks
  • 80 g diced onion
  • 2 cloves garlic
  • 2 tbsp. olive oil
  • 3 cups homemade chicken broth (or vegetable broth)
  • 25 g fresh parsley, for garnish
  • 1 tsp. salt
  • Black pepper, to taste

Directions:

  1. Start by heating olive oil in a large saucepan over medium-high heat.
  2. Add the diced onions, sliced leeks, and sliced garlic. Sauté until the vegetables become translucent and fragrant.
  3. Incorporate the fresh or frozen corn and diced potatoes into the pot. Season the mixture with salt and black pepper. Continue sautéing for an additional 2 to 3 minutes, allowing the flavors to meld.
  4. Pour in homemade or store-bought chicken or vegetable broth, bring the soup to a gentle simmer. Allow it to simmer for approximately 30 minutes, allowing the ingredients to tenderize and the flavors to develop.
  5. Blend the soup to a smooth and velvety cream consistency.
  6. Optionally, blend one cup of the creamy base with a generous amount of fresh parsley to create a vibrant green parsley soup for garnish.
  7. To serve, ladle the creamy corn soup into serving plates. Swirl a dollop of the green parsley soup on top of each serving, creating a visually stunning contrast of colors.

Prep Time:

  • 30 minutes Prep
  • 30 minutes Simmering

Nutritional Information (Per 1 Serving):

  • Energy: 204 calories
  • Protein: 4.16 g
  • Fat: 7.49 g
  • Carbohydrates: 33.79 g
  • Fiber: 4 g

Storage:

  • Store any leftover corn soup in an airtight container in the fridge for up to 3 days.

Notes:

  • Customize the soup by adding other seasonal vegetables or herbs according to your taste preferences.
  • This recipe is vegetarian and can easily be made vegan by using vegetable broth instead of chicken broth.


Almond Oat Cookies

Almond Oat Cookies

Almond Oat Cookies

Are you craving something sweet but want to keep it healthy? Let me introduce you to these delightful Almond Oat Cookies! These cookies are not just any cookies; they’re eggless, gluten-free, and made with wholesome ingredients that will satisfy your sweet tooth while nourishing your body. The combination of oat flour and almonds creates a nutty, hearty flavor that pairs perfectly with the hint of vanilla and the sweetness of maple syrup.

Oats, the star of this recipe, are a nutritional powerhouse. They are rich in fiber, particularly beta-glucan, which helps reduce cholesterol levels and supports heart health. Oats are also a great source of vitamins, minerals, and antioxidants, making them a fantastic addition to your daily diet. Adding these cookies to your snack rotation is an easy and delicious way to boost your intake of essential nutrients while enjoying a treat that feels indulgent.

Whether you’re looking for a quick snack, a lunchbox treat, or a guilt-free dessert, these Almond Oat Cookies are sure to become a household favorite. Plus, they’re super customizable, add your favorite nuts, dried fruits, or even some dark chocolate chips to make them uniquely yours!

Ingredients

  • 1 ½ cups (120 g) oat flour
  • 60 g room temperature dairy or non-dairy butter
  • 50 g (~⅓ cup) chopped almonds
  • ⅓ cup maple syrup
  • Pinch of salt
  • ½ teaspoon vanilla extract
  • 1 teaspoon baking powder
  • 30 g dark chocolate chips (optional for garnish)

Directions

  1. Preheat your oven to 350°F (175°C) and line a baking sheet with parchment paper.
  2. In a bowl, mix oat flour and room temperature butter until crumbly, using clean hands or a spatula.
  3. Add chopped almonds, a pinch of salt, vanilla extract, and baking powder to the bowl. Gradually pour in maple syrup while mixing, creating a slightly sticky dough.
  4. Let the dough rest in the fridge for about half an hour to harden and make it easier to shape into cookies.
  5. After chilling, shape the dough into large (or preferred size) cookies and gently press dark chocolate chips onto each cookie.
  6. Place the cookies on the prepared baking sheet and bake for about 30 minutes at 350°F or until the edges turn golden brown.
  7. Allow the cookies to cool slightly on the baking sheet before serving.

Prep Time

  • 20 minutes Prep
  • 30 minutes in the Fridge
  • 35 minutes Baking

Nutritional Information (Per 1 Serving)

  • Energy: 207 calories
  • Protein: 6.71 g
  • Fat: 6.94 g
  • Carbohydrates: 29.69 g
  • Fiber: 1.5 g

Storage and Recommendation

  • Store your cookies in an airtight container at room temperature for up to 3 days or in the fridge for 1 week.
  • Customize your cookies by adding dried fruits or different types of nuts for added flavor and texture.
Red Lentil Savory Muffins

Red Lentil Savory Muffins

Red Lentil Savory Muffins

Today, I’m super excited to share with you a recipe that has become a staple in my kitchen, Red Lentil Savory Muffins. These muffins are the perfect blend of nutritious and delicious, making them a go-to snack or meal addition. Whether you’re packing lunch for work, prepping snacks for the kids, or just need a quick, wholesome bite, these muffins have got you covered!

But before we dive into the recipe, let’s talk about the star of the show, red lentils. Red lentils are not only quick-cooking and versatile, but they’re also packed with protein, fiber, vitamins, and antioxidants. Including red lentils in your diet can help improve digestion, support heart health, and provide a steady source of energy throughout the day. Plus, they’re naturally gluten-free and low in fat, making them an excellent choice for anyone looking to maintain a balanced diet.

These Red Lentil Savory Muffins are not just a tasty treat; they’re a nutritious powerhouse packed with plant-based protein and essential nutrients. Perfect for meal prep or a quick snack, they’re bound to become a favorite in your household just as they are in mine.

So, let’s embrace the goodness of lentils with these easy and tasty muffins!

Ingredients:

  • 1/2 cup raw red lentils
  • 1 egg
  • 1/4 cup plain yogurt (or Greek yogurt or sour cream)
  • 80 g shredded carrot
  • 30 g diced red pepper
  • 20 g diced green onion
  • 2 tablespoons olive oil
  • 1 tsp. baking powder
  • 1/2 tsp. salt
  • Ground black pepper, to taste

Directions:

  1.  Start by soaking the red lentils for at least 6 hours or overnight in the refrigerator. This step is crucial to ensure the lentils are soft and blend smoothly into the batter.
  2.  Once soaked, rinse the lentils thoroughly under running water and drain them well.
  3.  In a blender or using a hand blender, combine the drained red lentils, egg, and plain yogurt. Blend until smooth and creamy.
  4. Transfer the lentil mixture to a mixing bowl. Add in the shredded carrot, diced red pepper, diced green onion, olive oil, salt, ground black pepper, and baking powder. Stir everything together until well combined.
  5. Spoon equally sized portions of the batter into silicone cups or high-quality cupcake liners. Lentil batter tends to stick easily, so using non-stick or silicone molds is recommended.
  6. Place the muffin tray in a preheated oven and bake at 365°F (185°C) for about 35 minutes or until the muffins turn golden brown and a toothpick inserted into the center comes out clean.
  7.  Remove the muffins from the oven, allow them to cool for a bit, and then enjoy!

Nutritional Information (Per Serving):

  • Energy: 124 calories
  • Protein: 5.45 g
  • Fat: 6.02 g
  • Carbohydrates: 12.81 g
  • Fiber: 2.3 g

Storage and Tips:

  • Storage: Store your savory lentil muffins in an airtight container in the fridge for up to 1 week or in the freezer for up to 3 months. Reheat them in the oven or microwave before serving.
  • Customization: Feel free to experiment with different vegetable combinations to customize the flavor of your muffins. You could add some spinach, zucchini, or even a bit of cheese for extra richness.