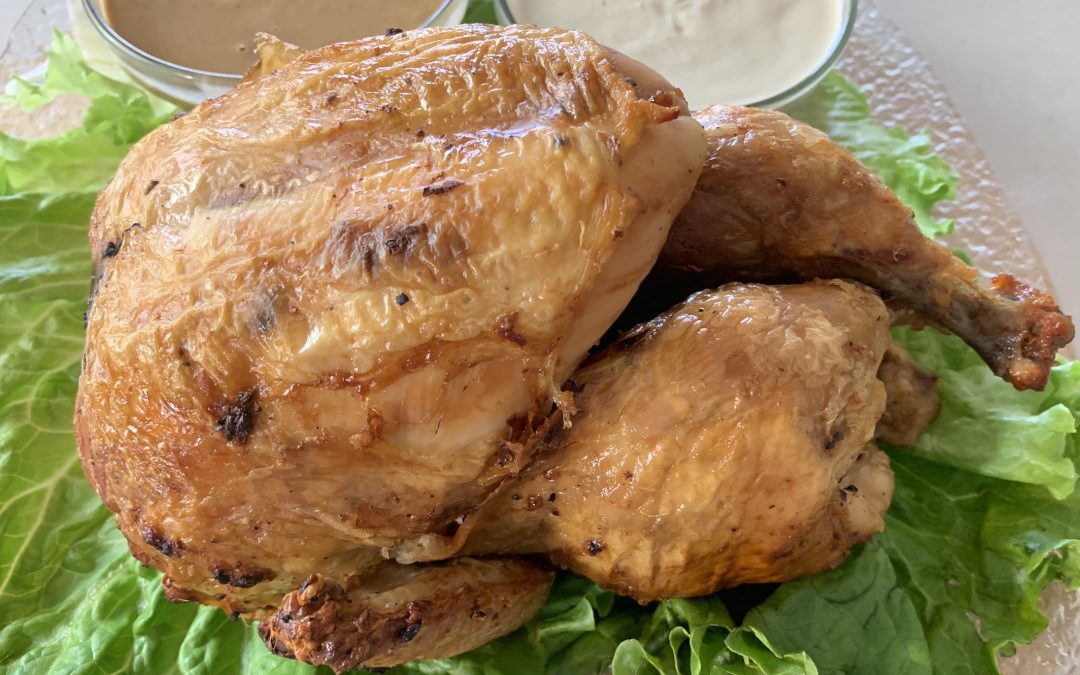
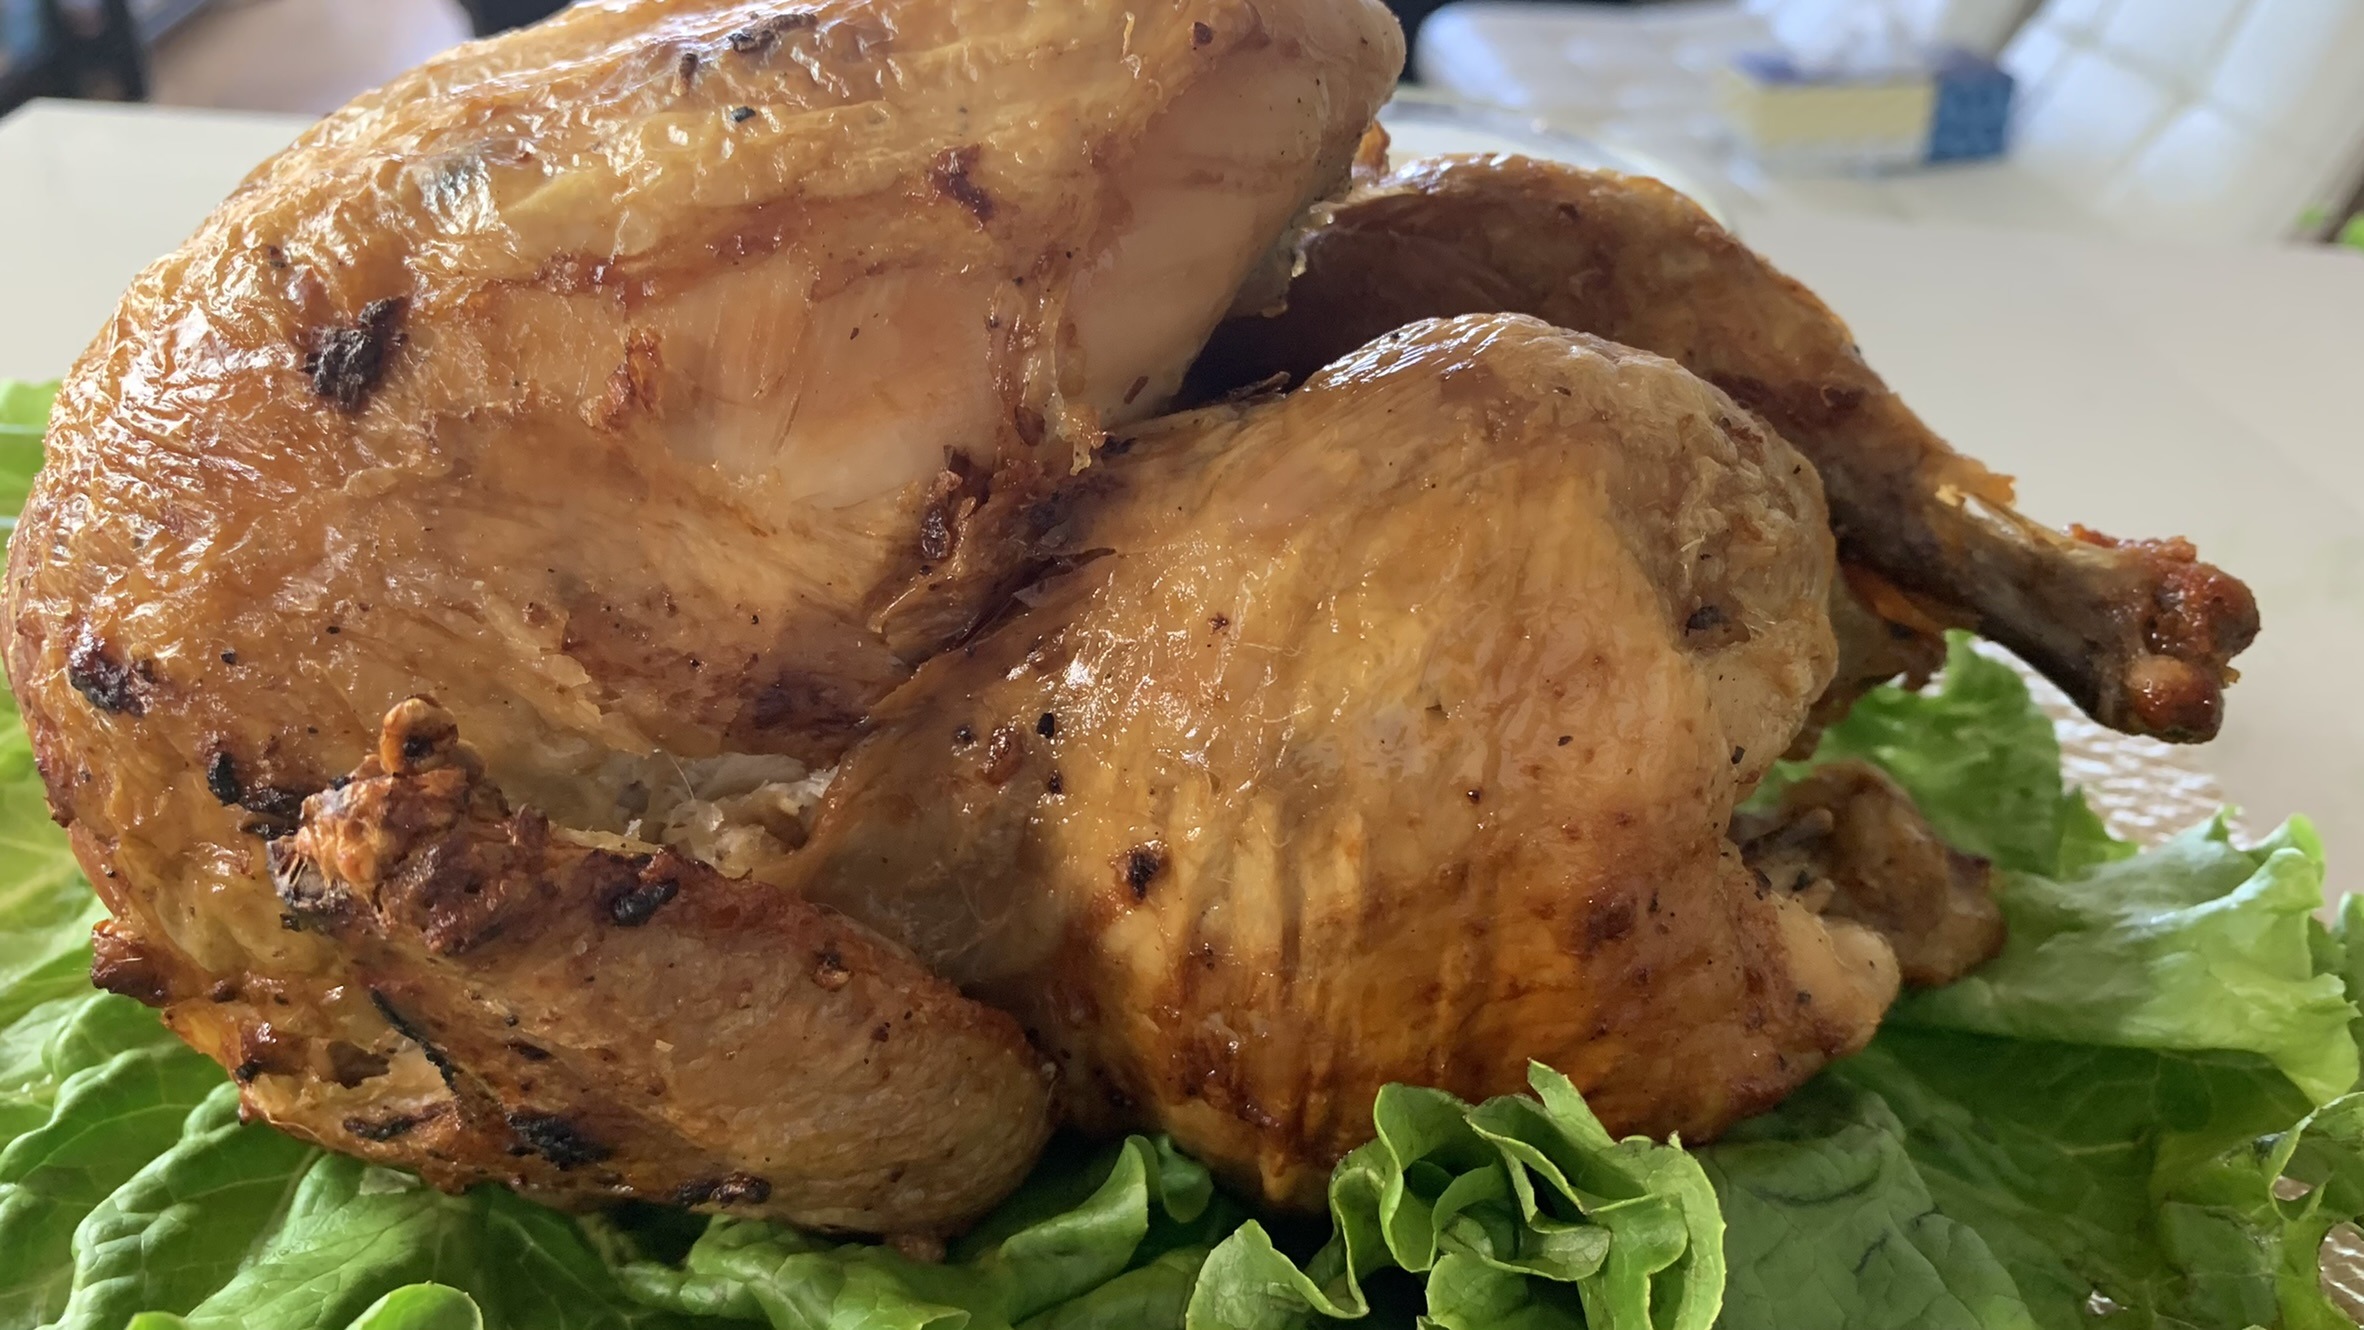
Roast Chicken

Roast Chicken

Roast Chicken

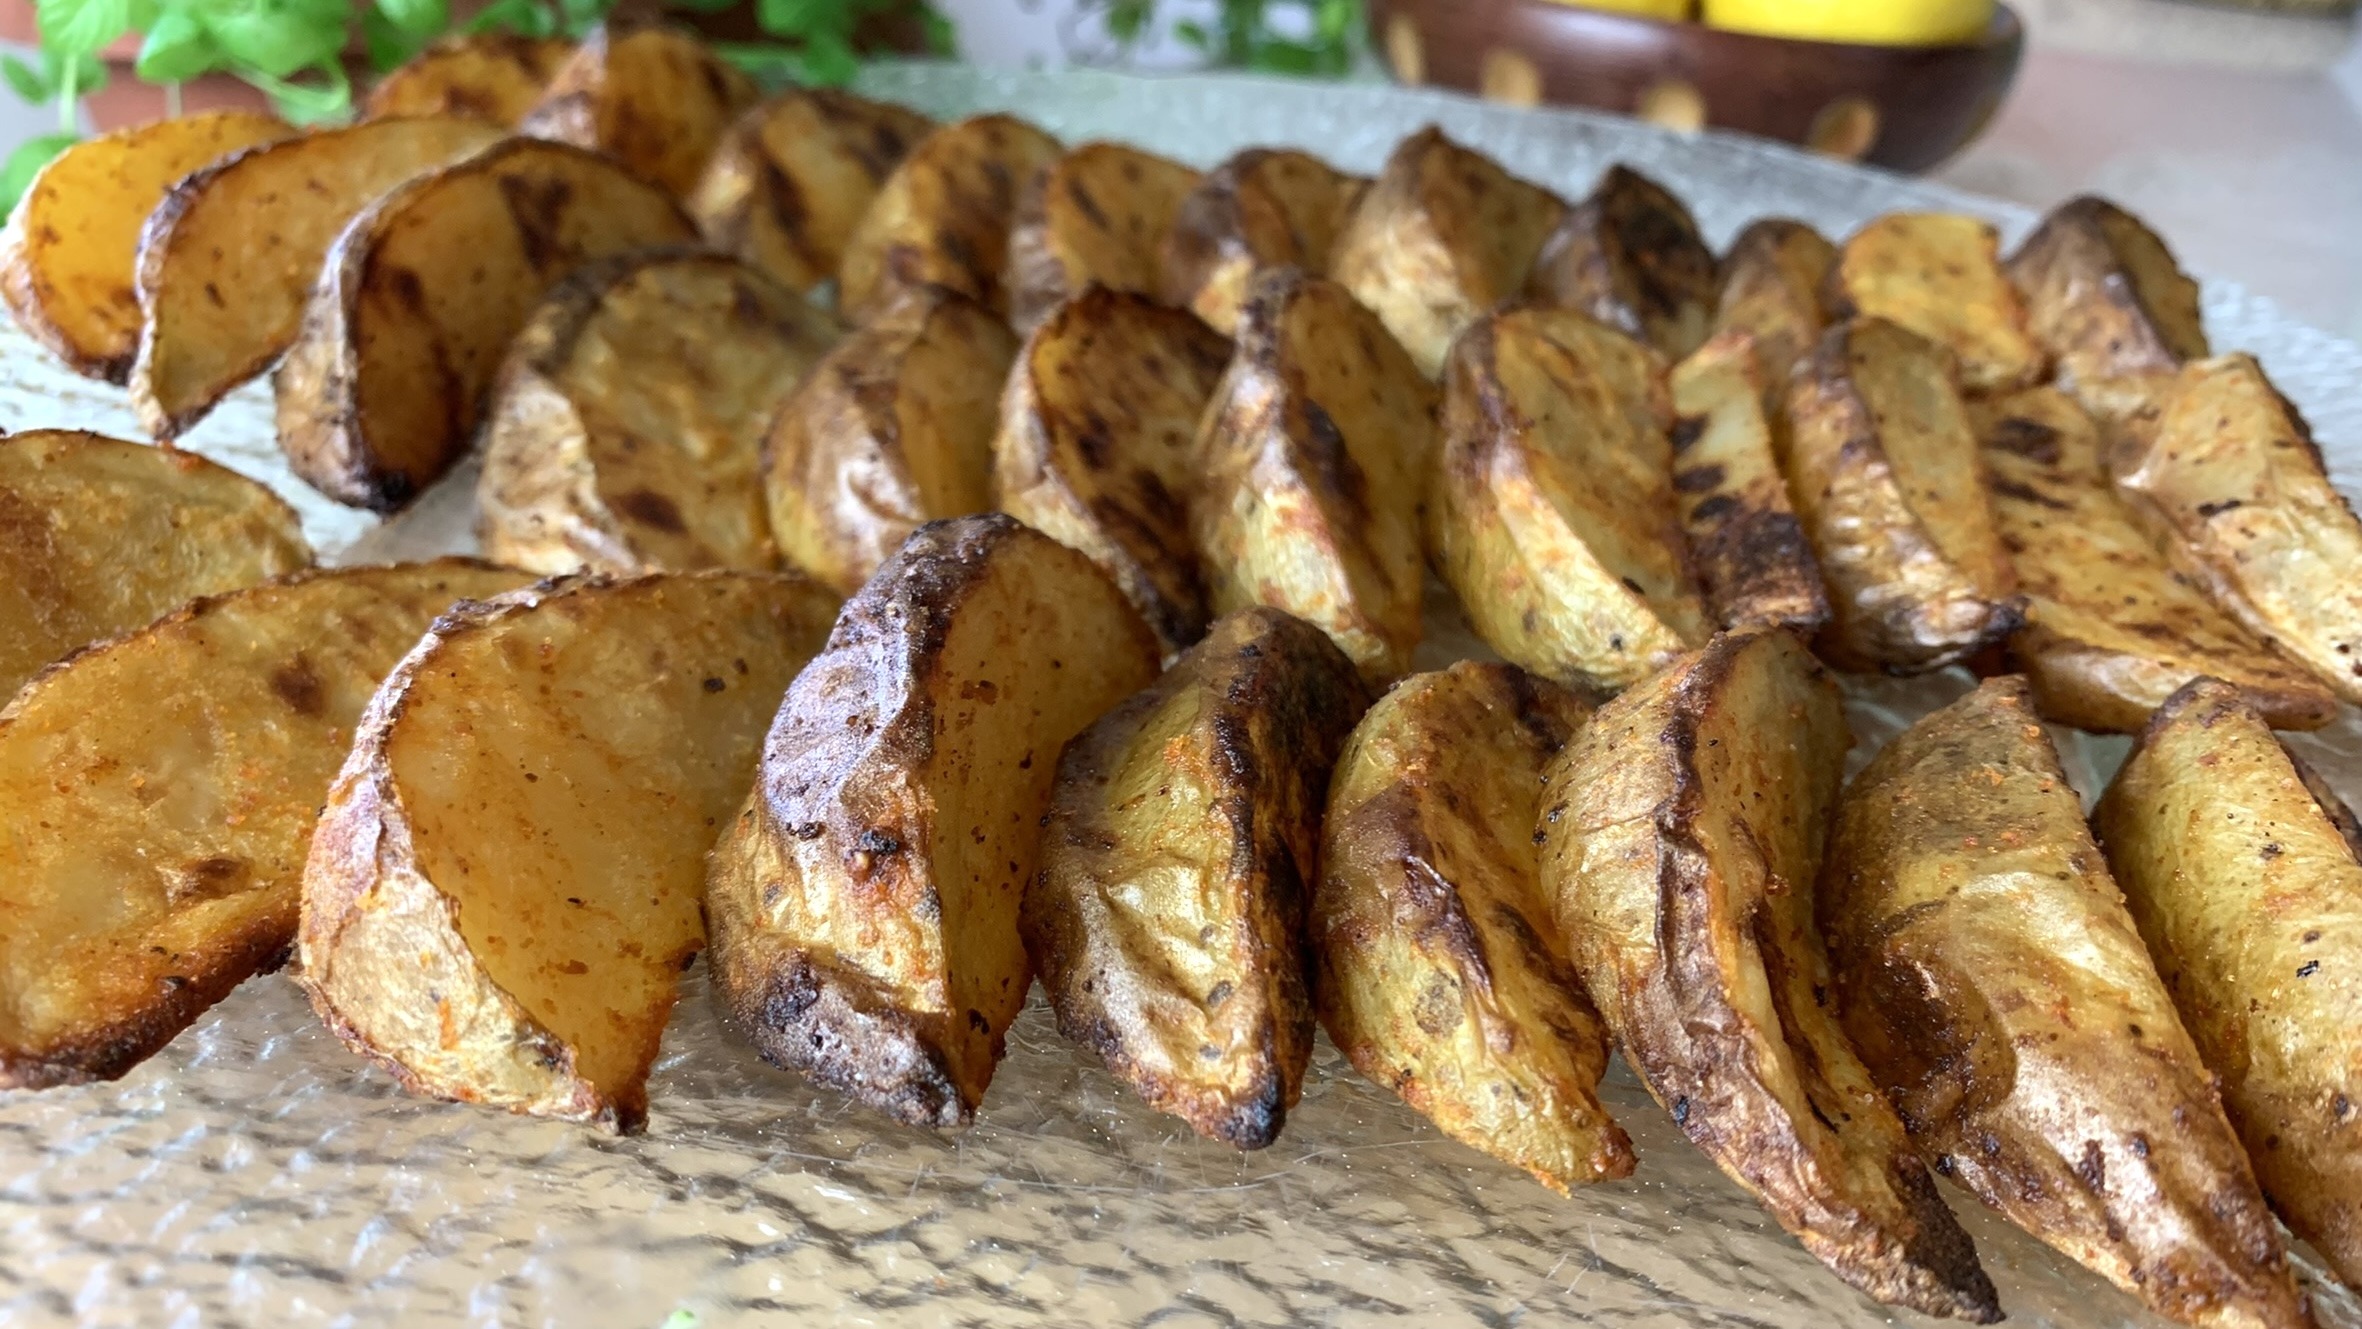
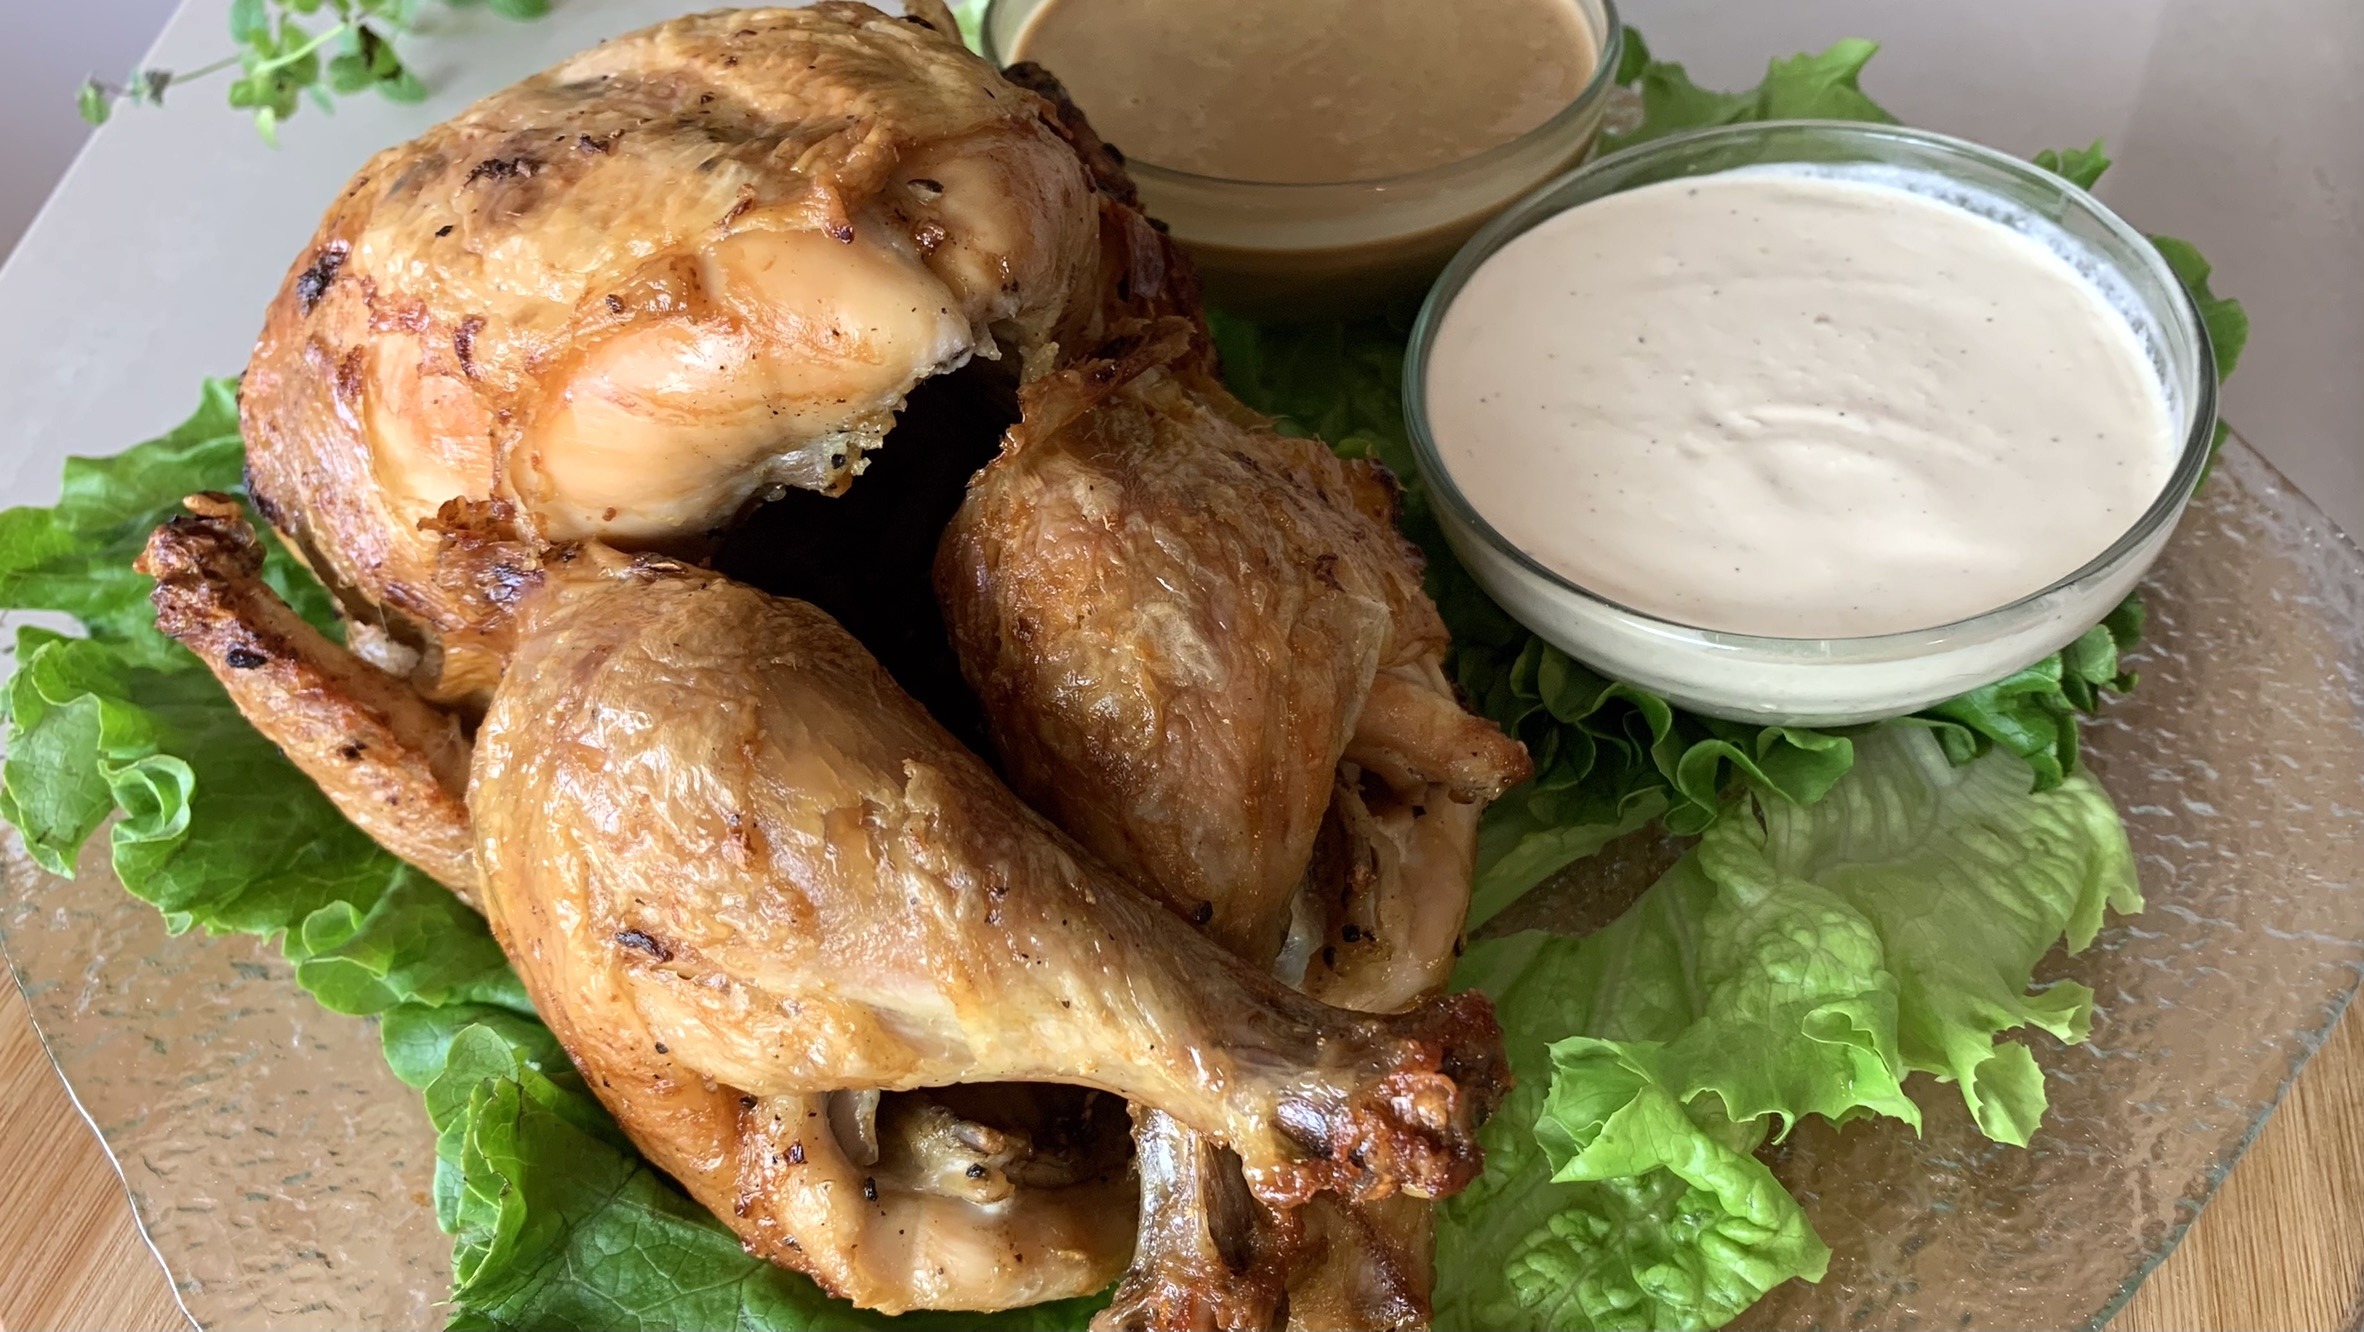
Roasting chicken can often feel like a daunting task, but this recipe breaks it down into simple steps that anyone can follow. This might be the most incredibly easy recipe for the Perfect Roast Chicken you’ve ever imagined. Designed for simplicity and flavor, this dish showcases the essence of tender chicken meat seasoned with the timeless combination of salt, pepper, and garlic.

Chicken, the primary ingredient in this dish, is a rich source of high-quality protein. It contains essential amino acids, supports muscle growth and repair, and is a great addition to a balanced diet. Chicken is also low in fat, especially when the skin is removed, making it an ideal choice for those who are watching their calorie intake. Regular consumption of chicken can contribute to a healthy diet and provide the energy you need to get through your day. By roasting the chicken, you retain its natural flavors while minimizing the need for added fats, making it a healthy, delicious, and satisfying meal.

Let’s get started!

Ingredients

  • 1 medium-sized chicken (3.3 pounds or ~1.5 kg)
  • Salt to taste
  • Black pepper to taste
  • 3 garlic cloves (minced)
  • You’ll also need a chicken roaster rack.

Directions

  1. Preheat your oven to 400°F (200°C).
  2. Rinse the chicken under cold water and pat it dry with paper towels.
  3. Peel and mince the garlic cloves.
  4. Season the chicken generously with salt, black pepper, and minced garlic, rubbing the mixture evenly over the surface of the chicken.
  5. Insert the chicken onto the chicken roaster rack, ensuring it is secure and positioned vertically.
  6. Place the rack with the chicken in the preheated oven and roast for approximately 1 hour and 30 minutes, or until the skin is crisp and golden brown, and the internal temperature reaches 165°F (75°C).
  7. Once done, remove the chicken from the oven and let it rest for a few minutes before carving.

Nutritional Information (Per Serving)

  • Calories: 305
  • Protein: 55.91 g
  • Fat: 7.43 g
  • Carbohydrates: 0 g
  • Fiber: 0 g

Serving Information

  • Servings: 4
  • Prep Time: 15 minutes
  • Baking Time: 90 minutes

    Storage & Tips

    • Storage: Leftover chicken roast can be stored in an airtight container in the fridge for up to 3-4 days.
    • Tip: To retain its flavor and moisture, reheat the chicken gently in the oven before serving.
    Beans Salad

    Beans Salad

    Beans Salad

    Welcome back to another delightful and nutritious recipe that will not only satisfy your taste buds but also fuel your body with essential nutrients. Today, we’re diving into the world of legumes with our Protein-Packed Beans Salad. This salad is a vibrant medley of colors, flavors, and textures, featuring the best of the Mediterranean diet.

    Legumes, particularly beans, chickpeas, and lentils, are the stars of this dish. These tiny powerhouses are packed with plant-based protein, fiber, and an array of vitamins and minerals. Incorporating legumes into your regular diet can significantly boost your health. They are excellent for maintaining a healthy heart, supporting digestive health, and keeping your blood sugar levels stable. Plus, they are incredibly versatile and can be a great substitute for meat, especially if you’re looking to add more plant-based meals to your diet.

    This Beans Salad is not just a side dish; it’s a complete meal. Whether you’re looking to improve your diet, boost your energy, or simply enjoy a fresh and tasty meal, this salad has got you covered. And the best part? It’s so easy to make!

    Let’s get started.

    Ingredients

    For the Salad:

    • 1 cup cooked chickpeas
    • 1 cup cooked green lentils
    • 1 cup cooked red beans
    • 190 g fresh tomato
    • 150 g red and/or green pepper
    • 150 g cucumber
    • 120 g fresh apple
    • 30 g green onion
    • 50 g parsley
    • 1 medium-sized avocado

    For the Vinaigrette:

    • 4 tbsp. olive oil
    • Juice of one lemon
    • 4 tbsp. apple cider vinegar
    • 1 tsp. salt
    • Black pepper to taste

    Directions

    1. Clean and chop the tomato, cucumber, red or green pepper, apple, onion, and parsley into small pieces.
    2. If not using canned legumes, cook your choice of legumes (beans, lentils, chickpeas) according to package instructions. Drain and rinse if using canned legumes.
    3. In a large mixing bowl, combine the cooked legumes and chopped vegetables.
    4. In a separate bowl, prepare the vinaigrette by mixing olive oil, lemon juice, apple cider vinegar, salt, and black pepper. Stir well to combine.
    5. Pour the vinaigrette over the mixed legumes and vegetables. Stir gently to ensure even distribution of the dressing.
    6. Transfer the salad to a serving plate or bowl.
    7. Slice the avocado and garnish the salad with the avocado slices.
    8. Serve and enjoy your fresh and healthy Protein-Packed Beans Salad!

    Nutritional Information (Per Serving)

    • Calories: 194
    • Protein: 7.18 g
    • Fat: 9.2 g
    • Carbohydrates: 22.55 g
    • Fiber: 7.1 g

    Serving Information

    • Servings: 8
    • Prep Time: 30 minutes

      Storage & Tips

      • Storage: Store leftover salad in an airtight container in the fridge. It’s best to consume it within 2-3 days for optimal freshness.
      • Tip: Add fresh avocado slices last minute when serving fresh or leftover portions to maintain their creamy texture and vibrant color.
      Baked Potato Wedges

      Baked Potato Wedges

      Baked Potato Wedges

      Indulge in the irresistible flavors of these crispy potato wedges paired with a creamy avocado sauce, a guilt-free delight that promises to satisfy your cravings without compromising your health. Whether you’re looking for a quick snack, a side dish, or even a party appetizer, these potato wedges are a versatile choice that never disappoints.

      Potatoes are a beloved staple in many households, and for good reason. They are not only incredibly versatile but also packed with essential nutrients. Rich in potassium, vitamin C, and dietary fiber, potatoes provide a hearty and satisfying base for countless recipes. When baked to perfection, as in this recipe, they become crispy on the outside while remaining tender on the inside—a combination that’s simply irresistible. Pairing these wedges with a fresh avocado sauce not only elevates the dish but also adds a dose of healthy fats and antioxidants, making this a snack that’s as nourishing as it is delicious.

      Let’s dive into how you can make these crispy potato wedges at home!

      Ingredients

      For Potato Wedges:

      • 850 g potatoes, flesh and skin
      • 2 tbsp. olive oil
      • 1 tsp. salt
      • 1 tsp. paprika
      • ½ tsp. dried onion
      • ½ tsp. dried garlic

      For Avocado Sauce:

      • 2 medium-sized avocados (200 g avocado flesh)
      • 4 or 5 fresh coriander stems
      • 1 garlic clove
      • 1 tbsp. olive oil
      • 2 tbsp. lemon juice
      • ½ tsp. salt and black pepper to taste
      • ½ tsp. dried onion
      • ½ tsp. dried garlic
      • 2 to 3 tbsp. water (to adjust the thickness)

      Directions

      1. Preheat the oven to 400°F (200°C). Cut large white and cleaned potatoes into wedges and pat dry.
      2. Mix olive oil, salt, paprika, dried onion, and dried garlic. Coat potato wedges.
      3. Bake the potato wedges for 1 hour or until crispy and brown to your liking.
      4. Instead of the popular and unhealthy mayonnaise, prepare your own avocado sauce.
      5. Blend avocado, fresh coriander, garlic, olive oil, and lemon juice until smooth. Season with salt and pepper, dried onion, and dried garlic (or with your favorite spices). If necessary, add water to reach the right consistency for your taste.
      6. Serve the wedges hot with avocado sauce for dipping.

      Nutritional Information

      Per 1 Serving of potato wedges:

      • Energy: 223 calories
      • Protein: 4.29 g
      • Fat: 6.94 g
      • Carbohydrates: 37.12 g
      • Fiber: 4.7 g

      Notes:

      • The avocado sauce is way better than any classic mayonnaise you have tried before.
      • Best to consume while still crispy and hot.

      Prep Time and Servings

      • Prep Time: 30 minutes
      • Baking Time: 1 hour
      • Servings: 4 servings

      Storage and Recommendations:

      • Storage: Store any leftover potato wedges in an airtight container in the refrigerator for up to 3 days. Reheat in the oven to restore their crispiness.
      • Recommendations: These wedges make a fantastic side dish for burgers, grilled meats, or just as a snack on their own with the avocado dip.
      Chicken Skewers

      Chicken Skewers

      Chicken Skewers

      If you’re looking for a dish that combines flavor, simplicity, and a touch of exotic flair, these Chicken Satay Skewers are exactly what you need. Inspired by the beloved Indonesian street food, this recipe transforms tender chicken breast into a culinary delight with the help of a rich marinade made from aromatic spices. Grilled to perfection, these skewers are not just a feast for the eyes but also a delight for the taste buds.

      Chicken is an excellent source of lean protein, making it a great choice for those looking to maintain or build muscle while keeping fat intake in check. This recipe, combined with the creamy peanut butter sauce, offers a balanced meal that’s both filling and nutritious. The peanut butter sauce adds a unique combination of sweet, salty, and spicy flavors that elevate the dish to another level, making it a must-try for any home cook. Perfect as an appetizer, main course, or even as a fun addition to a barbecue, these Chicken Satay Skewers are sure to impress. Including chicken in your regular diet provides high-quality protein and essential vitamins and minerals, such as B6 and B12, which are vital for maintaining energy levels and overall health.

      Let’s get started on making this delicious dish!

      Ingredients

      For Chicken Skewers:

      • 400 g chicken breast
      • 2 large garlic cloves
      • 8 g fresh ginger
      • 1 tbsp. sesame oil
      • 1 tbsp. maple syrup or other sweetener
      • 1 tbsp. soy sauce
      • 1 tbsp. white vinegar
      • ½ tsp. salt
      • Black pepper to taste

      For Peanut Butter Sauce:

      • ⅓ cup unsweetened peanut butter
      • 2 tbsp. sesame oil
      • 2 tbsp. soy sauce
      • 2 tbsp. maple syrup or other sweetener
      • 2 tbsp. lemon juice
      • 1 tbsp. Tabasco sauce (or sriracha sauce)
      • 1 garlic clove
      • 5 g fresh ginger
      • Salt and black pepper to taste

      Directions

      1. Marinate chicken strips in a mixture of minced garlic, minced ginger, sesame oil, maple syrup, soy sauce, white vinegar, salt, and black pepper for at least 30 minutes.
      2. Thread marinated chicken strips onto wooden skewers.
      3. Grill chicken skewers on a preheated grill pan over medium-high heat for 8-10 minutes, until golden brown and fragrant.
      4. Prepare peanut butter sauce by combining peanut butter, sesame oil, soy sauce, maple syrup, lemon juice, Tabasco sauce, minced garlic, minced ginger, salt, and black pepper.
      5. Serve grilled chicken skewers with peanut butter sauce for dipping or drizzling.

      Nutritional Information

      Per 1 Serving of chicken skewers:

      • Energy: 307 calories
      • Protein: 28.36 g
      • Fat: 17.86 g
      • Carbohydrates: 6.93 g
      • Fiber: 0.2 g

      Notes:

      • The peanut butter sauce is a must-try with these chicken satay skewers.
      • Leftovers can be stored in the fridge for 3 days.

      Prep Time and Servings

      • Prep Time: 30 minutes
      • Cooking Time: 15 minutes (Skillet cooking)
      • Servings: 3 servings

      Storage and Recommendations:

      • Storage: Store any leftover chicken skewers and sauce in an airtight container in the refrigerator for up to 3 days.
      • Recommendations: These skewers are perfect for serving at a party as an appetizer or as a main dish paired with jasmine rice or a fresh salad.
      Creamy Cauliflower Casserole

      Creamy Cauliflower Casserole

      Creamy Cauliflower Casserole

      Cauliflower is truly having its moment, and this Creamy Cauliflower Casserole is a perfect example of why this versatile vegetable deserves a spot in your regular meal rotation. Packed with antioxidants, choline, sulforaphane, and other essential nutrients, cauliflower is much more than just a low-carb alternative. It plays a significant role in supporting overall health, aiding in detoxification, and providing anti-inflammatory benefits.

      This dish brings together the creamy richness of béchamel sauce with the delicate flavor of cauliflower, making it a comforting and satisfying choice for any meal.

      Whether you’re looking to sneak more vegetables into your diet or simply want a cozy side dish to complement your main course, this casserole is a delicious and nutritious option. The blend of cheeses adds a delightful savory touch, while the cauliflower provides a light, yet hearty texture that makes this dish both indulgent and healthful. Make this Creamy Cauliflower Casserole part of your weekly meal plan, and enjoy the benefits of this nutrient-rich vegetable in the most delicious way possible.

      Let’s get cooking!

      Ingredients

      For the Cauliflower part:

      • 1 medium-sized head of cauliflower (700 g)
      • ½ tsp. salt
      • Ground black pepper to taste
      • ½ tsp. dried onion
      • ½ tsp. dried garlic
      • 3 tbsp. olive oil

      For the Béchamel Sauce:

      • 45 g butter
      • 3 tbsp. all-purpose flour
      • 600 ml milk (1% fat)
      • ½ tsp. salt
      • Black pepper to taste
      • ⅛ tsp. nutmeg
      • 30 g Grana Padano cheese or Parmesan cheese
      • 70 g Gouda cheese

      Directions

      1. Prepare cauliflower florets with salt, pepper, dried onion, dried garlic, and olive oil.
      2. Bake at 350°F (175°C) for 45 minutes.
      3. In a pan, melt butter, add flour, and cook until golden. While stirring continuously, gradually add milk, salt, pepper, and nutmeg to create the béchamel sauce. Set aside.
      4. Pour béchamel sauce over baked cauliflower.
      5. Top with Grana Padano or Parmesan cheese and Gouda cheese.
      6. Bake for an additional 20 minutes, allowing the cheese to melt and the flavors to meld.
      7. Serve and enjoy your creamy cauliflower casserole as a comforting lunch or dinner!

      Nutritional Information

      Per 1 Serving:

      • Energy: 345 calories
      • Protein: 12.44 g
      • Fat: 25.9 g
      • Carbohydrates: 18.02 g
      • Fiber: 2.9 g

      Notes:

      • If you prefer skipping the initial baking of the cauliflower, you can simply boil the cauliflower for 5-7 minutes.
      • Leftovers can be stored in the fridge for up to 3 days and in the freezer for up to 1 month.

      Prep Time and Servings

      • Prep Time: 30 minutes
      • Baking Time: 45 minutes + 20 minutes
      • Servings: 5 servings

      Storage and Recommendations

      • Storage: Leftovers can be stored in an airtight container in the refrigerator for up to 3 days or in the freezer for up to 1 month.
      • Recommendations: Serve this casserole alongside a light salad for a balanced meal, or pair it with roasted meats for a heartier dish.