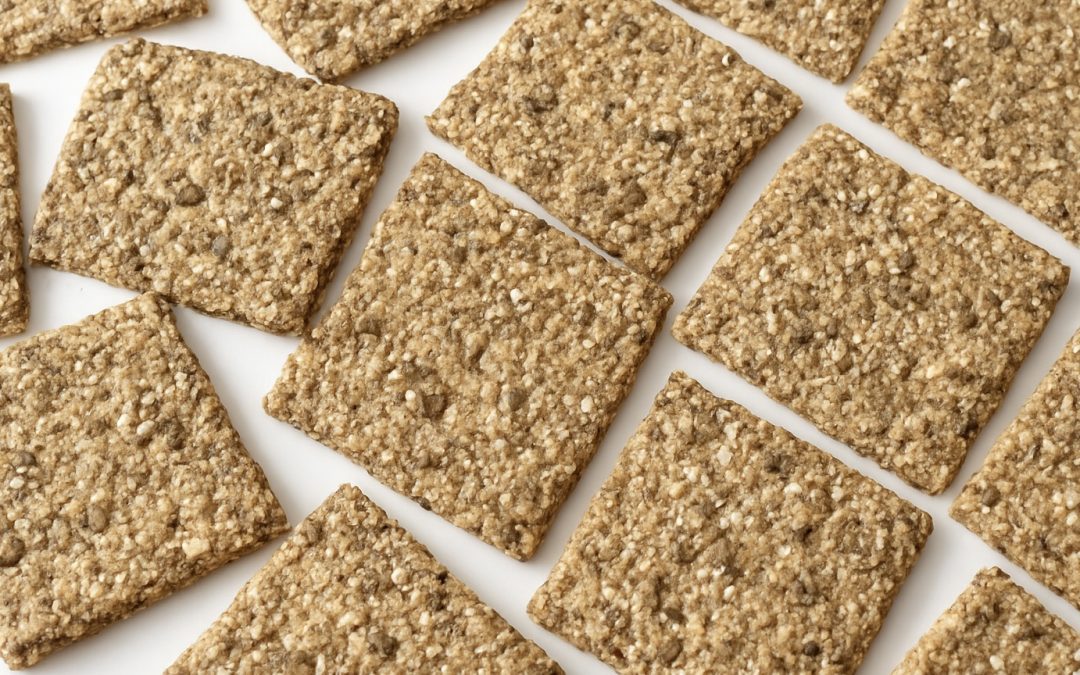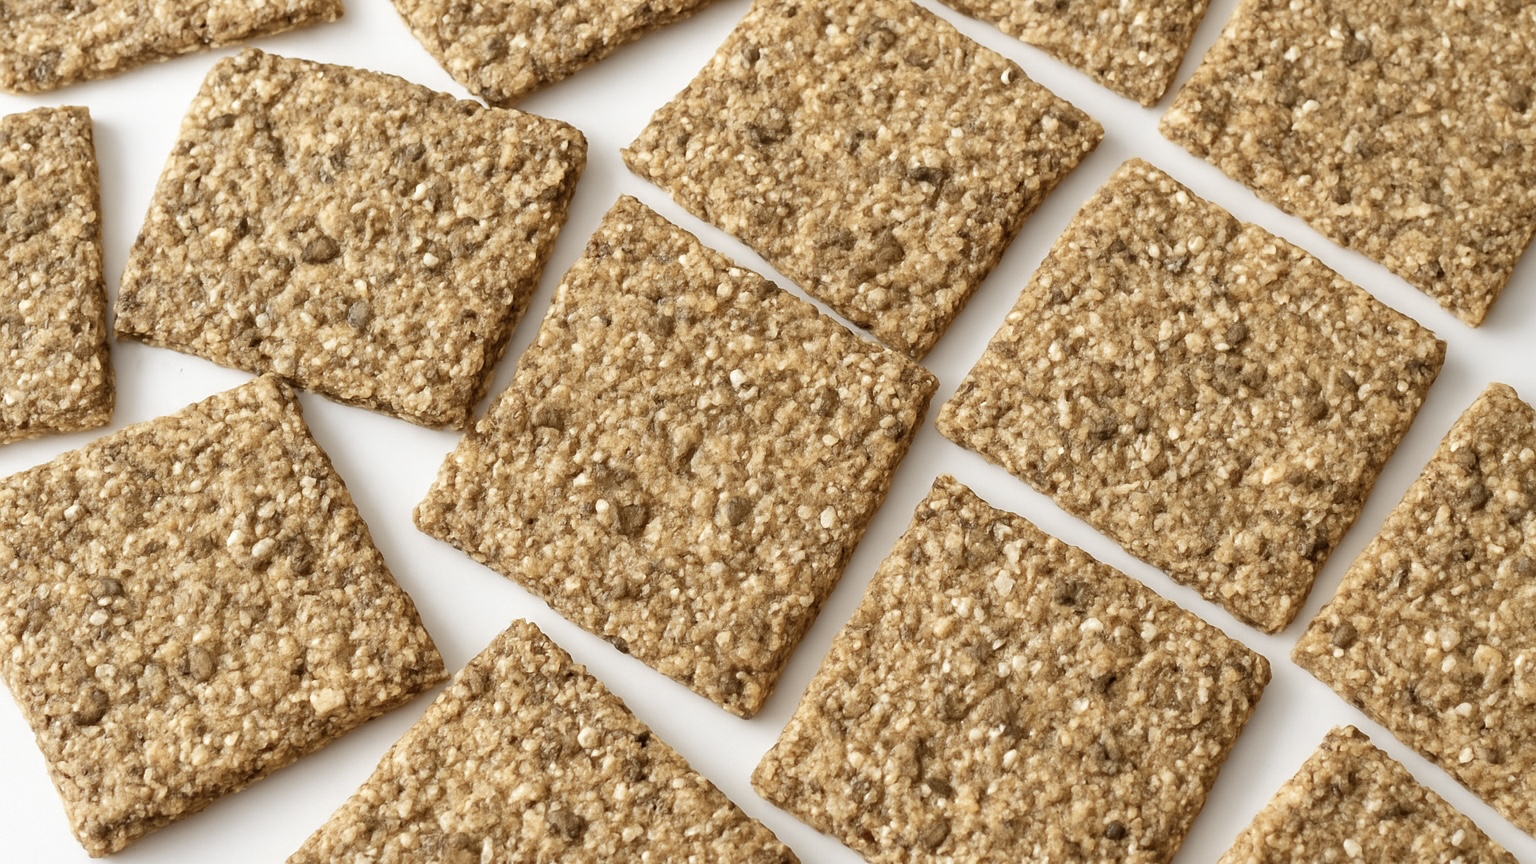
Wasa-Inspired Crackers
Wasa-Inspired Crackers

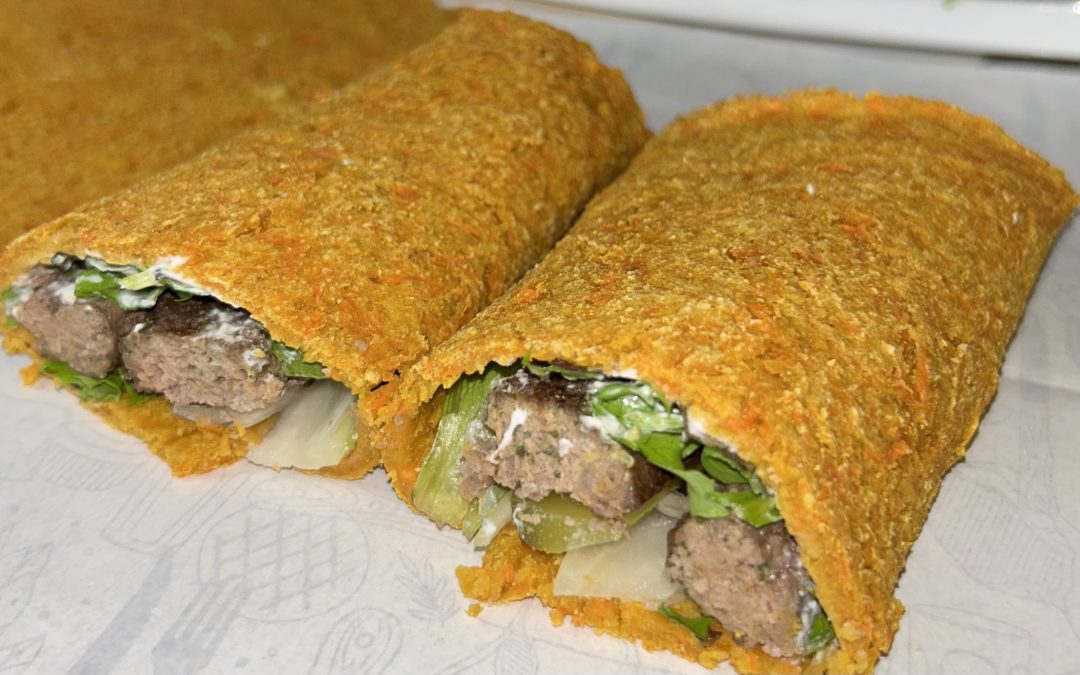
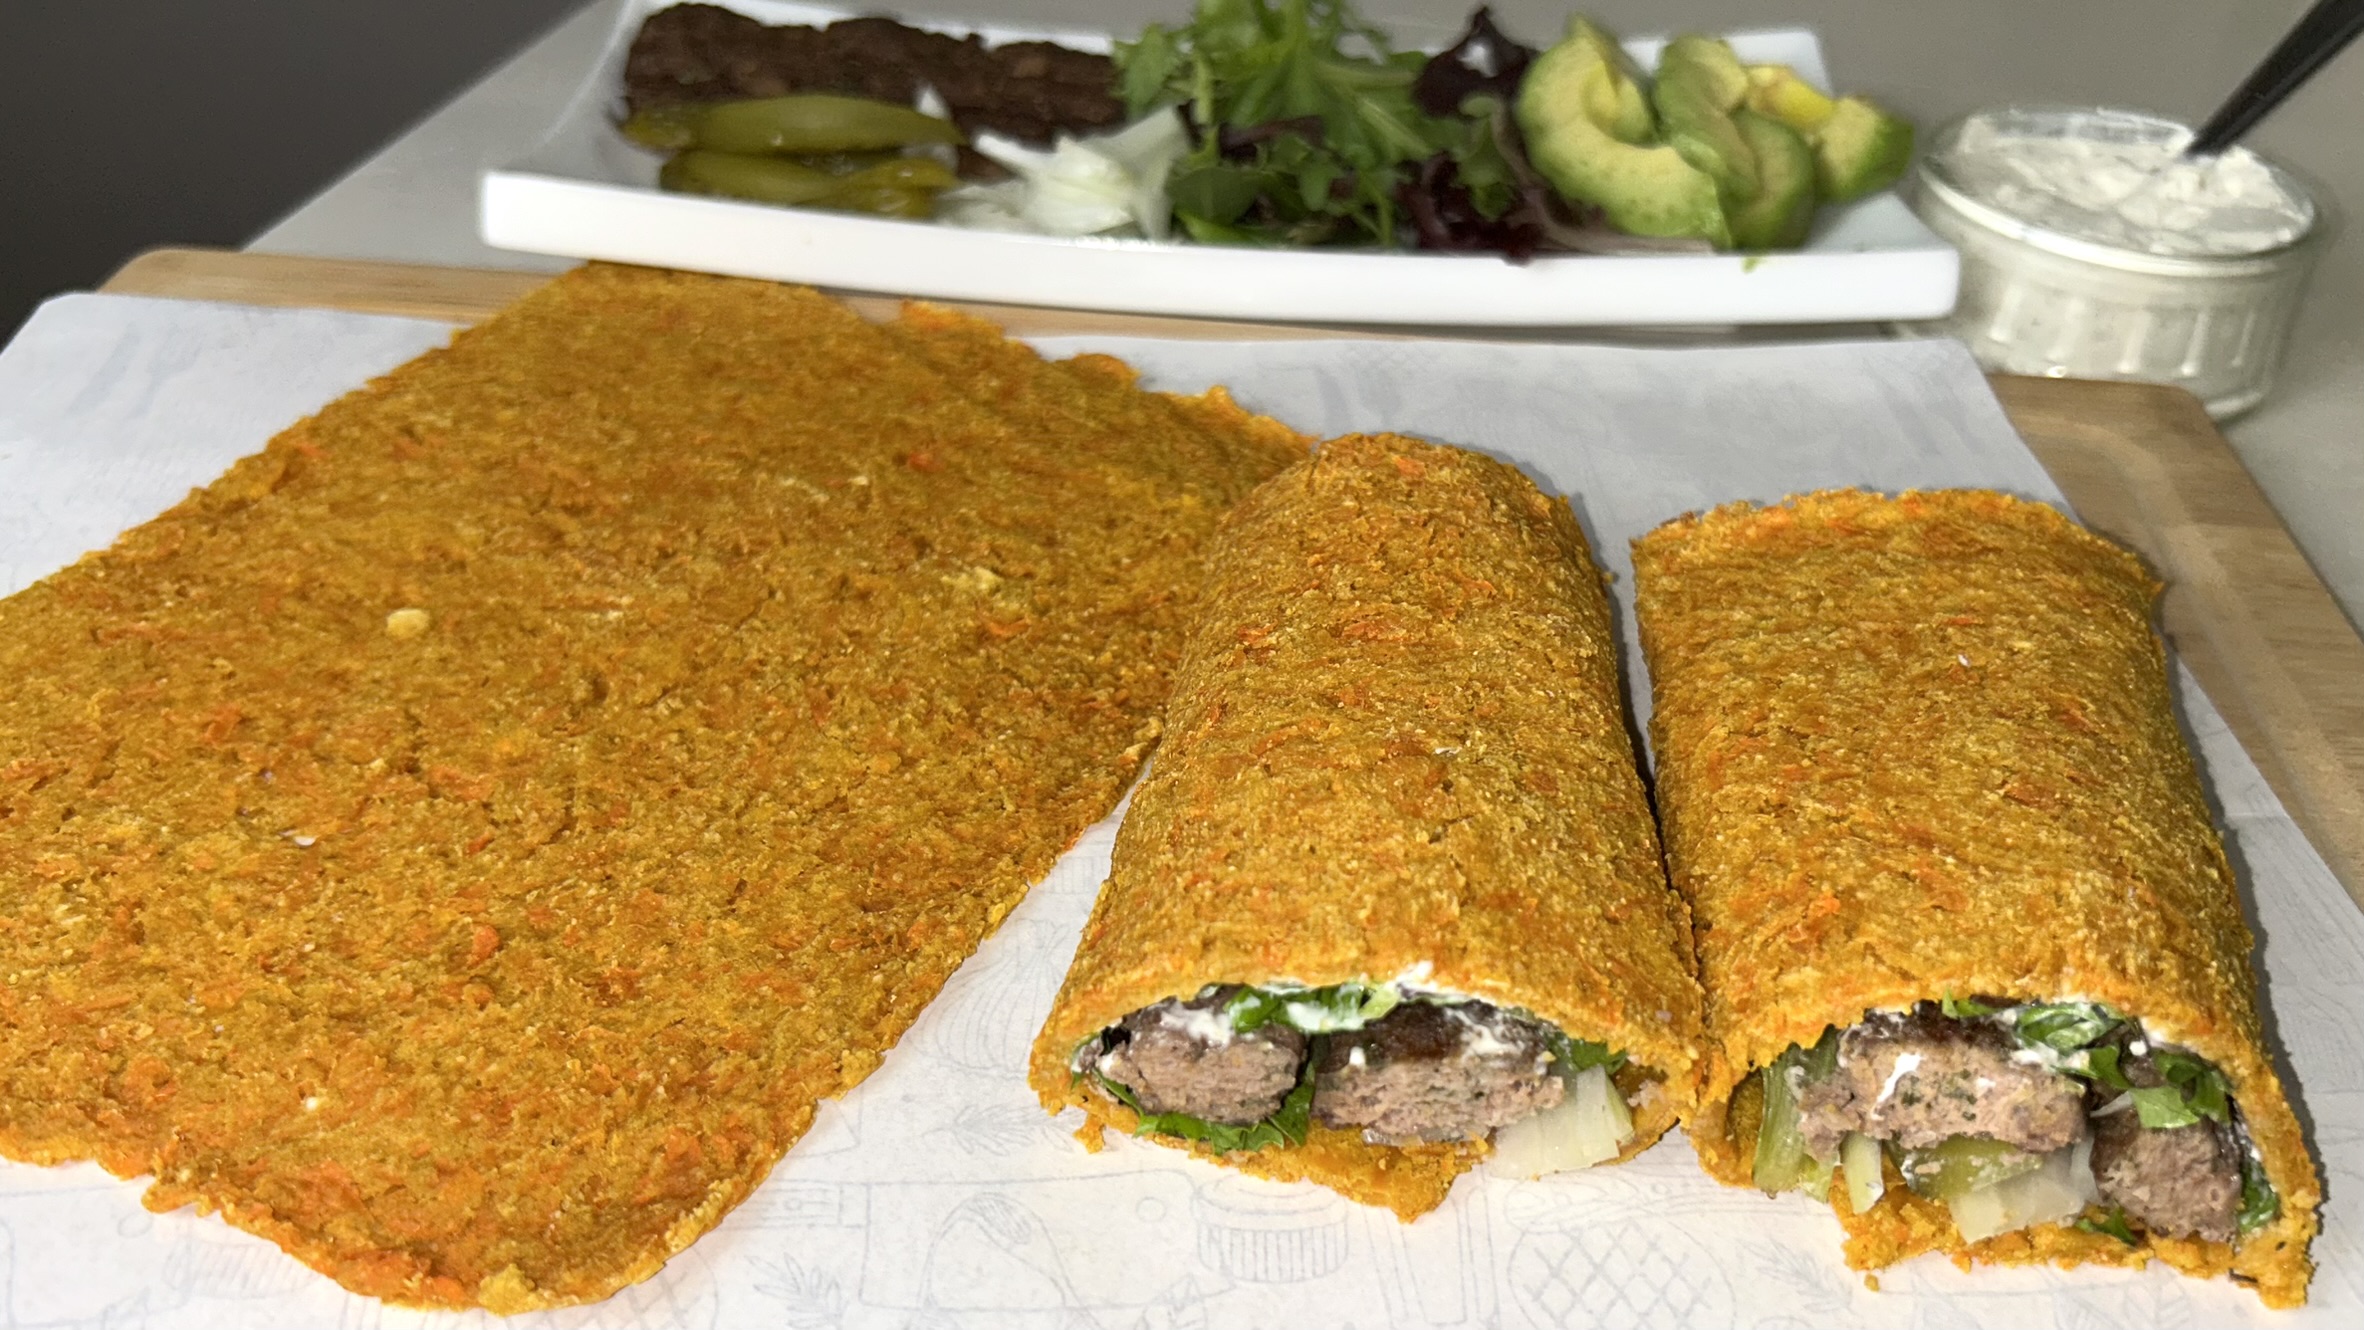
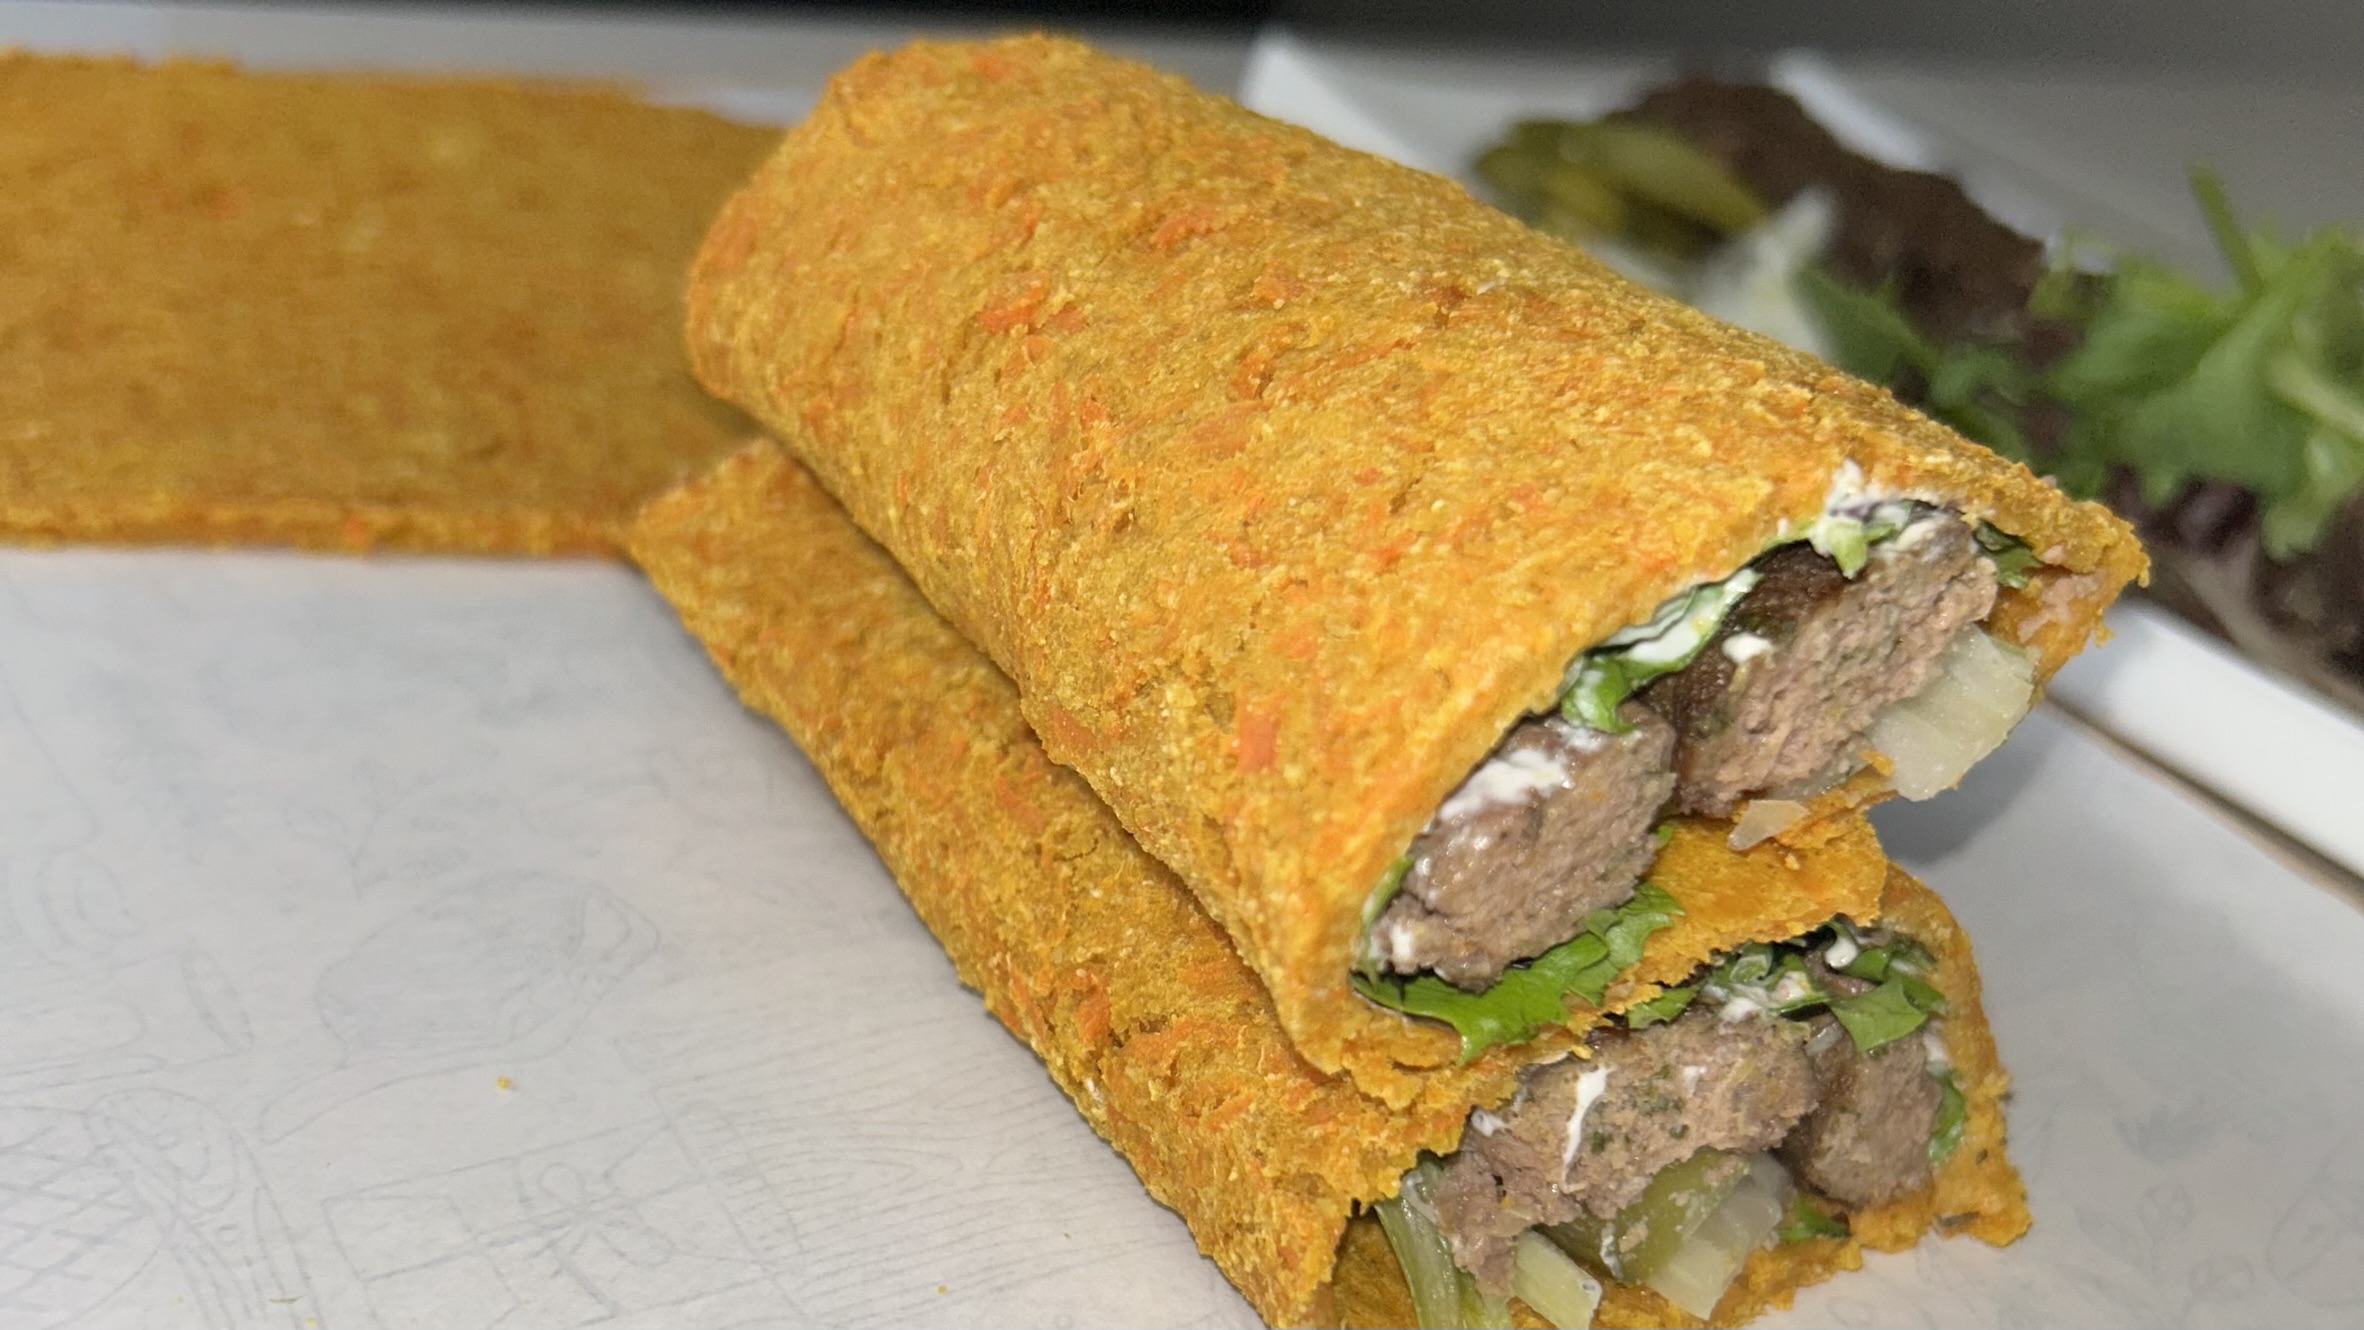
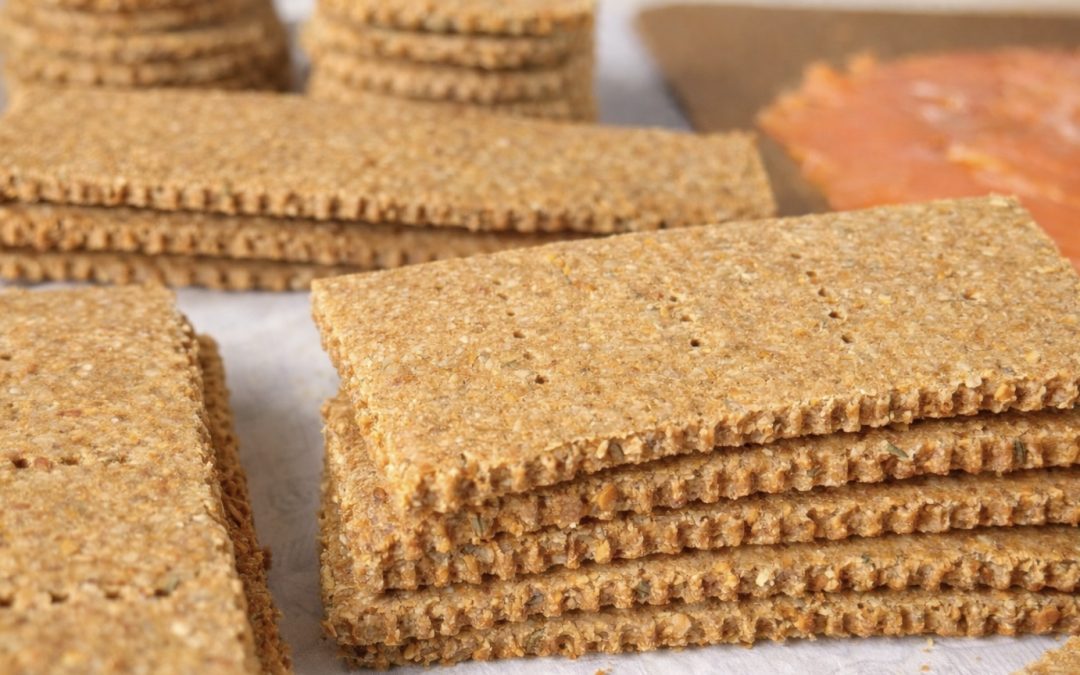
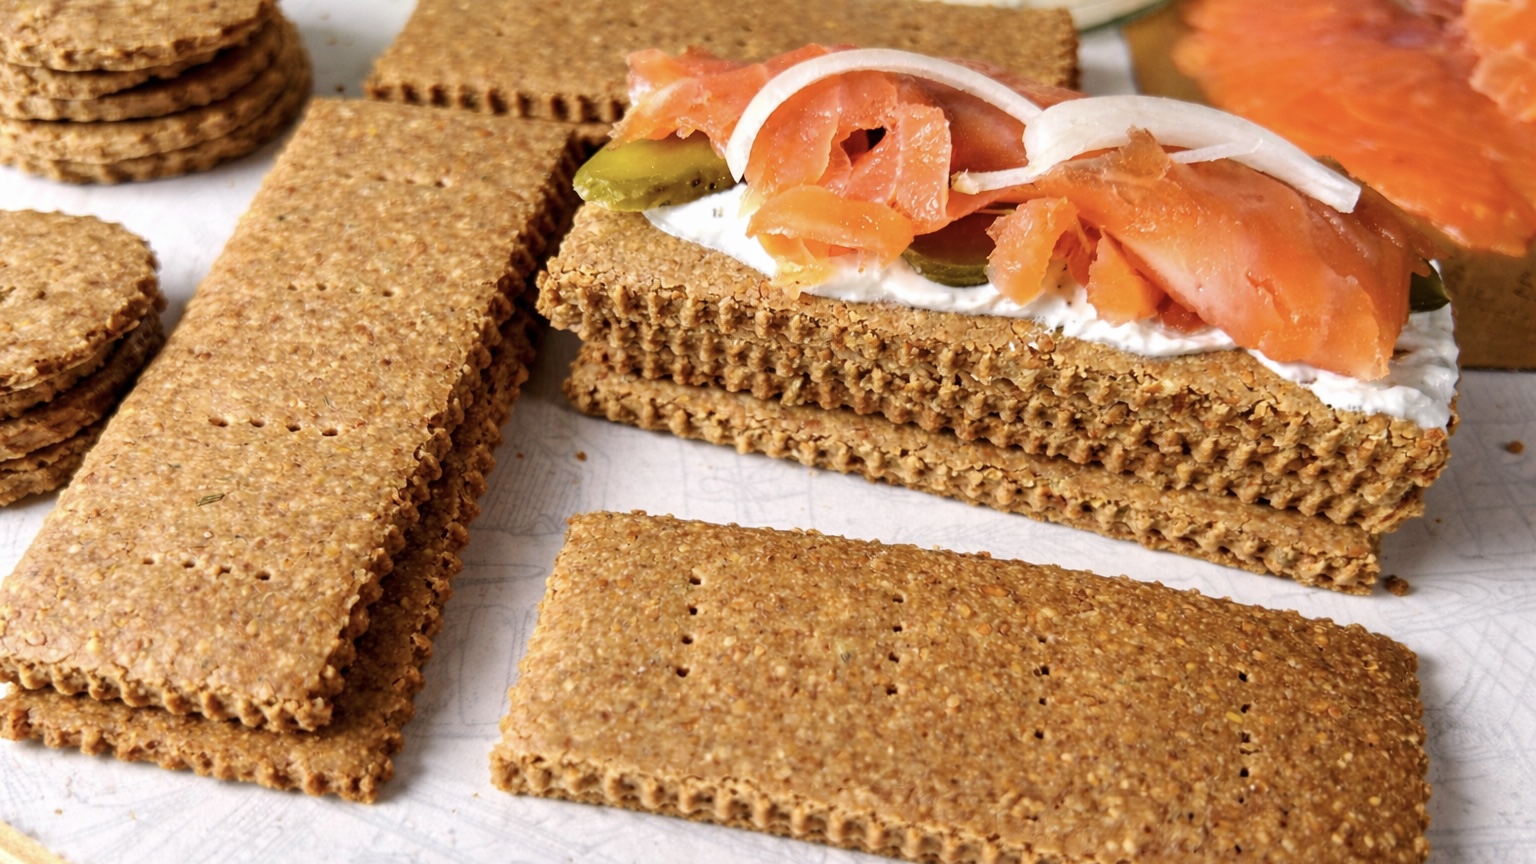
These homemade crackers are inspired by the popular Wasa crackers, a Scandinavian classic known for their crisp texture, simple ingredient list, and reputation as a healthier alternative to many refined, ultra-processed crackers. Traditionally made with whole grains and minimal additives, Wasa-style crackers are hearty, filling, and nutritionally smarter than most commercial options found in the grocery aisle. This gluten-free version builds on that idea by combining oats with a variety of nutrient-dense seeds to significantly increase fiber, plant-based protein, and essential minerals. Caraway seeds are the secret ingredient here, recreating that characteristic, nostalgic Wasa flavor, while a touch of yeast—used mainly for flavor development rather than rising, adds a deep, savory complexity. The result is a sturdy, nourishing cracker that holds up beautifully under a mountain of toppings, making it a versatile staple for your healthy pantry.
The foundation of this recipe relies on oats, an incredible superfood that truly deserves a place in your regular diet. Oats are famously rich in beta-glucan, a type of soluble fiber that has been scientifically shown to improve heart health by lowering “bad” LDL cholesterol and supporting a healthy gut microbiome. Beyond their cardiovascular benefits, oats provide a steady release of energy thanks to their low glycemic index, which helps prevent those midday blood sugar crashes.
They are also a fantastic source of essential minerals like manganese, phosphorus, and magnesium, which are vital for bone health and metabolic function. By incorporating oats into your snacks, you are prioritizing long-term satiety and metabolic health, ensuring your crackers do more than just satisfy a crunch—they actually fuel your body with high-quality nutrients.
Ingredients
-
1 1/2 cups (125 g) oats
-
1/3 cup (50 g) pumpkin seeds
-
1/3 cup (50 g) golden or dark flaxseeds
-
1/3 cup (45 g) sesame seeds
-
1/2 tbsp caraway seeds
-
1/4 tsp salt
-
1 tbsp instant yeast
-
2 tbsp olive oil (optional)
-
3/4 to 1 cup (180–240 ml) lukewarm water
Instructions
- Begin by adding the oats, pumpkin seeds, flaxseeds, sesame seeds, and caraway seeds to a food processor.
- Blend the mixture until a soft, fine flour forms, though it is perfectly fine to have some visible texture remaining from the seeds for a more rustic feel.
- Add the salt, instant yeast, olive oil (if using), and the lukewarm water to the processor bowl.
- Blend again until the mixture comes together into a cohesive, thick dough.
- If the dough feels a bit too sticky to handle, stop blending and let it rest for 15 to 30 minutes to allow the oats and seeds to fully absorb the moisture.
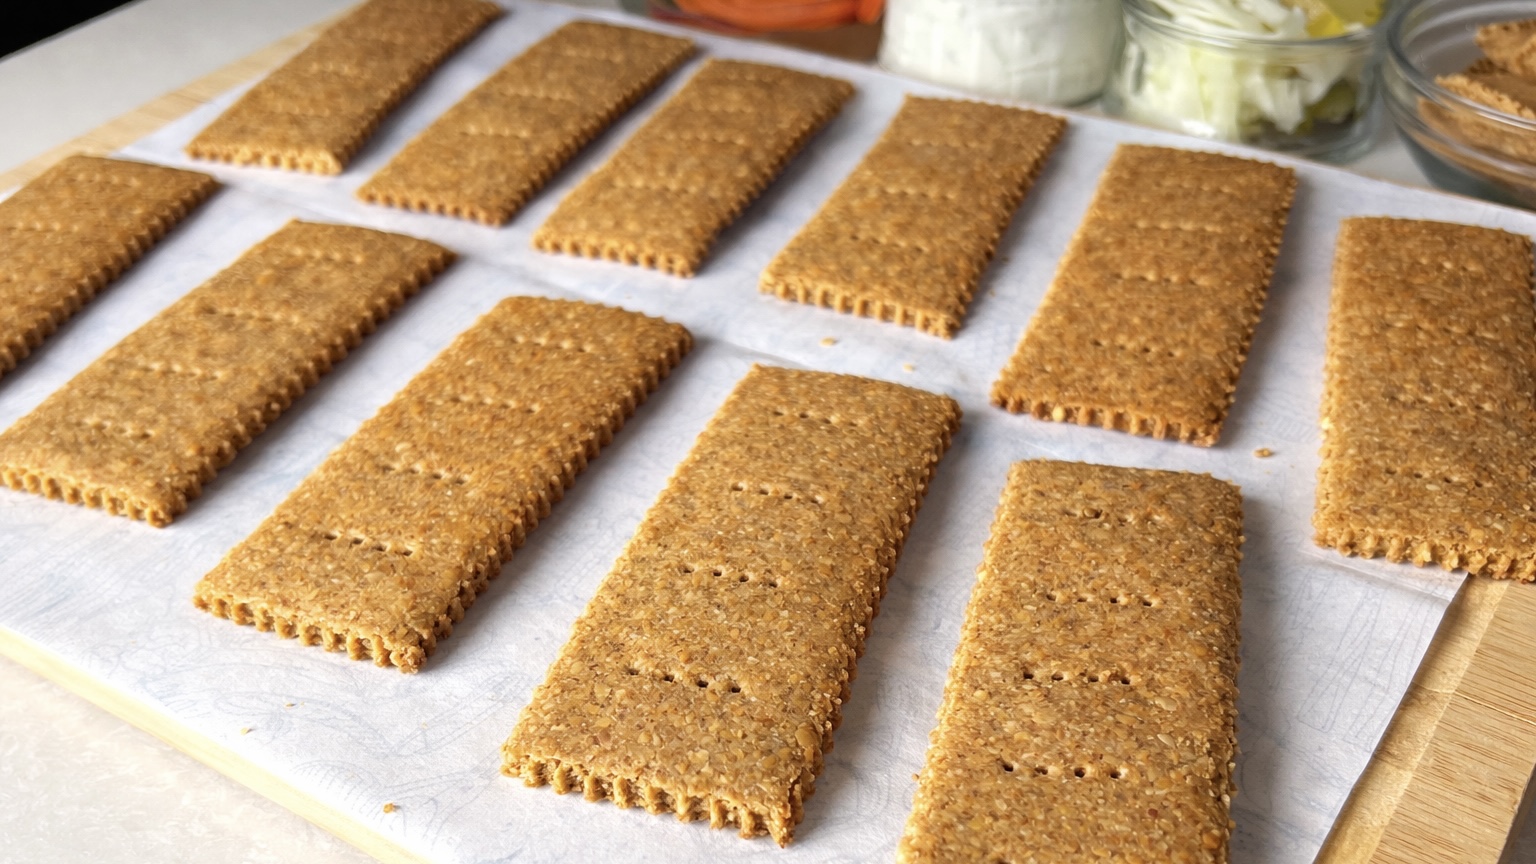
- Transfer the dough onto a work surface lined with a sheet of parchment paper.
- Lightly flatten the dough with your hands, then cover it with a second sheet of parchment paper to prevent sticking.
- Roll the dough evenly until it is about 8 mm thick, or adjust the thickness according to your personal preference.
- Cut the rolled dough into large rectangular crackers, approximately 11 cm long and 5 cm wide, to mimic the classic Wasa shape.
- Transfer the parchment paper with the cut crackers onto a large baking tray (about 37 × 26 cm).
- Dock each cracker with a fork by poking holes across the surface; this allows moisture to escape and ensures they stay flat while baking.
- Bake in a preheated oven at 180°C (350°F) for 20 minutes.
- Reduce the oven temperature to 175°C (340°F) and continue baking for an additional 30 minutes to allow them to dry out fully without browning too much.
- Remove from the oven and let the crackers cool completely on the tray, as they will continue to harden and become perfectly crisp as they sit.
Nutritional Information
Per 1 Cracker:
-
Energy: 99 calories
-
Protein: 3.8 g
-
Fat: 6.86 g
-
Carbohydrates: 6.95 g
-
Fiber: 2.4 g
Prep, Cook, and Servings
-
Prep: 30 mins
-
Cook: 50 mins
-
Servings: 16 Wasa Crackers
Notes and Recommendations
-
Dietary Compatibility: This recipe is naturally Vegan and Gluten-Free if using an oat brand that certified it’s gluten free.
-
Cooling is Key: Always allow the crackers to cool completely before storing; this is what locks in that signature “snap.”
-
Storage: Keep your crackers in an airtight container at room temperature to maintain their crispness for up to two weeks.
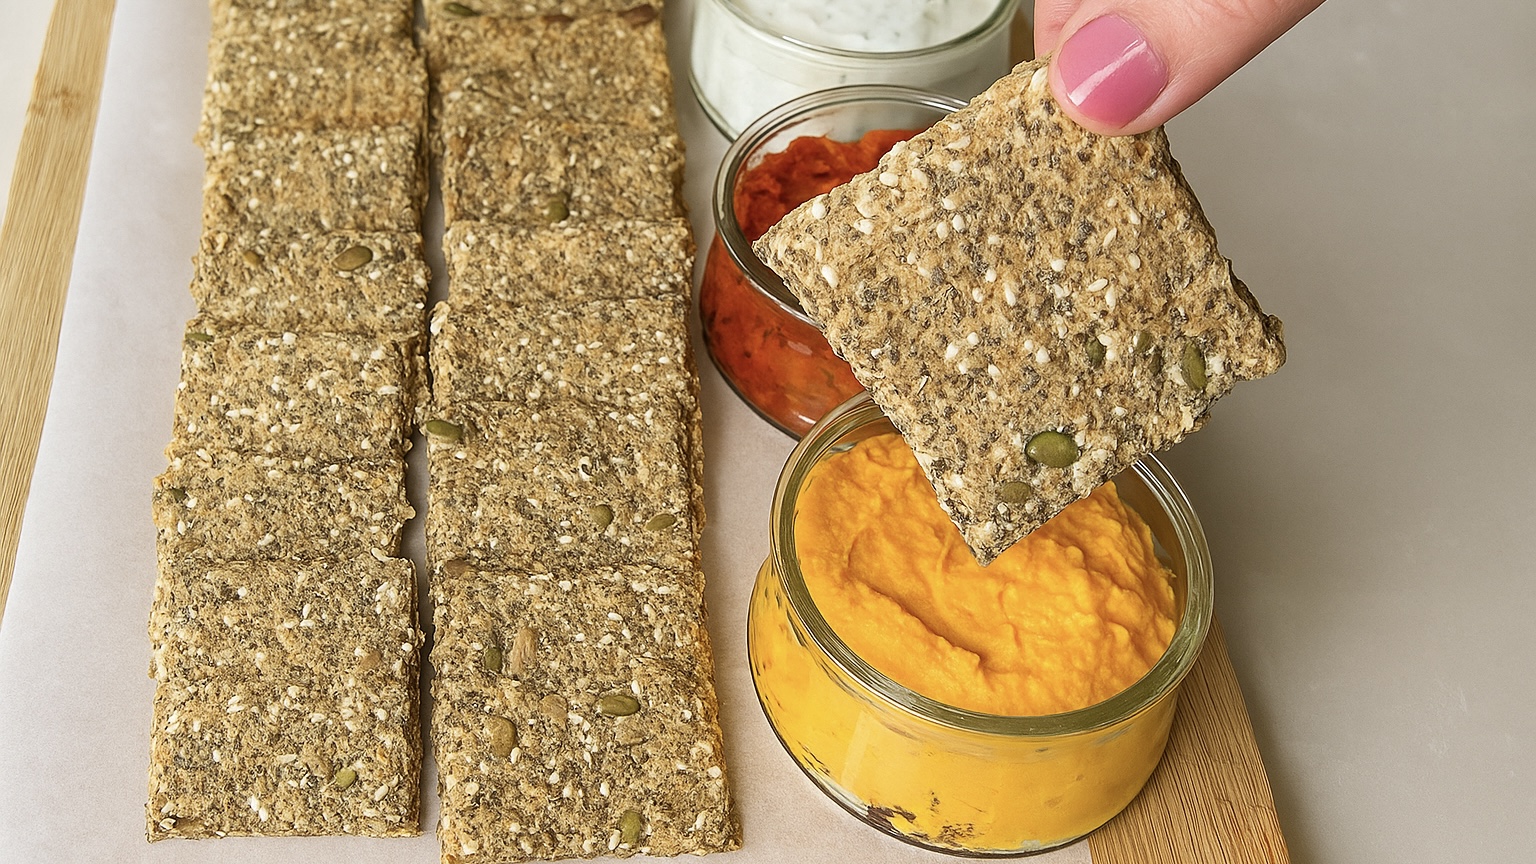
-
Savory Toppings: These are perfect as a base for savory options like smoked salmon, avocado, hard-boiled eggs, or cream cheese.
-
Sweet Pairings: For a lighter treat, try them with nut butter or your favorite fruit spreads.
-
Texture Tip: If you prefer an extra-thin cracker, roll the dough thinner and reduce the second baking stage by 5-10 minutes, keeping a close eye on the color.