Muhammara or Red Pepper Dip
Muhammara or Red Pepper Dip

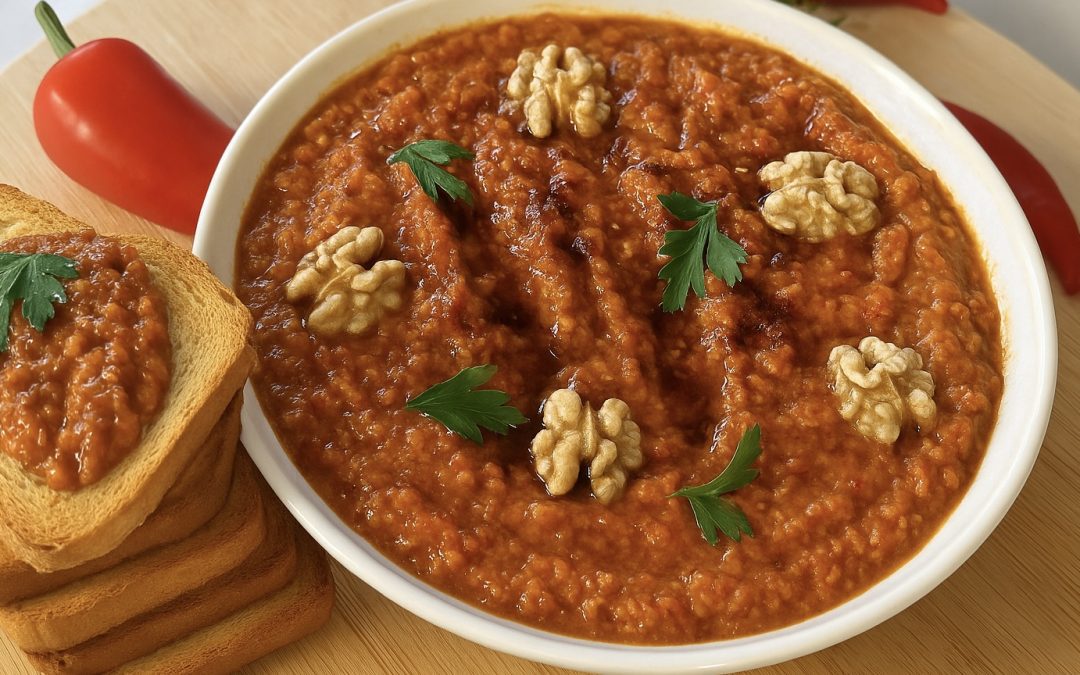
Okay, let’s talk about something bold, smoky, and addictive, in the best possible way. Today we’re making muhammara, a rich red pepper dip that’s been a staple in Levantine kitchens for centuries and is slowly making its way into global recognition. While hummus usually steals the spotlight, muhammara deserves its place on your table. Think of roasted red peppers with their naturally sweet depth, blended into a velvety mixture with toasted walnuts, garlic, olive oil, and a tangy drizzle of pomegranate molasses. The result? A savory-sweet, slightly smoky dip that’s creamy, complex, and unbelievably versatile. It’s the kind of thing you want to spread on everything: toast, wraps, grilled fish, or let’s be honest, just eat it by the spoonful.
The process is a little bit therapeutic too. Roasting the peppers until they blister, toasting walnuts to bring out their earthy aroma, and swirling everything together into this magical dip, it’s a sensory journey. And once you taste it, you’ll understand why it should have a permanent place in your kitchen.
Let’s shine a light on the star ingredient: red bell peppers. These vibrant beauties aren’t just colorful, they’re nutritional powerhouses. Red peppers are one of the richest sources of vitamin C, even more than oranges, which means they’re incredible for immune support and skin health. They also provide high amounts of vitamin A, essential for eye health, and contain powerful antioxidants like beta-carotene and capsanthin. With very few calories and a natural sweetness that deepens when roasted, red bell peppers are perfect for flavor-packed recipes that nourish your body without compromise. Including them in your regular diet can support inflammation control, boost collagen production, and help protect cells from oxidative damage. Basically, your body will thank you.
And let’s not forget about the walnuts, the quiet powerhouse in this recipe. Not only do they bring an earthy richness and creamy texture to the dip, but they’re also one of the best plant-based sources of omega-3 fatty acids (ALA), which support heart and brain health. Walnuts are packed with antioxidants, especially in their thin skins, and they offer anti-inflammatory benefits that are particularly helpful if you’re managing chronic conditions or just trying to age well. They’re also a source of magnesium, copper, and plant-based protein, making them a perfect match for both flavor and nutrition. When toasted, their deep, nutty aroma brings out the umami character of muhammara. In short, don’t skip the walnuts, they’re doing more than just filling in the texture.
INGREDIENTS
-
3 large red bell peppers (approx. 640 g)
-
1 rice cake (approx. 5 g), or substitute with 2 small toast crackers or breadcrumbs
-
70 g walnuts (60 g for the dip, 10 g for garnish)
-
3 tablespoons olive oil (plus 1 tablespoon for garnish)
-
3 garlic cloves
-
1 tablespoon red pepper paste (or tomato paste)
-
½ teaspoon paprika
-
¼ teaspoon salt
-
1 tablespoon pomegranate molasses (plus ½ tablespoon for garnish)
-
A few fresh parsley leaves (for garnish)
DIRECTIONS
- Start by giving your red bell peppers a good rinse. Slice them lengthwise and remove all the seeds and white membranes.
- Place the pepper halves skin-side up on a baking sheet.
- Broil them at 400°F (approx. 200°C) for 15–20 minutes, until the skins darken and blister.
- Once roasted, immediately place them in a glass container and cover with a lid. Let them steam for 15 minutes to loosen the skins.
- While the peppers are steaming, grind the rice cake or toast/breadcrumbs into fine crumbs using a coffee grinder or food processor.
- Toast the walnuts in a dry skillet over medium heat for 2–3 minutes, stirring frequently to prevent burning. Set them aside.
- In an oven-safe jar or small dish, combine the olive oil with the garlic cloves (peeled but left whole) and roast at 350°F (approx. 175°C) for 5 minutes. This will mellow the garlic flavor beautifully. (You can also skip roasting and use raw garlic if preferred.)
- After 15 minutes, uncover the peppers and peel off their skins—they should come off easily. Discard any remaining seeds.
- Transfer the peeled peppers to a food processor.
- Add the toasted walnuts (reserving 10 g for garnish), ground breadcrumbs, roasted garlic with the infused olive oil, red pepper paste, paprika, salt, and pomegranate molasses.
- Blend until silky smooth. Don’t over-process; keep it thick and luxurious, not watery.
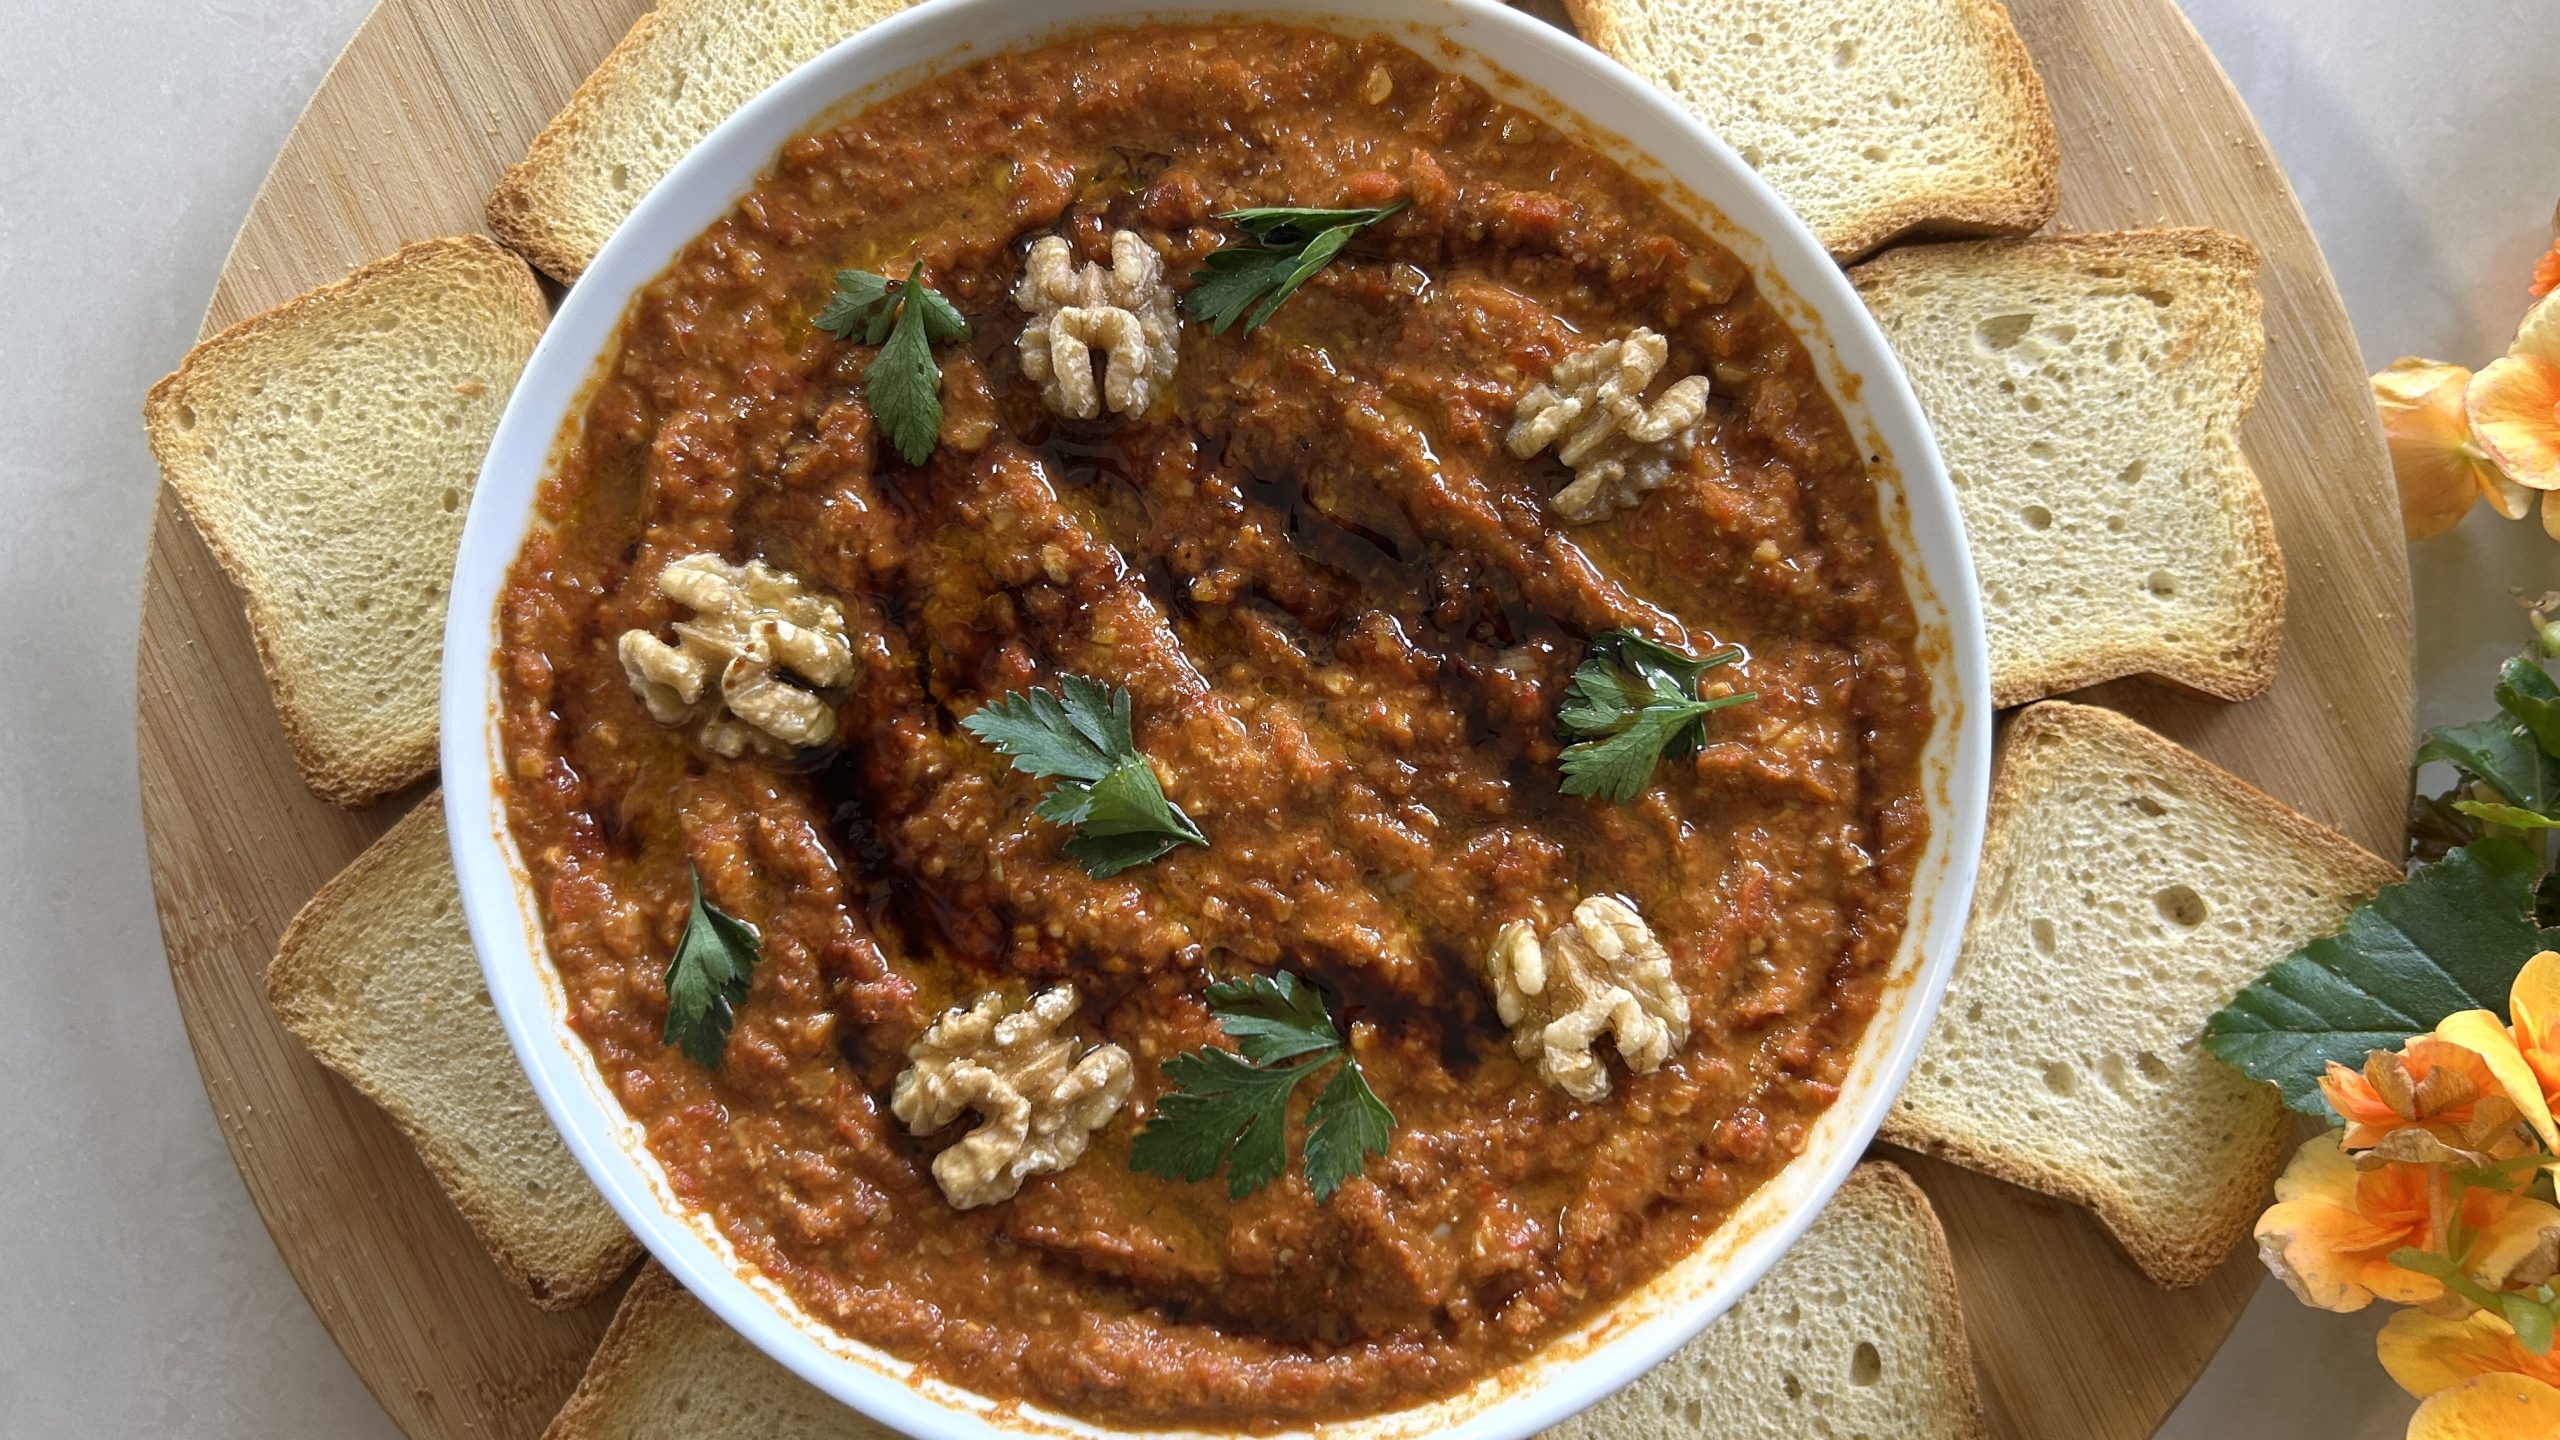
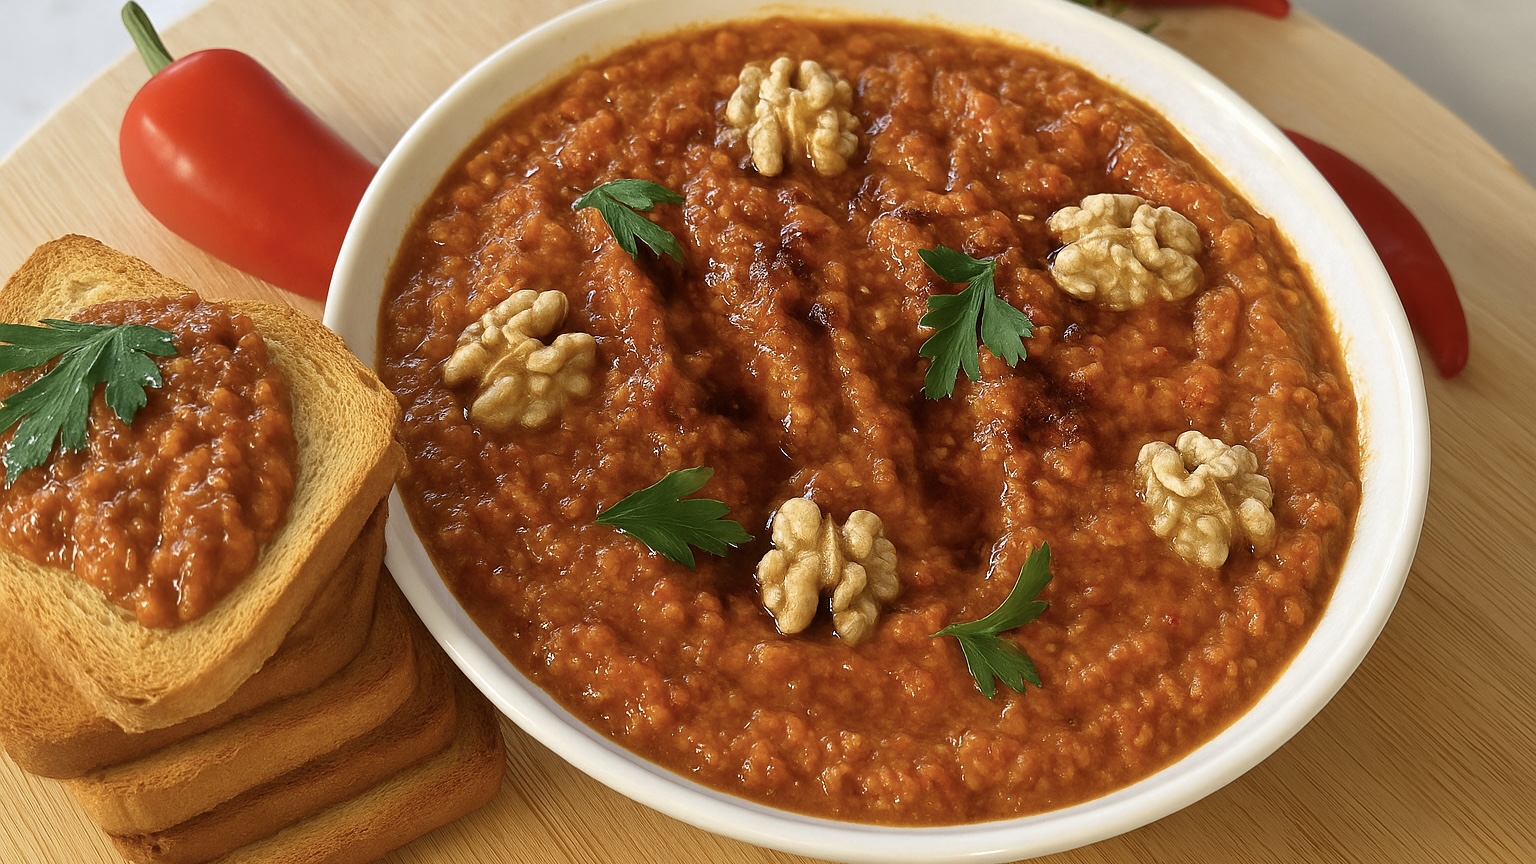
- Scoop the muhammara into a serving bowl.
- Garnish with a swirl of olive oil, a drizzle of pomegranate molasses, the reserved chopped walnuts, and fresh parsley.
PREP TIME: 30 minutes
COOKING TIME: 5 minutes baking
: 15 minutes broiling
YIELD: 6 servings
DIETARY INFO
This recipe is vegetarian, dairy-free, and gluten-free (if using rice cake or certified gluten-free breadcrumbs).
NUTRITIONAL INFORMATION
Per serving (based on 6 servings):
-
Energy: 217 calories
-
Protein: 4.12 g
-
Fat: 17.21 g
-
Carbohydrates: 15.47 g
-
Fiber: 2.8 g
STORAGE & RECOMMENDATIONS
-
Store in an airtight container in the fridge for up to 5 days.
-
Freezing is not recommended, as it may alter the creamy texture.
-
Use it in so many ways:
-
As a spread on toast
-
Swirled into pasta
-
As a dip for grilled veggies or pita
-
With grilled chicken or fish
-
In sandwiches or wraps for a flavor upgrade
-