Chickpea Brioche
Chickpea Brioche

Who doesn’t love brioche? This classic French bread is known and adored all over the world for its soft, fluffy texture and delicate sweetness. Traditionally made with refined wheat flour, butter, eggs, and sugar, brioche has become a staple for both sweet breakfasts and savory sandwiches. Its rich yet airy crumb makes it irresistible, but classic versions often rely heavily on refined flour, which is high in gluten but relatively poor in essential nutrients. In today’s recipe, we are giving this beloved French classic a wholesome, gluten-free twist by replacing refined flour with cooked chickpeas.
To recreate that signature soft structure, we incorporate psyllium husk, a powerful source of soluble fiber that supports gut health and acts as a natural binder in gluten-free baking. Combined with butter, eggs, and maple syrup, these homemade chickpea brioches beautifully blend indulgence with nourishment, making them perfect for breakfast, snacks, or mini-sandwiches.
Chickpeas are the star of this recipe and for good reason—they are a nutritional powerhouse that should be a regular part of any healthy diet. Naturally gluten-free, they are packed with plant-based protein, fiber, iron, magnesium, and essential vitamins. Unlike refined wheat flour, chickpeas help support stable blood sugar levels and promote long-lasting satiety, ensuring you feel full and energized throughout the day. By choosing chickpeas as your base, you are adding valuable minerals and fiber that aid digestion and overall intestinal balance. Incorporating this versatile legume into your baking is a simple yet effective way to upgrade the nutritional profile of your favorite comfort foods without sacrificing the soft, fluffy texture you crave.
Ingredients
-
2 cups (325 g) cooked chickpeas (canned, drained and rinsed, or homemade)
-
2 eggs
-
1/3 cup maple syrup
-
1 tbsp (10 g) instant yeast
-
A pinch of salt (optional)
-
60 g butter, softened at room temperature
-
6 tbsp (30 g) psyllium husk
-
30 g dark chocolate chips (optional)
-
1/4 cup plain yogurt (for brushing)
-
15 g sliced almonds (optional topping)
Instructions
- If you are preparing your chickpeas from dry, soak 1 cup (180 g) of dry chickpeas overnight, rinse them, and pressure cook until tender. Drain them thoroughly and let them cool slightly.
- Line a baking tray with parchment paper to prevent the rolls from sticking.
- Place the cooked chickpeas into a food processor.
- Add the eggs, maple syrup, instant yeast, and salt, then blend until the mixture is perfectly smooth and creamy.
- Add the softened butter and psyllium husk to the processor.
- Blend again until the ingredients form a soft, unified dough that holds together easily.
- Transfer the dough onto a work surface and divide it into two equal portions.
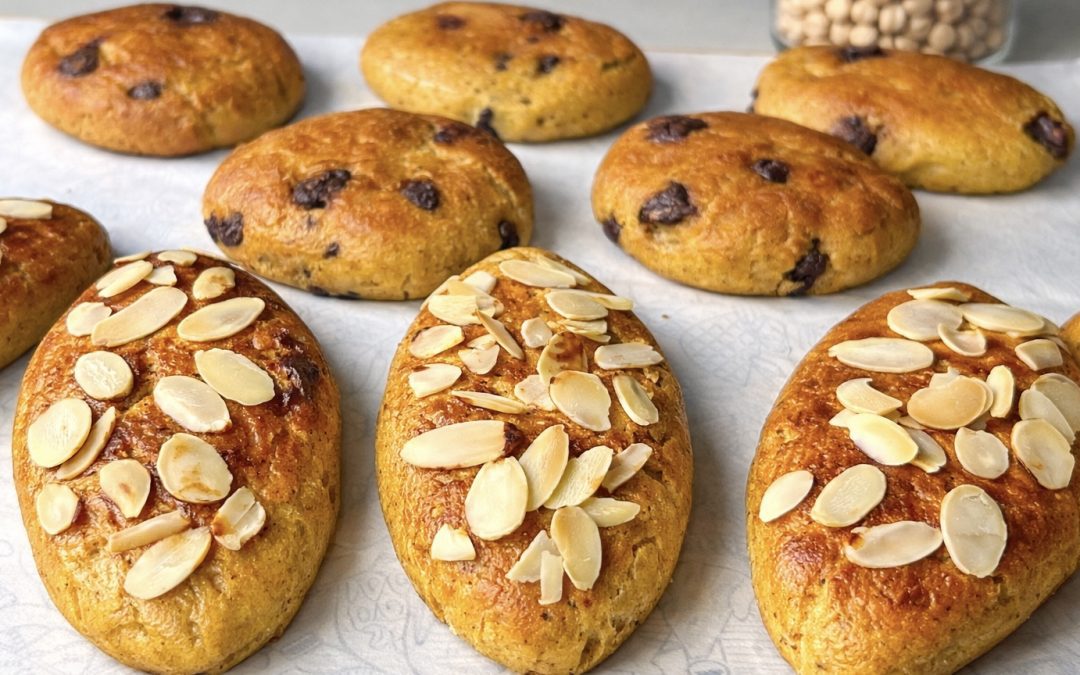
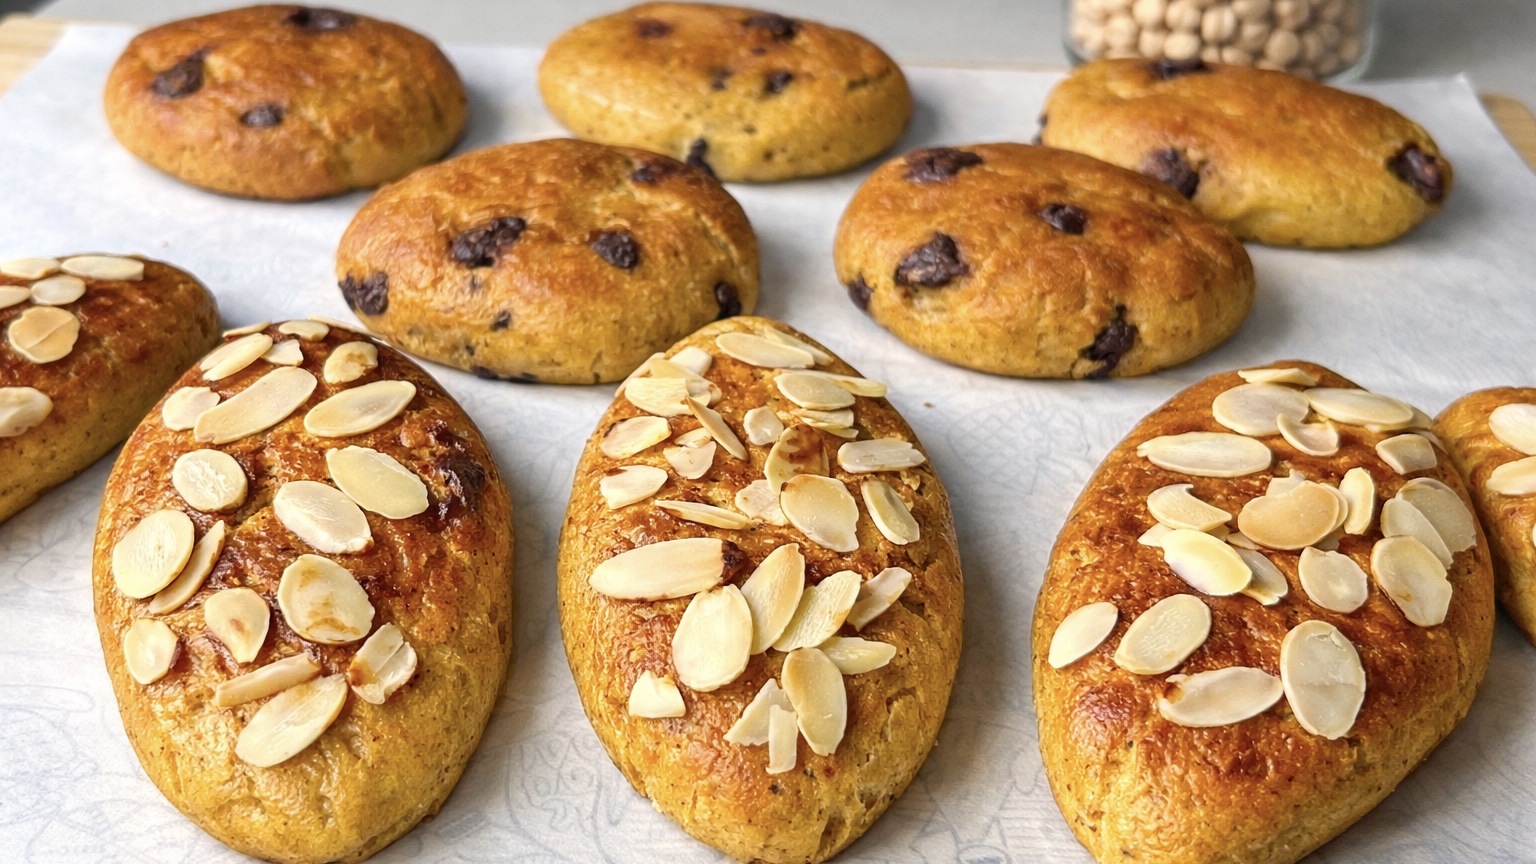
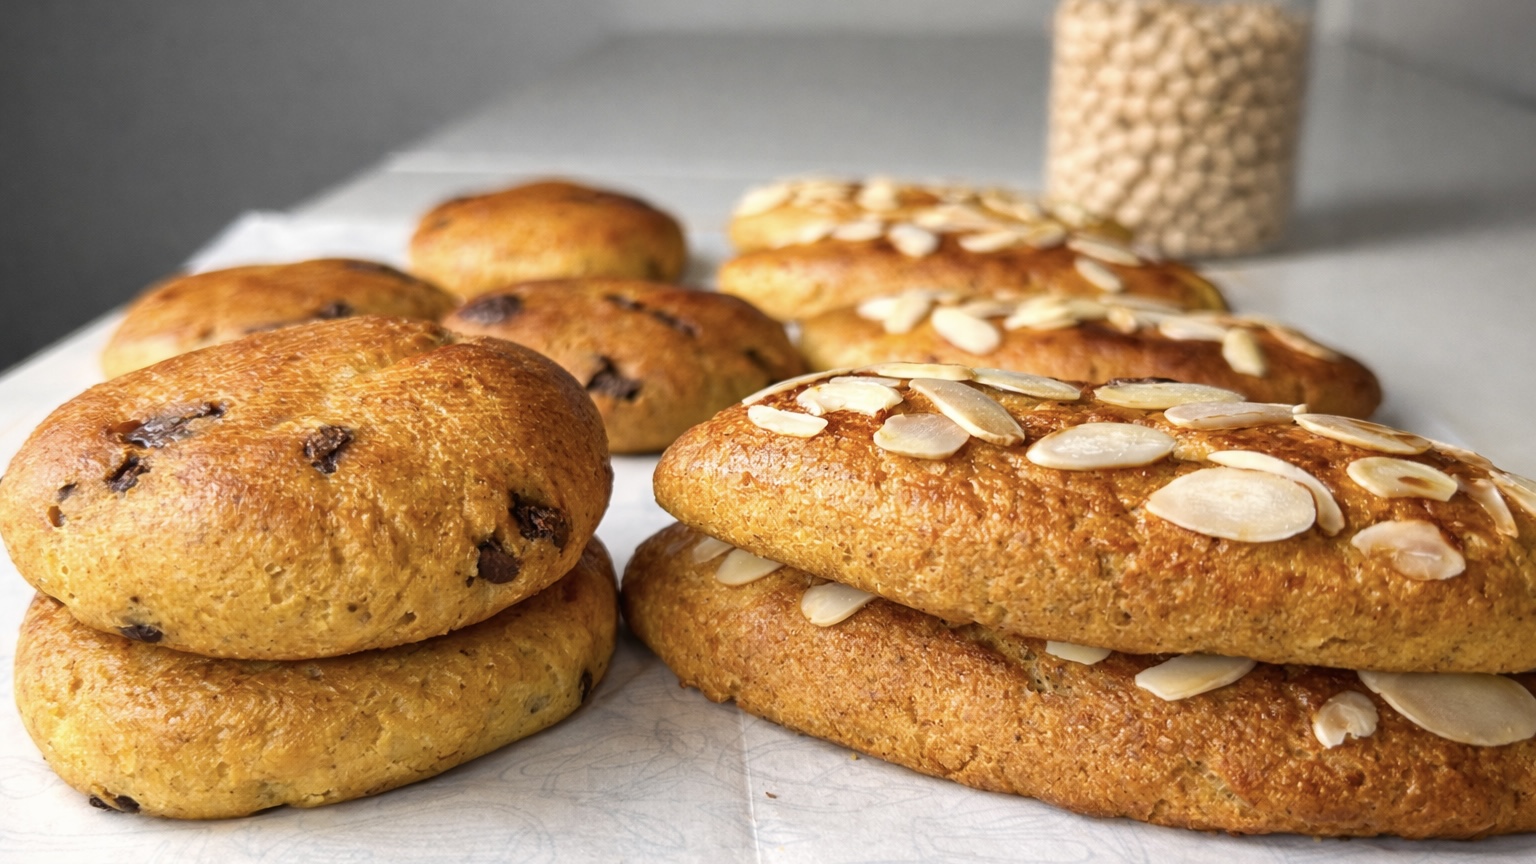
- Take the first portion, flatten it slightly, and add chocolate chips if you are using them. Gently knead the dough to distribute the chips, roll it into a cylinder, and divide it evenly into pieces.
- Shape these pieces into round balls and arrange them on the prepared baking tray.
- Roll the second portion of dough into a cylinder, divide it evenly, and shape the pieces into elongated rolls or your preferred shapes.
- Place these on the tray, cover everything with a clean kitchen towel, and let the dough rise in a warm place for about 30 minutes.
- Once risen, brush each brioche with a little yogurt and sprinkle sliced almonds on top if desired.
- Bake the rolls at 170°C (340°F) for approximately 30 minutes until they are golden brown and fully cooked. Let them cool slightly before serving.
Nutritional Information
Per 1 Serving:
-
Energy: 144 calories
-
Protein: 4.24 g
-
Fat: 7.21 g
-
Carbohydrates: 15.03 g
-
Fiber: 4.5 g
Prep, Cook, and Servings
-
Prep: 30 mins
-
Cook: 30 mins
-
Servings: 12 Servings
Notes and Recommendations
-
Ensure the chickpea mixture is blended until perfectly smooth to achieve the best airy texture in the final brioche.
-
These rolls are best enjoyed warm and pair wonderfully with nut butter, jam, or a light drizzle of honey.
-
For a savory twist, use these as buns for mini sandwiches filled with your favorite savory ingredients.
-
This recipe is naturally gluten-free.
-
If you have leftovers, slightly toast them to give the exterior a satisfying crispness while keeping the inside soft.