Green Lentil Loaf Bread
Green Lentil Loaf Bread

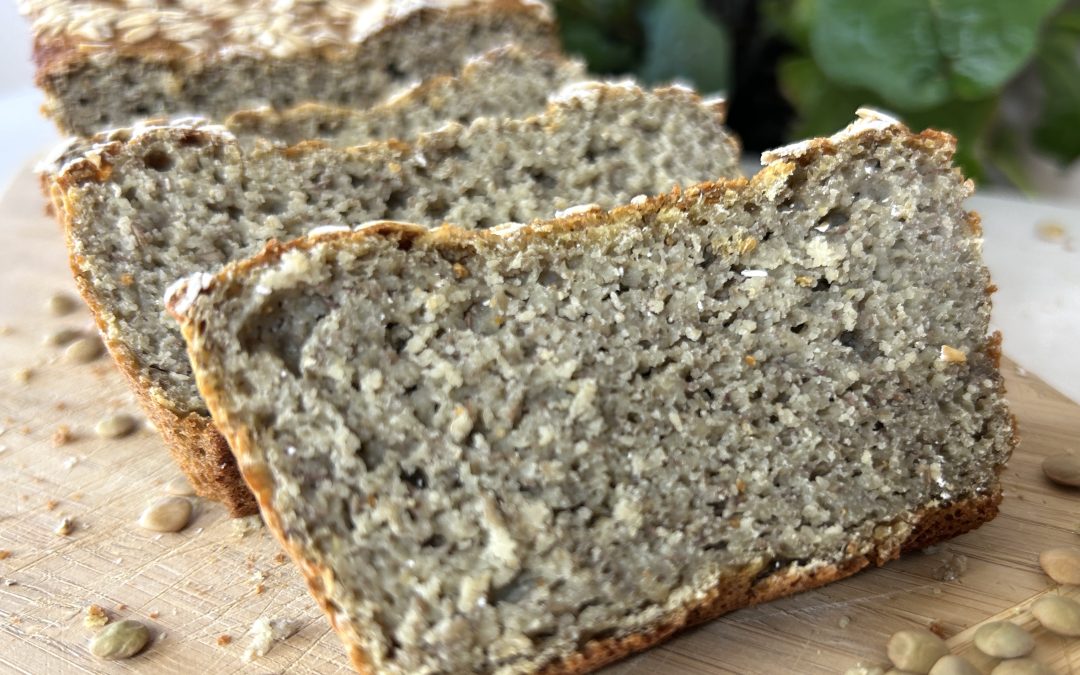
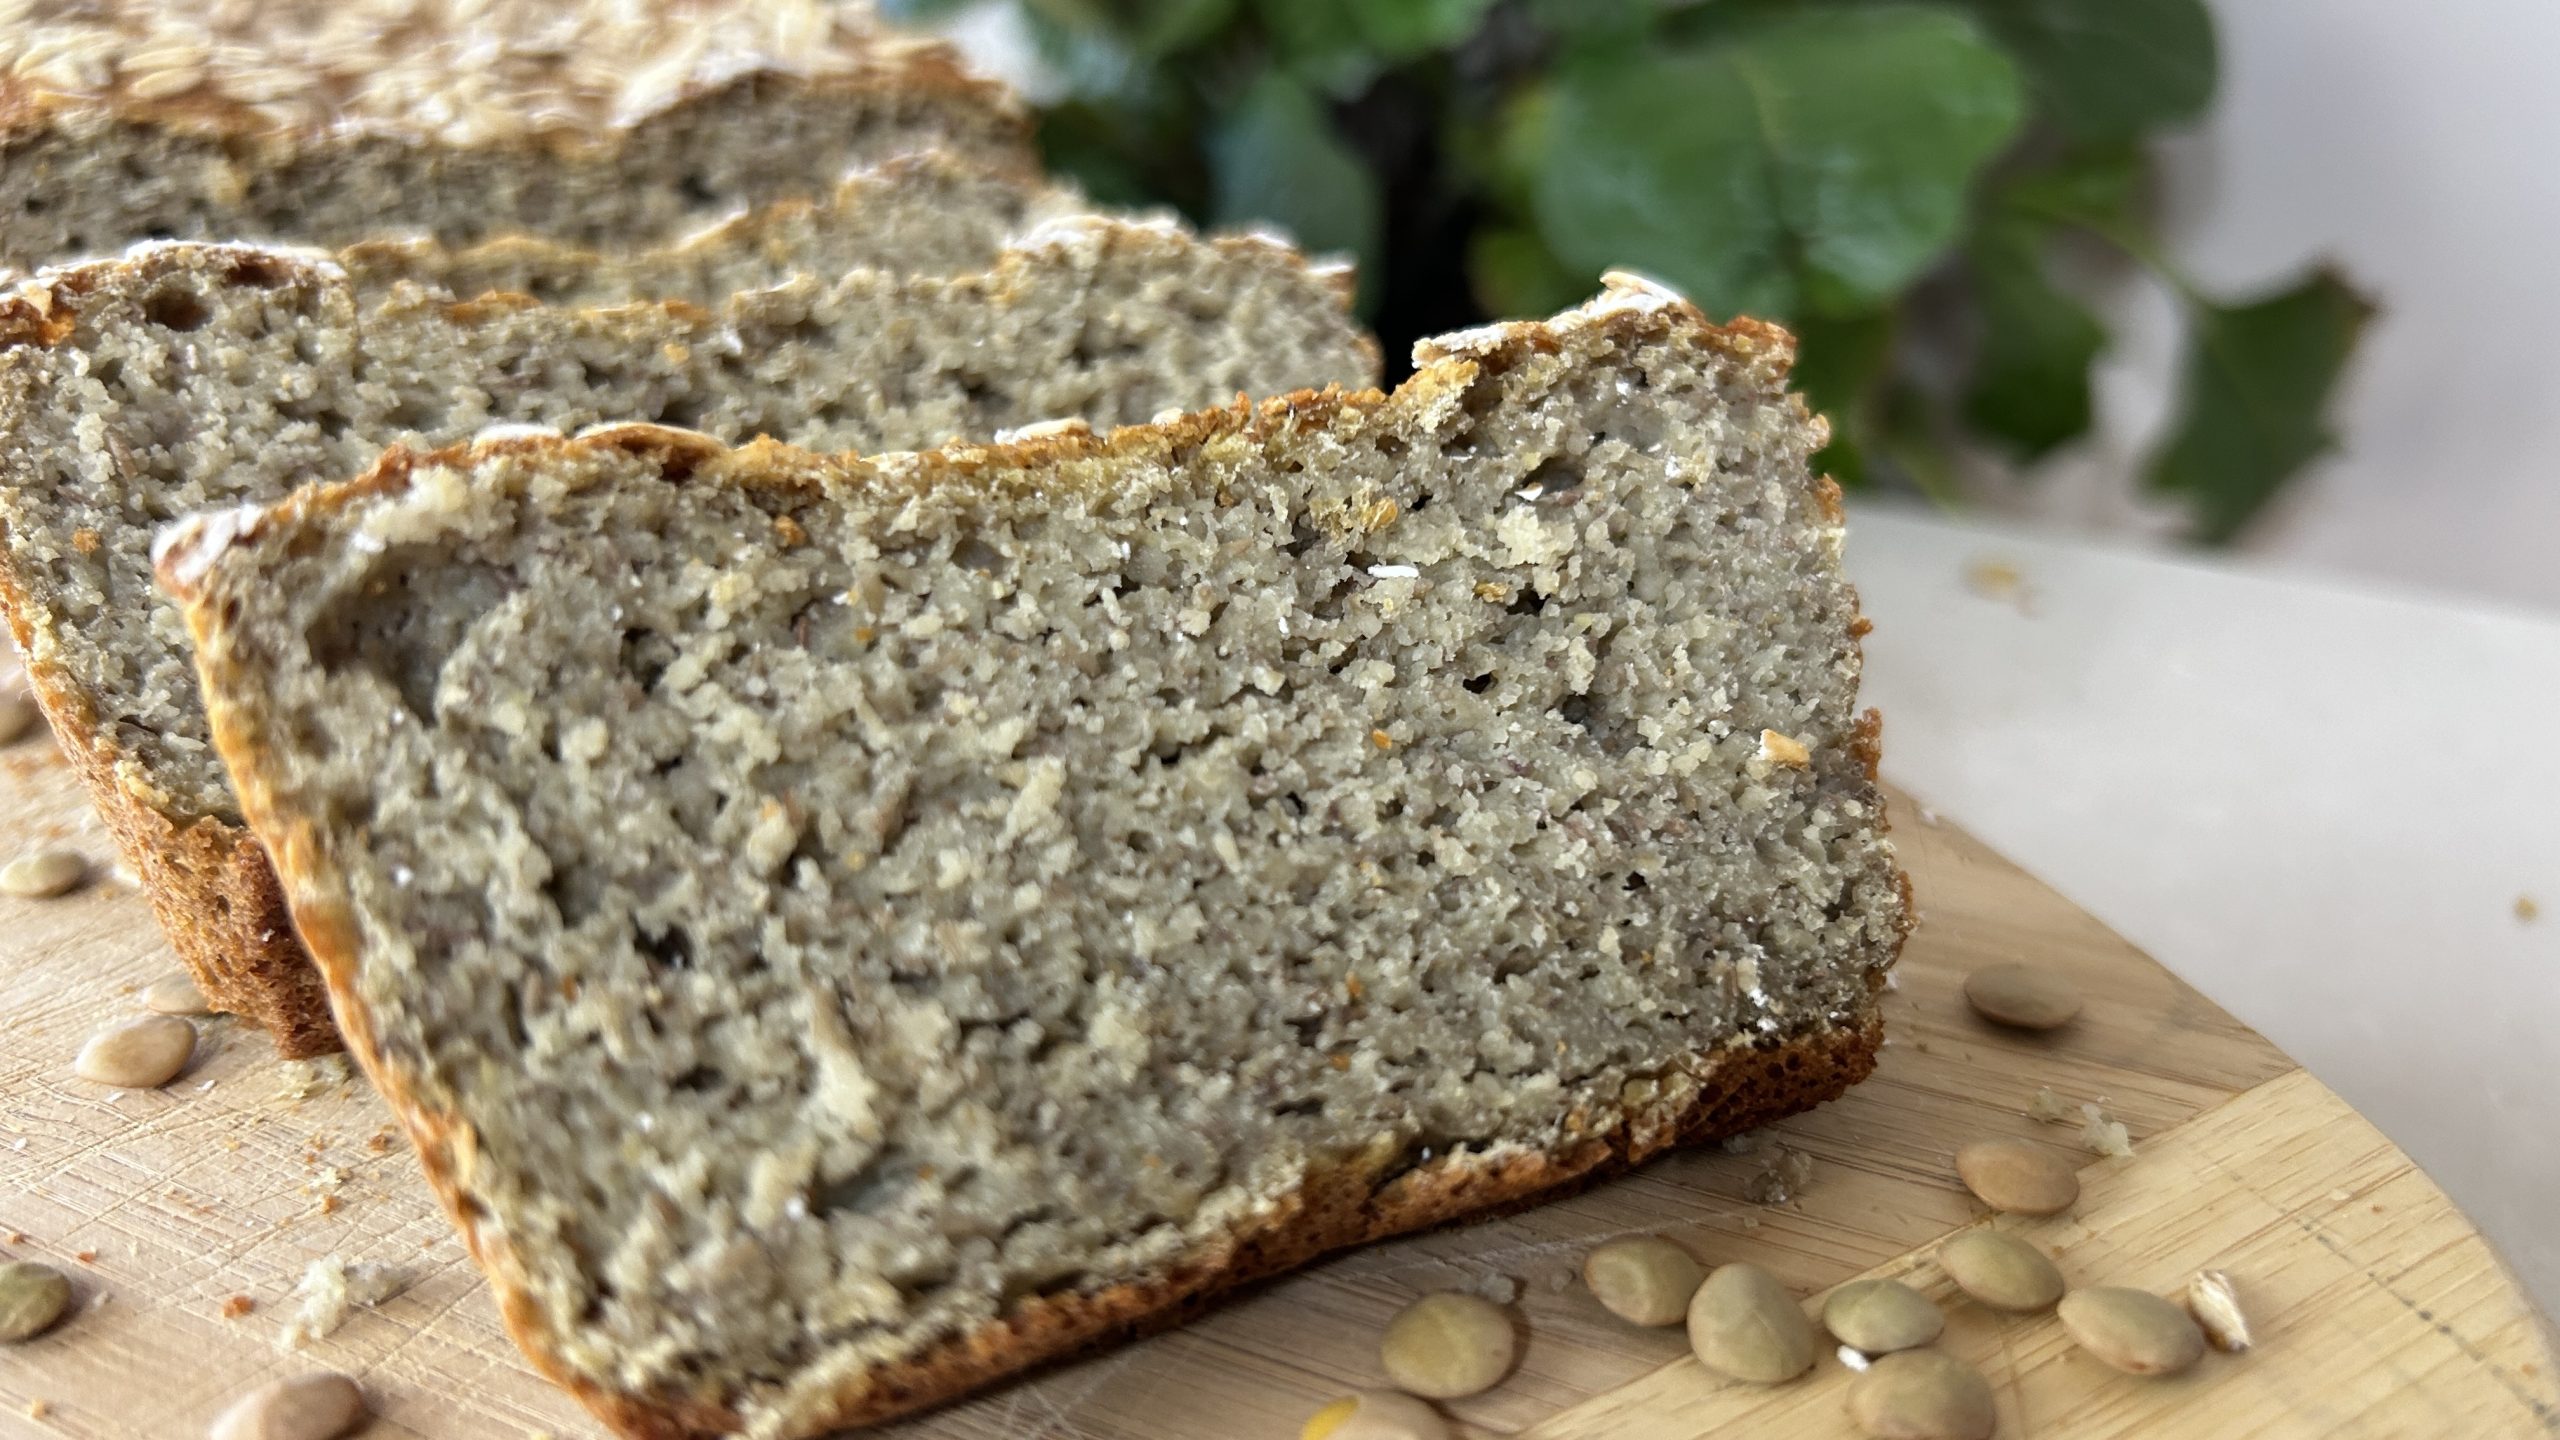
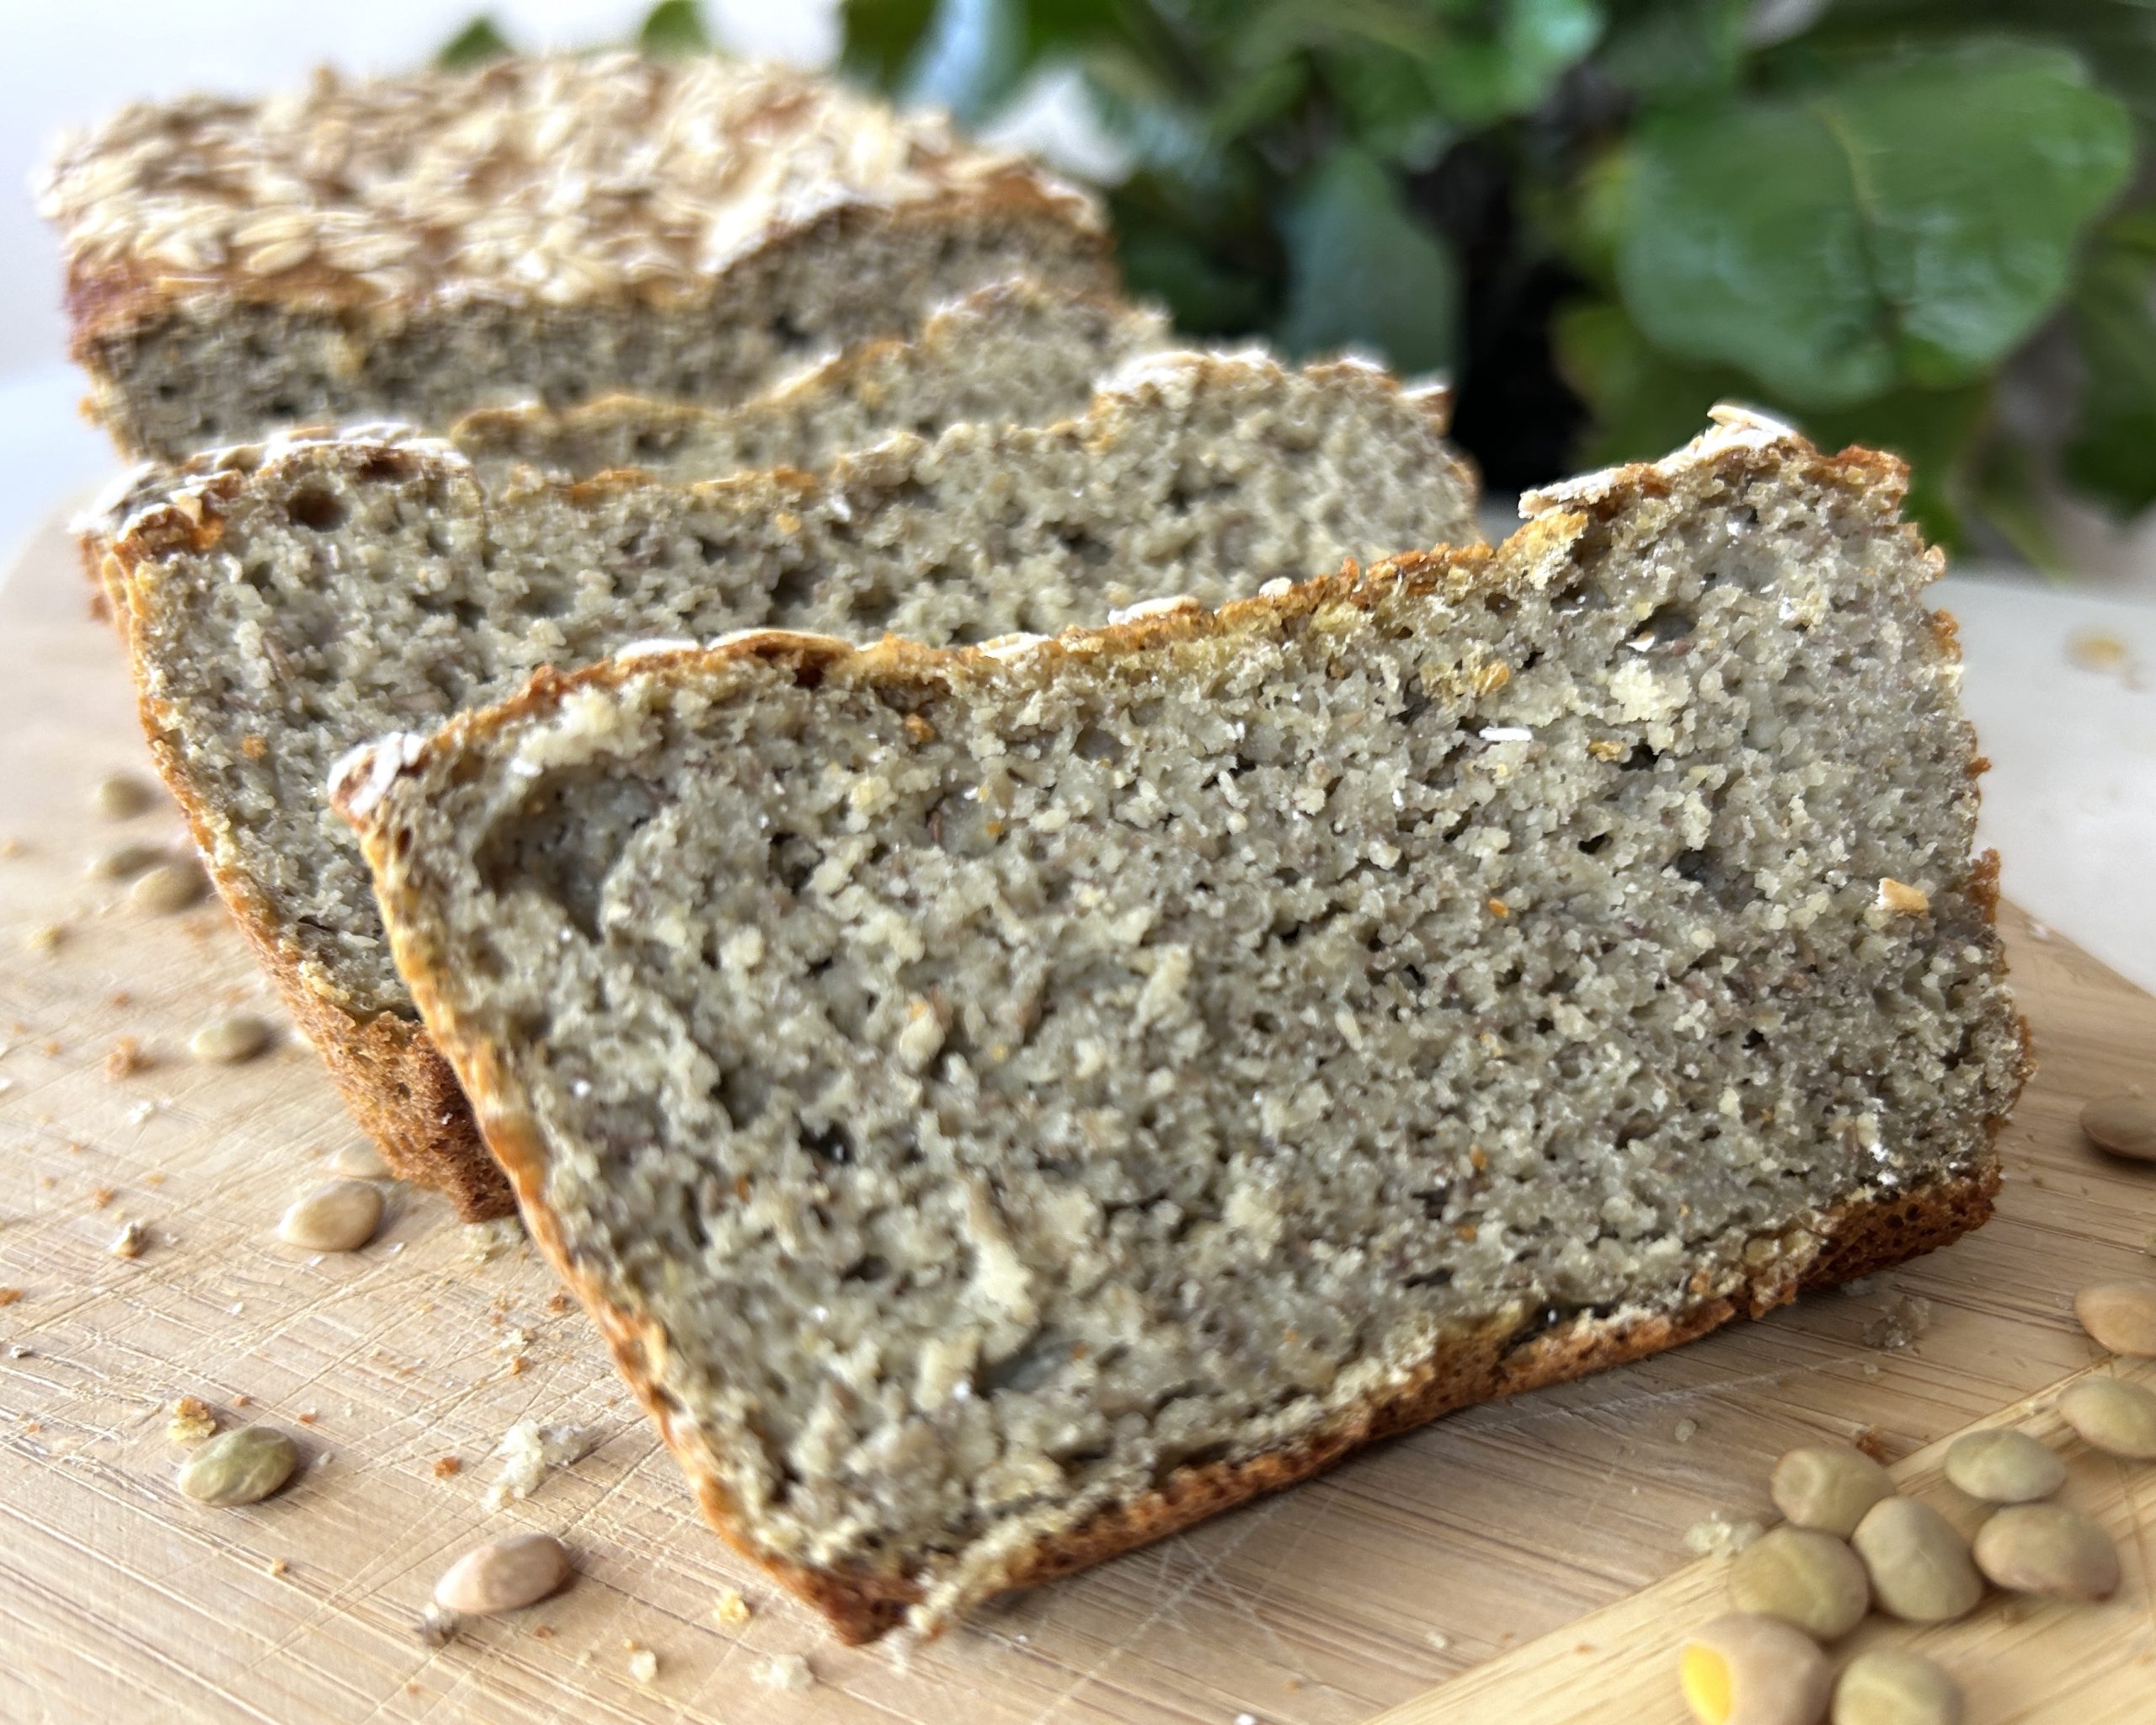
When you’re in the mood for something wholesome and filling, this Green Lentil Loaf Bread is exactly what you need. Made with the hearty goodness of green lentils and oats, this loaf is not only gluten-free but also packed with flavor and nutrients. The bread has a rich, soft texture, making it the perfect canvas for all your favorite toppings, whether it’s a simple spread of butter or something more indulgent like avocado or cheese. This recipe is ideal for anyone looking to add more plant-based proteins to their diet without sacrificing taste or satisfaction.
Let’s delve into the health benefits of green lentils, the star ingredient in this recipe. Green lentils are a nutritional powerhouse, rich in protein and fiber, which are essential for maintaining a healthy digestive system and keeping you full longer. They are also packed with iron, which is vital for producing energy and transporting oxygen throughout the body. Furthermore, green lentils are a good source of folate, which is particularly important for pregnant women, as it helps in the formation of the neural tube during early pregnancy.
 |
 |
Incorporating green lentils into your diet can also help manage cholesterol levels, as their high fiber content aids in reducing bad cholesterol. Moreover, lentils are low in fat and calories, making them an excellent choice for those looking to maintain or lose weight. With their impressive nutritional profile, it’s clear why green lentils should be a regular part of your diet, and this delicious loaf is a fantastic way to enjoy them.
Ingredients
- 3/4 cup (150 g) dry green lentils or 2 cups soaked green lentils
- 1 cup water
- 1 cup (90 g) oat flour
- 1 tbsp. instant yeast
- 1/2 tsp. salt
- 1 tsp. honey
- Butter or oil for greasing your loaf pan
- 1/4 cup (20 g) rolled oats or other grains and seeds of your choice (optional)
Directions
- Begin by soaking dry green lentils in water overnight. After soaking, thoroughly rinse and make sure you strain really well, ensuring all excess water is removed.
- Transfer the soaked lentils (yielding approximately 2 cups) to a mixing bowl and add water. Using a hand blender or food processor, blend the lentils until smooth, then transfer to a separate bowl.
- If not using store-bought oat flour, blend your rolled oats into a food processor until you get a flour consistency.
- Combine the oat flour with the blended lentils, add instant yeast, salt, and honey to aid in yeast activation. Gently stir until all ingredients are mixed, resulting in a sticky mixture.
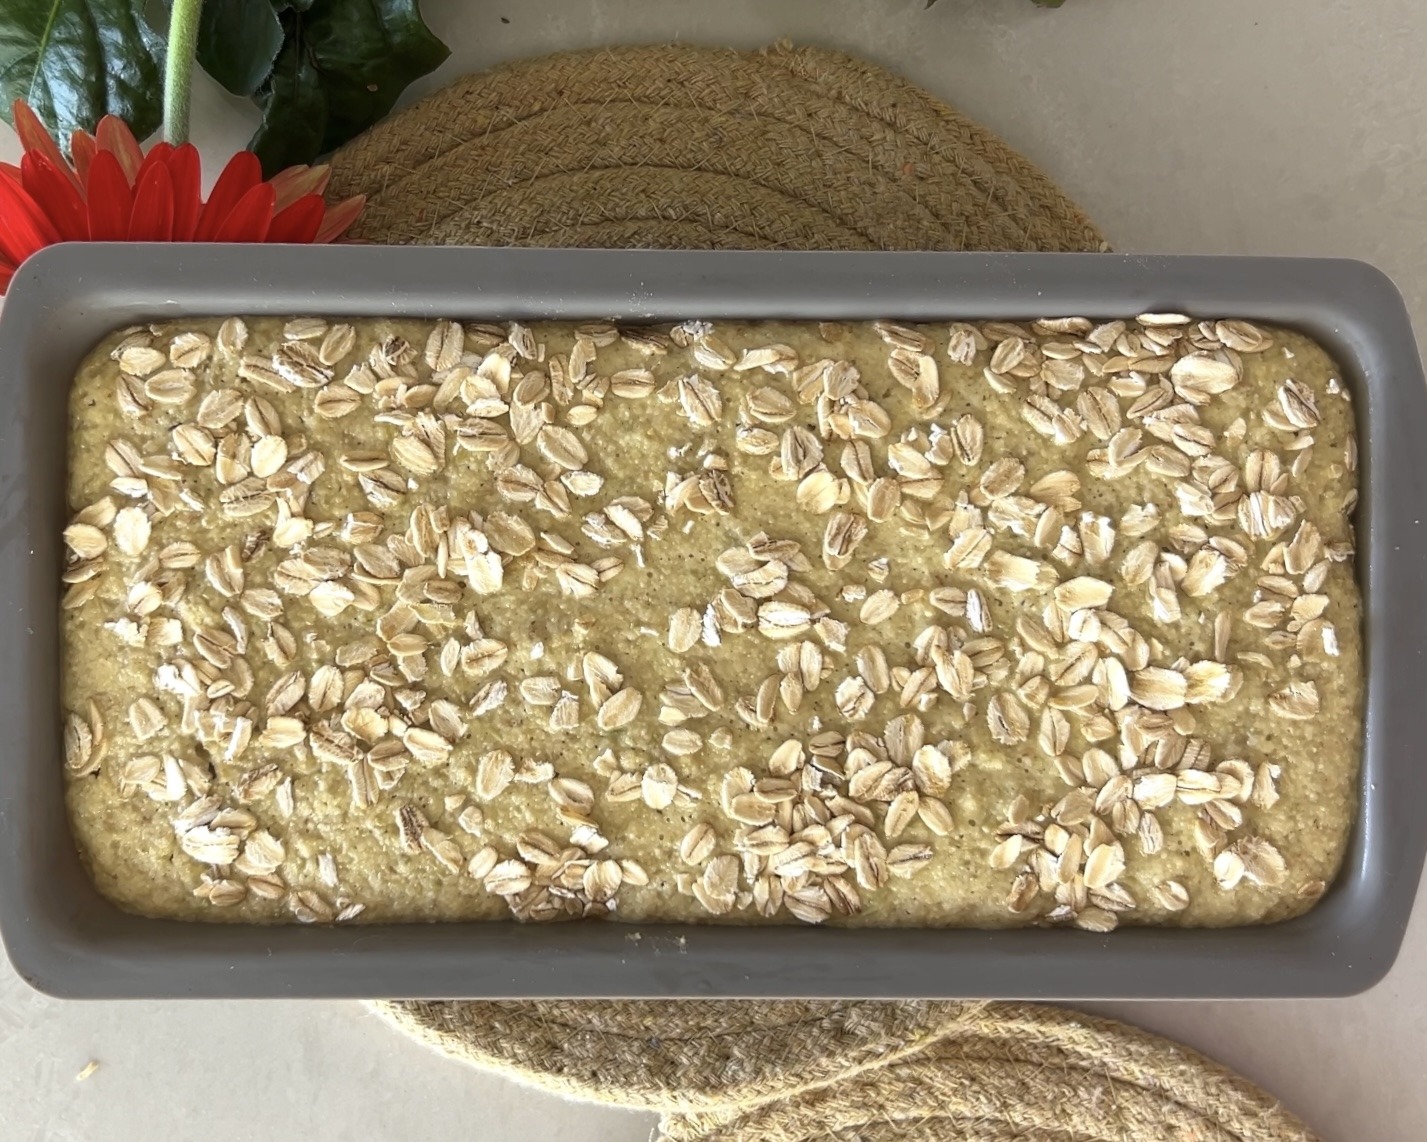
- Brush a 25 X 12.5 cm loaf pan with butter or oil and pour the mixture into the pan. If desired, sprinkle some rolled oats or other seeds of your choice on top for a nicer finish.
- Allow the dough to rise in a warm corner for 20 to 30 minutes, then bake in a preheated oven at 350°F (180°C) for 45 minutes.
- Once baked, promptly remove the loaf from the pan and let it cool on a cooling rack.
Prep Time: Soaking Overnight, 45 minutes Prep & Proofing
Cooking Time: 45 minutes (Pan Baking)
Servings: 10 slices
Nutritional Information
Per 1 Slice:
- Energy: 101 calories
- Protein: 5.98 g
- Fat: 0.93 g
- Carbohydrates: 17.74 g
- Fiber: 2.9 g
Storage and Recommendations
- Store your green lentil loaf bread in a sealed ziplock bag in the refrigerator for up to 7 days.
- Slice into your wholesome, gluten-free lentil bread and enjoy its hearty texture and rich flavor, whether paired with your favorite toppings or simply enjoyed with a spread of homemade butter.