Rice Paper Apple Turnovers
Rice Paper Apple Turnovers

If you’ve been scrolling through food trends lately, you’ve probably noticed rice paper popping up everywhere, not just for spring rolls anymore, but as a light and healthier substitute for puff pastry. And that’s exactly what makes these Rice Paper Apple Turnovers so exciting. Instead of the heavy, buttery layers of traditional French chaussons aux pommes (apple turnovers), this recipe uses rice paper to create a golden, crisp, and slightly chewy shell that’s naturally gluten-free. The result is a dessert that feels indulgent and cozy, yet much lighter, with fewer calories and no gluten worries.
Imagine the warm aroma of baked apples mixed with cinnamon and maple syrup, all wrapped in a delicate, crispy pocket. This is the kind of treat that instantly makes you think of fall, comfort, and home-baked goodness, but with a modern twist. Best of all, it’s an easy recipe that doesn’t require advanced baking skills. With just a handful of ingredients and simple steps, you’ll have a dessert that looks bakery-worthy but is much kinder to your body.

Now, let’s talk about the real star of this recipe: apples. Apples are one of nature’s most versatile and nutritious fruits. They’re packed with vitamin C, potassium, and antioxidants that help fight inflammation and support overall immunity. More importantly, apples are rich in soluble fiber, especially pectin, which plays a crucial role in regulating digestion, lowering cholesterol, and stabilizing blood sugar levels. That means you’re not just enjoying a sweet treat, you’re nourishing your body with every bite. Including apples regularly in your diet can help improve heart health, keep you fuller for longer, and even promote better gut health. When paired with cinnamon and a touch of maple syrup, apples transform into a naturally sweet and wholesome filling that feels both comforting and energizing.
If you’re looking for a dessert that’s lighter, healthier, and still delivers that golden, cozy comfort, these Rice Paper Apple Turnovers are the answer. Perfect for fall gatherings, after-school snacks, or a guilt-free indulgence with your coffee or tea, they’re proof that sometimes the simplest swaps create the most satisfying results.
Ingredients (8 turnovers)
-
5 medium apples (≈ 565 g after cleaning, cored, sliced)
-
3 cinnamon sticks
-
2 tbsp maple syrup
-
¼ cup water
-
1 tbsp butter (≈ 15 g)
-
2 eggs
-
2 tbsp maple syrup (for the custard dip)
-
1 cup milk (≈ 200 ml)
-
10 rice paper wrappers
-
1 egg yolk (for brushing)
-
1 tbsp brown sugar (optional, for sprinkling on top)
Directions
- Wash, core, and slice the apples thinly.
- Place the apple slices in a saucepan with the cinnamon sticks, maple syrup, and water.
- Cover and cook over low–medium heat for 10–15 minutes, stirring occasionally, until the apples are soft and most of the liquid has evaporated.
- Stir in the butter, cover again, and cook for 5 more minutes until the apples are tender but still hold their shape.
- Transfer the apples into a bowl and let them cool before using.
- In a large shallow bowl, whisk together the eggs, maple syrup, and milk to create a custard mixture.
- Dip one full rice paper into the custard, turning it gently until it becomes flexible but not overly soft.
- Dip one quarter piece of rice paper into the same mixture.
- Lay the softened full rice paper flat on a wooden board, keeping it smooth. Place the softened quarter piece in the center of the full wrapper.
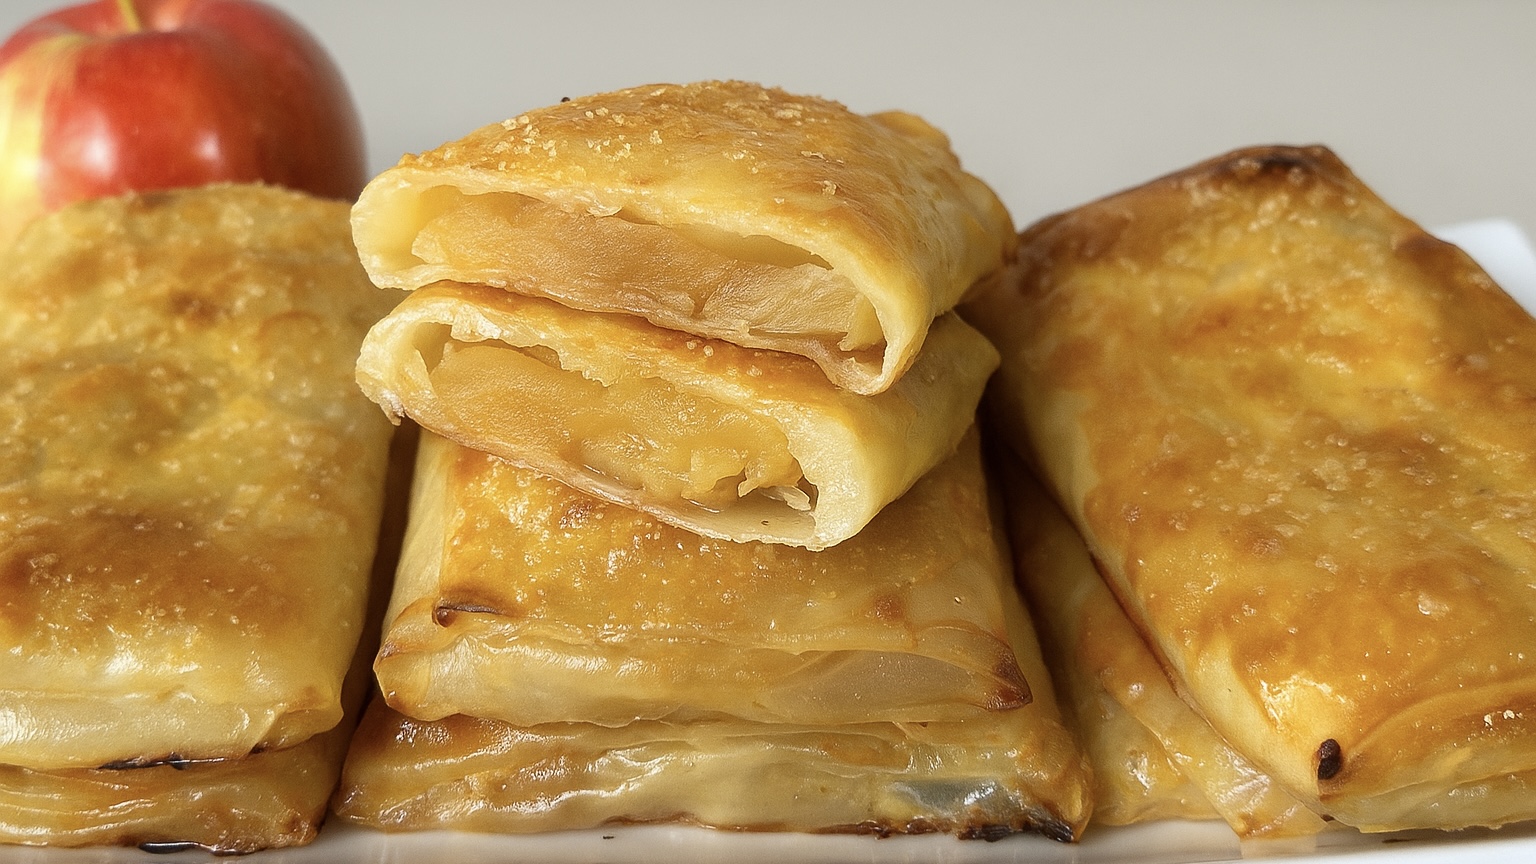
- Spoon about one-third cup of apple filling into the middle of the rice paper.
- Fold in the sides of the rice paper to form a rectangle, sealing the filling inside.
- Repeat the process with the remaining rice papers and filling.
- Place the assembled turnovers on a baking sheet lined with parchment paper.
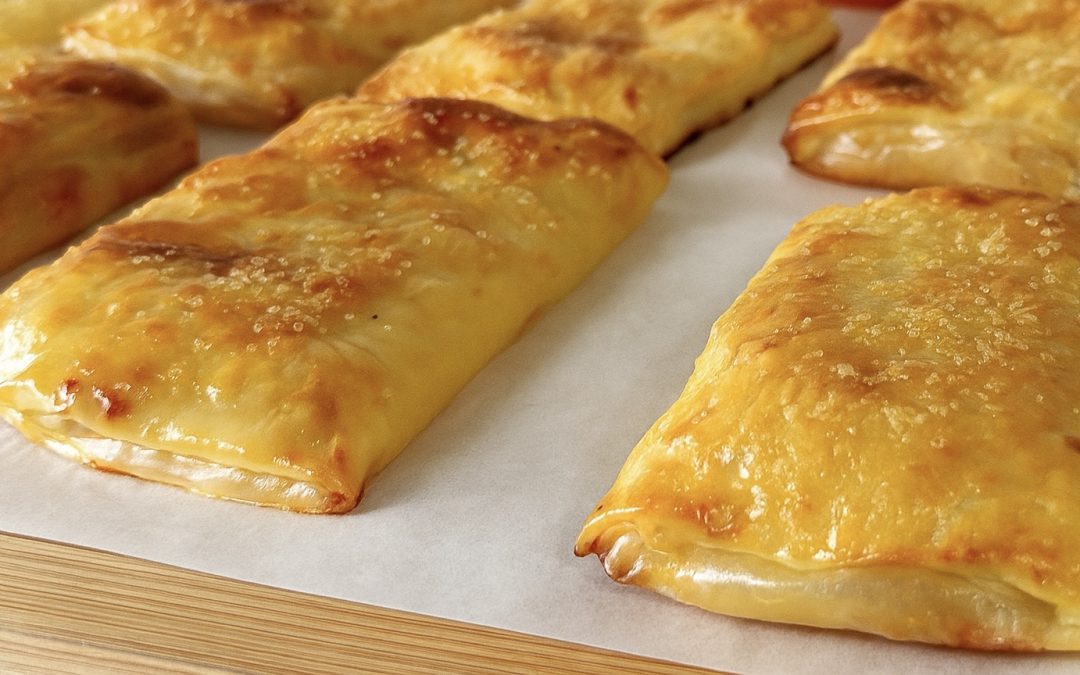
- Brush each turnover with egg yolk. Sprinkle a little brown sugar on top if desired.
- Bake in a preheated oven at 350°F (180°C) for 35–40 minutes, or until golden and crisp.
- Let the turnovers cool slightly before serving.
Prep & Baking Info
-
Prep Time: 30 minutes
-
Cooking Time: 20 minutes
-
Baking Time: 35–40 minutes
-
Yield: 8 apple turnovers
Nutritional Information (per 1 turnover)
-
Energy: 117 calories
-
Protein: 2.29 g
-
Fat: 3.19 g
-
Carbohydrates: 21 g
-
Fiber: 1.2 g
-
Naturally gluten-free
Storage & Recommendations
-
Best eaten fresh the same day for maximum crispness.
-
Store cooled turnovers in an airtight container at room temperature for up to 5 days.
-
Avoid covering or stacking while still warm to prevent sogginess.
-
Reheat in the oven for a few minutes to restore crispness before serving.