Carrot Flatbread
Carrot Flatbread

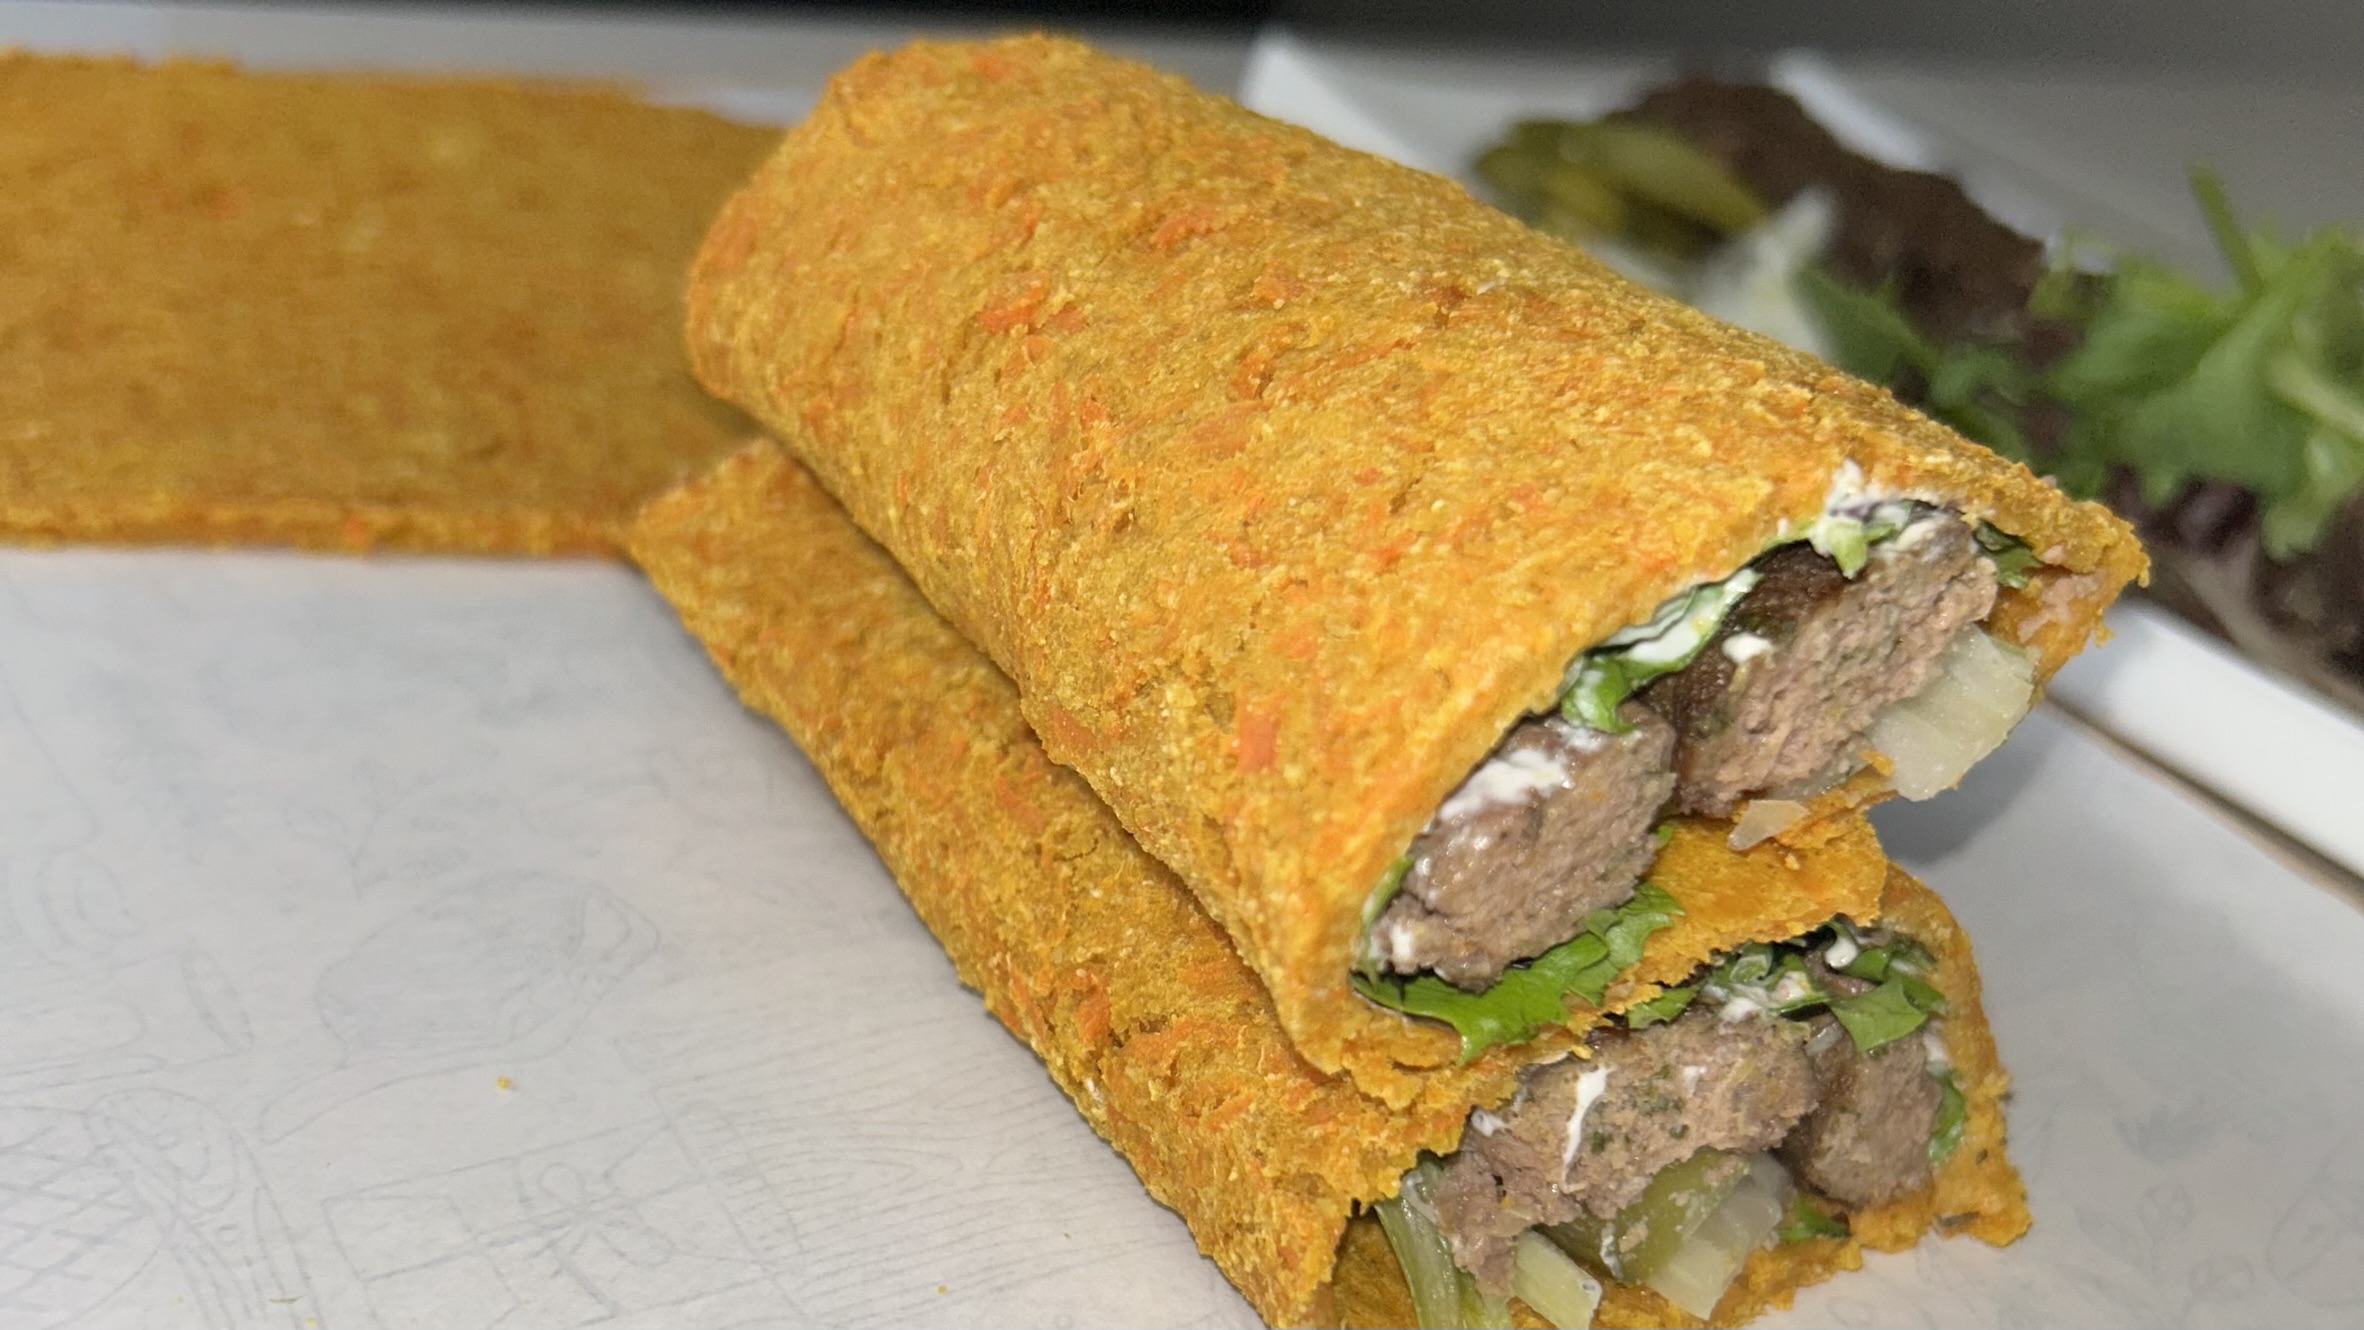
If you’ve been searching for a soft, flexible, and wholesome bread alternative that’s easy to make and packed with real ingredients, this carrot flatbread might just become your new favorite kitchen staple. It’s one of those simple recipes that surprises you, just a handful of everyday ingredients transforming into a beautifully pliable, naturally sweet, and nourishing wrap.
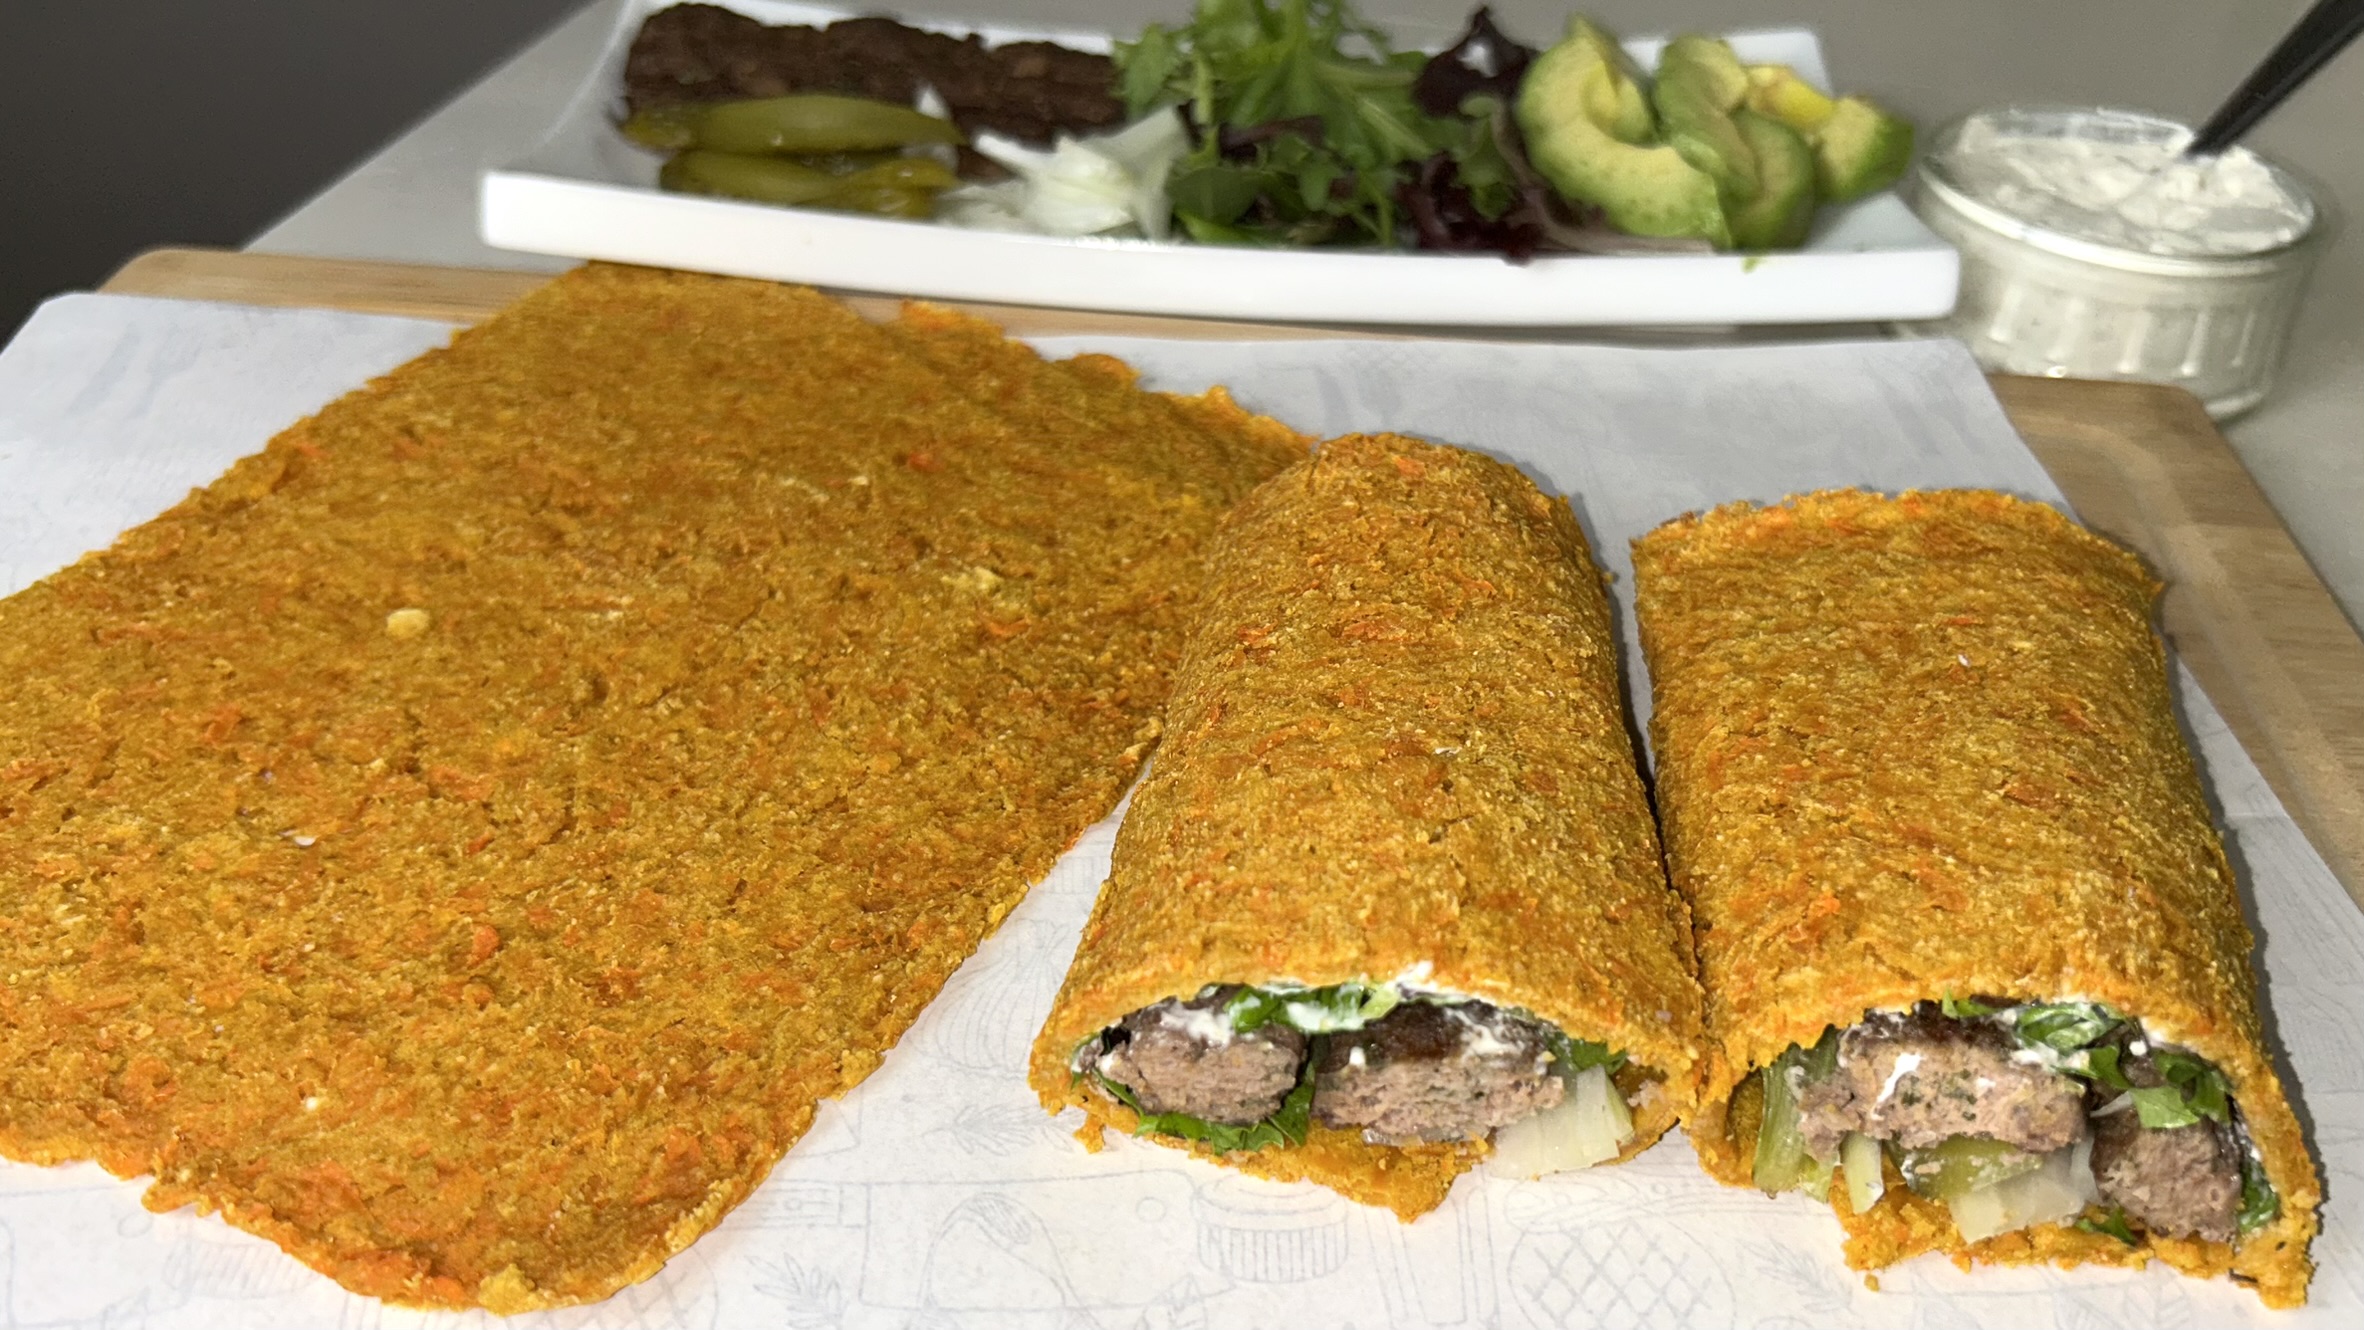
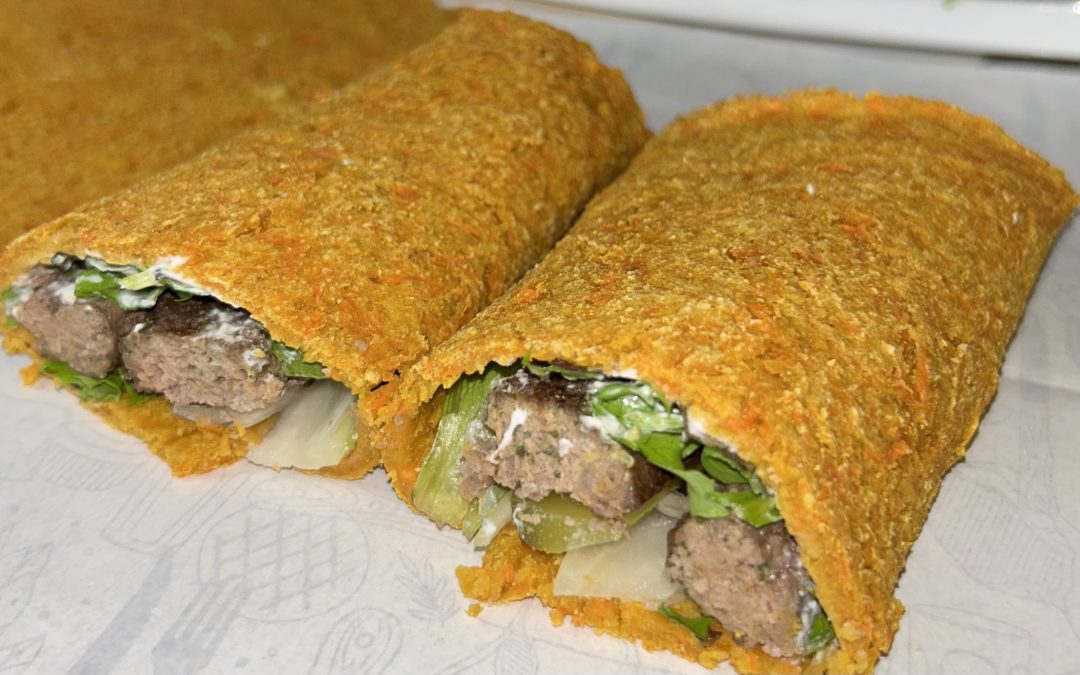
What I love most about this carrot and oat flatbread is how effortlessly it comes together. No complicated techniques, no yeast, no kneading. Just grate, mix, spread, and bake. The result? A golden, tender flatbread that folds beautifully around your favorite fillings, perfect for wraps, tacos, sandwiches, or even as a savory base for creative toppings.
Finely shredded fresh carrot blends seamlessly with oat flour, creating a dough that bakes into a flexible yet sturdy flatbread. The carrots distribute their natural moisture and subtle sweetness throughout, while oat flour provides structure and a satisfying texture. It’s simple, practical, and incredibly versatile.
Now let’s talk about why carrots deserve a regular place in your diet. Carrots are rich in beta-carotene, a powerful antioxidant that your body converts into vitamin A — essential for healthy vision, immune support, and skin health. They also provide fiber, which supports digestion and promotes satiety, helping you feel full longer. Regularly incorporating carrots into meals, even in creative ways like flatbreads, is a smart and delicious way to boost your daily vegetable intake. When you combine carrots with oat flour, you also benefit from beta-glucans found in oats, a type of soluble fiber known to support heart health, steady energy levels, and balanced blood sugar. Together, they create a nutrient-dense flatbread that feels light yet deeply nourishing.
This recipe is vegan and naturally gluten-free (as long as certified gluten-free oat flour is used), making it suitable for many dietary preferences. It’s especially helpful if you’re looking for healthy wrap alternatives or creative ways to include more vegetables in your meals.
Let’s make it!
Ingredients
-
1 large carrot (275 g), finely shredded
-
1 cup (90 g) oat flour
-
½ tsp. salt
-
1 tsp. baking powder (optional)
Directions
- Thoroughly wash and peel the carrot to remove any dirt or residue.
- Finely shred the carrot using a box grater or food processor.
- Transfer the shredded carrot to a large bowl and sprinkle it with the salt.
- Let it rest briefly to allow the salt to draw out excess moisture.
- Add the oat flour and baking powder (if using) to the carrot mixture.
- Gently stir until everything is evenly combined, avoiding overmixing.
- Check the texture — the dough should be slightly sticky but not runny.
- Line a large baking tray (about 37 cm × 26 cm) with parchment paper.
- Spread the mixture evenly and thinly over the tray using a spatula or rectangular scraper.
- Bake in a preheated oven at 350°F (180°C) for 20–25 minutes, or until the surface looks set and dry.
- Remove from the oven and allow it to cool slightly before cutting.
- Slice into large portions and enjoy warm as a wrap, sandwich base, taco shell, or flatbread.
Prep Time, Baking Time & Servings
-
Prep Time: 15 minutes
-
Baking Time: 20–25 minutes
-
Servings: 2 large flatbreads
Nutritional Information (Per 1 Serving)
-
Energy: 230 calories
-
Protein: 8.88 g
-
Fat: 3.45 g
-
Carbohydrates: 44.17 g
-
Fiber: 8.7 g
This flatbread is high in fiber, plant-based, and naturally gluten-free when using certified gluten-free oats.
Storage & Recommendations
-
Best enjoyed warm, when soft and flexible.
-
Once fully cooled, it tends to dry out — avoid prolonged exposure to air.
-
Store leftovers wrapped tightly in the refrigerator for up to 5 days.
-
Reheat gently in a pan or oven to restore softness before serving.
-
Ideal for wraps, tacos, sandwiches, or as a base for savory toppings.