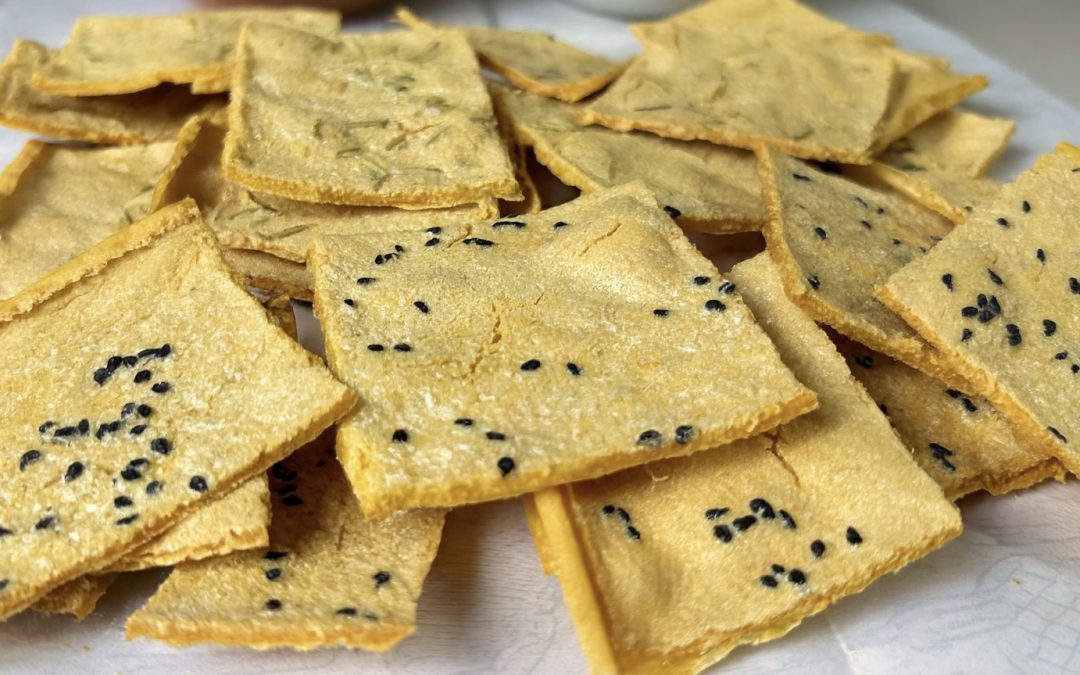
Chickpea Crackers
Chickpea Crackers
Get ready to revolutionize your snack game with these incredible Homemade Chickpea Crackers! If you are tired of the expensive, highly processed, and often flavorless crackers you find in the grocery store aisles, this recipe is exactly what you have been waiting for. These crackers are not just a healthy alternative; they are an absolute flavor explosion, incredibly crunchy, naturally gluten-free, and vegan-friendly!
Whether you are looking for the perfect on-the-go snack to fuel your busy day or a sophisticated addition to your next charcuterie board with your favorite dips and sauces, these crackers deliver on every level. You won’t believe how easy it is to achieve that professional-grade “snap” right in your own kitchen with just a few simple ingredients.
The absolute star of this show is chickpea flour, a culinary powerhouse that is about to become your new favorite pantry staple. Unlike common refined flours found in most crackers, chickpea flour is naturally rich in plant-based protein and provides significantly more fiber, which is essential for keeping you full and satisfied throughout the day. It also contains fewer net carbohydrates, making it a much more balanced and nutritious choice for anyone looking to maintain steady energy levels. Beyond the basics, chickpea flour is a fantastic source of essential vitamins and minerals like folate, which supports heart health and cell growth, and iron, which is vital for energy production. By making these crackers a regular part of your diet, you are choosing a nutrient-dense food that promotes better digestion and helps manage blood sugar levels. It’s a delicious way to nourish your body while still enjoying the satisfying crunch of a gourmet snack!
Ingredients
-
1 cup (120 g) chickpea flour
-
1/2 tsp. salt
-
2 tbsp (30 ml) olive oil (Optional)
-
1 1/2 cups (360 ml) water
-
1 tbsp dried rosemary
-
1 tbsp nigella seeds
Instructions
- Start by adding your chickpea flour, salt, and olive oil into a large mixing bowl.
- Gradually pour in the water while whisking vigorously and continuously until you achieve a totally smooth, lump-free consistency.
- Prepare your baking tray (ideally 37 cm × 25 cm or 14.5 inches × 10 inches) by brushing it with oil and lining it with a sheet of parchment paper.
- Pour the chickpea batter onto the prepared tray, spreading it out evenly across the entire surface.
- Give the pan a gentle shake to help the batter distribute perfectly.
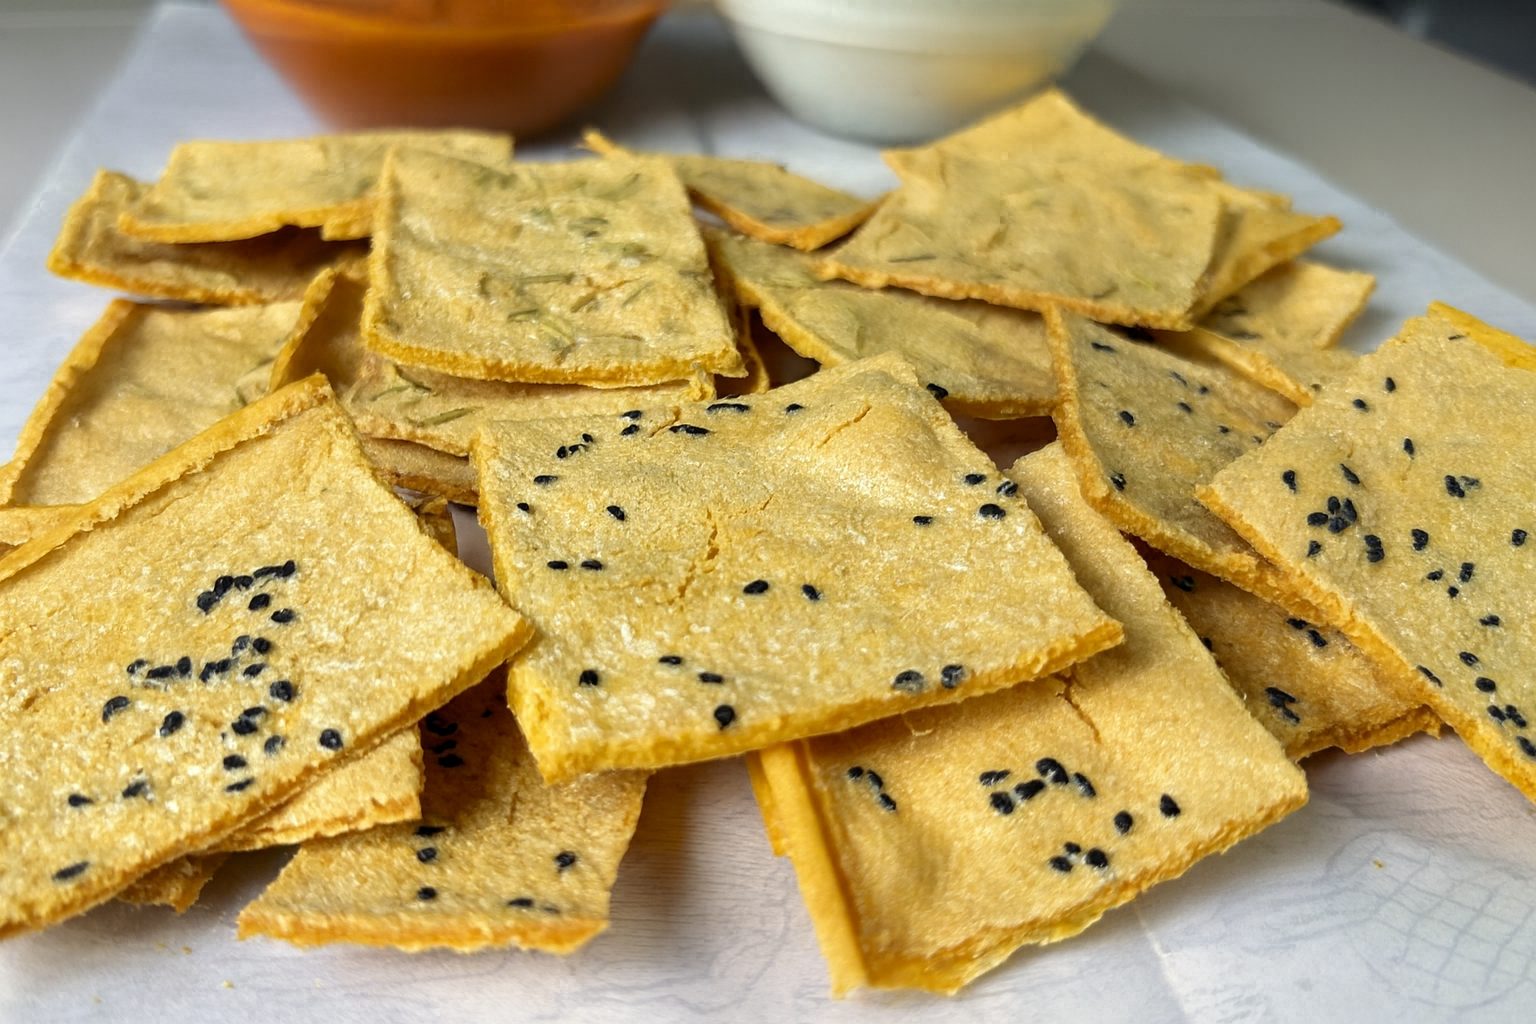
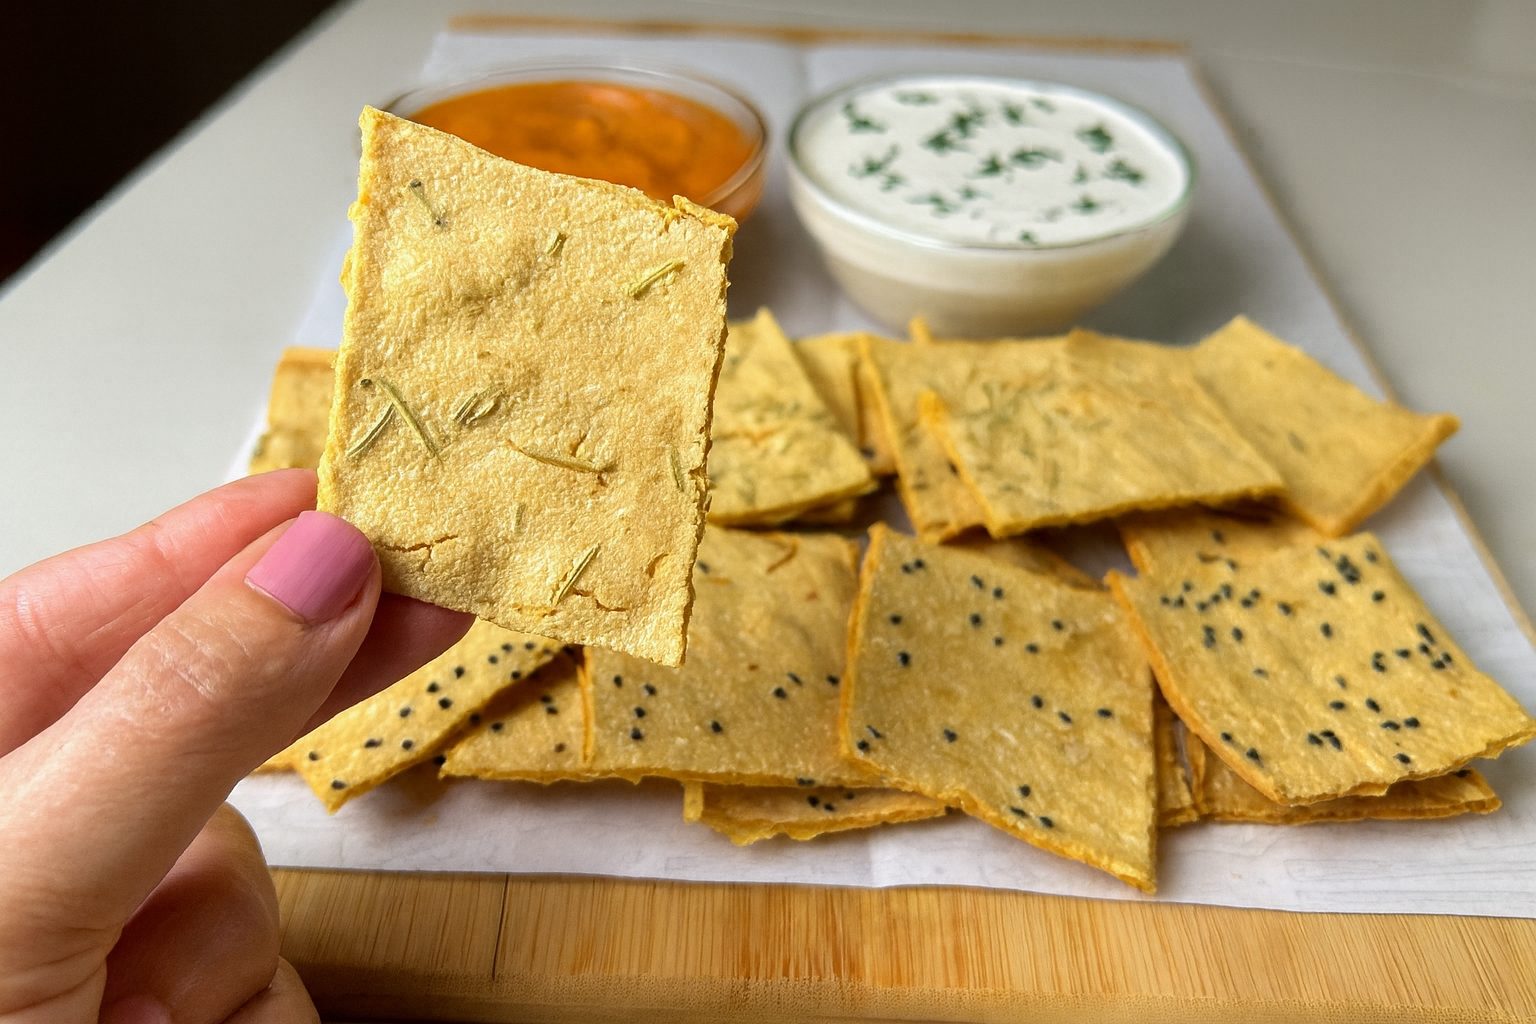
- Now for the flavor: sprinkle your favorite seeds or herbs over the batter; for this version, we sprinkled dried rosemary on one half and nigella seeds on the other.
- Place the tray into a preheated oven at 350°F (180°C) and bake for 10 minutes until the batter turns into a dry texture.
- Remove the tray from the oven and use a pizza cutter or sharp knife to cut the dough into small squares or your desired cracker shapes.
- Return the cut crackers to the oven and bake for an additional 40 minutes at 340°F (170°C), or until they are completely dry and crispy.
- Once finished, take the crackers out of the oven and let them cool completely before serving with your favorite dips.
Nutritional Information per 1 Cracker
-
Energy: 25 calories
-
Protein: 0.9 g
-
Fat: 1.2 g
-
Carbohydrates: 2.7 g
-
Fiber: 0.8 g (Note: Nutritional values are per 1 cracker)
Prep, Cook, and Servings
-
Prep: 10 mins
-
Cook: 60 mins (10 mins initial bake + 50 mins second bake and prep)
-
Servings: 28 Crackers
-
Dietary Status: Gluten-Free and Vegan
Notes and Recommendations
-
Storage: Once they have cooled completely, store your crackers in an airtight container at room temperature for up to 10 days to maintain their crunch.
-
Customization: Don’t be afraid to get creative with your toppings! You can easily substitute the rosemary and nigella seeds with other spices like garlic powder, onion powder, or sesame seeds depending on your mood.
-
Serving Suggestion: These are perfect by themselves for a quick on-the-go snack, but they truly shine when served alongside a creamy hummus, a spicy salsa, or your favorite dairy-free dip.